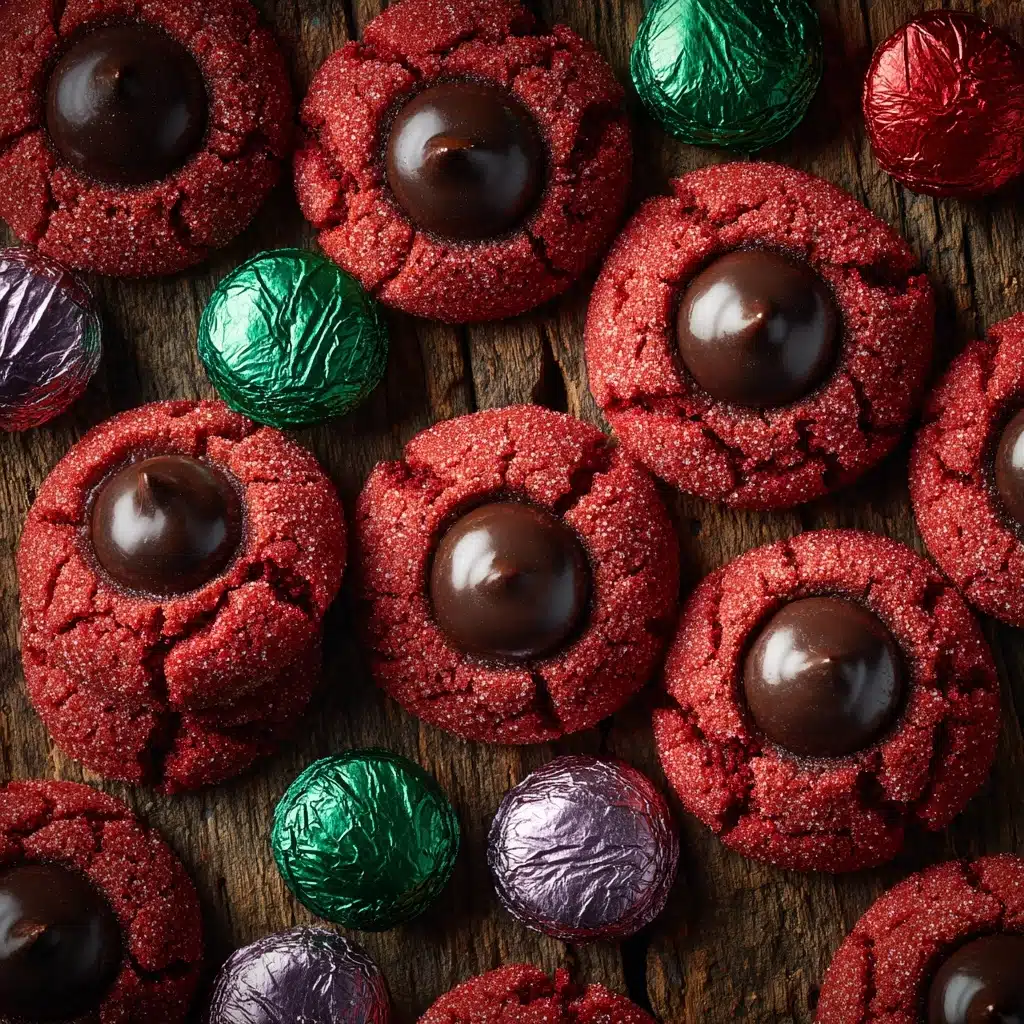
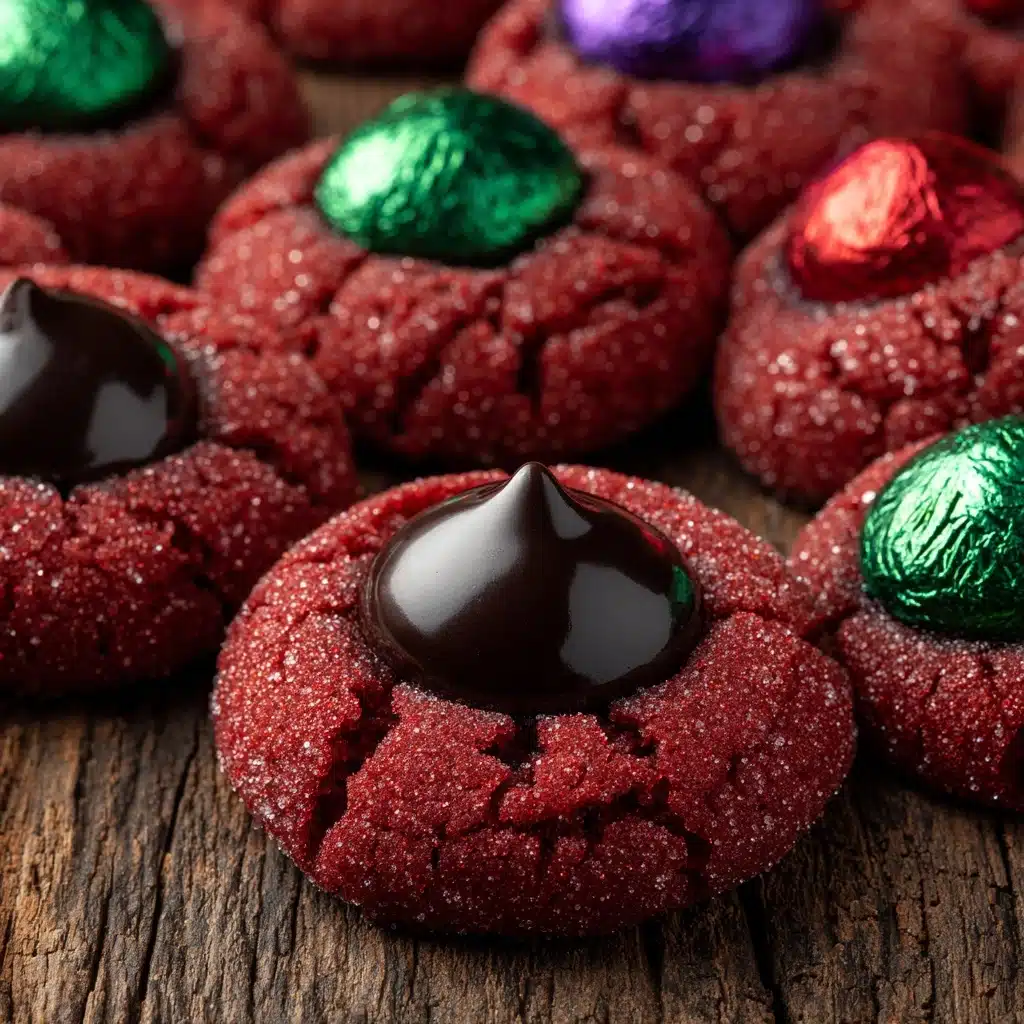
If you’re searching for a cookie that’s as charming as it is delicious, look no further than Red Velvet Kiss Cookies. With their luscious red hue, hint of cocoa, and signature chocolate Kiss nestled right on top, these cookies steal the show wherever they go. Perfect for holidays, parties, or a cozy night in, this delightful treat features soft, chewy texture and just a pop of festive color. The best part? They’re surprisingly simple to whip up, proving that you don’t need any special occasion to add a little extra love to your cookie platter.
Ingredients You’ll Need
Gathering the right ingredients for Red Velvet Kiss Cookies is incredibly easy, and each component has an important role to play in flavor, color, or structure. Paying attention to the little details of each ingredient ensures your cookies turn out as irresistible as they look!
- All-purpose flour: The sturdy base that gives these cookies their perfect chew and structure.
- Unsweetened cocoa powder: Adds that signature hint of chocolate to mimic the classic red velvet flavor.
- Baking powder: Just enough lift to keep the cookies soft and slightly puffy.
- Salt: Brightens and balances out the sweet and chocolaty notes.
- Unsalted butter (softened): Creamy richness and that melt-in-your-mouth bite begin right here.
- Granulated sugar: For the perfect sweetness and a wonderfully tender crumb.
- Large egg: Your key for binding all that goodness together and adding richness.
- Milk: Just a splash for extra moisture and smoothness in the dough.
- Vanilla extract: An aromatic layer that rounds out all the other flavors harmoniously.
- Red food coloring: The unmistakable pop of red that makes these cookies so striking.
- Hershey’s Kisses (unwrapped): The lovable chocolate center that sets these cookies apart—classic is best, but get creative if you wish!
- Extra granulated sugar (for rolling): Roll the dough balls in sugar for a delicate sparkle and a little extra sweetness with each bite.
How to Make Red Velvet Kiss Cookies
Step 1: Prep Your Oven and Pans
Before you dive into mixing, preheat your oven to 350°F (175°C). Line two baking sheets with parchment paper for easy cleanup and to prevent sticking—nothing should get between you and a perfect batch of Red Velvet Kiss Cookies!
Step 2: Mix the Dry Ingredients
In a medium bowl, whisk together the flour, cocoa powder, baking powder, and salt. This ensures all your leavening and flavorings are evenly distributed, setting the stage for a cookie dough that’s uniform in taste and texture.
Step 3: Cream Butter and Sugar
In a large mixing bowl, beat the softened butter and granulated sugar until they become light and fluffy. This step infuses the dough with air for that irresistibly soft center, plus it guarantees a smooth mix for the wet ingredients to follow.
Step 4: Add Eggs and Wet Ingredients
Add the egg, milk, vanilla extract, and that brilliant red food coloring to your creamed butter and sugar. Beat until everything is well combined—watch the dough turn that signature velvety red as you mix!
Step 5: Combine Wet and Dry Ingredients
Gradually add your dry ingredient mixture to the red batter, mixing until you have a soft, cohesive dough. The key is to avoid overmixing, so stop as soon as no streaks remain. Now your Red Velvet Kiss Cookies dough is ready for shaping!
Step 6: Shape and Sugar-Coat
Scoop out tablespoon-sized portions of dough and roll them into balls with your hands. Drop each dough ball gently into extra granulated sugar and roll to coat. This step gives your finished cookies that sparkling, crackly exterior.
Step 7: Bake
Arrange the sugared dough balls on your prepared baking sheets, spacing them about 2 inches apart. Bake for 8 to 10 minutes, just until the edges are set. Resist the urge to overbake—they’ll continue to firm up as they cool.
Step 8: Add the Chocolate Kiss
As soon as the cookies come out of the oven, press a Hershey’s Kiss into the center of each one. The residual warmth helps the chocolate adhere without melting it into a puddle. Leave the cookies on the sheet for 5 minutes, then transfer to a wire rack to cool completely.
How to Serve Red Velvet Kiss Cookies

Garnishes
For a charming finishing touch, try a dusting of powdered sugar right before serving or some festive sprinkles over the chocolate Kiss while it’s still slightly soft. These tiny additions can make your Red Velvet Kiss Cookies look even more enticing, especially for holidays or special occasions.
Side Dishes
Pair these cookies with a frosty glass of milk, a cozy mug of hot cocoa, or even a scoop of vanilla ice cream. Their sweet-but-not-too-sweet profile makes them perfect alongside coffee or celebratory drinks, turning snack time into a special treat.
Creative Ways to Present
Stack them on a vintage cake stand for a party centerpiece, arrange in cellophane bags tied with ribbon for heartfelt gifts, or assemble a cookie platter with a variety of holiday favorites. Red Velvet Kiss Cookies are especially striking nestled among other festive desserts!
Make Ahead and Storage
Storing Leftovers
Once completely cooled, store your Red Velvet Kiss Cookies in an airtight container at room temperature. They’ll stay tender and delicious for up to five days, though chances are they’ll disappear much faster.
Freezing
You can freeze both the unbaked dough balls (without sugar coating or Kisses) and the finished cookies. For best results, flash-freeze shaped dough balls and store in ziplock bags—just thaw and roll in sugar before baking. Baked cookies can also be frozen, separated by layers of wax paper, for up to 2 months.
Reheating
If serving from frozen, simply let the cookies thaw at room temperature, or warm in a 275°F (135°C) oven for 3 to 5 minutes to refresh that just-baked texture. The chocolate Kiss will soften slightly, making each bite extra dreamy!
FAQs
Can I use cream cheese instead of butter?
While cream cheese is delicious in red velvet desserts, using butter in this recipe keeps the cookies classic and chewy. If you want a slight tang and extra richness, try swapping a couple tablespoons of butter for cream cheese, but stick with mostly butter for best results.
What kind of red food coloring works best?
Gel food coloring is ideal for rich, vibrant color with less liquid, so your dough doesn’t get too soft. If you only have liquid coloring, you may need a bit more for that bright red velvet look.
How do I stop the chocolate Kisses from melting?
Pop your unwrapped Kisses in the freezer for 10 minutes before pressing onto hot cookies. This helps them keep their classic shape and stay picture-perfect even as the cookies cool.
Can I make these gluten-free?
Absolutely! Simply substitute your favorite 1:1 gluten-free flour blend for the all-purpose flour. The results are generally just as tasty and crowd-pleasing.
Why are my cookies spreading too much?
If your dough is very soft, it’s likely due to warm butter or too much liquid. Chill the dough for 20 minutes before rolling and baking to help Red Velvet Kiss Cookies keep their puffy, round shape.
Final Thoughts
Red Velvet Kiss Cookies blend playful nostalgia with bold color and that irresistible chocolatey finish. They’re easy, eye-catching, and always met with smiles. Give them a try and watch how quickly they become a treasured favorite—everyone deserves a little red velvet magic in their cookie jar!
Print
Red Velvet Kiss Cookies Recipe
- Total Time: 25 minutes
- Yield: 24 cookies 1x
- Diet: Vegetarian
Description
These Red Velvet Kiss Cookies are a delightful twist on traditional chocolate kiss cookies. With a rich red velvet flavor and a sweet surprise in the center, they are perfect for holiday gatherings or any time you crave a sweet treat.
Ingredients
Dry Ingredients:
- 1 1/2 cups all-purpose flour
- 1/4 cup unsweetened cocoa powder
- 1 teaspoon baking powder
- 1/4 teaspoon salt
Wet Ingredients:
- 1/2 cup unsalted butter (softened)
- 3/4 cup granulated sugar
- 1 large egg
- 1 tablespoon milk
- 1 teaspoon vanilla extract
- 1 teaspoon red food coloring
Additional:
- 24 Hershey’s Kisses (unwrapped)
- Extra granulated sugar for rolling
Instructions
- Preheat the oven: Preheat the oven to 350°F (175°C) and line two baking sheets with parchment paper.
- Prepare the dry ingredients: In a medium bowl, whisk together the flour, cocoa powder, baking powder, and salt.
- Mix the wet ingredients: In a large bowl, beat the butter and sugar until light and fluffy. Add the egg, milk, vanilla extract, and red food coloring; beat until well combined.
- Combine the ingredients: Gradually add the dry ingredients to the wet ingredients, mixing until a soft dough forms.
- Shape and bake: Scoop tablespoon-sized portions of dough, roll into balls, then coat in extra granulated sugar. Place on baking sheets and bake for 8 to 10 minutes.
- Add the Kisses: Remove from the oven and press a Hershey’s Kiss into the center of each cookie. Let cool before serving.
Notes
- For a deeper red color, add an extra 1/2 teaspoon of red food coloring if desired.
- Freeze the unwrapped Kisses for 10 minutes beforehand to help them keep their shape when pressed into the warm cookies.
- Prep Time: 15 minutes
- Cook Time: 10 minutes
- Category: Dessert
- Method: Baking
- Cuisine: American
Nutrition
- Serving Size: 1 cookie
- Calories: 140
- Sugar: 10g
- Sodium: 60mg
- Fat: 6g
- Saturated Fat: 4g
- Unsaturated Fat: 2g
- Trans Fat: 0g
- Carbohydrates: 20g
- Fiber: 1g
- Protein: 2g
- Cholesterol: 20mg


