
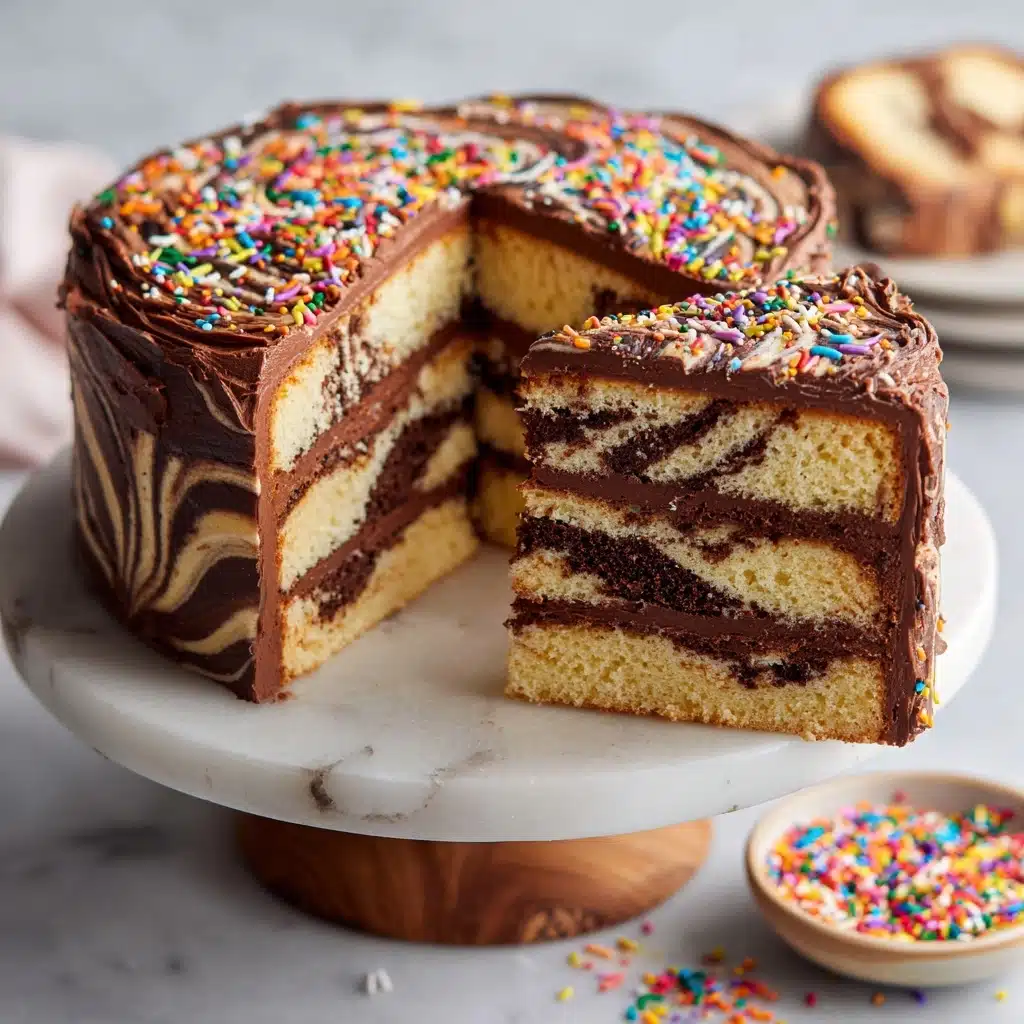
If you love desserts that look just as fun as they taste, this Zebra Cake is about to leap onto your favorites list! Imagine a moist, tender cake with playful chocolate and vanilla stripes running throughout each slice – it’s a treat that turns every gathering into a celebration. Whether you’re a beginner or a seasoned baker, the process is surprisingly simple but absolutely magical when you unveil those stripes. Let’s bring the wonder of Zebra Cake into your kitchen and add some excitement to your dessert table!
Ingredients You’ll Need
Whipping up a stunning Zebra Cake only requires some classic baking staples, but each one has an essential role! From soft flour to a swirl of cocoa, you’ll find these ingredients join forces to create a harmonious blend of flavor, moisture, and wow-worthy pattern.
- All-purpose flour: The backbone for a fluffy yet sturdy crumb holds those stripes together beautifully.
- Baking powder: Ensures the cake rises evenly, helping each layer remain distinct and light.
- Salt: Just a touch to balance the sweetness and enhance all the other flavors.
- Granulated sugar: Adds the perfect amount of sweetness and gives the cake its delicate, golden exterior.
- Eggs (room temperature): Help create structure and keep your Zebra Cake moist and rich.
- Whole milk: For a tender, melt-in-your-mouth texture and creamy taste.
- Vegetable oil: Keeps the cake soft for days and adds moisture without any heaviness.
- Vanilla extract: Lends a warm aroma that pairs wonderfully with both chocolate and vanilla stripes.
- Unsweetened cocoa powder: Key for those bold, chocolatey stripes – sift it into half the batter for best texture.
How to Make Zebra Cake
Step 1: Prepare the Pan and Oven
Begin by preheating your oven to 350°F (175°C). Grease a 9-inch round cake pan and line the bottom with parchment paper for an easy, clean release. These simple steps will set you up for a flawless Zebra Cake presentation with sharp, picture-perfect stripes.
Step 2: Combine Dry Ingredients
In a medium bowl, whisk together the flour, baking powder, and salt. This not only mixes your dry ingredients evenly, but also infuses air for a lighter crumb. Proper mixing here ensures your stripes bake up smoothly without dense patches.
Step 3: Beat Eggs and Sugar
In a large mixing bowl, beat the eggs and sugar on medium-high speed until the mixture turns pale and fluffy. This is where you create the soft, cloud-like texture that makes Zebra Cake so delightful. The color transformation is your cue – it should look creamy and nearly doubled in volume.
Step 4: Add Milk, Oil, and Vanilla
Pour in the milk, vegetable oil, and vanilla extract, and gently mix until smooth. This blend brings moisture and flavor, keeping the cake tender with each bite. Be careful not to overmix – you want everything just combined for the best texture.
Step 5: Incorporate Dry Ingredients
Gradually fold in your prepared dry ingredients, mixing until just combined. Overmixing can toughen your cake, so a gentle hand is key here. At this stage, your batter should be smooth and pourable, ready for the next creative step!
Step 6: Divide and Flavor the Batters
Evenly divide the batter into two bowls. Sift the unsweetened cocoa powder into one bowl and mix thoroughly for a rich, chocolate batter. This is the secret to bold, distinct stripes that make Zebra Cake so eye-catching.
Step 7: Create the Zebra Stripes
Using a ladle or large spoon, pour about 2 tablespoons of your vanilla batter into the center of the pan. Immediately pour the same amount of chocolate batter directly on top, always aiming for the center. Continue alternating, pouring each new scoop on top of the last, until you run out of batter and a bullseye pattern forms. This simple technique gives your Zebra Cake its signature striped look with minimal fuss.
Step 8: Bake and Cool
Bake in the preheated oven for 35-40 minutes, or until a toothpick inserted in the center comes out clean. Let the cake cool in the pan for 10 minutes before transferring it to a wire rack to cool completely. The anticipation as it cools only adds to the excitement of slicing into those beautiful stripes!
How to Serve Zebra Cake

Garnishes
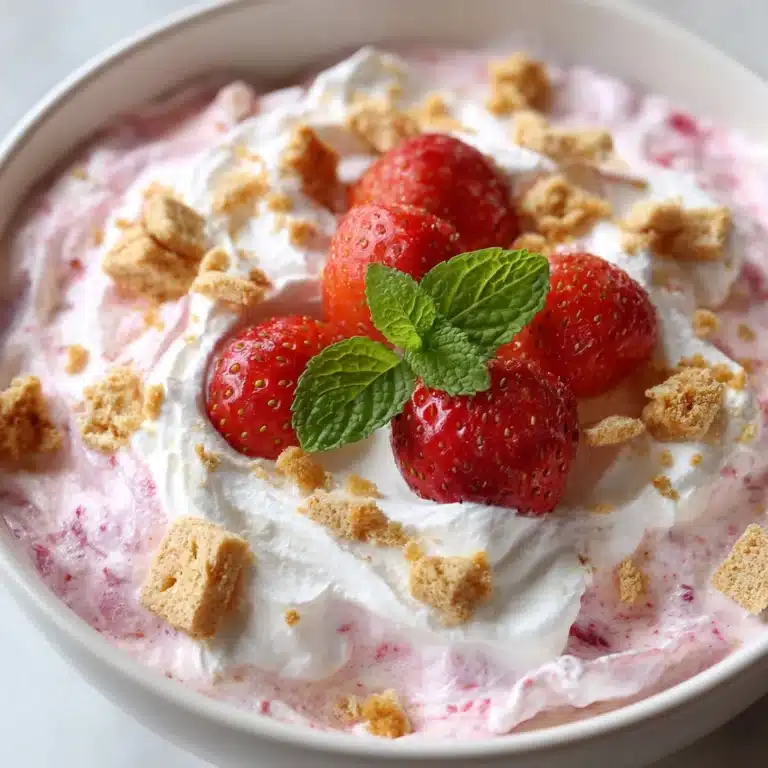
A sprinkle of powdered sugar, a swirl of chocolate ganache, or a drizzle of vanilla glaze are all phenomenal ways to finish your Zebra Cake. For a touch of freshness, add a few berries or a mint sprig right before serving. A light, elegant garnish makes every slice look bakery-worthy.
Side Dishes
Pair your Zebra Cake with a scoop of vanilla ice cream, a dollop of lightly sweetened whipped cream, or fresh fruit like strawberries or raspberries. These sides complement the cake’s gentle flavors and really let those stripes shine. For a grown-up twist, serve alongside coffee or a mocha latte.
Creative Ways to Present
Turn your Zebra Cake into a centerpiece! Try cutting the cake into wedges and stacking slices for a striped “cake tower.” For parties, use a circular cookie cutter to create mini zebra cakes, perfect for individual servings. Even a simple dusting of powdered sugar in a zebra stencil can bring an extra bit of fun and flair.
Make Ahead and Storage
Storing Leftovers
Keep any leftover Zebra Cake stored in an airtight container at room temperature for up to three days. The oil in the batter helps the crumb stay moist and tender, so every slice tastes fresh even on day two or three!
Freezing
Zebra Cake freezes beautifully. Let your cake cool completely, then wrap slices individually in plastic wrap and tin foil before placing them in an airtight container. They’ll keep their flavor for up to three months – simply thaw at room temperature to enjoy again.
Reheating
If you love your cake slightly warm, pop slices in the microwave for about 10-15 seconds. This softens the crumb and brings out the vanilla and cocoa aromas. Be careful not to overheat – a little warmth is all you need for that bakery-fresh experience.
FAQs
Can I use a different size pan for Zebra Cake?
Absolutely! You can use an 8-inch pan for a taller cake or a 10-inch for a thinner version. Just adjust the baking time accordingly – a smaller pan may need a few extra minutes, while a larger pan will bake a bit faster.
How do I get the stripes to look perfect?
The best tip is to always pour new batter into the dead center of the pan, letting each ring naturally push the previous one outward. Make sure batters are the same consistency so stripes spread evenly – if needed, add a tablespoon of milk to the chocolate batter to match the texture.
Can I add extra flavors or fillings?
Definitely! Try adding orange zest to the vanilla batter for a citrus kick, or a splash of espresso to the chocolate batter for mocha stripes. For a surprise in the center, spread a thin layer of jam or cream between two zebra cakes and sandwich them together.
Is it possible to make Zebra Cake gluten-free?
Yes, you can substitute a good-quality gluten-free all-purpose flour blend for the regular flour. Be sure it contains xanthan gum to help the cake hold together and rise properly.
What should I do if my Zebra Cake sinks in the middle?
Sinking can happen if the cake is underbaked or if the oven door was opened too early. Use an oven thermometer to ensure the correct temperature, and don’t open the oven until the cake is nearly done and smells fragrant!
Final Thoughts
If you’ve never tried making a Zebra Cake, now’s the time to let those chocolate and vanilla stripes brighten up your baking routine! Every slice is a celebration, and the process is just as much fun as the final reveal. Gather your ingredients, pour those batters, and prepare for a cake that’s as joyful to see as it is to eat – you’re going to love it!
Print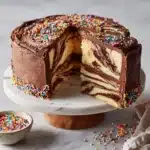
Zebra Cake Recipe
- Total Time: 1 hour
- Yield: 12 servings 1x
- Diet: Vegetarian
Description
Learn how to make a visually stunning Zebra Cake with this simple and delicious recipe. This eye-catching dessert features alternating layers of vanilla and chocolate cake, creating a beautiful striped pattern that is sure to impress.
Ingredients
Vanilla Batter:
- 2 cups all-purpose flour
- 2 teaspoons baking powder
- 1/2 teaspoon salt
- 1 cup granulated sugar
- 4 large eggs, room temperature
- 1 cup whole milk
- 1 cup vegetable oil
- 1 teaspoon vanilla extract
Chocolate Batter:
- 2 tablespoons unsweetened cocoa powder
Instructions
- Preheat the oven: Preheat your oven to 350°F (175°C) and prepare a 9-inch round cake pan with parchment paper.
- Mix dry ingredients: In a medium bowl, whisk together flour, baking powder, and salt.
- Beat eggs and sugar: In a large bowl, beat eggs and sugar until pale and fluffy.
- Add wet ingredients: Mix in milk, oil, and vanilla extract until smooth.
- Combine batter: Gradually fold in dry ingredients until just combined.
- Prepare batters: Divide batter into two bowls. Sift cocoa powder into one bowl and mix well.
- Layer the batter: Alternate pouring plain and chocolate batters into the center of the pan until all batter is used.
- Bake: Bake for 35-40 minutes until a toothpick comes out clean.
- Cool and serve: Let the cake cool before slicing and serving.
Notes
- Enhance with chocolate ganache or vanilla glaze for added flavor.
- Ensure batter consistency is pourable but not runny for defined stripes.
- Prep Time: 20 minutes
- Cook Time: 40 minutes
- Category: Dessert
- Method: Baking
- Cuisine: European
Nutrition
- Serving Size: 1 slice
- Calories: 250
- Sugar: 16g
- Sodium: 90mg
- Fat: 12g
- Saturated Fat: 2g
- Unsaturated Fat: 9g
- Trans Fat: 0g
- Carbohydrates: 32g
- Fiber: 1g
- Protein: 4g
- Cholesterol: 55mg


