
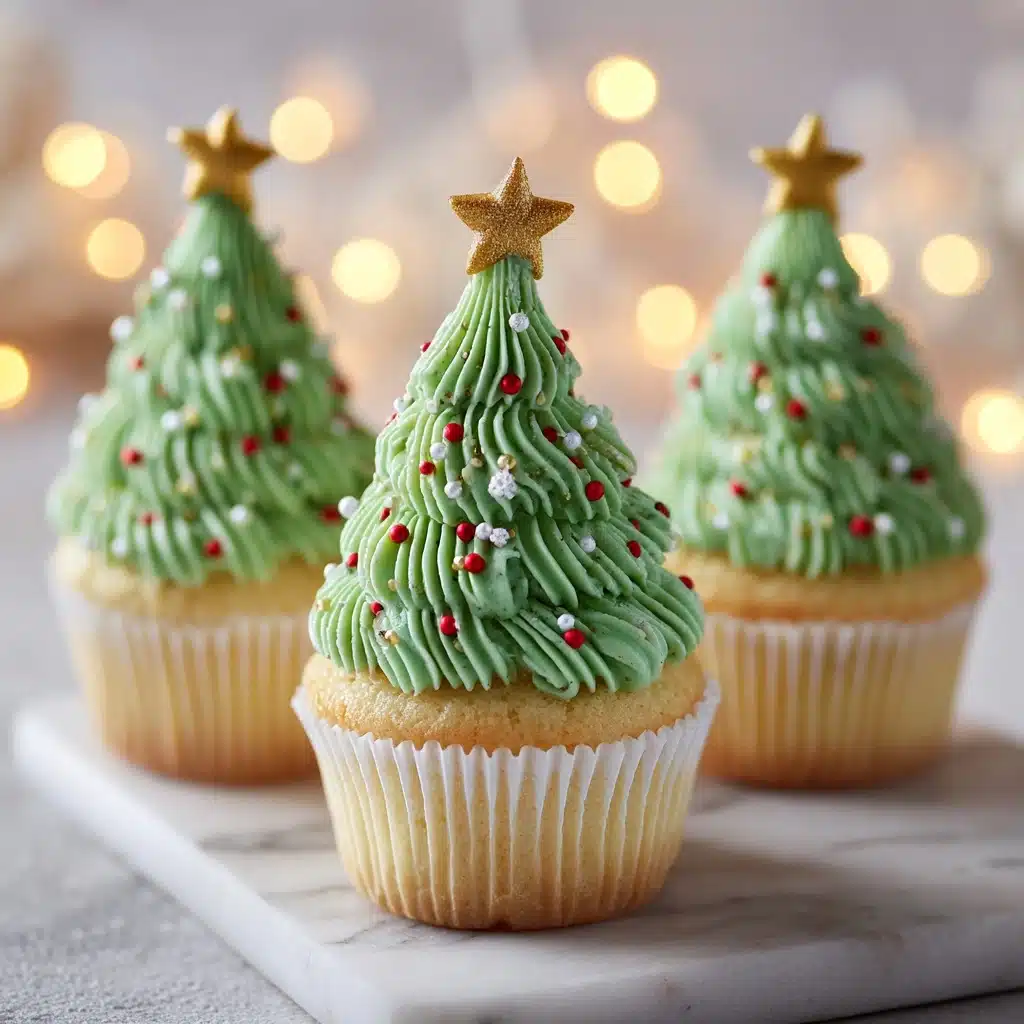
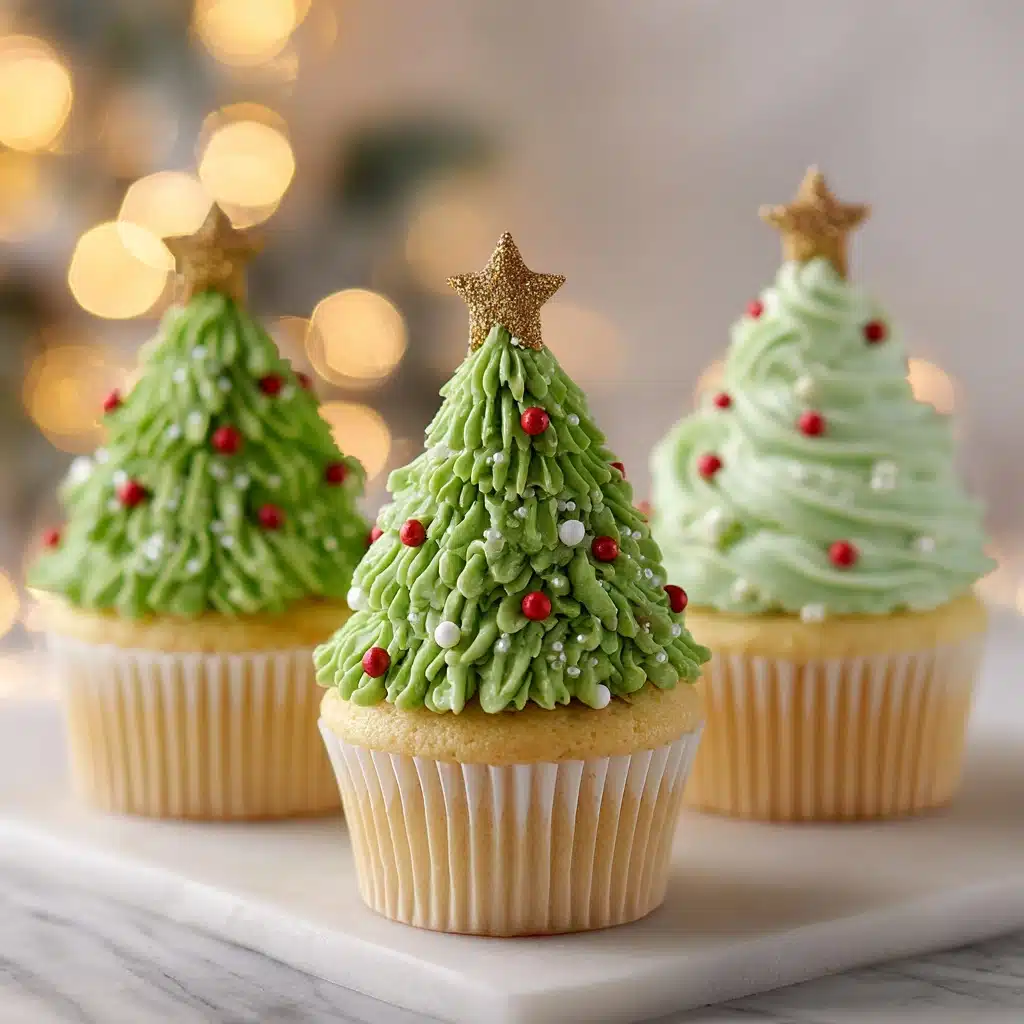
If there’s one way to absolutely dazzle your family and friends this holiday season, it’s with Christmas Tree Cupcakes. Soft vanilla cupcakes serve as the snowy “ground,” crowned by ice cream cone trees covered in swirls of vibrant green frosting and festive sprinkles. It’s an irresistibly fun baking project, a show-stopping centerpiece for any dessert table, and a hands-on treat both kids and adults will be excited to help decorate (and eat). Every bite captures the spirit of the season, offering a perfect blend of sweetness, creativity, and holiday magic.
Ingredients You’ll Need
Every ingredient in this festive recipe plays a special role, bringing together incredible flavor, vibrant color, and the texture that makes these whimsical trees stand out. The best part? You’ll find these items in most pantries with just a couple of joyful, holiday-themed accents!
- All-purpose flour: The base of your cupcake batter—it provides structure for these festive little cakes.
- Granulated sugar: This sweetens and adds tenderness to the cupcake crumb.
- Unsalted butter, softened: Gives the cupcakes and frosting their rich, buttery flavor and a delicate, moist texture.
- Eggs: These bind everything together for a fluffy, cohesive result.
- Whole milk: Adds moisture and helps the cupcakes stay soft and tender.
- Baking powder: Ensures your cupcakes rise high and light.
- Salt: Just a touch balances the sweetness and brightens flavors.
- Vanilla extract: For that classic, comforting warmth in both cupcake and frosting.
- Powdered sugar: Critical for that luscious, cloud-like frosting texture.
- Heavy cream: Whips the frosting into an extra-silky, spreadable dream.
- Green gel food coloring: The secret to that bold, beautiful Christmas tree shade.
- Star-shaped sprinkles: Top each tree for a picture-perfect star!
- Assorted holiday sprinkles: Scatter on your trees for instant festive cheer.
- Ice cream cones (flat-bottomed): These turn upside-down to create that iconic evergreen shape.
How to Make Christmas Tree Cupcakes
Step 1: Prepare the Cupcake Batter
Start by preheating your oven to 350°F (175°C) and lining a cupcake pan with 12 papers. In a large bowl, cream together the softened butter and granulated sugar until the mixture is pale and fluffy—this is key for light cupcakes! Beat in your eggs one at a time, blending well, then mix in the vanilla extract for extra flavor.
Step 2: Combine Dry and Wet Ingredients
Whisk together flour, baking powder, and salt in a separate bowl. Gradually add the dry ingredients to your wet mixture, alternating with whole milk. Take care not to overmix—just stir until everything is blended. This helps maintain a delicate crumb.
Step 3: Fill and Bake
Divide the batter evenly among the cupcake liners. Bake for 18 to 20 minutes, until a toothpick inserted in the center comes out clean. Let the cupcakes cool completely before frosting—this step is crucial to keep your frosting (and tree) from slipping!
Step 4: Whip Up the Green Frosting
For the “pine needles,” beat unsalted butter until smooth, then gradually add powdered sugar, heavy cream, and vanilla extract. Keep whipping until it’s fluffy and spreadable. Now comes the fun part: tint with green gel food coloring until you reach that perfectly festive hue. The depth of color is totally up to you!
Step 5: Build Your Christmas Trees
Frost each cooled cupcake with a thin layer of green frosting to help the tree stand tall. Place an ice cream cone upside down over each cupcake—the cone is your Christmas tree’s base. Fill a piping bag fitted with a star tip with the remaining green frosting, then pipe little “leaves” around each cone, starting from the bottom and spiraling upward. Don’t worry about perfection—it just adds charm!
Step 6: Decorate Your Trees
Now it’s time to let your creativity shine. Scatter on holiday sprinkles for baubles and ornaments, then crown each tree with a star-shaped sprinkle. If you want a frosty effect, add a pinch of edible glitter. Stand back and admire your festive forest of Christmas Tree Cupcakes!
How to Serve Christmas Tree Cupcakes
Garnishes
The star-shaped sprinkle is a must for each Christmas tree, but don’t stop there! Dust with a little edible glitter for sparkle, or sprinkle extra powdered sugar around the cupcake tops to mimic a dusting of snow. Mini marshmallows and silver dragées also make delightful details.
Side Dishes
These cupcakes love company! Set them out with mugs of hot chocolate or spiced cider for a cozy, wintry spread. They also shine next to a plate of gingerbread cookies, sugar cookies, or a big bowl of popcorn during holiday movie night.
Creative Ways to Present
Arrange your Christmas Tree Cupcakes in a forest formation on a festive platter, or nestle each cupcake into a red and green baking cup. For parties, serve each in a clear cello bag tied with a ribbon for a magical homemade party favor. Want to make them a centerpiece? Stack cake stands at different heights and nestle the cupcakes among pine branches and twinkle lights.
Make Ahead and Storage
Storing Leftovers
Keep your Christmas Tree Cupcakes in an airtight container at room temperature for up to 3 days. The cones may soften slightly over time, but the cupcakes and frosting will stay moist and delicious. Store in a cool spot away from direct sunlight to preserve the colors and decorations.
Freezing
You can freeze unfrosted cupcakes in a tightly sealed zip-top bag or container for up to 2 months. For decorated cupcakes, freeze uncovered until solid, then wrap gently in plastic wrap and transfer to a container. Bring them back to room temperature before serving for the best texture and color.
Reheating
Cupcakes are best enjoyed at room temperature. If your cupcakes are chilled or frozen, let them thaw gently on the counter—no need to reheat. Avoid microwaving frosted cupcakes, as it can melt the decorations and soften the cones.
FAQs
Can I make Christmas Tree Cupcakes with chocolate cake instead?
Absolutely! Swap out the vanilla cupcake base for your favorite chocolate cupcake recipe. The dark cake gives a nice “earthy” look under the green trees, and the flavors are just as festive.
What’s the best way to get vibrant green frosting?
Gel food coloring is key. It delivers a bold color without watering down your frosting. Start with a few drops, mix thoroughly, then add more for a deeper shade. Powdered food colorings also work well if you have them on hand.
Do I have to use flat-bottomed cones?
Flat-bottomed cones are the easiest for creating stable, upright trees on your cupcakes. If you only have pointed cones, you can still use them—just know that decorating may require a gentle touch to keep everything balanced!
How far ahead can I decorate the cupcakes?
You can bake and frost Christmas Tree Cupcakes up to one day in advance and store them in a covered container. For sharp, fresh cones, add the ice cream cones and decorations the day you plan to serve so they stay crisp and picture-perfect.
Can I make these cupcakes gluten-free?
Yes! Substitute your favorite cup-for-cup gluten-free flour blend in place of regular all-purpose flour. Check the labels on your cones and sprinkles as well to ensure everything is gluten-free.
Final Thoughts
If you’re ready to fill your kitchen with joy and whimsy, Christmas Tree Cupcakes are a treat that truly lights up the season. With a bit of imagination and a swirl of frosting, you’ll create not just a dessert but a memory. I hope you’ll make these delightful cupcakes part of your winter festivities—don’t forget to snap a picture before they all disappear!
Print
Christmas Tree Cupcakes Recipe
- Total Time: 50 minutes
- Yield: 12 cupcakes 1x
- Diet: Vegetarian
Description
These festive Christmas Tree Cupcakes are a delightful holiday treat that will bring joy to all. With a vanilla cupcake base, creamy buttercream frosting, and fun decorations, these cupcakes are sure to be a hit at any holiday gathering.
Ingredients
Cupcake:
- 1 1/2 cups all-purpose flour
- 1 cup granulated sugar
- 1/2 cup unsalted butter, softened
- 2 large eggs
- 1/2 cup whole milk
- 1 1/2 teaspoons baking powder
- 1/4 teaspoon salt
- 1 teaspoon vanilla extract
Frosting:
- 1/2 cup unsalted butter
- 2 cups powdered sugar
- 2 tablespoons heavy cream
- 1/2 teaspoon vanilla extract
- green gel food coloring
Decorations:
- star-shaped sprinkles
- assorted holiday sprinkles
- 12 ice cream cones (flat-bottomed)
Instructions
- Preheat the oven and prepare cupcake pan: Preheat the oven to 350°F (175°C) and line a cupcake pan with 12 liners.
- Make cupcake batter: Cream together softened butter and sugar, add eggs and vanilla. Whisk together flour, baking powder, and salt, then add to wet ingredients alternating with milk. Mix until combined.
- Bake: Divide batter among cupcake liners and bake for 18-20 minutes until a toothpick comes out clean. Cool completely.
- Make frosting: Beat butter until smooth, then add powdered sugar, cream, and vanilla. Tint with green food coloring.
- Decorate: Frost cupcakes, place an ice cream cone on each, pipe green frosting around cones, and decorate with sprinkles.
Notes
- Add edible glitter for extra sparkle.
- Store cupcakes in an airtight container for up to 3 days.
- Prep Time: 30 minutes
- Cook Time: 20 minutes
- Category: Dessert
- Method: Baking
- Cuisine: American
Nutrition
- Serving Size: 1 cupcake
- Calories: 350
- Sugar: 35g
- Sodium: 120mg
- Fat: 16g
- Saturated Fat: 10g
- Unsaturated Fat: 6g
- Trans Fat: 0g
- Carbohydrates: 50g
- Fiber: 1g
- Protein: 3g
- Cholesterol: 65mg


