
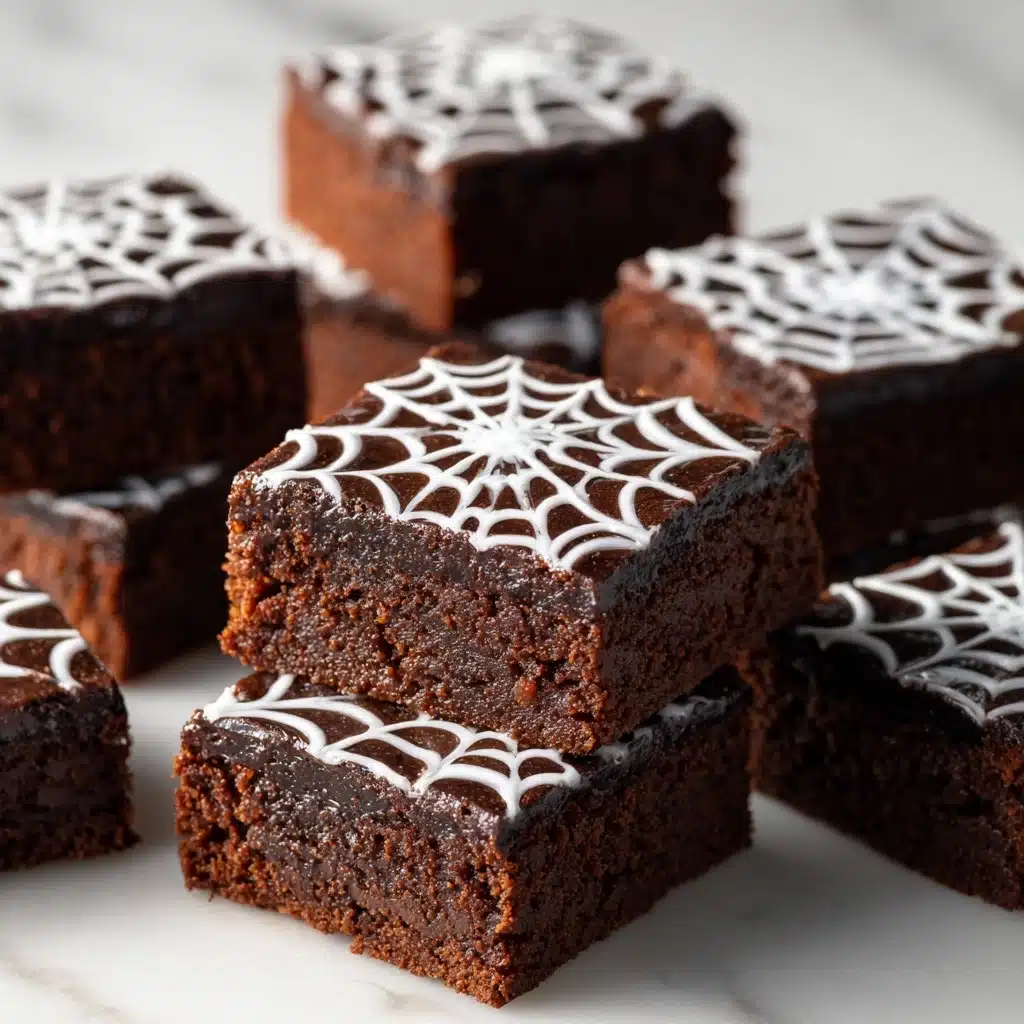
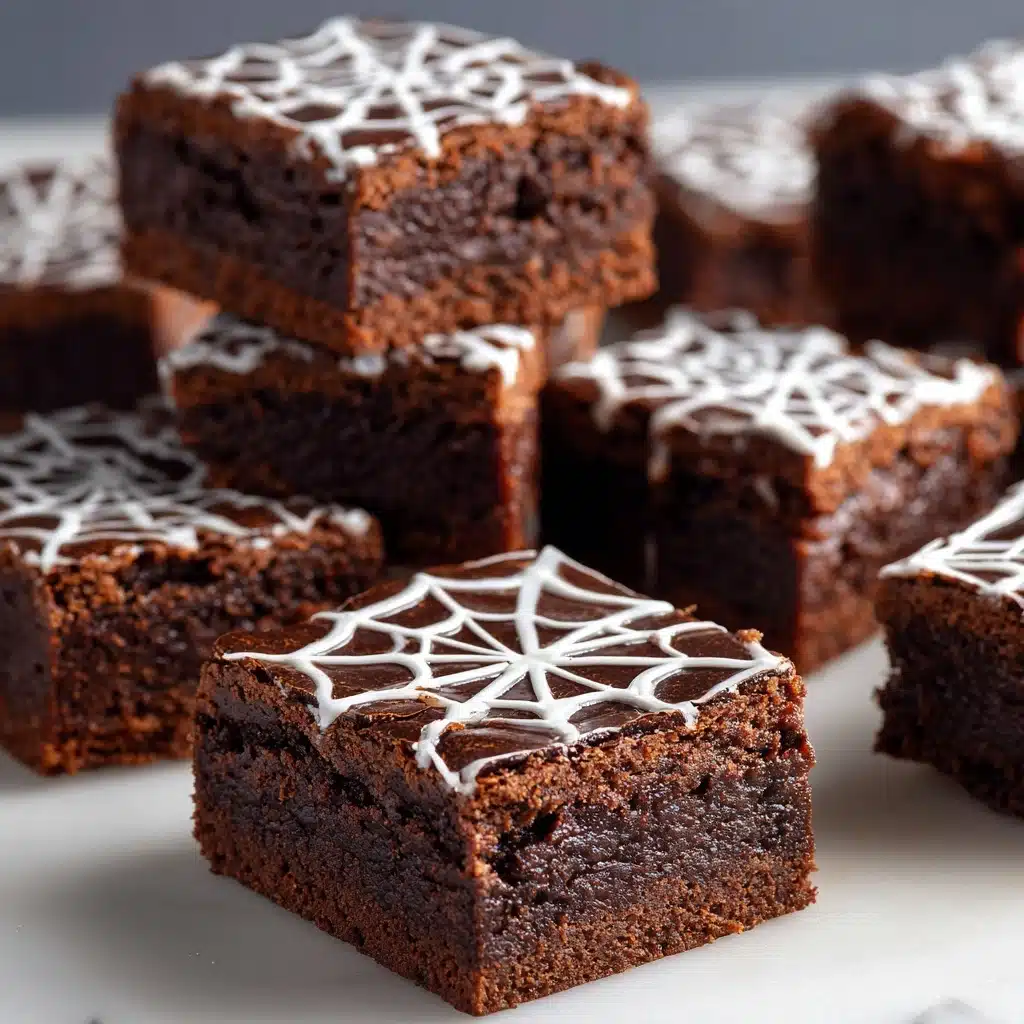
If you’re searching for a treat that turns heads at any fall gathering, look no further than White Chocolate Spiderweb Brownies. These brownies strike the perfect balance: irresistibly fudgy, deeply chocolatey, with a playful, spooky topper of creamy white chocolate spiderwebs that make every slice a showstopper. Whether you’re whipping them up for a Halloween party or just craving something a little whimsical, this recipe makes it easy to create a dessert that’s as delightful to look at as it is to eat.
Ingredients You’ll Need
The magic of these White Chocolate Spiderweb Brownies lies in their unfussy pantry ingredients, each playing a key role in taste, texture, and that signature “spooky” flair. Don’t skip or substitute — here’s what you need and why it matters.
- Unsalted butter (1/2 cup, melted): Anchors the brownies with rich, melt-in-your-mouth moisture and flavor.
- Granulated sugar (1 cup): Sweetens each bite and gives brownies their irresistible, crackly top.
- Large eggs (2): Bind everything together and provide structure for that tender crumb.
- Vanilla extract (1 teaspoon): Enhances chocolate’s complexity and gives warmth to the flavor profile.
- Unsweetened cocoa powder (1/3 cup): Delivers deep chocolate intensity while keeping brownies fudgy but not overly rich.
- All-purpose flour (1/2 cup): Adds necessary structure without making brownies cakey.
- Salt (1/4 teaspoon): Balances sweetness and sharpens every flavor note.
- Baking powder (1/4 teaspoon): Gives just the right amount of lift for that classic brownie texture.
- White chocolate chips (1/2 cup): Melt down into velvety webs, adding visual drama and a sweet, creamy contrast to dark chocolate.
- Coconut oil or shortening (1 teaspoon): Keeps the white chocolate perfectly glossy and smooth for piping.
How to Make White Chocolate Spiderweb Brownies
Step 1: Prepare Your Pan and Gather Ingredients
Start by preheating your oven to 350°F. Line an 8×8-inch baking pan with parchment paper, letting a bit of paper hang over the edges for easy removal later. Get all your ingredients measured out and ready to streamline the brownie-making process and ensure nothing gets forgotten.
Step 2: Whisk Butter and Sugar
In a medium mixing bowl, whisk together the melted unsalted butter and granulated sugar until smooth and glossy. This base is essential — it dissolves the sugar and guarantees that signature shiny brownie crust.
Step 3: Add Eggs and Vanilla
Crack in the eggs one at a time, whisking well after each addition. Stir in your vanilla extract. The eggs emulsify the mixture, giving you that rich, cohesive batter and allowing all the chocolatey flavors to shine.
Step 4: Fold In the Dry Ingredients
Place a fine sieve over the bowl and sift in the cocoa powder, all-purpose flour, salt, and baking powder. Stir gently with a spatula until just combined. You want to avoid overmixing, which helps achieve those tender, fudgy White Chocolate Spiderweb Brownies we crave.
Step 5: Bake
Pour your luscious batter into the prepared pan, smoothing the top so it cooks evenly. Slide it onto the center rack of your oven and bake for 20-25 minutes. Keep a close eye and check at the 20-minute mark: a toothpick should come out with a few moist crumbs but not wet batter for ideal texture.
Step 6: Cool Completely
Patience pays off! Let your brownies cool completely in the pan. This step ensures clean slices and sets up the perfect canvas for your white chocolate spiderweb art.
Step 7: Make the White Chocolate Spiderweb Topping
Combine your white chocolate chips with the coconut oil or shortening in a microwave-safe bowl. Microwave in 20-second bursts, stirring between each, until everything is melted and smooth. Transfer to a piping bag (or a zip-top bag with the tip cut off). Starting at the center of the cooled brownies, pipe concentric circles outwards. Then, take a toothpick or skewer and gently drag lines from the center to the edges to create dramatic spiderweb lines. Allow the chocolate to set before slicing.
How to Serve White Chocolate Spiderweb Brownies
Garnishes
Take these brownies over the top by finishing each square with festive touches: think Halloween-themed sprinkles, edible glitter, or even a tiny plastic spider perched right in the web (just don’t eat the spider!). You can also dust a touch of cocoa powder along the edges or add a drizzle of extra white chocolate for even more flair.
Side Dishes
Pair your White Chocolate Spiderweb Brownies with something that pops: a scoop of vanilla ice cream, a dollop of whipped cream, or fresh strawberries on the side. For grown-up gatherings, a bold cup of coffee or a tall glass of cold milk makes these chocolatey treats even more irresistible.
Creative Ways to Present
For a haunting platter, cut the brownies into small bite-sized pieces and arrange them in a spiral on a serving tray, nestling them among scattered candy eyeballs or mini pumpkins. For party favors, individually wrap each brownie in cellophane and tie with a black ribbon — your guests will rave about your edible artistry!
Make Ahead and Storage
Storing Leftovers
Keep any uneaten White Chocolate Spiderweb Brownies in an airtight container at room temperature for up to three days. The flavors actually deepen overnight, and the white chocolate web stays pristine if you store them in a single layer.
Freezing
Planning ahead? Once the brownies are cool and the spiderwebs are set, stack them (with parchment between layers to protect the decoration) in a freezer-safe container. They’ll last up to two months — perfect for party prep or surprise chocolate cravings!
Reheating
If you love brownies warm, you can microwave individual slices for 7–10 seconds. Just be careful: the white chocolate will get melty, so serve on a plate and enjoy with a fork for a gooey, decadent bite.
FAQs
Can I double the White Chocolate Spiderweb Brownies recipe?
Absolutely! Just bake in a 9×13-inch pan and check for doneness at around 25 minutes — you may need a few extra minutes depending on your oven.
What’s the best way to get a neat spiderweb shape?
Piping smooth, evenly spaced circles and dragging a toothpick gently from the center outward makes all the difference. Take your time and wipe the toothpick between drags for crisp, clear lines.
Can I use regular chocolate instead of white chocolate for the webs?
Definitely! It won’t be the classic look, but dark or milk chocolate can make fabulous contrasting swirls. White chocolate really pops against the brownie, especially for Halloween, but feel free to get creative.
Do these brownies travel well for parties?
They do! Just let the chocolate set completely, then pack in a single layer in a sturdy container. If it’s warm out, a small ice pack will help keep the white chocolate intact.
What if I don’t have a piping bag?
No problem — just snip a tiny corner off a zip-top sandwich bag and pipe as directed. It’s quick, easy, and gets you perfect spiderwebs every time!
Final Thoughts
There’s nothing more rewarding than sharing a tray of homemade White Chocolate Spiderweb Brownies and watching eyes light up. They’re easy enough for a casual weekend and memorable enough for any celebration. Don’t wait for Halloween — bake a batch and bring a little spooky, chocolatey magic into your kitchen!
Print
White Chocolate Spiderweb Brownies Recipe
- Total Time: 50 minutes
- Yield: 9 brownies 1x
- Diet: Vegetarian
Description
These White Chocolate Spiderweb Brownies are a delightful treat for Halloween, combining rich chocolate flavors with a spooky decorative touch. Perfect for a festive dessert!
Ingredients
Brownies:
- 1/2 cup unsalted butter, melted
- 1 cup granulated sugar
- 2 large eggs
- 1 teaspoon vanilla extract
- 1/3 cup unsweetened cocoa powder
- 1/2 cup all-purpose flour
- 1/4 teaspoon salt
- 1/4 teaspoon baking powder
White Chocolate Topping:
- 1/2 cup white chocolate chips
- 1 teaspoon coconut oil or shortening
Instructions
- Preheat the oven: Preheat the oven to 350°F and line an 8×8-inch baking pan with parchment paper.
- Mix the batter: In a medium bowl, whisk melted butter and sugar. Add eggs, vanilla, then sift in cocoa, flour, salt, and baking powder. Stir until combined.
- Bake: Pour batter into the pan and bake for 20-25 minutes. Let cool.
- Create spiderweb: Melt white chocolate and oil, pipe circles on brownies, then drag lines from center to edges with a toothpick to make a spiderweb effect.
- Serve: Let chocolate set before slicing and serving.
Notes
- Add Halloween sprinkles or plastic spider toppers for extra fun.
- Store leftovers in an airtight container at room temperature for up to 3 days.
- Prep Time: 25 minutes
- Cook Time: 25 minutes
- Category: Dessert
- Method: Baking
- Cuisine: American
Nutrition
- Serving Size: 1 brownie
- Calories: 240
- Sugar: 23g
- Sodium: 80mg
- Fat: 12g
- Saturated Fat: 7g
- Unsaturated Fat: 4g
- Trans Fat: 0g
- Carbohydrates: 33g
- Fiber: 1g
- Protein: 3g
- Cholesterol: 50mg


