
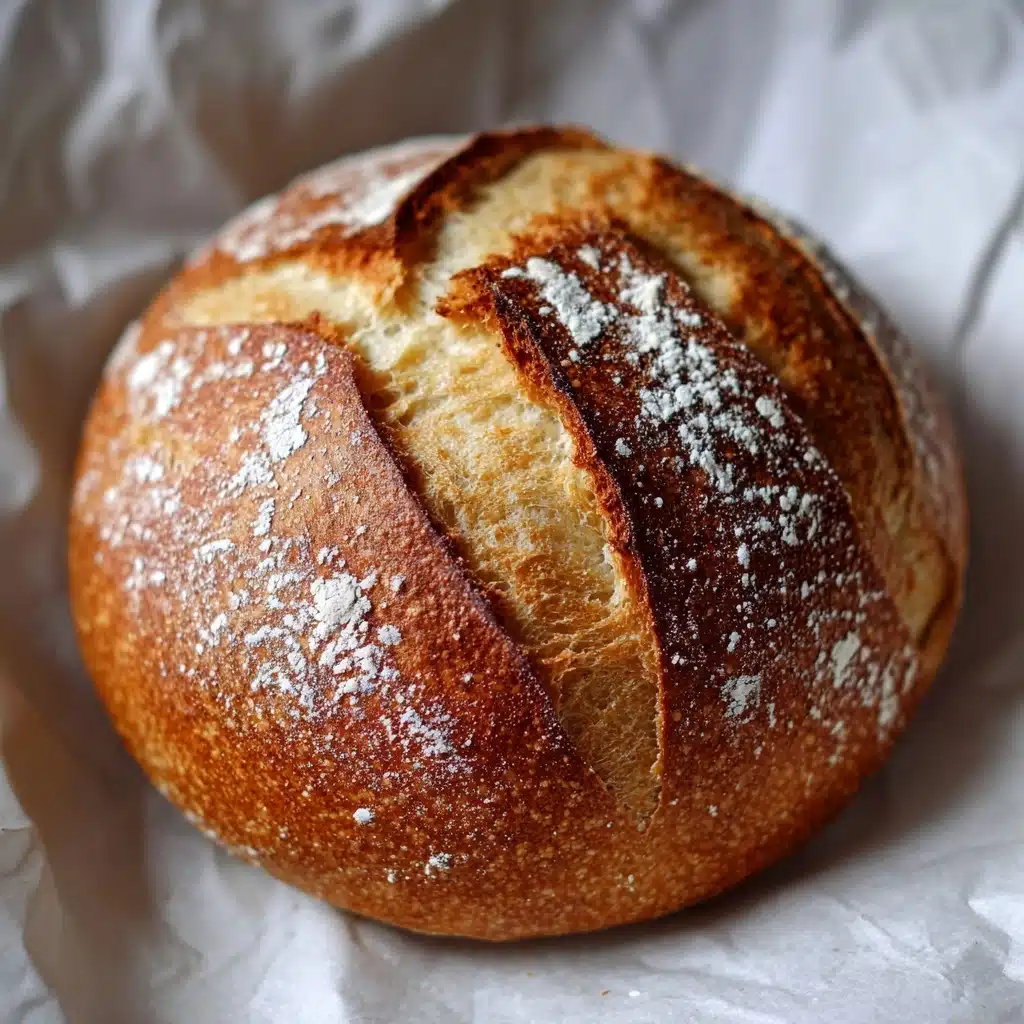
If you’ve ever longed for a tender, golden loaf that wraps your kitchen in a homey aroma, then Grandma’s Perfect Homemade Bread has your name all over it. This classic recipe yields two beautiful loaves with a pillowy crumb and a perfectly crisp crust, just like the ones our grandmothers used to pull fresh from the oven. It’s the perfect cornerstone for sandwiches, morning toast, or simply slathering with butter while it’s still warm—a nostalgic, soul-satisfying bite every time.
Ingredients You’ll Need
The magic of Grandma’s Perfect Homemade Bread comes from its humble, straight-from-the-pantry ingredients. Each one lends something special: flavor, structure, tenderness, or that golden color you crave in every slice.
- Active dry yeast (2 1/4 teaspoons): Gives the bread its tender rise and signature airy texture—make sure it’s fresh for best results.
- Warm water (2 1/4 cups, about 110°F): Activates the yeast and helps blend everything into a supple dough.
- Granulated sugar (2 tablespoons): Feeds the yeast and adds the faintest hint of sweetness.
- Salt (1 tablespoon): Balances the flavors and strengthens the dough.
- Vegetable oil or melted butter (2 tablespoons): Softens the crumb and enriches the loaf; choose butter for a little extra flavor.
- All-purpose flour (6 cups, plus more for kneading): The backbone of your bread—the trick is to add it gradually and stop when your dough feels just right.
How to Make Grandma’s Perfect Homemade Bread
Step 1: Activate the Yeast
Start your bread journey by combining the warm water, sugar, and active dry yeast in a large mixing bowl. Let it stand for 5 to 10 minutes until you see a thick foamy layer forming on top—this means the yeast is alive and raring to go. If you don’t see bubbles, your yeast might be tired, so try a new packet to ensure your bread rises beautifully.
Step 2: Mix in Salt, Oil, and Flour
Stir in the salt and oil, then add the flour a cup at a time, mixing carefully after each addition. You’re looking for a soft, slightly sticky dough that pulls away from the sides of the bowl. Don’t overdo the flour—too much can make the bread dense. Each turn brings you closer to the legendary texture of Grandma’s Perfect Homemade Bread.
Step 3: Knead the Dough
Turn the dough out onto a lightly floured surface. Now comes the fun part: give it a good knead for 8 to 10 minutes, folding and pressing the dough until it’s glossy, smooth, and elastic. This kneading develops the gluten, delivering that characteristic bounce you want in your bread. It’s also a mini upper-body workout!
Step 4: First Rise
Drop your dough into a greased bowl, flipping it over once so both sides get a thin coat of oil. Cover the bowl with a clean towel and let it sit in a warm, cozy spot for about an hour, or until it doubles in size. Watching the dough puff up never gets old—this is where Grandma’s Perfect Homemade Bread starts to come alive.
Step 5: Shape and Second Rise
Punch down the dough to release the air, then divide it evenly in half. Shape each portion into a loaf and nestle them into greased 9×5-inch loaf pans. Cover and let the loaves rise again for another 30 to 45 minutes, until they’ve grown an inch above the top of the pans. This patience pays off with that picture-perfect bakery look!
Step 6: Bake to Golden Perfection
While your loaves enjoy their final rise, preheat your oven to 375°F. Slide the pans onto the center rack and bake for 25 to 30 minutes. The irresistible aroma will fill your kitchen. Your bread is done when it’s deep golden and sounds hollow when you tap the top. Remove from the pans and cool on wire racks, resisting the urge to slice immediately—letting it rest ensures the inside stays fluffy.
How to Serve Grandma’s Perfect Homemade Bread
Garnishes
A simple brush of melted butter while the loaves are still hot makes the crust soft and decadent—just like Grandma did. A sprinkle of flaky sea salt or a swipe of garlic butter is a fun twist when you want to add a little oomph to each slice. Try a drizzle of honey for an irresistibly sweet and shiny finish.
Side Dishes
Serve Grandma’s Perfect Homemade Bread with a bubbling bowl of soup, a crisp salad, or alongside your favorite pasta dinner. It makes the best partner for hearty stews and is the perfect vehicle for sopping up savory sauces. And don’t overlook the power of a simple bread-and-butter plate to start (or finish) any meal in style.
Creative Ways to Present
For gatherings, cut the bread into thick, rustic slices and display them in a linen-lined basket for a cozy, welcoming feel. Turn it into croutons or homemade breadcrumbs for salads and soups. Or go all-in on brunch with a French toast casserole that highlights the pillowy crumb of Grandma’s Perfect Homemade Bread.
Make Ahead and Storage
Storing Leftovers
Wrap any leftover bread in a clean kitchen towel or plastic wrap and store at room temperature for up to three days. This keeps the loaf fresh and soft, so you can enjoy grandma’s magic even on a busy weekday morning. Avoid storing it in the refrigerator, as this can cause homemade bread to stale faster.
Freezing
For longer storage, let your bread cool completely, then wrap the whole loaf or individual slices tightly in plastic wrap and tuck them into a zip-top freezer bag. Frozen slices can be popped right into the toaster—talk about instant comfort! Grandma’s Perfect Homemade Bread freezes beautifully for up to two months.
Reheating
To revive the just-baked warmth, wrap leftover bread in foil and warm it in a 350°F oven for about 10 minutes. For slices, a few seconds in the toaster works wonders. Enjoy that irresistible aroma and flavor all over again, just like it was fresh from the oven.
FAQs
Can I make Grandma’s Perfect Homemade Bread with whole wheat flour?
Absolutely! Swap out half of the all-purpose flour for whole wheat to add heartiness and a nutty flavor. The result is still soft and rises beautifully—just a touch more rustic and wholesome.
Why did my bread turn out dense?
Dense bread can happen if too much flour is added or if the dough did not get enough kneading. Make sure to add flour gradually and stop as soon as the dough is soft but easy to handle. Kneading helps trap air and gives you that feather-light texture that makes Grandma’s Perfect Homemade Bread unforgettable.
Can I use instant yeast instead of active dry yeast?
Yes, you can! Instant yeast doesn’t require proofing—just mix it directly with your other ingredients. Reduce the rise time slightly and keep an eye on your dough so it doesn’t overproof.
Is it possible to halve the recipe for just one loaf?
Of course! Simply cut all the ingredients in half. Follow the same steps for perfect results, just with a single loaf—though we guarantee you’ll wish you’d made two once you taste it.
My crust is too hard—how can I make it softer?
For a softer crust, brush the bread with melted butter right after baking. Wrapping the freshly baked loaves in a clean towel while they cool also helps trap moisture, giving you that pillowy-soft outer layer characteristic of Grandma’s Perfect Homemade Bread.
Final Thoughts
There’s nothing quite as comforting as the scent of fresh-baked bread wafting from the oven, and Grandma’s Perfect Homemade Bread truly delivers on every nostalgic promise. Give this recipe a try with your own spin—it’s sure to become a favorite in your house too! Happy baking, friends.
Print
Grandma’s Perfect Homemade Bread Recipe
- Total Time: 2 hours (including rise time)
- Yield: 2 loaves 1x
- Diet: Vegetarian
Description
A heartwarming recipe for Grandma’s Perfect Homemade Bread that yields two loaves of classic white bread with a soft crust and a light, fluffy interior. This easy sandwich bread is ideal for toasting, making sandwiches, or enjoying warm with butter.
Ingredients
Dough:
- 2 1/4 teaspoons active dry yeast (1 packet)
- 2 1/4 cups warm water (about 110°F)
- 2 tablespoons granulated sugar
- 1 tablespoon salt
- 2 tablespoons vegetable oil or melted butter
- 6 cups all-purpose flour (plus more for kneading)
Instructions
- Dissolve Yeast: In a large mixing bowl, dissolve the yeast and sugar in warm water. Let it sit for 5–10 minutes until foamy.
- Mix Ingredients: Stir in the salt and oil, then gradually add the flour, one cup at a time, mixing until a soft dough forms.
- Knead Dough: Turn the dough onto a lightly floured surface and knead for 8–10 minutes until smooth and elastic.
- Rise: Place the dough in a greased bowl, cover, and let rise in a warm place for about 1 hour, or until doubled in size.
- Shape Loaves: Punch down the dough, divide it into two portions, shape each into a loaf, and place into greased loaf pans.
- Rise Again: Cover the pans and let rise for 30–45 minutes until the dough rises above the pans.
- Bake: Preheat oven to 375°F. Bake loaves for 25–30 minutes until golden brown and hollow-sounding.
- Cool: Remove from pans and cool on wire racks.
Notes
- For softer crusts, brush the tops with melted butter after baking.
- You can use half whole wheat flour for a heartier loaf.
- This bread freezes well—cool completely, then wrap tightly and freeze for up to 2 months.
- Prep Time: 20 minutes
- Cook Time: 30 minutes
- Category: Bread
- Method: Baking
- Cuisine: American
Nutrition
- Serving Size: 1 slice (1/16 of total recipe)
- Calories: 150
- Sugar: 2g
- Sodium: 290mg
- Fat: 3g
- Saturated Fat: 0.5g
- Unsaturated Fat: 2.5g
- Trans Fat: 0g
- Carbohydrates: 27g
- Fiber: 1g
- Protein: 4g
- Cholesterol: 0mg


