
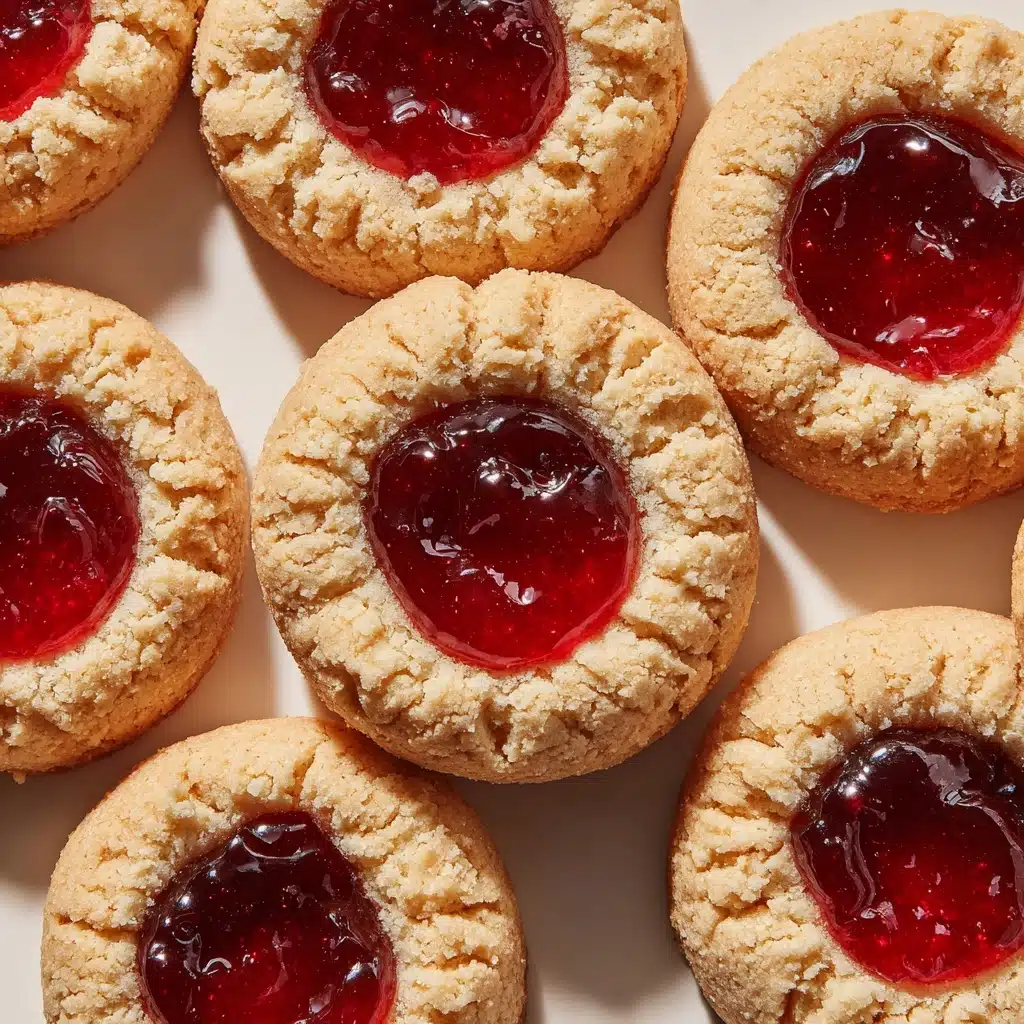
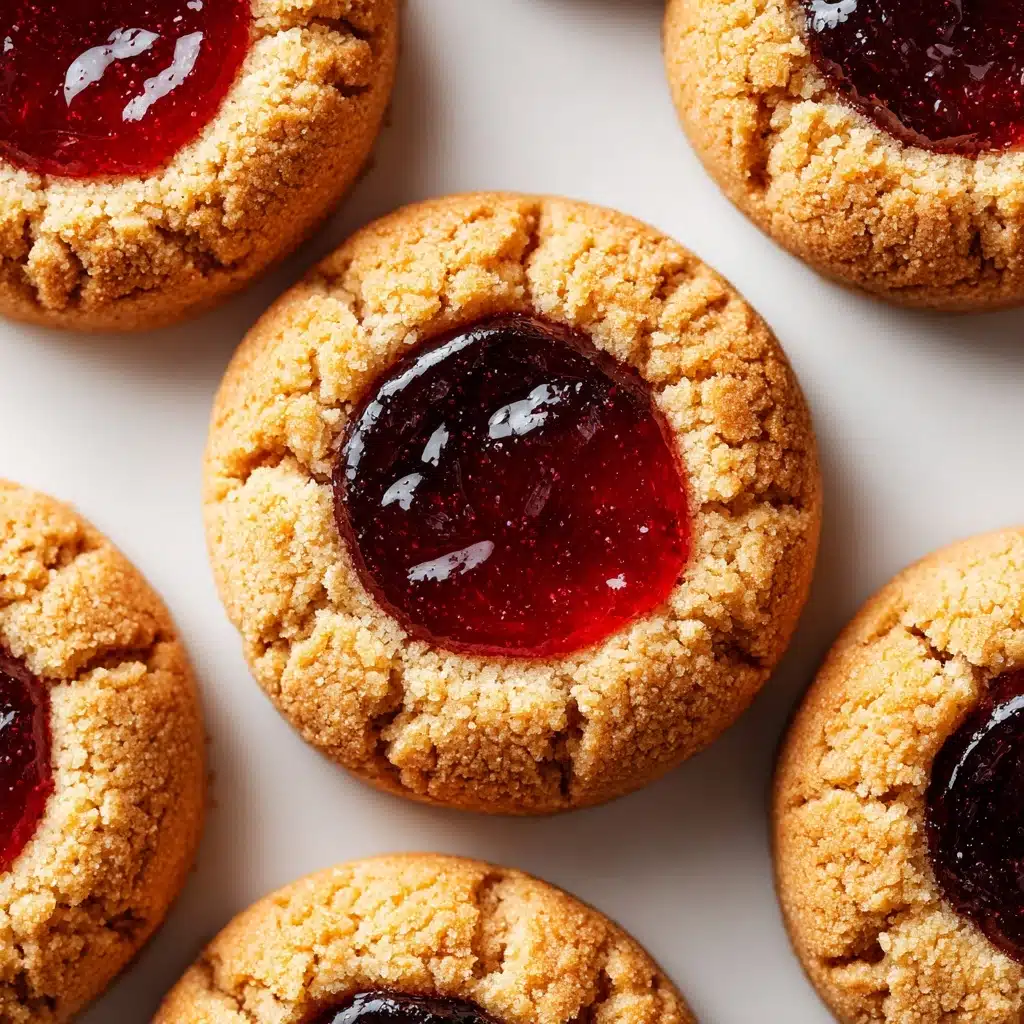
Buttery, fruity, and with a perfectly tender crumb, Thumbprint Cookies are the heartwarming treat you’ll reach for all year long. Their crumbly, melt-in-your-mouth texture and jewel-toned jam centers make them irresistible on any dessert table. Whether you’re baking for the holidays, gift-giving, or simply indulging a sweet craving, these cookies are a classic crowd-pleaser that always feel special but couldn’t be simpler to make.
Ingredients You’ll Need
To create a batch of these delightful Thumbprint Cookies, you only need a handful of pantry staples and your favorite jam. Each ingredient has a purpose, from the rich butter base to the vibrant jam filling, all coming together to deliver the best flavor and texture in every bite.
- Unsalted butter (1 cup, softened): The secret behind the cookies’ rich, tender crumb; make sure it’s properly softened for easy creaming.
- Granulated sugar (2/3 cup): Sweetens the dough and helps create those lightly crisp edges we love.
- Egg yolk (1 large): Adds richness and acts as a binder for the delicate dough.
- Vanilla extract (1 teaspoon): Rounds out the flavors with warmth and a hint of floral sweetness.
- All-purpose flour (2 cups): Provides structure while keeping the cookies tender.
- Salt (1/4 teaspoon): Balances the sweetness and enhances all the other flavors.
- Fruit jam or preserves (1/2 cup, raspberry, strawberry, or apricot): The star of the show! Choose your favorite or mix and match for variety.
- Optional powdered sugar for dusting: A pretty finish that brings just a touch more sweetness and elegance.
How to Make Thumbprint Cookies
Step 1: Prep Your Oven and Baking Sheet
Begin by preheating your oven to 350°F (175°C). Line a baking sheet with parchment paper—this not only prevents sticking but also promotes even browning and makes cleanup a breeze.
Step 2: Cream Butter and Sugar
In a large mixing bowl, use a hand mixer or stand mixer to cream together the softened butter and granulated sugar. Beat for about 2-3 minutes, until the mixture is light, fluffy, and a pale yellow—this step is key to a delicate cookie.
Step 3: Mix in Egg Yolk and Vanilla
Add in the egg yolk and vanilla extract, then mix until everything is smooth and fully incorporated. These ingredients enrich the dough and give the cookies their signature flavor.
Step 4: Combine Dry Ingredients
Sprinkle the flour and salt over the wet mixture. Mix on low speed, just until a soft, cohesive dough forms. Take care not to overmix—stop as soon as no streaks of flour remain for the best texture.
Step 5: Shape the Cookies
Roll the dough into 1-inch balls, placing them 2 inches apart on your prepared baking sheet. To create the classic Thumbprint Cookies look, gently press your thumb or the back of a small spoon into the center of each ball, making a well for the jam.
Step 6: Add Jam and Bake
Spoon about 1/2 teaspoon of your chosen jam into each indentation. Bake the cookies for 12–14 minutes, just until the edges are set and lightly golden. Avoid overbaking for that perfect, tender bite.
Step 7: Cool and Finish
Allow the cookies to cool on the baking sheet for 5 minutes, then transfer to a wire rack to cool completely. If you’d like, finish with a dusting of powdered sugar for a polished, bakery-style touch.
How to Serve Thumbprint Cookies
Garnishes
For a burst of color and extra charm, try a sprinkle of powdered sugar, a drizzle of melted white chocolate, or even a tiny twist of lemon zest. These small touches make your Thumbprint Cookies look as beautiful as they taste.
Side Dishes
Pair these cookies with a cup of tea or coffee for a timeless afternoon snack. They also shine on a holiday cookie platter alongside chocolate fudge, shortbread, or spiced nuts for a delightful mix of flavors and textures.
Creative Ways to Present
Arrange your Thumbprint Cookies in a decorative tin layered with parchment for a heartfelt homemade gift. They look stunning stacked on a rustic cake stand, or serve them nestled in cupcake papers at a party for a touch of elegance.
Make Ahead and Storage
Storing Leftovers
Store your cooled cookies in an airtight container at room temperature. They’ll stay fresh for up to 5 days and retain their signature melt-in-your-mouth texture.
Freezing
To freeze, layer the cookies between sheets of parchment in a freezer-safe container. They’ll keep beautifully for up to 2 months. Thaw at room temperature for about an hour before serving—no need to reheat.
Reheating
If you prefer a just-baked feel, warm the cookies in a 300°F (150°C) oven for 3-4 minutes. This brings back some of their tender crumb, but don’t worry—they’re delicious straight from the container too!
FAQs
Can I use different types of jam in my Thumbprint Cookies?
Absolutely! Raspberry, strawberry, and apricot are classic choices, but you can experiment with any fruit preserve you love. Lemon curd, orange marmalade, or even Nutella make excellent and flavorful fillings.
Why did my cookies spread too much?
If your Thumbprint Cookies spread more than you’d like, try chilling the dough for 30 minutes before baking. Softened butter and warm kitchens can make the dough give way, but a quick chill helps them hold their shape beautifully.
Do I need to dust the cookies with powdered sugar?
Powdered sugar is a lovely finishing touch, but it’s entirely optional. If you love a sweeter bite or want a photo-ready cookie, go ahead and dust them after they’re cool.
Can I make the dough ahead of time?
Yes! You can prep the dough up to two days in advance and store it tightly wrapped in the fridge. Let it soften slightly at room temperature before shaping and baking for best results.
How do I prevent the jam from leaking or burning?
Be careful not to overfill the indentations—just 1/2 teaspoon of jam per cookie is plenty. Also, use thick, high-quality preserves so the filling stays put and doesn’t ooze out as the cookies bake.
Final Thoughts
There’s nothing quite as inviting as a plate of homemade Thumbprint Cookies, whether you’re sharing them with friends or keeping a few (or more!) for yourself. Give them a try and discover how something so simple can be so wonderfully special—happy baking!
Print
Thumbprint Cookies Recipe
- Total Time: 29 minutes
- Yield: 24 cookies 1x
- Diet: Vegetarian
Description
These delightful thumbprint cookies are a classic favorite, perfect for any occasion. A buttery cookie base filled with your favorite jam, these treats are easy to make and even easier to enjoy.
Ingredients
Cookies:
- 1 cup unsalted butter, softened
- 2/3 cup granulated sugar
- 1 large egg yolk
- 1 teaspoon vanilla extract
- 2 cups all-purpose flour
- 1/4 teaspoon salt
Filling:
- 1/2 cup fruit jam or preserves (such as raspberry, strawberry, or apricot)
Optional:
- powdered sugar for dusting
Instructions
- Preheat oven: Preheat oven to 350°F (175°C) and line a baking sheet with parchment paper.
- Cream butter and sugar: In a large bowl, cream together the butter and sugar until light and fluffy. Mix in the egg yolk and vanilla extract.
- Add dry ingredients: Add the flour and salt, and mix until a soft dough forms.
- Shape and fill cookies: Roll the dough into 1-inch balls and place on the baking sheet. Press an indentation into each cookie and fill with jam.
- Bake: Bake for 12–14 minutes until lightly golden. Cool on a wire rack.
- Dust with sugar: Dust with powdered sugar if desired before serving.
Notes
- Chill the dough before baking for better shape retention.
- Experiment with different jam flavors or fillings for variety.
- Store in an airtight container for up to 5 days.
- Prep Time: 15 minutes
- Cook Time: 14 minutes
- Category: Dessert
- Method: Baking
- Cuisine: American
Nutrition
- Serving Size: 1 cookie
- Calories: 130
- Sugar: 6g
- Sodium: 40mg
- Fat: 8g
- Saturated Fat: 5g
- Unsaturated Fat: 2g
- Trans Fat: 0g
- Carbohydrates: 14g
- Fiber: 0g
- Protein: 1g
- Cholesterol: 25mg


