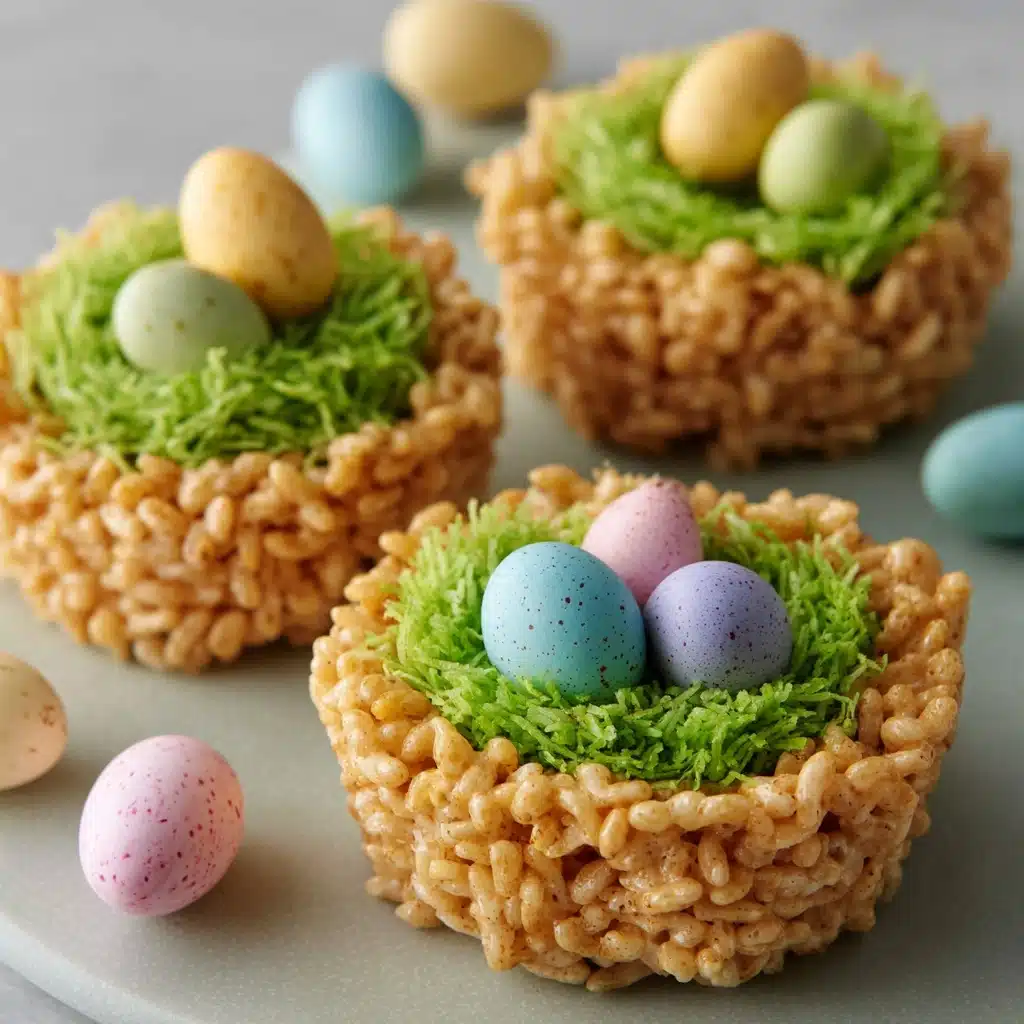
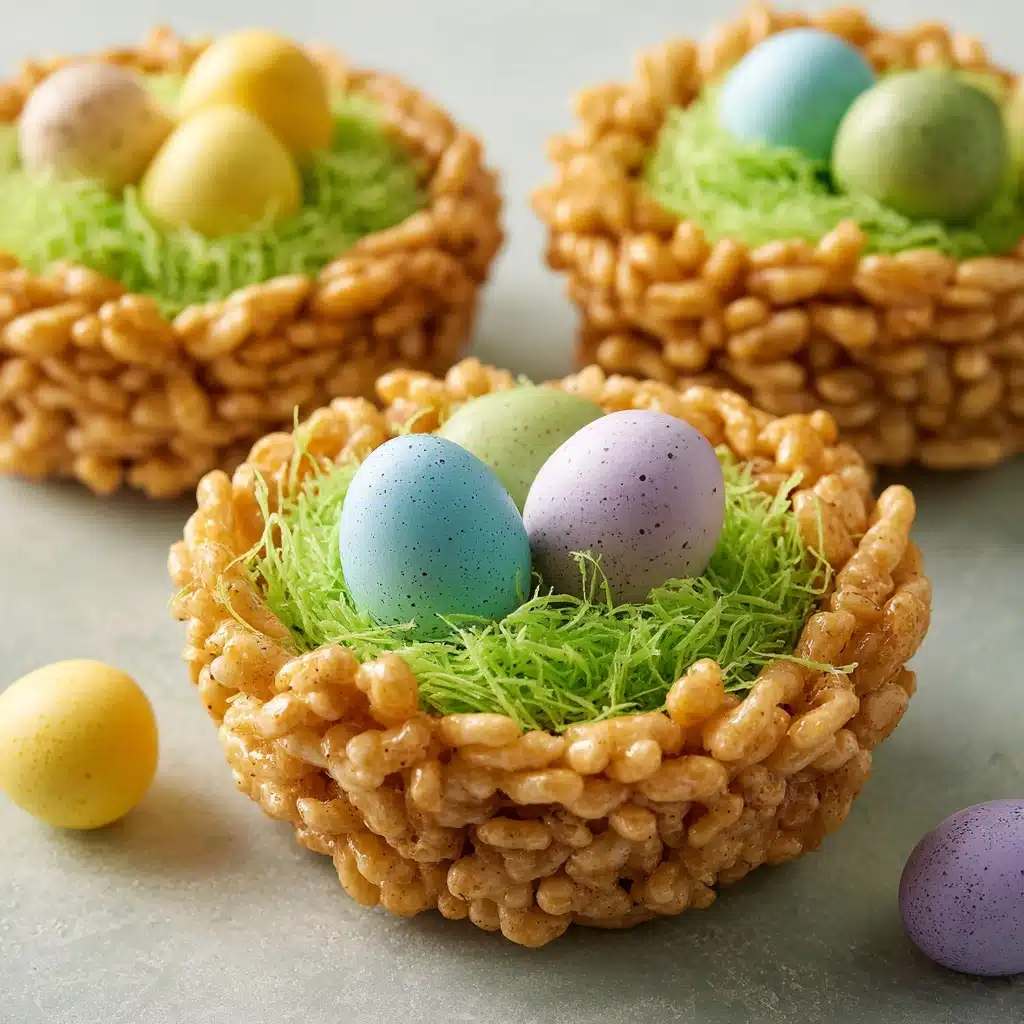
If you’re searching for a dessert that’s as delightful to look at as it is to eat, look no further than this Adorable Rice Krispie Nests Recipe. Featuring a gooey marshmallow base, crunchy cereal, and an irresistibly charming finish of candy eggs and coconut grass, these no-bake treats are perfect for spring gatherings, Easter celebrations, or simply bringing a smile to anyone’s face. I love how these bite-sized nests come together quickly, require just a handful of kitchen staples, and make everyone feel a little extra cheerful. It’s almost impossible not to grin when you see these sweet little candies nestled in their crispy shells!
Ingredients You’ll Need
Ingredients You’ll Need
The ingredients for our Adorable Rice Krispie Nests Recipe are wonderfully straightforward, ensuring you spend less time shopping and more time creating. Each component brings an essential flavor, texture, or burst of color, making this recipe as fun to make as it is to eat!
- Unsalted butter (3 tablespoons): Melts into the base to create a rich, silky texture.
- Mini marshmallows (1 package, 10 oz): The secret to that classic gooey sweetness and perfect stickiness.
- Rice Krispies cereal (6 cups): Delivers the signature crispy crunch that forms each nest.
- Vanilla extract (½ teaspoon, optional): Adds warmth and depth, but the nests are tasty even without it.
- Nonstick cooking spray: A little spray makes removing the nests from the tin a breeze.
- Candy eggs or jelly beans: Colorful and festive, these decorate every nest with a pop of springtime charm.
- Shredded coconut and green food coloring (optional): When tossed together, they create the cutest “grass” for the ultimate nest effect.
How to Make Adorable Rice Krispie Nests Recipe
Step 1: Prepare the Muffin Tin
Start by giving your muffin tin a generous coat of nonstick cooking spray. This little step ensures the nests pop out effortlessly later, keeping them perfectly shaped and saving you from any sticky messes.
Step 2: Melt the Butter and Marshmallows
In a large saucepan over low heat, melt the butter. Once it turns liquid gold, stir in the mini marshmallows. Continuously stir until everything melts into a glossy, smooth, and deliciously gooey mixture—this is where that irresistible flavor starts!
Step 3: Add the Vanilla and Cereal
Remove the pan from the heat and stir in the vanilla extract if you’re using it. Instantly, a lovely aroma will fill your kitchen! Quickly fold in the Rice Krispies cereal, mixing thoroughly so every last piece is coated in marshmallow magic.
Step 4: Shape the Nests
Let the mixture cool for just a minute or two—enough so it’s handleable but still pliable. With greased hands or a spoon, scoop generous portions into each muffin cup. Press down in the center with your fingers or the back of a spoon to create a nest shape. Pro tip: keep a small bowl of water nearby to dampen your fingers, so the mixture doesn’t stick!
Step 5: Let Them Set
Allow the filled tins to sit for about 30 minutes while the nests cool and firm up. This quick rest is all it takes before they’re ready to pop out and decorate.
Step 6: Decorate the Nests
If you’re making coconut “grass,” simply toss shredded coconut with a few drops of green food coloring until evenly coated. Sprinkle some grass into each nest, then arrange those adorable candy eggs or jelly beans in the center. The finished product is a vibrant, cheerful treat that just looks like spring!
How to Serve Adorable Rice Krispie Nests Recipe
Garnishes
Give each nest a whimsical finish! A sprinkle of homemade coconut grass makes them look like they’re straight out of an enchanted meadow. For even more color, add flower-shaped sprinkles or drizzle with a bit of melted white chocolate. The key is to have fun—let your creativity shine as you serve these up.
Side Dishes
Since the Adorable Rice Krispie Nests Recipe is sweet and light, they pair beautifully with a fruit platter—think fresh strawberries, grapes, and sliced kiwi. If you’re serving at a party, creamy lemonade, fruity punch, or a selection of teas would balance out the sweetness deliciously.
Creative Ways to Present
Turn your dessert table into a springtime wonderland by arranging the nests on a cake stand tucked with extra green coconut as “grass.” For parties, package each nest in a clear cellophane bag tied with pastel ribbon—a delightful party favor! Or nestle them in a basket lined with tissue for an irresistibly cute edible centerpiece.
Make Ahead and Storage
Storing Leftovers
To keep your Adorable Rice Krispie Nests Recipe fresh and crunchy, store leftovers in an airtight container at room temperature. They’ll stay tasty for up to three days, though chances are they’ll disappear long before then!
Freezing
If you’d like to make these ahead for a later celebration, these nests can be frozen. Place them in a freezer-safe container with layers separated by wax paper. They’ll keep beautifully for up to a month—just be sure to add the “grass” and candy decorations after thawing for best color and texture.
Reheating
There’s no need to reheat these treats, but if you want to refresh their texture a bit, leave them out at room temperature for about ten minutes after thawing. Avoid microwaving, as it can melt the candy and make the nests soggy.
FAQs
Can I use large marshmallows instead of mini marshmallows?
Yes, you absolutely can! Just chop them up a bit and measure out the same ten ounces. They’ll melt a little slower, so be patient and stir until smooth.
Are there gluten-free alternatives for the cereal?
You can definitely swap in a gluten-free crispy rice cereal to make the Adorable Rice Krispie Nests Recipe suitable for gluten-sensitive guests. Double-check that your marshmallows are gluten-free too.
What’s the best way to remove nests if they stick?
If you find a nest is sticking in the tin, run a thin butter knife gently around the edges and lift it out. Greasing the pan well and dampening your fingers should prevent most sticking.
Can I make these ahead for a party?
Absolutely! The Adorable Rice Krispie Nests Recipe is perfect for making a day or two ahead. Store them in an airtight container until ready to serve for maximum crunch and freshness.
Can kids help make these nests safely?
Yes! Kids can help shape the nests and decorate with coconut grass and candy eggs. Just keep an adult on hand to manage the hot marshmallow mixture. Turning this into a family project is half the fun.
Final Thoughts
Don’t wait for a holiday to enjoy the Adorable Rice Krispie Nests Recipe! These treats come together so quickly and always bring joy to any table, whether you’re hosting a big celebration or just want to share a sweet surprise with someone special. Give them a try—you’ll love how easy they are, and everyone will be wowed by your adorable, homemade creations.
Print
Adorable Rice Krispie Nests Recipe
- Total Time: 25 minutes
- Yield: 12 nests 1x
- Diet: Vegetarian
Description
These Adorable Rice Krispie Nests are a delightful and easy-to-make treat that is perfect for spring holidays or kids’ parties. Made with marshmallows, Rice Krispies cereal, and optional toppings like candy eggs and coconut ‘grass,’ these cute nests are sure to be a hit with both kids and adults alike.
Ingredients
Ingredients:
- 3 tablespoons unsalted butter
- 1 package (10 oz) mini marshmallows
- 6 cups Rice Krispies cereal
- ½ teaspoon vanilla extract (optional)
- nonstick cooking spray
- candy eggs or jelly beans for decorating
- shredded coconut and green food coloring (optional, for ‘grass’)
Instructions
- Prepare the Nests: Lightly grease a muffin tin with nonstick spray.
- Melt the Marshmallows: In a large saucepan over low heat, melt the butter. Add the marshmallows and stir continuously until fully melted and smooth.
- Combine Ingredients: Remove from heat, stir in vanilla extract if using. Fold in Rice Krispies cereal and mix until fully coated.
- Shape the Nests: Let the mixture cool briefly, then press a heaping spoonful into each muffin cup to form a nest shape.
- Set and Decorate: Allow nests to cool and set for about 30 minutes. Fill with candy eggs and a sprinkle of coconut ‘grass’ if desired.
Notes
- To make shaping easier, keep a small bowl of water nearby to dampen your fingers as you press the mixture into the tins.
- These nests are perfect for spring holidays or kids’ parties and can be made ahead and stored in an airtight container.
- Prep Time: 15 minutes
- Cook Time: 10 minutes
- Category: Dessert
- Method: No-Bake
- Cuisine: American
Nutrition
- Serving Size: 1 nest
- Calories: 140
- Sugar: 11g
- Sodium: 100mg
- Fat: 3g
- Saturated Fat: 2g
- Unsaturated Fat: 1g
- Trans Fat: 0g
- Carbohydrates: 27g
- Fiber: 0g
- Protein: 1g
- Cholesterol: 10mg
