
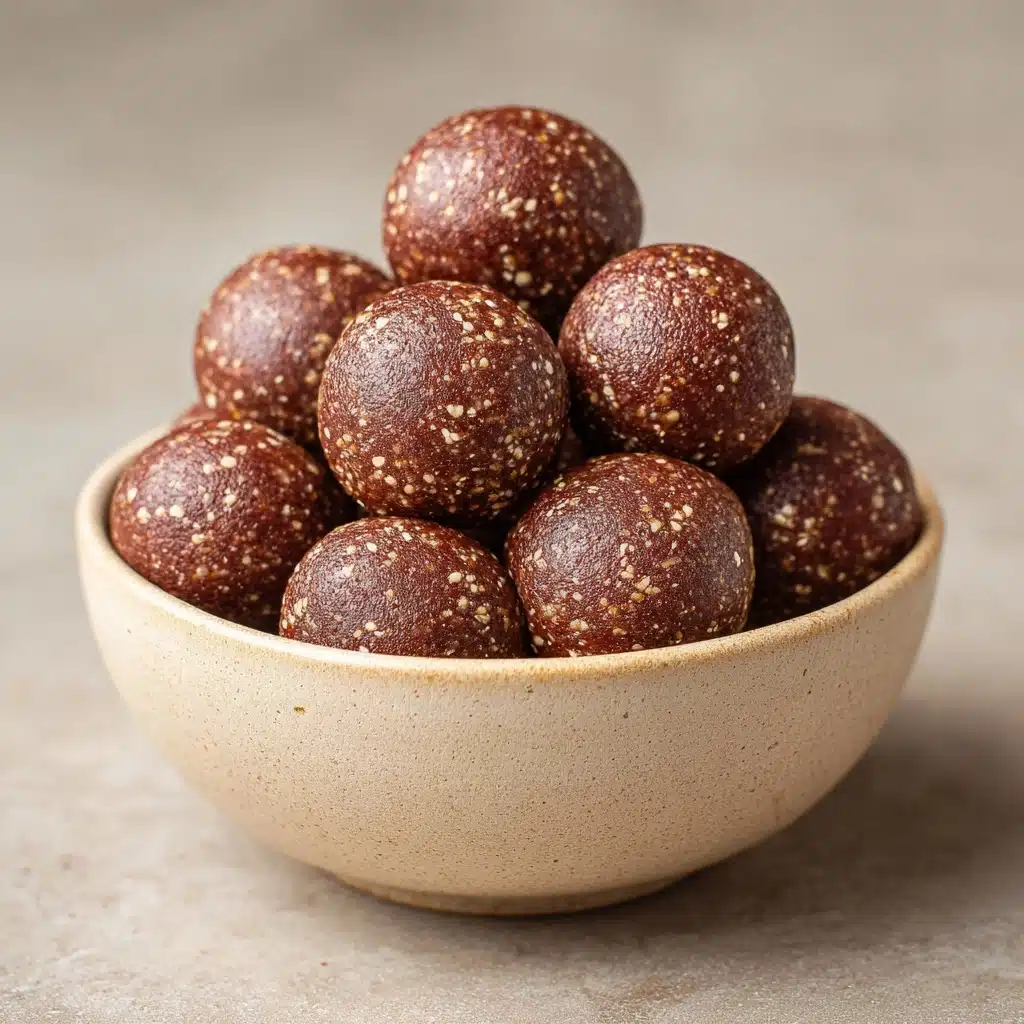
If you’re craving a quick chocolate fix that doesn’t leave you feeling guilty, Wholesome Chocolate Bliss Balls are about to become your go-to treat. Packed with nourishing ingredients and naturally sweetened with dates, these easy, no-bake bites deliver all the rich, fudgy flavor you love while fueling your body with lasting energy. Whether you’re stashing them in your lunchbox, sharing with friends, or sneaking one for a midnight snack, you won’t believe how satisfying and delicious healthy can taste.
Ingredients You’ll Need
Just a handful of pantry staples come together to create this irresistible treat, and each one brings something special to both flavor and nutrition. The real magic of Wholesome Chocolate Bliss Balls is how these simple ingredients combine for a texture that’s both chewy and delightfully dense, with a real pop of chocolate.
- Medjool dates (1 cup, pitted): The secret to natural sweetness and sticky texture, these dates are the glue holding everything together.
- Raw almonds (½ cup): They add a pleasant nutty crunch plus healthy fats and protein for staying power.
- Rolled oats (½ cup): Oats give structure and a hint of wholesome earthiness, balancing the sweetness perfectly.
- Unsweetened cocoa powder (3 tablespoons): Deep and rich, this is what gives your bliss balls their signature chocolate flavor.
- Almond butter (2 tablespoons): It helps everything stick while adding even more creamy, nutty flavor (swap in peanut butter if that’s your jam).
- Chia seeds (1 tablespoon): A sneaky way to add a boost of fiber and omega-3s – plus, they thicken things up!
- Vanilla extract (1 teaspoon): For that warm, round depth that only real vanilla can provide.
- Pinch of salt: Just a touch teases out all the sweet and chocolatey tones.
- Water (1–2 tablespoons, as needed): The right amount pulls everything together without making the mixture too sticky.
- Unsweetened shredded coconut or cocoa powder (optional, for rolling): The finishing touch for a delightfully special look and extra flavor.
How to Make Wholesome Chocolate Bliss Balls
Step 1: Load Up the Food Processor
Toss your pitted Medjool dates, almonds, rolled oats, cocoa powder, almond butter, chia seeds, vanilla extract, and pinch of salt into your food processor. There’s no need for fancy prep—just make sure those dates are pitted! The food processor does the heavy lifting, combining the nuts and oats with the sticky dates for a blissfully smooth (and still slightly chunky) texture that keeps every bite interesting.
Step 2: Process Until Sticky and Crumbly
Pulse everything together until the mixture looks crumbly, but feels sticky when pressed. This magic moment happens fast, so keep an eye (and a spatula) on it. If the mixture looks a little dry, don’t worry—just keep going, and start adding water a tablespoon at a time until you hit that perfect sticky consistency. You want the mixture to stick together easily when you squeeze it between your fingers.
Step 3: Test and Adjust the Texture
Scoop a little bit of the mixture out and press it between your fingers. Does it hold together in a ball? If not, add a splash more water and pulse again. The goal here is a dough that’s soft and pliable, but not wet—it should form balls without crumbling apart.
Step 4: Shape into Bliss Balls
Now comes the fun! Use a heaping teaspoon or small cookie scoop to portion out the dough, then roll each one between your hands to create compact, bite-size balls. The warmth of your hands helps everything come together, and there’s something seriously satisfying about shaping each Wholesome Chocolate Bliss Ball by hand.
Step 5: Roll in Toppings (Optional)
For a show-stopping finish, roll your bliss balls in unsweetened shredded coconut or a dusting of cocoa powder. This not only makes them look bakery-worthy, but also adds a new layer of flavor and a little extra texture with every bite. If you want to get creative, try chopped nuts or even a sprinkle of cinnamon.
Step 6: Chill and Set
Arrange your finished bliss balls in an airtight container and chill in the fridge for at least 30 minutes. This helps the flavors meld and gives each ball the perfectly fudgy, chewy bite that makes these treats so irresistible. Once set, they’re ready to enjoy at home or on the go!
How to Serve Wholesome Chocolate Bliss Balls

Garnishes
Finishing touches make everything taste even better! A sprinkle of flaky sea salt on top can highlight the deep chocolate flavor, or try a light roll in extra cocoa powder for a rich, dramatic look. Chopped pistachios or freeze-dried raspberries add pops of color and a playful crunch—there’s no wrong way to dress up your Wholesome Chocolate Bliss Balls.
Side Dishes
These bliss balls are fabulous on their own, but if you’re serving guests or packing a snack tray, try pairing with fresh berries, sliced apples, or segments of citrus for an extra refreshing burst. They also sit beautifully alongside a cup of green tea or rich, dark coffee for an elevated afternoon pick-me-up.
Creative Ways to Present
Elevate these healthy chocolate treats at your next get-together by piling them high on a rustic wooden board, nestled among other homemade snacks. Pop a few into mini cupcake wrappers for an elegant presentation, or stack them in a pretty jar with a ribbon for the ultimate edible gift. Wholesome Chocolate Bliss Balls are right at home in lunch boxes or as a sweet finish to a brunch spread.
Make Ahead and Storage
Storing Leftovers
Keep your bliss balls in an airtight container in the refrigerator and they’ll stay chewy, fudgy, and fresh for up to a week. I love having a stash handy for a quick snack or healthier dessert anytime the craving for chocolate strikes!
Freezing
One of the best things about Wholesome Chocolate Bliss Balls is how freezer-friendly they are. Arrange them in a single layer on a tray to freeze until solid, then pop into a zip-top bag or container. They’ll last up to three months, so you can always have a healthy treat ready in a pinch.
Reheating
These bliss balls are best enjoyed chilled or at room temperature. If you want to take the chill off straight from the freezer, just let them thaw on the counter for 10–15 minutes before eating—no microwave or oven required. That fudgy texture will still be perfect!
FAQs
Can I substitute another nut or seed for the almonds?
Absolutely! Cashews, walnuts, or sunflower seeds all work well. Just keep the measurements the same for a different twist on your Wholesome Chocolate Bliss Balls.
Are these bliss balls kid-friendly?
Totally! Kids love the chocolate flavor, and parents love that every bite is loaded with nourishing ingredients. You can skip the cocoa powder rolling step for picky eaters if you like.
How can I make them nut-free?
Swap the almonds and almond butter for sunflower or pumpkin seeds and use sunflower seed butter instead. The result is still delicious, chewy, and nut-allergy friendly!
Can I add other flavors, like spices or extracts?
Definitely! A pinch of cinnamon or a few drops of orange or peppermint extract can take your Wholesome Chocolate Bliss Balls in a whole new direction. Feel free to experiment to suit your cravings.
Are Wholesome Chocolate Bliss Balls gluten-free?
Yes, as long as you use certified gluten-free oats, these bliss balls are entirely gluten-free. They’re also naturally vegan and dairy-free, making them a treat just about anyone can enjoy.
Final Thoughts
I guarantee you’ll fall in love with how easy, flexible, and downright delicious these Wholesome Chocolate Bliss Balls are. Whether you keep them all to yourself or share with your favorite people, there’s always a reason to roll up a batch. Give them a try and let every blissful, chocolatey bite remind you that wholesome can truly taste amazing!
Print
Wholesome Chocolate Bliss Balls Recipe
- Total Time: 10 minutes
- Yield: 16 bliss balls
- Diet: Gluten-Free, Vegetarian, Vegan
Description
Indulge in these Wholesome Chocolate Bliss Balls for a guilt-free treat packed with goodness. These no-bake delights are easy to make and perfect for snacking on the go or satisfying your sweet cravings.
Ingredients
Dates:
1 cup Medjool dates (pitted)
Almonds:
½ cup raw almonds
Rolled Oats:
½ cup rolled oats
Cocoa Powder:
3 tablespoons unsweetened cocoa powder
Almond Butter:
2 tablespoons almond butter (or peanut butter)
Chia Seeds:
1 tablespoon chia seeds
Vanilla Extract:
1 teaspoon vanilla extract
Salt:
pinch of salt
Water:
1–2 tablespoons water (as needed)
Coating:
unsweetened shredded coconut or cocoa powder (optional, for rolling)
Instructions
- Prepare the Bliss Balls: Combine dates, almonds, oats, cocoa powder, almond butter, chia seeds, vanilla, and salt in a food processor. Blend until sticky and crumbly.
- Adjust Consistency: If too dry, add water gradually until mixture holds when pressed. Roll into balls.
- Optional Coating: Roll balls in coconut or cocoa powder. Chill for 30 minutes before serving.
Notes
- Perfect for meal prep and as a healthy dessert.
- Store in the fridge for up to a week or freeze for up to 3 months.
- Enhance with dark chocolate chips or cinnamon for extra flavor.
- Prep Time: 10 minutes
- Cook Time: 0 minutes
- Category: Snack
- Method: No-Cook
- Cuisine: Health-Focused
Nutrition
- Serving Size: 1 bliss ball
- Calories: 90
- Sugar: 8g
- Sodium: 20mg
- Fat: 4g
- Saturated Fat: 0.5g
- Unsaturated Fat: 3g
- Trans Fat: 0g
- Carbohydrates: 12g
- Fiber: 2g
- Protein: 2g
- Cholesterol: 0mg


