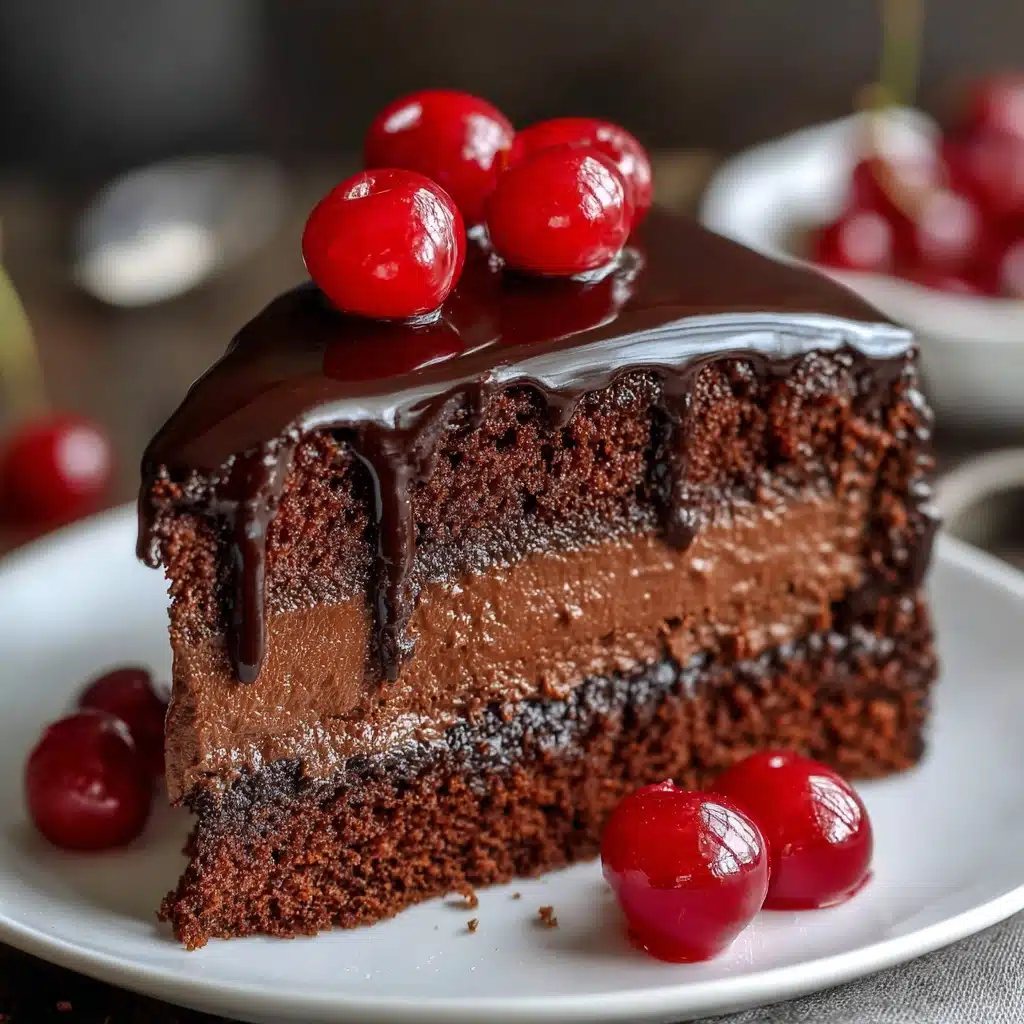
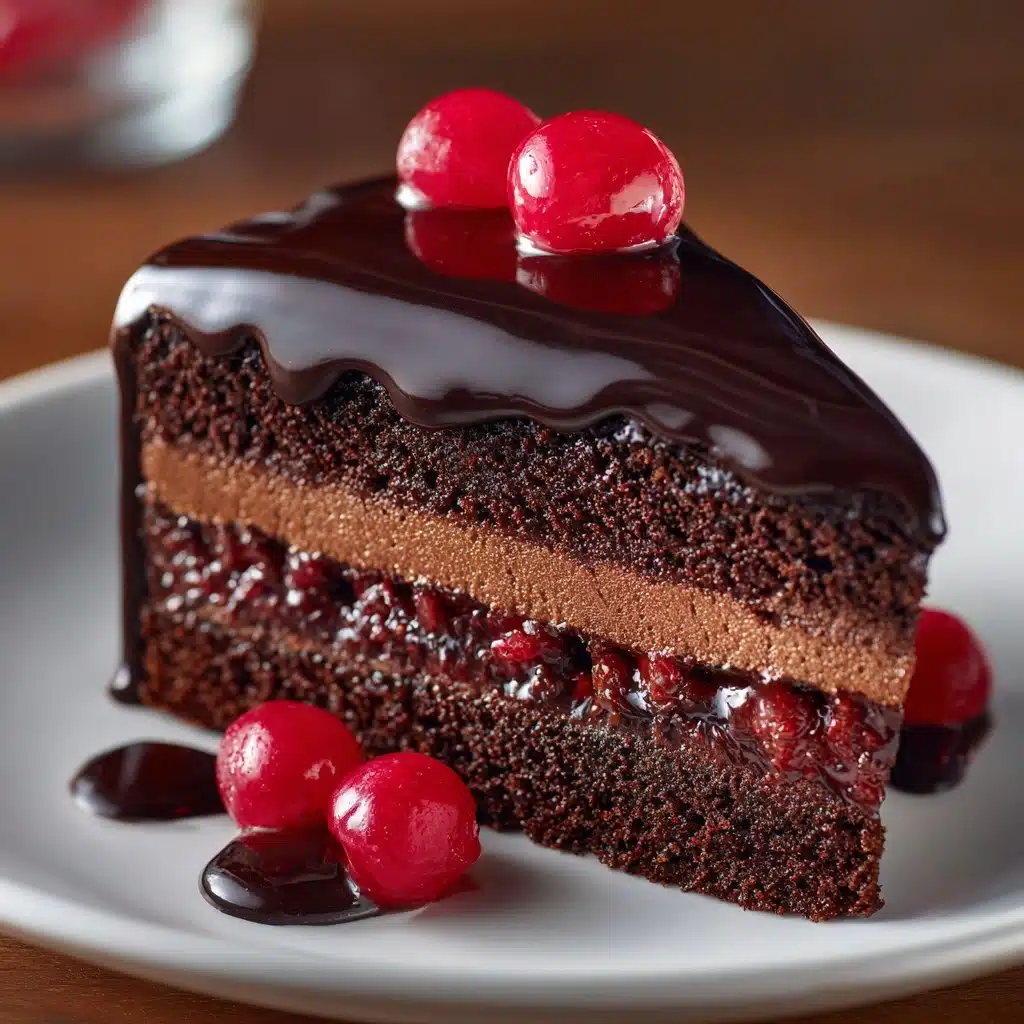
Get ready to fall head over heels for Decadent Black Forest Cheesecake Cake! This showstopping dessert brings together luscious layers of moist chocolate cake, dreamy vanilla cheesecake, tangy cherry filling, and billowy whipped cream. Every forkful is an absolute celebration—sweet, tart, creamy, and rich, all at once. Whether you’re gathering loved ones for a special occasion or simply treating yourself, this dessert guarantees smiles and “just one more slice!” moments. One bite of this festive masterpiece, and you’ll understand why it belongs at the top of every dessert lover’s list.
Ingredients You’ll Need
Great recipes like Decadent Black Forest Cheesecake Cake start with the right basics—every ingredient matters! From silky-smooth cream cheese to deep, cocoa-rich cake, each part plays its role in making this cake extra memorable. Here’s how everything comes together for a dessert you’ll crave long after the last bite.
- All-purpose flour: The foundation for a tender, sturdy chocolate cake that holds up to luscious layers.
- Granulated sugar: Sweetens both cake and cheesecake layers just right—never cloying, always balanced.
- Unsweetened cocoa powder: Provides that classic, deep chocolate flavor; dark cocoa works if you like extra intensity!
- Baking powder and baking soda: A dynamic duo that ensures your cake layers bake up fluffy and tall.
- Salt: Just a pinch is enough to amplify all the other flavors.
- Eggs: Essential for structure and richness, in both cake and cheesecake.
- Whole milk: Keeps your chocolate cake moist with a hint of creaminess.
- Vegetable oil: Ensures every bite stays soft and tender, even after chilling.
- Vanilla extract: Wakes up all the flavors with sweet, floral aroma in every layer.
- Boiling water: Blooms the cocoa, deepening the chocolate taste and making the batter easy to mix.
- Cream cheese: The absolute star of the cheesecake layer, creating a dreamy, silky texture.
- Sour cream: Adds tanginess and helps with that melt-in-your-mouth consistency in the cheesecake.
- Cherry pie filling: Classic, juicy, and vibrant—brings the iconic Black Forest flavor and a pop of color.
- Heavy whipping cream: Whipped into clouds for a soft, luxurious frosting.
- Powdered sugar: Sweetens the whipped cream frosting to perfection—no graininess allowed!
- Chocolate shavings and extra cherries (optional): These garnishes make your cake look irresistible and add texture and flavor in every slice.
How to Make Decadent Black Forest Cheesecake Cake
Step 1: Bake the Cheesecake Layer
Begin by preheating your oven to 325°F (163°C) and lining a 9-inch springform pan with a circle of parchment paper—this makes for the neatest release later! Beat the softened cream cheese and sugar until satiny smooth, then add the eggs one at a time, mixing gently so your cheesecake stays light. Finally, blend in sour cream and vanilla for extra silkiness and a hint of tang. Pour into the pan, bake until just set (about 40–45 minutes), then cool and refrigerate. Overnight chilling is your friend here, guaranteeing a firm yet creamy layer that slices beautifully.
Step 2: Make the Chocolate Cake Layers
Once your cheesecake is chilling, raise your oven to 350°F (177°C) and prep two 9-inch round pans—grease and flour them well for easy release. In a big bowl, whisk together your flour, sugar, cocoa, baking powder, baking soda, and salt. Mixing the eggs, milk, oil, and vanilla in ensures everything gets evenly distributed. Pour in the boiling water last; it will make the batter thin, but don’t worry! This is what makes your layers beautifully moist and fluffy. Split the batter between your pans and bake until a toothpick comes out with just a few crumbs—about 30–35 minutes. Let them cool completely for clean, even layering.
Step 3: Assemble the Layers
Ready for the fun part? Set one chocolate cake layer on your platter, then add the well-chilled cheesecake (you may need to run a thin knife around the pan before releasing). Spoon half the cherry pie filling over the cheesecake, letting the ruby-red cherries tumble slightly over the sides—it’s all about rustic charm here! Carefully place the second chocolate cake layer on top, sandwiching the cherries and creamy goodness in between.
Step 4: Frost with Whipped Cream
Pour cold heavy cream into a chilled bowl, add powdered sugar and a splash of vanilla, and whip until you reach stiff peaks. Don’t skimp on this step—the whipped cream should be cloudlike and hold its shape when dolloped and spread. Frost the entire cake generously, swirling or smoothing as you please. The contrast of the snow-white cream against the dark chocolate sides is pure drama!
Step 5: Add the Finishing Touches
To bring your Decadent Black Forest Cheesecake Cake over the top, generously scatter chocolate shavings over the whipped cream and artfully place some extra cherries. These garnishes aren’t just for looks—they add a lovely crunch and burst of fruitiness that keeps everyone coming back for more. Now all that’s left is to chill the cake until you’re ready to slice, serve, and bask in the compliments.
How to Serve Decadent Black Forest Cheesecake Cake

Garnishes
Garnishing is where you can add your own flair to Decadent Black Forest Cheesecake Cake! Sprinkle heaps of chocolate shavings over the whipped cream for a luxurious touch, or try chocolate curls for a fancier finish. Extra maraschino or fresh cherries not only look gorgeous, but also give a burst of merry color and juicy flavor in every bite. For a little sparkle, dust lightly with powdered sugar right before serving.
Side Dishes
This Black Forest masterpiece shines as the main event, so keep side dishes simple. Pair slices with hot espresso, a latte, or after-dinner coffee to balance the richness. For a more playful spin, a few crisp chocolate wafer cookies or chocolate-dipped strawberries on the plate will emphasize the dessert’s chocolaty, fruity notes without stealing the show.
Creative Ways to Present
Consider assembling your Decadent Black Forest Cheesecake Cake as individual mini cakes using ring molds—perfect for dinner parties! Or, slice the whole cake into tall wedges and serve each on a sparkly plate drizzled with a little cherry syrup and extra whipped cream. Play with height by stacking a cake slice vertically and garnishing with a chocolate stick “tree,” staying true to the enchanted Black Forest vibe.
Make Ahead and Storage
Storing Leftovers
Wrap any leftover Decadent Black Forest Cheesecake Cake tightly with plastic wrap or store in an airtight container. It’ll keep beautifully in the refrigerator for up to 4 days, maintaining its signature layers and creamy textures. If you’ve garnished with extra whipped cream or fresh cherries, add those fresh every time for the best look and taste.
Freezing
To freeze, slice the cake and wrap each piece individually in plastic wrap, then foil, to lock in freshness. Store in a freezer-proof container or bag for up to 2 months. Thaw slices in the refrigerator overnight so the cheesecake and cake layers have time to regain their perfect texture and flavor.
Reheating
This dessert is best served cold or at cool room temperature, so there’s usually no need to reheat. If you prefer a slightly softer cake, let your slice sit out of the fridge for 10–15 minutes before enjoying. Avoid the microwave, as it can melt the whipped cream and make the cheesecake runny.
FAQs
Can I make Decadent Black Forest Cheesecake Cake ahead of time?
Absolutely! This cake actually improves when made a day in advance, as the flavors meld beautifully and the layers have time to firm up. Assemble everything (garnish just before serving), cover well, and chill in the fridge overnight.
Is it possible to use homemade cherry filling instead of canned?
Definitely! If you love cooking from scratch, a simple cherry compote made with fresh or frozen cherries and a little sugar works perfectly. Just be sure it isn’t too runny, so your layers stay tidy when slicing.
What can I use instead of a springform pan for the cheesecake layer?
A regular 9-inch cake pan can work in a pinch—line it well with parchment paper and leave a generous overhang so you can lift out the cooled cheesecake. Just be extra gentle when removing it so the cake stays intact.
How do I get clean, beautiful slices?
For the prettiest presentation, use a large, sharp knife dipped in hot water and wiped clean between slices. This will help you glide through the layers and keep those gorgeous lines sharp and distinct!
Can this recipe be made gluten-free?
Yes, you can swap in your favorite gluten-free all-purpose flour blend for the chocolate cake layers. The cheesecake, filling, and whipped cream are already gluten-free, so everyone can enjoy a slice of Decadent Black Forest Cheesecake Cake!
Final Thoughts
There’s just nothing quite as joyful and impressive as a homemade Decadent Black Forest Cheesecake Cake. Whether celebrating something big or making an ordinary day feel special, this dessert is guaranteed to draw a chorus of wows. Give it a try, share it with the people you love, and watch memories (and crumbs) disappear!
Print
Decadent Black Forest Cheesecake Cake Recipe
- Total Time: 2 hours (plus chilling time)
- Yield: 12 servings 1x
- Diet: Vegetarian
Description
Indulge in the ultimate decadence with this Black Forest Cheesecake Cake. Layers of rich chocolate cake, creamy cheesecake, cherry filling, and whipped cream frosting come together to create a show-stopping dessert that will impress any crowd.
Ingredients
For the chocolate cake:
- 1 ¾ cups all-purpose flour
- 1 ½ cups granulated sugar
- ¾ cup unsweetened cocoa powder
- 1 ½ teaspoons baking powder
- 1 ½ teaspoons baking soda
- 1 teaspoon salt
- 2 large eggs
- 1 cup whole milk
- ½ cup vegetable oil
- 2 teaspoons vanilla extract
- 1 cup boiling water
For the cheesecake layer:
- 2 (8 oz) packages cream cheese, softened
- ½ cup granulated sugar
- 2 large eggs
- ½ cup sour cream
- 1 teaspoon vanilla extract
For the cherry filling:
- 1 (21 oz) can cherry pie filling
For the whipped cream frosting:
- 2 cups heavy whipping cream
- ½ cup powdered sugar
- 1 teaspoon vanilla extract
For garnish:
- chocolate shavings and extra cherries (optional)
Instructions
- Cheesecake Layer: Preheat oven to 325°F (163°C) and line a 9-inch springform pan. Beat cream cheese and sugar. Add eggs, sour cream, and vanilla. Bake for 40–45 minutes. Chill.
- Chocolate Cake: Preheat oven to 350°F (177°C). Grease and flour two 9-inch round pans. Whisk dry ingredients, add wet ingredients, mix, stir in boiling water. Bake for 30–35 minutes. Cool.
- Assembly: Place one cake layer, top with cheesecake, cherry filling, second cake layer. Frost with whipped cream. Garnish with chocolate and cherries. Refrigerate.
Notes
- Chill the cheesecake overnight for best texture.
- You can use homemade cherry compote instead of canned filling.
- For a more intense chocolate flavor, use dark cocoa powder.
- Prep Time: 45 minutes
- Cook Time: 1 hour 15 minutes
- Category: Dessert
- Method: Baking
- Cuisine: German-American
Nutrition
- Serving Size: 1 slice
- Calories: 620
- Sugar: 46g
- Sodium: 360mg
- Fat: 38g
- Saturated Fat: 23g
- Unsaturated Fat: 13g
- Trans Fat: 0.5g
- Carbohydrates: 63g
- Fiber: 3g
- Protein: 8g
- Cholesterol: 130mg


