
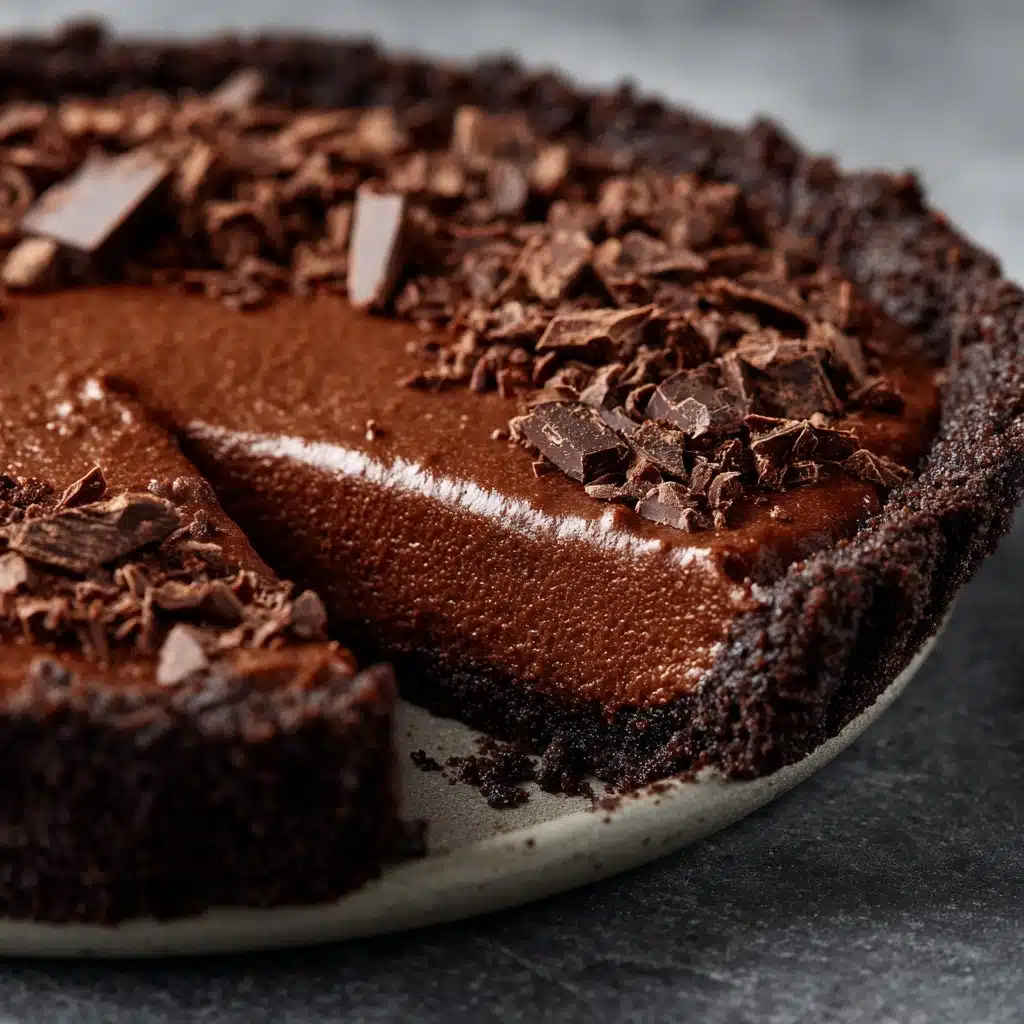
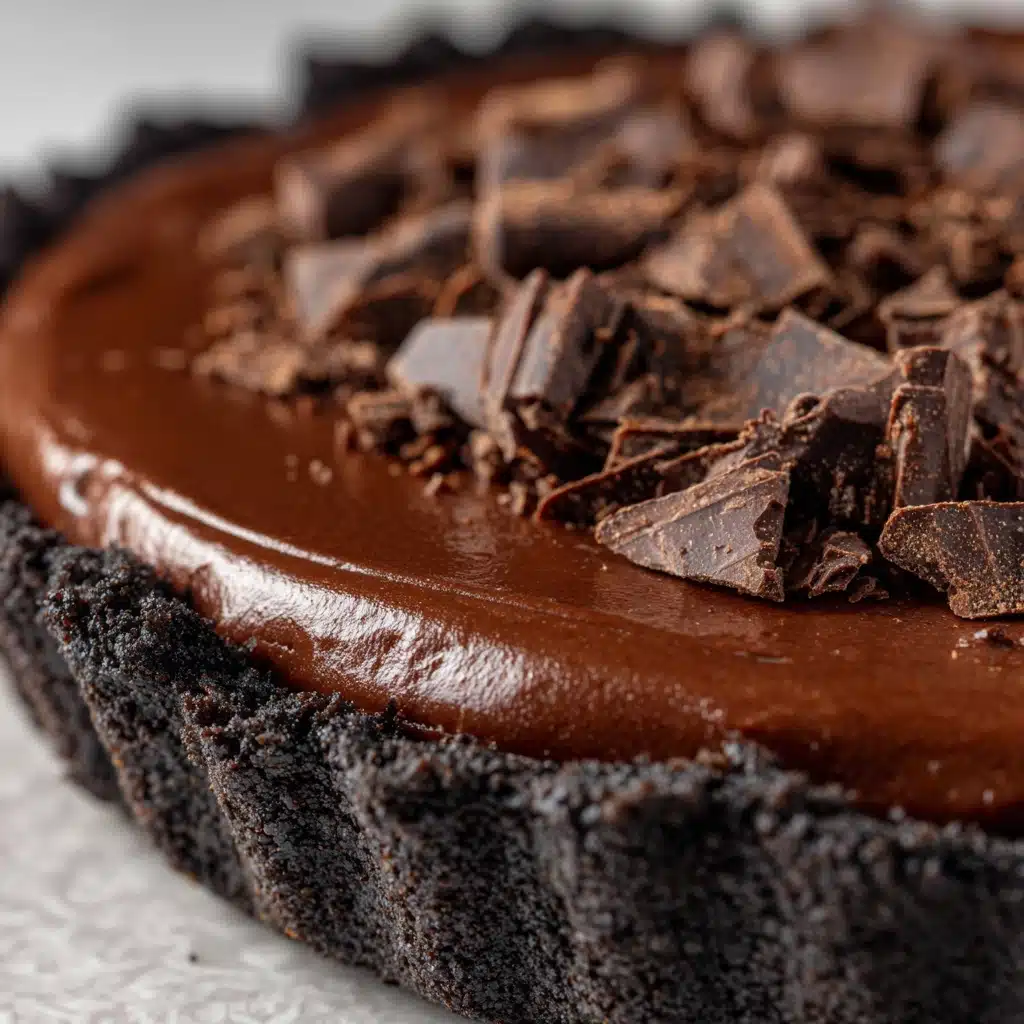
Get ready to fall in love with a dessert that combines rich chocolatey goodness, creamy texture, and ease—all in one irresistible bite! This No-Bake Chocolate Pudding Pie delivers classic, crowd-pleasing comfort with barely any effort in the kitchen. Whether you’re prepping for a last-minute gathering or simply craving a decadent treat without turning on the oven, this pie is the ultimate answer. With a velvety pudding filling, a cloud of whipped topping, and your choice of scrumptious crust, it’s no wonder this dessert is adored by chocolate fans of all ages.
Ingredients You’ll Need
-
Pie Crust:
- 1 prepared 9-inch graham cracker or Oreo pie crust
Chocolate Pudding Filling:
- 2 boxes (3.4 ounces each) instant chocolate pudding mix
- 2 3/4 cups cold milk
Topping:
- 1 tub (8 ounces) whipped topping, thawed
- Chocolate shavings or mini chocolate chips for garnish
How to Make No-Bake Chocolate Pudding Pie
Step 1: Prepare the Pudding Mixture
Grab your largest mixing bowl and pour in both boxes of the instant chocolate pudding mix. Add the cold milk and whisk everything together for about two minutes. You’ll see it thicken up and turn glossy, letting you know it’s ready for the next step. This chocolatey base is the heart and soul of your No-Bake Chocolate Pudding Pie.
Step 2: Fold in Whipped Topping
Spoon about half of your thawed whipped topping into the thickened pudding, and gently fold it in using a spatula. This step keeps the filling light, airy, and oh-so-velvety—be gentle so you don’t deflate the whipped topping!
Step 3: Fill the Pie Crust
Carefully pour the pudding mixture into your prepared graham cracker or Oreo pie crust. Use your spatula to spread it out until the surface is even and smooth. Already, your kitchen smells like a chocolate lover’s dream.
Step 4: Top with Remaining Whipped Topping
Dollop the rest of the whipped topping on the pie and spread it gently over the pudding layer. You can go rustic with big swoops or aim for a super-smooth finish—it’s up to you!
Step 5: Garnish with Chocolate
To let everyone know this pie means business, sprinkle chocolate shavings or mini chocolate chips all over the top. If you like, a drizzle of chocolate syrup or some crushed cookies can add even more drama.
Step 6: Chill and Set
Transfer your masterpiece to the refrigerator and let it chill for at least three hours. This sets the filling so it slices beautifully and the flavors meld together for pure dessert bliss.
How to Serve No-Bake Chocolate Pudding Pie
Garnishes
A finishing sprinkle of chocolate shavings or mini chocolate chips takes this pie from amazing to outstanding. If you want, add a spiral of chocolate syrup or even a few fresh raspberries for a pop of color and tartness. Let your toppings be the exclamation mark on your magnificent No-Bake Chocolate Pudding Pie!
Side Dishes
This pie is indulgent enough to stand alone, but it also pairs beautifully with a mug of coffee or a glass of cold milk. For a more complete dessert table, serve it alongside bowls of fresh berries, a fruit salad, or simple vanilla ice cream—something cool and bright to balance all that chocolate.
Creative Ways to Present
Why not serve mini No-Bake Chocolate Pudding Pie cups for parties? Spoon the filling and toppings into small jars or clear glasses so each person gets their own adorable serving. You could also pipe whipped topping in decorative peaks or add themed sprinkles for special occasions—the possibilities are endless!
Make Ahead and Storage
Storing Leftovers
Leftover pie keeps wonderfully in the fridge. Just cover it tightly with plastic wrap or pop it into an airtight container, and it’ll stay fresh for up to three days. This makes it a perfect treat to sneak a slice whenever your chocolate craving strikes!
Freezing
If you want to make your No-Bake Chocolate Pudding Pie even farther ahead, freezing works well. Simply assemble as usual, wrap the whole pie (or individual slices) tightly, and freeze for up to one month. Thaw overnight in the refrigerator before serving for best results—the texture remains surprisingly creamy!
Reheating
There’s no need to reheat this dessert, as it’s designed to be served cold. Instead, if it’s been in the freezer, just allow it to fully thaw in the fridge. Once it’s cold and sliceable again, it’s ready to enjoy straight from the fridge.
FAQs
Can I use homemade whipped cream instead of store-bought topping?
Absolutely! Homemade whipped cream offers wonderful flavor and a fresh feel. Just whip up about 3 cups of heavy cream with a touch of sugar until you have soft peaks, then use it exactly in place of the store-bought whipped topping.
What if I only have one box of pudding mix?
For best results, you’ll want to use two boxes to fill a full 9-inch pie crust and achieve that characteristic thick and fudgy texture. If you only have one, you can halve the other ingredients and make a smaller pie or even parfait cups.
Can I make No-Bake Chocolate Pudding Pie dairy-free?
Yes! Grab a non-dairy instant pudding mix, use your favorite plant-based milk (like almond or soy), and a dairy-free whipped topping. Just make sure your crust is also dairy-free, and you’ve got a delicious vegan-friendly dessert.
How do I prevent the pudding filling from becoming runny?
Using the right milk-to-mix ratio and letting the pie chill fully are both key. Measure carefully, use cold milk, and give the pie at least three hours—or even overnight—in the refrigerator so it sets up perfectly smooth and sliceable.
Can I make this pie with other pudding flavors?
Definitely! The method is the same, so feel free to pair vanilla, butterscotch, or even banana pudding with your favorite crust and toppings. Get creative and invent a signature variation of the classic No-Bake Chocolate Pudding Pie!
Final Thoughts
If you’ve been searching for that show-stopping, simple-to-make chocolate dessert, this No-Bake Chocolate Pudding Pie checks every box. Every bite is creamy, nostalgic, and pure joy. Don’t wait for a special occasion—whip one up soon and treat yourself and your loved ones to this foolproof favorite!
Print
No-Bake Chocolate Pudding Pie Recipe
- Total Time: 3 hours 10 minutes (including chilling)
- Yield: 8 servings 1x
- Diet: Non-Vegetarian
Description
Indulge in this luscious No-Bake Chocolate Pudding Pie that’s creamy, chocolatey, and oh-so-easy to make. With a rich chocolate pudding filling nestled in a graham cracker or Oreo crust and topped with fluffy whipped cream, this pie is a delightful treat for any occasion.
Ingredients
Pie Crust:
- 1 prepared 9-inch graham cracker or Oreo pie crust
Chocolate Pudding Filling:
- 2 boxes (3.4 ounces each) instant chocolate pudding mix
- 2 3/4 cups cold milk
Topping:
- 1 tub (8 ounces) whipped topping, thawed
- Chocolate shavings or mini chocolate chips for garnish
Instructions
- Prepare the Pudding: In a large mixing bowl, whisk together the pudding mixes and cold milk for about 2 minutes until thickened.
- Combine with Whipped Topping: Gently fold in half of the whipped topping until smooth.
- Fill the Crust: Pour the pudding mixture into the prepared pie crust and spread evenly.
- Add the Topping: Top with the remaining whipped topping, smoothing it out with a spatula. Garnish with chocolate shavings or mini chocolate chips.
- Chill and Serve: Refrigerate for at least 3 hours or until set before slicing and serving.
Notes
- For extra indulgence, use an Oreo crust and add a drizzle of chocolate syrup on top before serving.
- You can also layer crushed cookies or candy bars between the pudding and whipped topping for added texture.
- Prep Time: 10 minutes
- Cook Time: 0 minutes
- Category: Dessert
- Method: No-Bake, Refrigerated
- Cuisine: American
Nutrition
- Serving Size: 1 slice
- Calories: 310
- Sugar: 25g
- Sodium: 410mg
- Fat: 15g
- Saturated Fat: 8g
- Unsaturated Fat: 6g
- Trans Fat: 0g
- Carbohydrates: 42g
- Fiber: 2g
- Protein: 4g
- Cholesterol: 10mg


