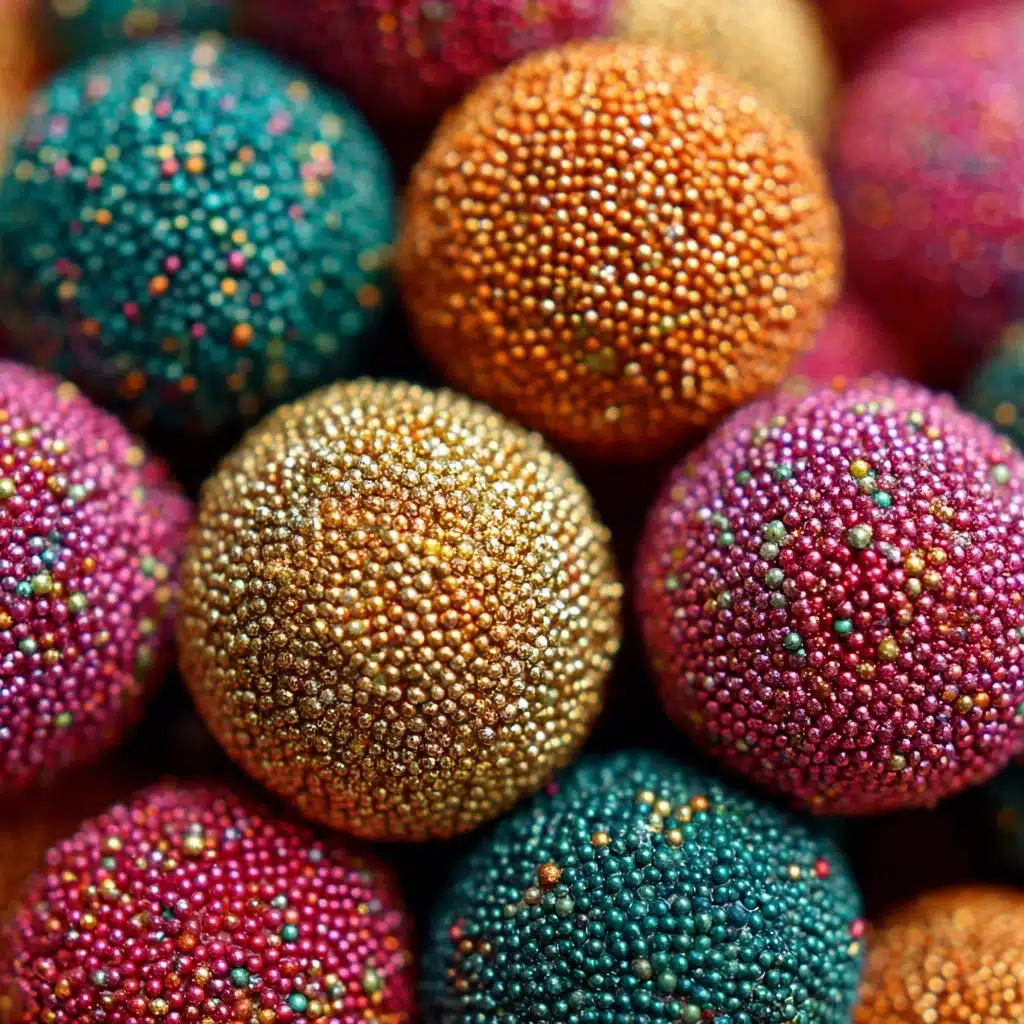
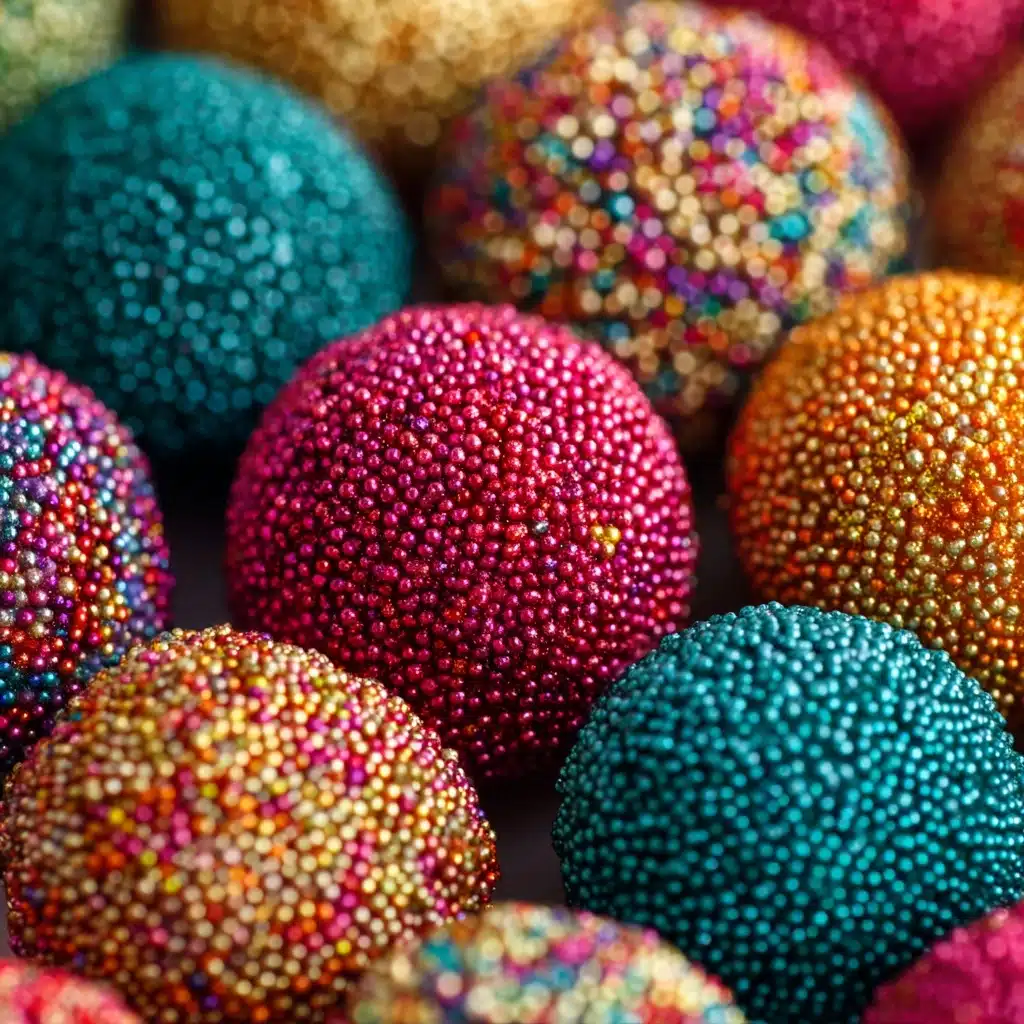
If you love desserts that are fun, festive, and impossibly easy to make, you’re going to fall head-over-heels for these Glitter Cookie Balls! Sweet vanilla cookies and tangy cream cheese are blended together, dipped in luscious white chocolate, and coated with sparkling edible glitter. No baking required—just a little mixing, rolling, and decorating for a batch of treats guaranteed to steal the show at any celebration. Whether you’re whipping these up for a holiday, a party, or just because, Glitter Cookie Balls are pure joy in every bite.
Ingredients You’ll Need
Every ingredient here deserves a moment in the spotlight! Each one is essential for the unique texture, flavor, and dazzling look that sets Glitter Cookie Balls apart. Even the smallest pinch or sparkle brings something special to this no-bake treat.
- Vanilla sandwich cookies: These are the base of your cookie balls, giving them that nostalgic, creamy sweetness and the perfect crumbly texture.
- Cream cheese: Softened cream cheese acts as the “glue,” making your mixture rich, smooth, and oh-so-luscious.
- Vanilla extract: Just a splash amps up the vanilla flavor and gives a warm, fragrant aroma.
- Pinch of salt: This tiny addition balances out all the sweetness, making every bite more satisfying.
- White chocolate chips or candy melts: For that dreamy, snappy shell; white chocolate is easy to melt and works wonderfully with bright or pastel tints.
- Edible glitter or sparkling sugar: The magic touch! Use a rainbow of colors to make your Glitter Cookie Balls truly shine.
- Food coloring (gel-based, optional): If you want to tint your chocolate coating, gel food coloring adds bold color without thinning the chocolate.
How to Make Glitter Cookie Balls
Step 1: Mix the Dough
Start by placing your crushed vanilla sandwich cookies in a large mixing bowl. Add the softened cream cheese, vanilla extract, and a pinch of salt. Use a sturdy spatula or a hand mixer to combine everything until you have a uniform, soft dough. It might look a little messy at first, but keep mixing—soon you’ll see it come together into a magical, scoopable mixture.
Step 2: Shape into Balls
Scoop out tablespoon-sized portions of the dough and roll them between your hands to form smooth, even balls. Line them up on a parchment-lined tray. Don’t worry if they aren’t perfectly round—the chocolate shell and glitter will make them look gorgeous! Once you’re done, pop the tray into the freezer for 20 to 30 minutes to firm them up.
Step 3: Melt and Color the Chocolate
While your cookie balls chill, pour the white chocolate chips or candy melts into a microwave-safe bowl. Microwave in 30-second bursts, stirring well after each interval, until you have a silky, lump-free melt. If you’d like to tint the coating, add a bit of gel-based food coloring and stir to your preferred shade. This is where you can really let your creativity shine!
Step 4: Dip and Decorate
Take your chilled cookie balls from the freezer. Using a fork or skewer, dip each ball into the melted chocolate, making sure it’s fully coated. Let any excess chocolate drip back into the bowl, then gently set each ball onto the parchment tray. While the coating is still wet, generously sprinkle edible glitter or sparkling sugar over the tops. Work quickly so the glitter sticks before the shell sets!
Step 5: Set and Serve
Once all your Glitter Cookie Balls are decorated, let them sit until the chocolate hardens. You can leave them at room temperature or speed things up in the fridge. Serve them chilled or at room temperature, and watch as everyone swoons over their dazzling looks and dreamy flavor.
How to Serve Glitter Cookie Balls

Garnishes
Why stop at edible glitter? For extra flair, add a few delicate drizzles of colored chocolate or a sprinkle of tiny edible pearls. You can match the color theme to birthdays, baby showers, or holiday parties—there are endless ways to make your Glitter Cookie Balls even more eye-catching!
Side Dishes
Serve these sweet cookie balls with a pitcher of cold milk, mugs of hot cocoa, or a spread of fresh fruit. They pair beautifully with other finger foods on a dessert buffet or as the shining star alongside a platter of cookies and brownies.
Creative Ways to Present
Pile them high on a pretty cake stand, nestle them in mini cupcake liners, or skewer them on sticks for cookie ball pops! For party favors, tuck a few Glitter Cookie Balls into small cellophane bags tied with ribbons that match your party colors—guests will love taking a little sparkle home.
Make Ahead and Storage
Storing Leftovers
Store any leftover Glitter Cookie Balls in an airtight container in the fridge. They’ll stay fresh and delicious for up to five days, making them perfect for prepping ahead of parties or keeping as a sweet treat throughout the week.
Freezing
You can absolutely freeze Glitter Cookie Balls! Lay them out in a single layer on a tray to freeze until solid, then transfer to a freezer-safe container. They’ll last up to two months—just let them thaw in the fridge before enjoying.
Reheating
No need to reheat these beauties, as they’re delicious straight from the fridge or at room temperature. If you’ve frozen them, simply thaw in the refrigerator overnight so the coating stays firm and the centers are perfectly creamy.
FAQs
Can I use chocolate sandwich cookies instead of vanilla?
Absolutely! Chocolate sandwich cookies add a deeper cocoa flavor and look equally stunning coated in glitter. Just replace the vanilla cookies one-for-one and follow the same steps.
What’s the best way to crush the cookies?
The quickest way is in a food processor, but if you don’t have one, place the cookies in a zip-top bag and crush them with a rolling pin. You want fine crumbs for a smoother dough, but a little texture is okay!
Can I make Glitter Cookie Balls gluten-free?
Yes, simply use gluten-free vanilla sandwich cookies and check that all your other ingredients, especially the chocolate and decorations, are certified gluten-free.
Is it possible to use other types of chocolate for the coating?
Definitely! You can dip your cookie balls in milk or dark chocolate if you prefer. White chocolate is perfect for vibrant colors, but any will taste delicious.
How far in advance can I make Glitter Cookie Balls for a party?
You can make them up to five days ahead and keep them refrigerated, or freeze them weeks in advance. Just decorate with glitter after thawing if you want that ultra-shiny finish right before serving.
Final Thoughts
Making Glitter Cookie Balls is pure joy from start to finish—they’re fun, festive, and incredibly easy to whip up, no oven required. There’s something so delightful about customizing every batch with your favorite colors and glitter. Give these a try and get ready to dazzle your friends and family with the prettiest little treats on the table!
Print
Glitter Cookie Balls Recipe
- Total Time: 50 minutes (includes chilling)
- Yield: 24 cookie balls 1x
- Diet: Vegetarian
Description
These Glitter Cookie Balls are a fun and festive no-bake treat perfect for parties and special occasions. With a creamy vanilla cookie center coated in white chocolate and sparkling edible glitter, these sweet treats are sure to dazzle your taste buds.
Ingredients
For the Cookie Balls:
- 1 (14 oz) package vanilla sandwich cookies (crushed)
- 4 oz cream cheese (softened)
- 1/2 teaspoon vanilla extract
- Pinch of salt
For Coating and Decoration:
- 1 cup white chocolate chips or candy melts
- Edible glitter or sparkling sugar (various colors)
- Optional gel-based food coloring
Instructions
- Prepare the Cookie Mixture: In a large mixing bowl, combine crushed vanilla sandwich cookies, softened cream cheese, vanilla extract, and salt. Mix until a soft dough forms.
- Shape the Cookie Balls: Scoop out tablespoon-sized portions of the dough and roll into smooth balls. Place on a parchment-lined tray and chill in the freezer for 20–30 minutes.
- Coat with Chocolate: Melt the white chocolate in the microwave, adding food coloring if desired. Dip each chilled cookie ball into the melted chocolate, then sprinkle with edible glitter. Allow to set on the tray.
- Set and Serve: Let the cookie balls firm up at room temperature or in the fridge. Enjoy chilled or at room temperature.
Notes
- Experiment with different colored glitters for various occasions.
- Store the cookie balls in an airtight container in the fridge for up to 5 days.
- Prep Time: 20 minutes
- Cook Time: 0 minutes
- Category: Dessert
- Method: No-Bake
- Cuisine: American
Nutrition
- Serving Size: 1 cookie ball
- Calories: 120
- Sugar: 9g
- Sodium: 85mg
- Fat: 6g
- Saturated Fat: 3g
- Unsaturated Fat: 2g
- Trans Fat: 0g
- Carbohydrates: 15g
- Fiber: 0g
- Protein: 1g
- Cholesterol: 5mg


