
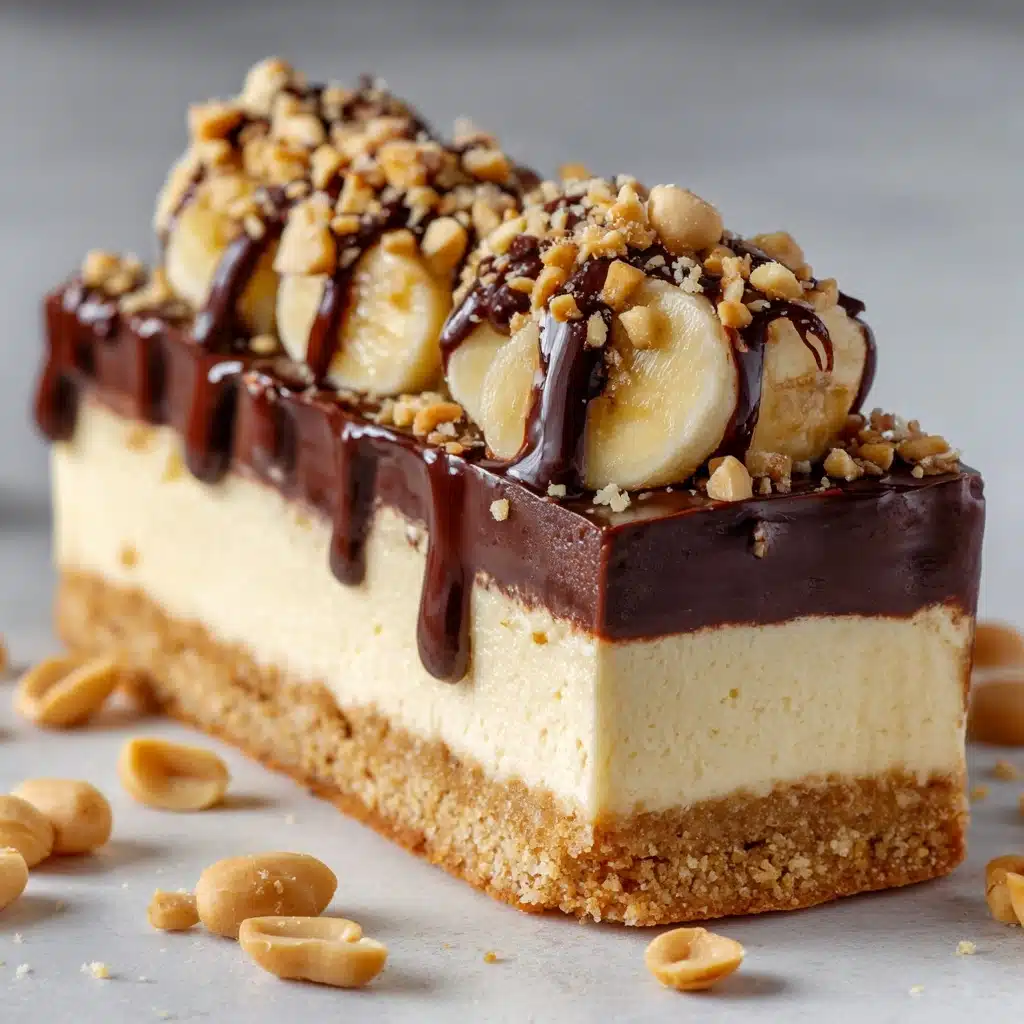
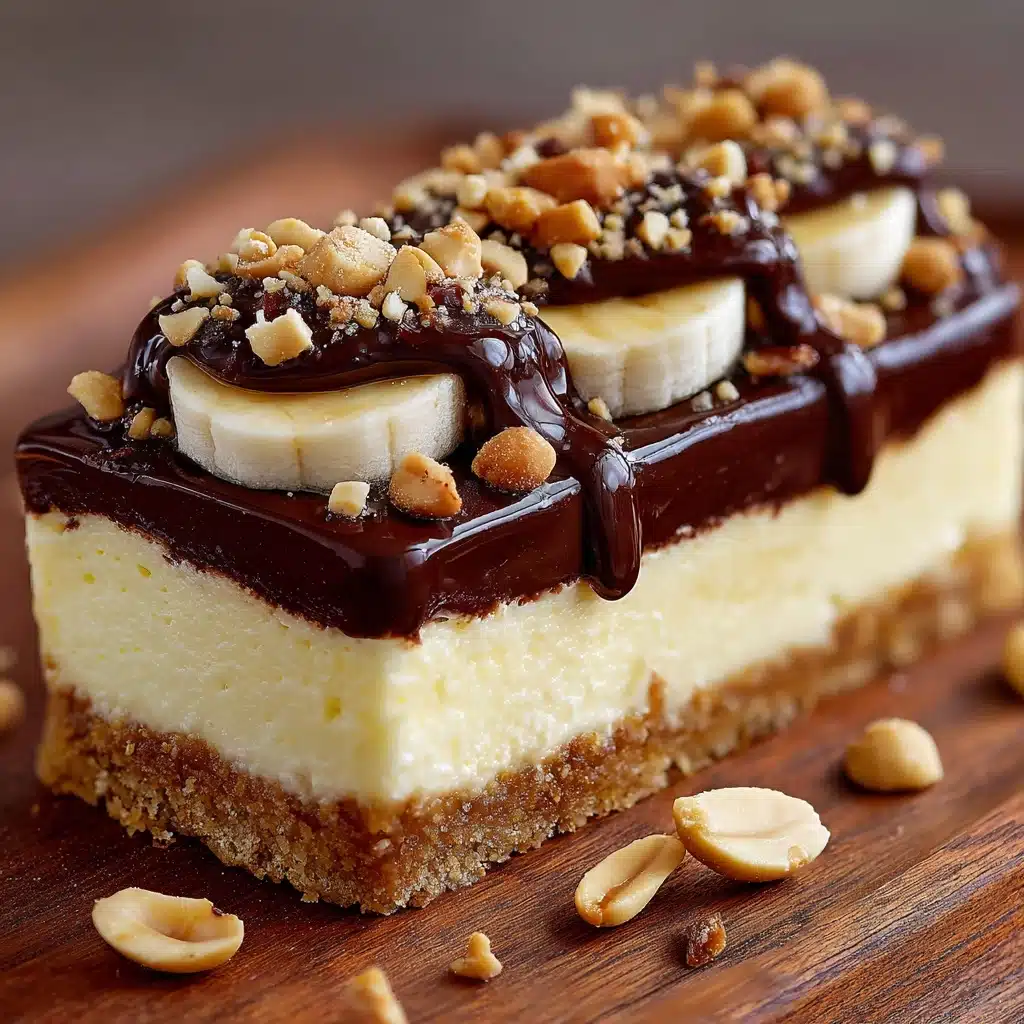
If you’re seeking a refreshing treat that’s both easy and a little bit virtuous, look no further than these Frozen Banana Dessert Bars. This recipe brings together sweet mashed bananas, nutty oats, creamy nut butter, and just the right amount of chocolate for a frosty, no-bake delight. They check all the boxes for flavor, texture, and nutrition, all while keeping things gluten-free and customizable for nearly any diet. A winner for meal-prep, an after-dinner sweet fix, or a wholesome snack that feels like pure decadence—there is simply nothing like these Frozen Banana Dessert Bars!
Ingredients You’ll Need
Each ingredient in this recipe is chosen for a reason, creating the ideal chewy, creamy, and slightly crunchy bar. Stock your kitchen with these simple building blocks to make magic happen in your freezer! Here’s what you’ll need, plus a tip for each:
- Ripe bananas: Their natural sweetness and creamy texture create the foundation of the bars—make sure they’re well-speckled for the best flavor.
- Rolled oats: Give the bars structure and heartiness, while keeping things wonderfully chewy.
- Almond butter or peanut butter: Adds richness, binds the mixture, and delivers healthy fats; pick your favorite flavor or substitute sunflower seed butter for a nut-free version.
- Maple syrup or honey: Just a bit boosts sweetness and helps everything stick together; use maple syrup to keep things vegan.
- Cinnamon: Brings a cozy warmth that complements the banana and nutty notes perfectly.
- Vanilla extract: Enhances all the other flavors and rounds out the sweetness beautifully.
- Salt: A tiny pinch makes every other ingredient pop—don’t skip it!
- Mini chocolate chips: For melty, fudgy spots in every bite without overwhelming the bars.
- Chopped walnuts or pecans (optional): Lend crunch and a toasty, buttery depth, plus extra nutrition if you like.
- Melted dark chocolate for drizzling (optional): Adds a dramatic finish and extra chocolatey goodness; totally worth the effort!
How to Make Frozen Banana Dessert Bars
Step 1: Prepare Your Pan
Start by lining an 8×8-inch baking pan with parchment paper, leaving a bit of overhang on the sides. This makes the bars super easy to lift out once frozen—no prying or crumbling, just one simple lift and you’re slicing into perfect squares!
Step 2: Mix Your Base
In a big, welcoming bowl, mash your ripe bananas until smooth. Add the rolled oats, your chosen nut (or seed) butter, maple syrup or honey, cinnamon, vanilla extract, and that essential pinch of salt. Stir it all together—watch as the mixture transforms into something thick, sticky, and seriously tempting.
Step 3: Fold in the Goodies
Now, sprinkle in the mini chocolate chips and, if you’re feeling fancy, some chopped walnuts or pecans. Give everything a gentle stir, folding just until those chocolatey and crunchy bits are evenly dispersed. This is where the anticipation really starts to build!
Step 4: Press and Freeze
Transfer the mixture to your lined pan. Using a spatula or your hands, press the mix firmly and evenly into every corner. The firmer you press, the better your Frozen Banana Dessert Bars will hold together. Slide the pan into your freezer and let them set for at least 2 hours, until solid and sliceable.
Step 5: Slice and Finish
Once frozen, grab the parchment overhang to lift your slab from the pan. Place it on a cutting board and slice into 9 neat bars (or, honestly, larger pieces if you’re sharing with friends who have sweet teeth). If you’d like, drizzle with some melted dark chocolate for that glossy, dessert-worthy finish.
How to Serve Frozen Banana Dessert Bars
Garnishes
These bars look extra inviting with a few fancy touches! After drizzling with chocolate, try finishing with a sprinkle of flaky sea salt, toasted coconut, or even a few extra chocolate chips on top. Each garnish adds its own layer of texture and flair to your Frozen Banana Dessert Bars.
Side Dishes
Since these bars are cool and satisfying on their own, they’re fantastic as a midday snack with a cup of coffee or tea. For dessert, I love pairing them with a scoop of dairy-free vanilla ice cream or a handful of fresh berries to make a bright and beautiful snack plate.
Creative Ways to Present
If you want to impress (or just delight yourself!), try cutting the bars into bite-sized squares and threading them onto skewers with slices of strawberry or kiwi. Or, serve Frozen Banana Dessert Bars in individual cupcake liners for easy sharing at a picnic or party—so fun and easy to grab!
Make Ahead and Storage
Storing Leftovers
Keep your leftover bars in an airtight container in the freezer. This way, they stay fresh, frosty, and ready whenever you need a quick, satisfying treat. Bonus: since they don’t have preservatives, you can feel great about grabbing one any time.
Freezing
Frozen Banana Dessert Bars are designed to live in your freezer! Just layer parchment between bars if stacking, so they don’t stick together. They’ll keep perfectly for up to 2 months—though good luck making them last that long.
Reheating
There’s no actual reheating needed for these bars. Simply let one sit at room temperature for about 3-5 minutes before biting in—this softens them just enough to achieve that delightful creamy-chewy texture.
FAQs
Can I make Frozen Banana Dessert Bars nut-free?
Absolutely! Sunflower seed butter works beautifully in place of almond or peanut butter, making these bars safe and scrumptious for nut-free households.
How ripe should my bananas be?
The riper, the better! Look for bananas with plenty of brown spots—this means they’re sweet, soft, and will mash easily, giving the bars their irresistibly sweet banana flavor.
Are these bars gluten-free?
Yes! Just be sure to use certified gluten-free oats, and you’ll have bars that everyone can enjoy, regardless of dietary needs.
Can I add extra mix-ins?
Definitely! Try unsweetened shredded coconut, chia seeds, or even a handful of dried fruit for more texture and fun. These Frozen Banana Dessert Bars are super versatile, so make them your own.
Do I need to thaw the bars before serving?
Not really—just let them sit for a couple of minutes after taking them from the freezer. They’ll be soft enough to bite but still perfectly cold and satisfying, especially on a warm day.
Final Thoughts
I can’t recommend these Frozen Banana Dessert Bars enough—they’re outrageously easy, customizable, and so delicious you just might find yourself making batch after batch. Whether you need a cool snack, a healthy dessert, or a little something to brighten your day, give these bars a try. You deserve this sweet frozen treat!
Print
Frozen Banana Dessert Bars Recipe
- Total Time: 2 hours 10 minutes
- Yield: 9 bars 1x
- Diet: Gluten-Free, Vegan
Description
Indulge in these delicious Frozen Banana Dessert Bars that are easy to make and perfect for a healthy treat. Packed with wholesome ingredients like bananas, oats, nut butter, and chocolate chips, these bars are a delightful frozen dessert option.
Ingredients
Main Ingredients:
- 3 ripe bananas (mashed)
- 1 1/2 cups rolled oats
- 1/2 cup almond butter or peanut butter
- 1/4 cup maple syrup or honey
- 1/2 teaspoon cinnamon
- 1 teaspoon vanilla extract
- 1/4 teaspoon salt
Additional Ingredients:
- 1/2 cup mini chocolate chips
- 1/4 cup chopped walnuts or pecans (optional)
- Melted dark chocolate for drizzling (optional)
Instructions
- Prepare the Base: Line an 8×8-inch baking pan with parchment paper.
- Mix the Ingredients: In a large bowl, combine mashed bananas, oats, nut butter, maple syrup, cinnamon, vanilla, and salt. Stir in chocolate chips and nuts if using.
- Freeze the Bars: Spread the mixture into the prepared pan, press down firmly, and freeze for at least 2 hours until firm.
- Serve: Once frozen, cut into bars and drizzle with melted chocolate if desired. Store in the freezer until ready to enjoy.
Notes
- You can use sunflower seed butter for a nut-free version.
- For added texture, consider mixing in shredded coconut or chia seeds.
- These bars are ideal for meal prep and serve as a wholesome frozen snack.
- Prep Time: 10 minutes
- Cook Time: 0 minutes
- Category: Dessert
- Method: No-Bake
- Cuisine: American
Nutrition
- Serving Size: 1 bar
- Calories: 180
- Sugar: 10g
- Sodium: 60mg
- Fat: 9g
- Saturated Fat: 2g
- Unsaturated Fat: 6g
- Trans Fat: 0g
- Carbohydrates: 22g
- Fiber: 3g
- Protein: 4g
- Cholesterol: 0mg
