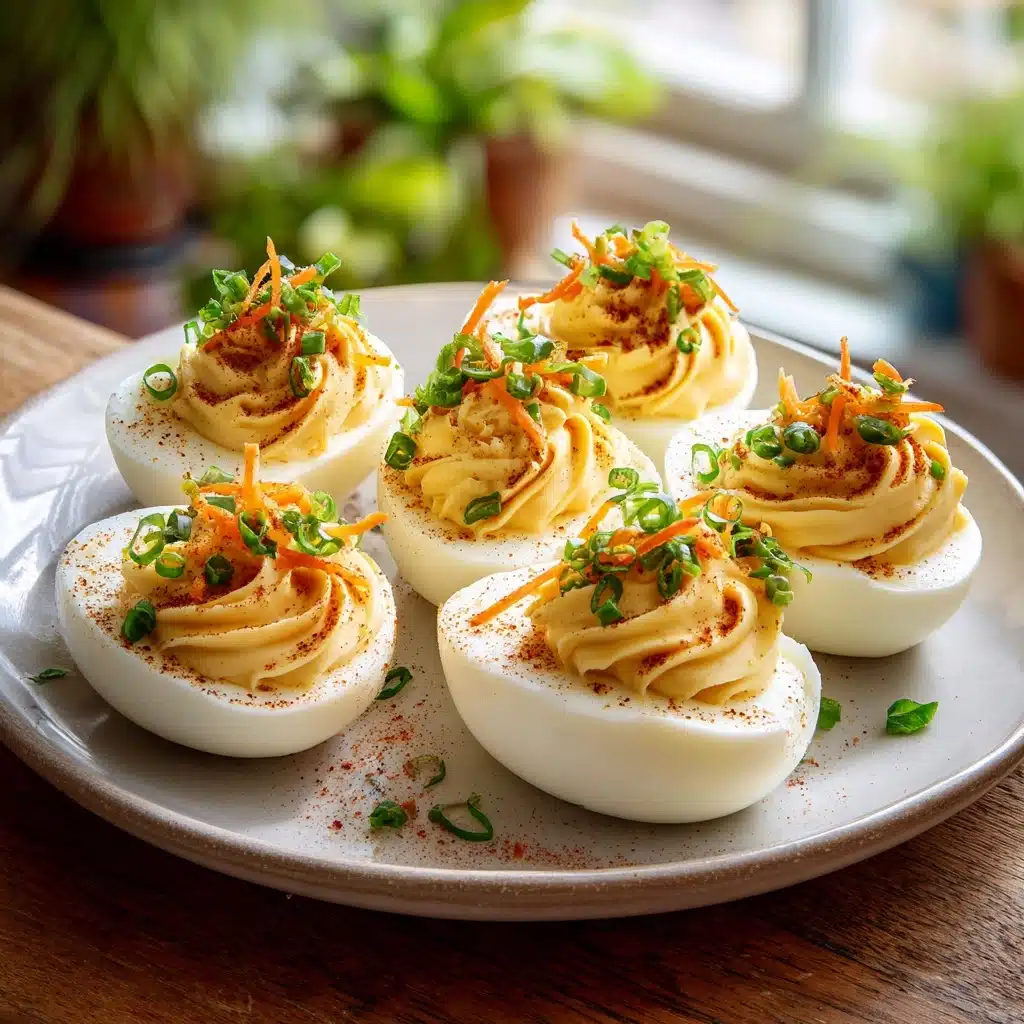
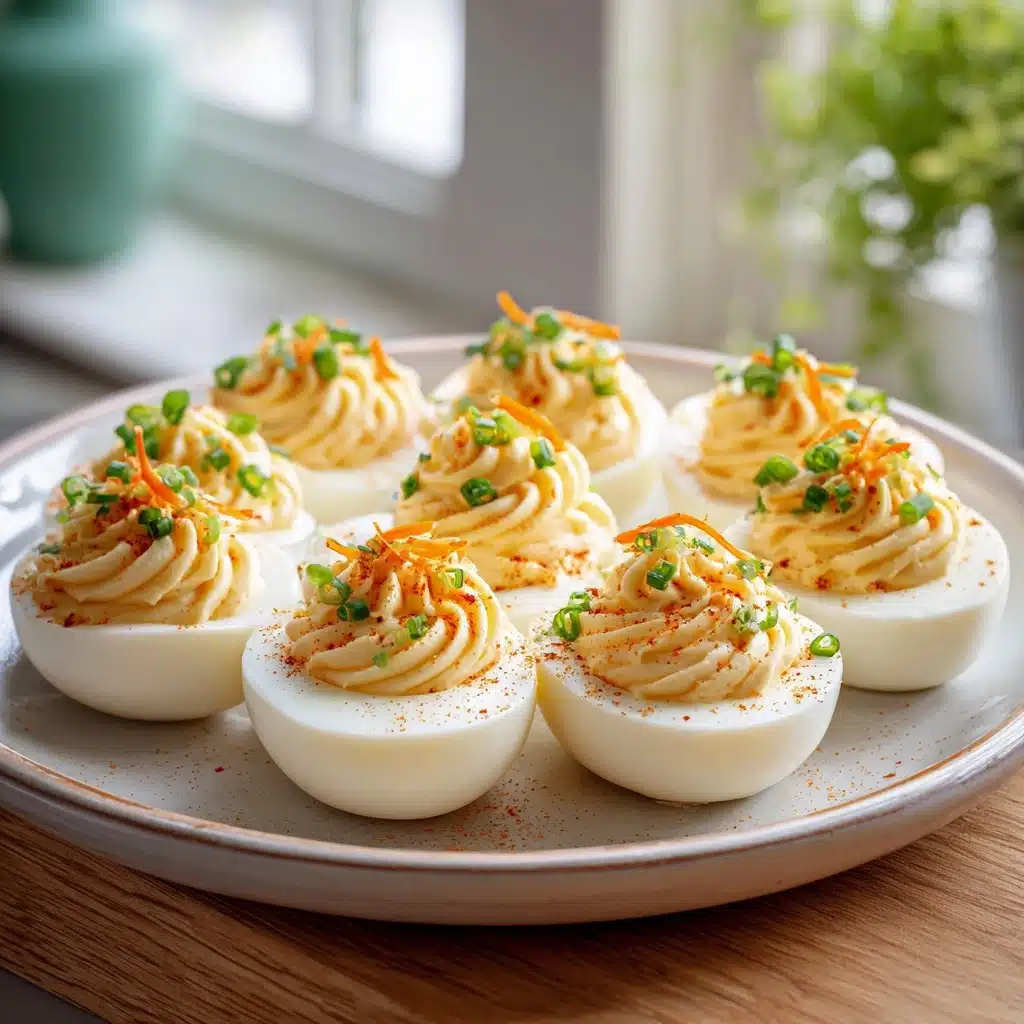
If you’re searching for the most adorable addition to your next party, these Deviled Egg Chicks are guaranteed to steal the show! Imagine a platter of playful chicks peeking up from their nests—delicious, creamy, and irresistible. They’re not only a whimsical nod to classic deviled eggs but also bring extra charm perfect for Easter, spring gatherings, or anytime you want to add a smile to the table. With jammy yolks turned into a tangy filling and easy-to-find veggies for decoration, you’ll find yourself making these cuties for more occasions than you expected.
Ingredients You’ll Need
The magic of Deviled Egg Chicks lies in just a handful of everyday ingredients, each one essential for the texture, color, and that signature flavor. Don’t be fooled by the simplicity; every item in this list truly plays its part, from the rich creaminess of the yolks to the sweet crunch of carrot beaks.
- 12 large eggs: The star ingredient, providing the classic deviled egg base as well as the adorable chick shape.
- ⅓ cup mayonnaise: Creates a creamy, luxurious yolk filling that brings everything together.
- 2 teaspoons yellow mustard: Lends tangy brightness and classic deviled egg flavor.
- 1 teaspoon white vinegar: A splash of acidity to balance the richness of the yolk mixture.
- Salt and black pepper to taste: Don’t skip this step—it’s all about seasoning to perfection.
- 2–3 baby carrots (for beaks): Adds sweetness, crunch, and most importantly, the cutest little orange beaks!
- 6 black olives or whole peppercorns (for eyes): Black olives are easy to cut and not too spicy, but peppercorns work too for little chick eyes.
How to Make Deviled Egg Chicks
Step 1: Boil and Cool the Eggs
Start by placing all 12 eggs in a large saucepan and cover them completely with cold water. Bring the water to a gentle boil over medium-high heat. Once boiling, lower the heat to a soft simmer and set your timer for 10 minutes. As soon as time’s up, use a slotted spoon to transfer the eggs into an ice bath (fill a bowl with cold water and plenty of ice) to halt the cooking—this is the secret to easy peeling and perfectly tender whites.
Step 2: Peel and Prep the Eggs
Once the eggs are cool, gently tap them all over with the back of a spoon and peel under running water. Next, slice a tiny layer off the bottom of each egg so they stand up like little egg soldiers—no tipping chicks allowed! Carefully cut the top third off each egg and set those “hats” aside. Use a small spoon or teaspoon to gently scoop out all the cooked yolks into a mixing bowl, being careful not to tear the whites.
Step 3: Make the Yolk Filling
In the bowl with the yolks, add the mayonnaise, mustard, white vinegar, salt, and black pepper. Mash everything together (a fork works great here!) until the mixture is ultra-smooth, creamy, and free of lumps. Taste and adjust with a bit more salt or pepper if you like—it should taste subtly tangy and rich.
Step 4: Fill and Shape Your Chicks
Spoon the yolk filling into a piping bag or a sturdy zip-top bag with a corner snipped off. Pipe (or scoop with a small spoon) the creamy filling generously into the egg white bottoms, letting it mound up a bit for that chubby chick look. Gently place the reserved egg tops back on—not perfectly aligned, but at a jaunty angle for an extra dose of personality!
Step 5: Decorate with Beaks and Eyes
Now for the fun part—creating those adorable faces! Slice the baby carrots into thin rounds, then cut tiny triangles for the beaks. Press a carrot beak gently into the filling of each chick. Next, cut small bits from the olives (or use whole peppercorns) for their bright eyes and tuck them into the yolk “face.” Each little chick gets a unique look and personality. Pop the whole tray into the fridge to chill until you’re ready to serve.
How to Serve Deviled Egg Chicks

Garnishes
Deviled Egg Chicks look perfectly festive on a simple platter, but a sprinkling of fresh chopped chives, dill, or parsley around them takes it up a notch. A bed of shredded lettuce or baby spinach makes a soft “nest” and gives the presentation a beautiful spring vibe.
Side Dishes
Keep the rest of your spread light and complementary—think crisp veggies and dip, buttery crostini, or even a platter of seasonal fruit. These chicks are rich and flavorful, so balance their creamy filling with fresh, crunchy sides for the ultimate crowd-pleasing appetizer lineup.
Creative Ways to Present
For a playful twist, arrange Deviled Egg Chicks on a bright platter with edible flowers tucked around them, or nestle them on mini cupcake liners for individual servings. If you’re hosting an Easter egg hunt, hide them among a tangle of baby greens or colorful radishes for a delightful surprise!
Make Ahead and Storage
Storing Leftovers
If you happen to have leftovers (though I doubt it!), simply store the Deviled Egg Chicks in an airtight container in the fridge for up to 2 days. Place a sheet of parchment between layers to prevent them sticking or smudging their cute faces. Keep them chilled to retain their flavor and presentation.
Freezing
Unfortunately, Deviled Egg Chicks don’t freeze well, as the texture of both egg whites and the filling can become rubbery and watery. If you’re looking to prep ahead, boil the eggs and make the filling in advance, then assemble everything fresh on the day you plan to serve.
Reheating
No need to reheat—these delightful chicks are best served chilled! If they’ve been in the fridge, simply let them sit out for 10–15 minutes before serving so the yolk filling softens slightly and the flavors shine. Avoid microwaving, as this can compromise both texture and appearance.
FAQs
How far in advance can I assemble Deviled Egg Chicks?
For best results, you can boil the eggs and make the filling up to a day ahead. Wait to assemble and decorate the Deviled Egg Chicks just before serving to keep them looking their freshest and most adorable.
Can I use different ingredients for the beaks and eyes?
Absolutely! Get creative—try bits of red bell pepper or pickles for beaks, and capers or black sesame seeds for eyes. Just make sure you don’t use anything too watery, as it can affect the filling.
Do I need a piping bag to fill the eggs?
A piping bag makes it easier for a neat, full look, but you can absolutely use a small spoon to dollop the yolk filling inside. Your Deviled Egg Chicks will look just as charming with rustic swirls.
How do I prevent the egg whites from tearing?
Peeling the eggs under running water and handling them gently is key. If you do get a tear, don’t worry—the filling will usually hide minor imperfections, and a jaunty “hat” can cover up the rest!
Can I double the recipe for a big crowd?
Definitely! You can easily scale up this recipe for more Deviled Egg Chicks. Just use two pans to boil your eggs in batches, and mix up a bigger bowl of yolk filling. More chicks means more smiles!
Final Thoughts
If you’re ready to wow your friends and family, Deviled Egg Chicks are the perfect blend of flavor, fun, and creativity. Whip up a batch and watch everyone race to the table for these irresistible cuties—you’re about to make a new crowd favorite!
Print
Deviled Egg Chicks Recipe
- Total Time: 30 minutes
- Yield: 12 servings 1x
- Diet: Gluten-Free, Vegetarian
Description
These adorable Deviled Egg Chicks are a fun and festive appetizer perfect for Easter or any springtime gathering. Creamy deviled eggs are transformed into cute little chicks with clever use of olives, carrots, and egg whites.
Ingredients
Ingredients:
- 12 large eggs
- ⅓ cup mayonnaise
- 2 teaspoons yellow mustard
- 1 teaspoon white vinegar
- Salt and black pepper to taste
- 2–3 baby carrots (for beaks)
- 6 black olives or whole peppercorns (for eyes)
Instructions
- Boil the Eggs: Place the eggs in a large saucepan and cover with water. Bring to a boil, then reduce heat and simmer for 10 minutes. Remove eggs and place in an ice bath to cool. Peel the eggs carefully.
- Prepare the Filling: Slice a thin layer off the bottom of each egg so they stand upright. Cut the top third off each egg and set the tops aside. Gently scoop out the yolks into a bowl.
- Mix and Fill: Mash the yolks with mayonnaise, mustard, vinegar, salt, and pepper until smooth and creamy. Transfer the filling to a piping bag or use a small spoon to fill the egg whites generously. Place the reserved egg tops back on slightly tilted to resemble “hats.”
- Add Features: Cut small triangles from the carrots to form beaks and insert into the filling. Use tiny pieces of black olives or peppercorns for eyes.
- Chill and Serve: Chill before serving.
Notes
- To make ahead, boil the eggs and prepare the filling the day before. Assemble just before serving to keep the chicks looking fresh and cute.
- Prep Time: 20 minutes
- Cook Time: 10 minutes
- Category: Appetizer
- Method: Boiling
- Cuisine: American
Nutrition
- Serving Size: 1 egg chick
- Calories: 85
- Sugar: 0g
- Sodium: 90mg
- Fat: 7g
- Saturated Fat: 2g
- Unsaturated Fat: 4g
- Trans Fat: 0g
- Carbohydrates: 1g
- Fiber: 0g
- Protein: 4g
- Cholesterol: 95mg

