
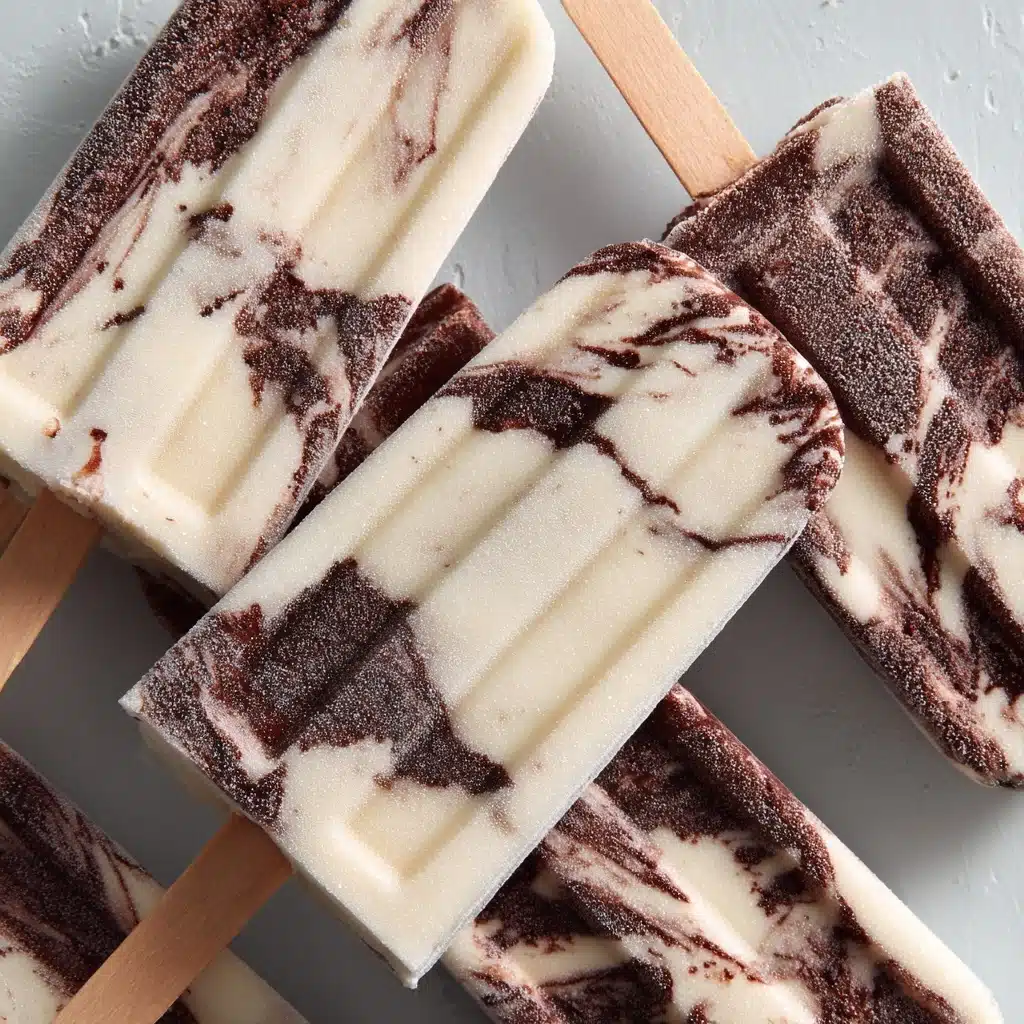
Remember those magical summer days when a cold treat could make everything feel perfect? Jello Pudding Pops are that delightful bite of nostalgia wrapped up in smooth, creamy chocolatey goodness. With just a handful of pantry staples and a few simple steps, you’ll have homemade pops that taste like childhood memories on a stick. Whether you’re making them for your kids or reliving your own favorite moments, this easy, frosty dessert brings pure joy to any day.
Ingredients You’ll Need
-
Chocolate Pudding Pops:
- 1 package (3.9 oz) instant chocolate pudding mix
- 2 cups cold milk
- 1/2 cup heavy cream (optional for creamier texture)
- 1/2 teaspoon vanilla extract
- 1 tablespoon sugar (optional)
- popsicle molds or small paper cups
- wooden sticks
How to Make Jello Pudding Pops
Step 1: Whisk the Base
In a medium mixing bowl, grab your instant pudding mix and cold milk. Whisk the two together for about 2 minutes, until the mixture is super smooth and just starting to thicken up. This step creates that signature pudding texture we’re after, so make sure there aren’t any lumps!
Step 2: Add the Creamy Extras
Stir in your heavy cream (if you’re using it), vanilla extract, and a bit of extra sugar if you like things on the sweeter side. This is where your Jello Pudding Pops get their dreamy, creamy consistency and an elevated vanilla note that pairs beautifully with the chocolate.
Step 3: Pour Into Molds
Once your mixture is perfectly blended, carefully pour it into popsicle molds or even small paper cups if you don’t have traditional molds on hand. Fill them almost to the top, leaving a bit of space to prevent messy overflows in the freezer.
Step 4: Insert Sticks
Pop a wooden stick into the center of each mold or cup. If your sticks have trouble standing upright, simply let the pops chill in the freezer for 30-40 minutes before inserting — the partially frozen mixture will help them stay put.
Step 5: Freeze Until Firm
Place your filled molds in the freezer and let them hang out for at least 4–6 hours, or until they’re completely firm. Overnight is even better if you have the patience! You’ll know they’re ready when they feel solid to the touch and easily release from the sides.
Step 6: Release and Enjoy
When you’re ready for a treat, run the molds or cups under warm (not hot) water for just a few seconds. Gently tug on the stick and your Jello Pudding Pops should slide right out, ready to be devoured!
How to Serve Jello Pudding Pops
Garnishes
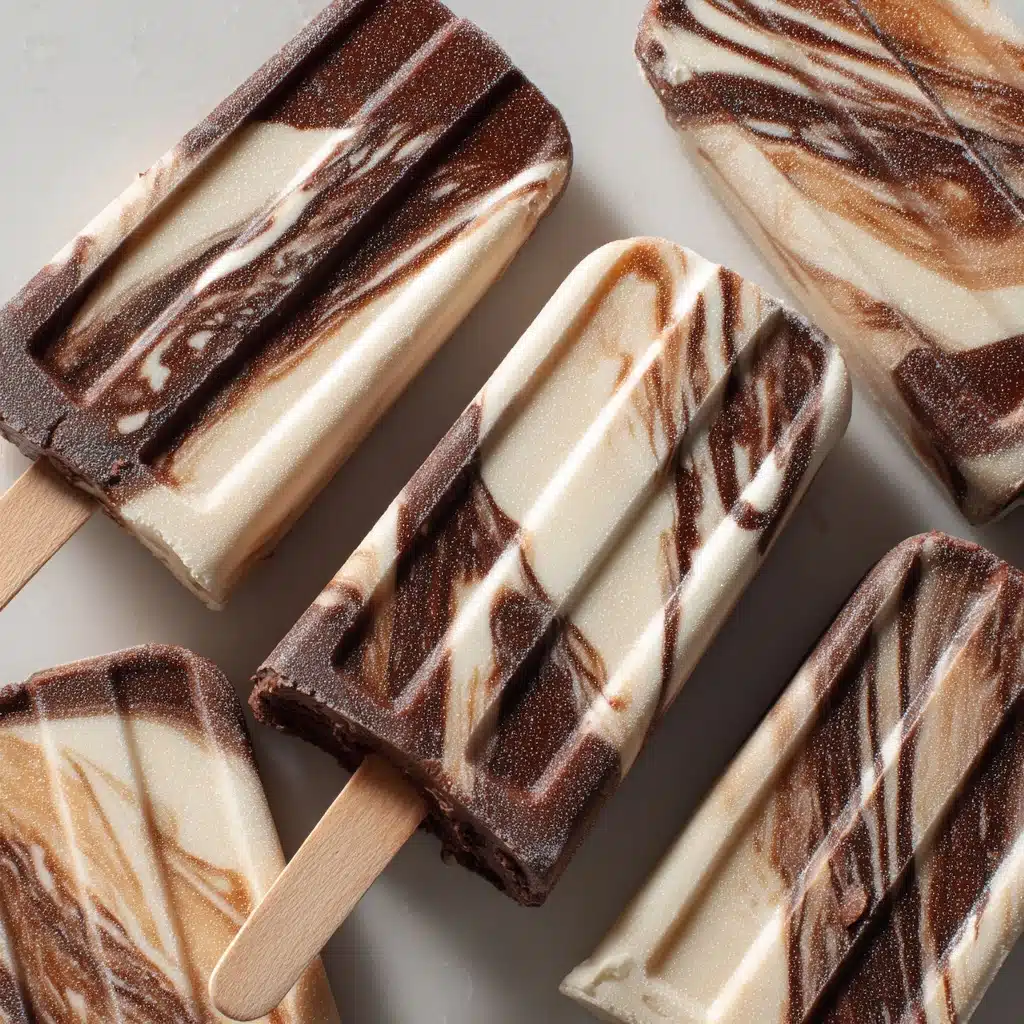
The fun really starts when you get creative with garnishes. Dip your Jello Pudding Pops in a little melted chocolate and sprinkle with crushed nuts, mini chocolate chips, or colorful sprinkles for a festive touch. Or keep them classic and let the rich chocolate flavor take center stage.
Side Dishes
Pair your Jello Pudding Pops with fresh berries, fruit salad, or even a small cookie on the side. These pops are rich and satisfying, so a light, juicy side is the perfect complement for a sunny afternoon snack.
Creative Ways to Present
Serve your Jello Pudding Pops upright in a bowl of crushed ice at your next picnic or birthday party. Want to impress the kids? Arrange an assortment of pudding pop flavors (think chocolate and vanilla swirled!) on a playful platter, and let everyone grab their favorite.
Make Ahead and Storage
Storing Leftovers
Store any leftover Jello Pudding Pops right in their molds if possible, or wrap individual pops in plastic wrap and place them in a freezer-safe bag. They’ll stay fresh and delicious for several weeks, ready whenever you need a sweet, frosty fix.
Freezing
These pops are designed for the freezer! Make sure they’re frozen solid before removing from the molds for best texture and flavor. Keep them stored at the back of the freezer to protect against unwanted temperature changes or freezer burn.
Reheating
Unlike baked treats, you don’t want to reheat Jello Pudding Pops. If they’re a little too hard straight from the freezer, just let them sit at room temperature for a couple of minutes to soften ever so slightly — then savor every cool, creamy bite.
FAQs
Can I use different pudding flavors?
Absolutely! Jello Pudding Pops work with any instant pudding flavor you love, from classic vanilla and butterscotch to banana or cookies and cream. Try swirling two flavors together for an extra-fun twist.
What can I do if I don’t have popsicle molds?
No molds? No problem. Small paper cups are a perfect substitute. Simply fill them with the pudding mixture, cover with foil, poke a stick through the center, and freeze until firm.
Are these Jello Pudding Pops gluten-free?
Yes, as long as you choose an instant pudding mix that’s labeled gluten-free, your pops will be safe for those avoiding gluten. Always double-check ingredient labels to be sure.
How long do they last in the freezer?
Jello Pudding Pops will retain their best taste and texture for about four weeks in the freezer, but they’re so tasty they’ll probably disappear much faster!
Can I reduce the sugar or make them healthier?
You can easily cut back on the added sugar or use sugar-free pudding mix and low-fat milk to lighten these up. They’ll still taste delicious and satisfy those summer sweet cravings.
Final Thoughts
There’s something truly special about bringing back the classic joy of Jello Pudding Pops in your own kitchen. Whether you’re making them for your family, a party, or a well-deserved personal treat, these pops deliver a cool dose of nostalgia and pure, chocolatey happiness. Go ahead, give them a try — I can’t wait for you to taste that first creamy, chilled bite!
Print
Jello Pudding Pops Recipe
- Total Time: 6 hours
- Yield: 6 pops 1x
- Diet: Vegetarian
Description
These Jello Pudding Pops are a delightful and creamy frozen treat perfect for cooling off on a hot day. Made with just a few simple ingredients, these popsicles are easy to prepare and a hit with both kids and adults.
Ingredients
Chocolate Pudding Pops:
- 1 package (3.9 oz) instant chocolate pudding mix
- 2 cups cold milk
- 1/2 cup heavy cream (optional for creamier texture)
- 1/2 teaspoon vanilla extract
- 1 tablespoon sugar (optional)
- popsicle molds or small paper cups
- wooden sticks
Instructions
- Prepare the Pudding Mixture: In a medium mixing bowl, whisk together the instant pudding mix and cold milk until smooth and slightly thickened, about 2 minutes.
- Enhance the Mixture: Stir in the heavy cream, vanilla extract, and sugar if using, until well combined.
- Fill the Molds: Pour the mixture evenly into popsicle molds or small paper cups. Insert wooden sticks into the center of each mold.
- Freeze: Freeze for at least 4–6 hours or until completely firm.
- Serve: To release, run the molds under warm water for a few seconds and gently pull out the pops.
Notes
- You can use any flavor of instant pudding for variety.
- For swirled pops, layer two flavors in the molds.
- These are a fun, nostalgic treat perfect for kids and hot summer days.
- Prep Time: 10 minutes
- Cook Time: 0 minutes
- Category: Dessert
- Method: Freezing
- Cuisine: American
Nutrition
- Serving Size: 1 pop
- Calories: 140
- Sugar: 13g
- Sodium: 180mg
- Fat: 5g
- Saturated Fat: 3g
- Unsaturated Fat: 2g
- Trans Fat: 0g
- Carbohydrates: 20g
- Fiber: 1g
- Protein: 3g
- Cholesterol: 15mg


