
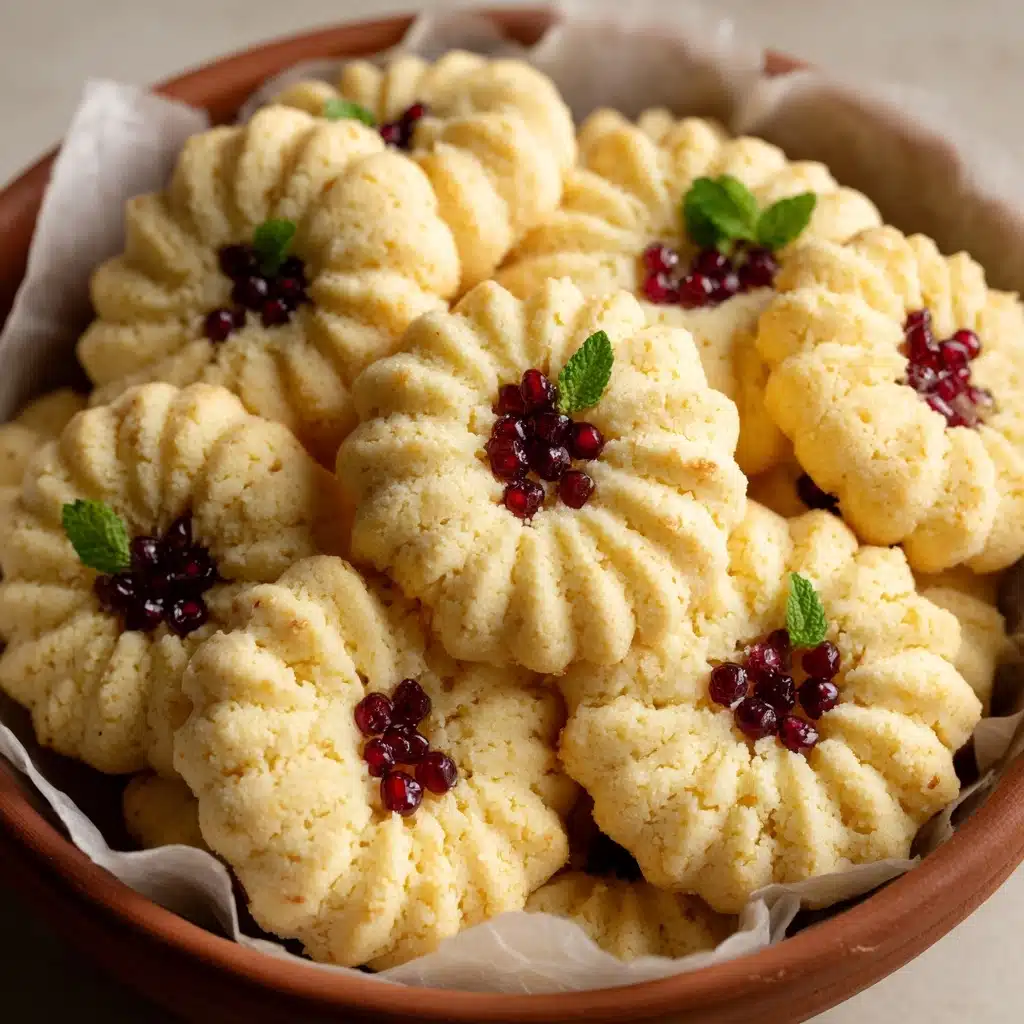
There’s something magical about baking a batch of Christmas Butter Cookies during the holidays. These melt-in-your-mouth treats have a delicate crumb, a rich buttery flavor, and a festive appeal that brightens up any cookie platter. Whether you’re making them with family or gifting them to friends, Christmas Butter Cookies are a time-honored tradition that never fails to spark joy. With their simple ingredients and endless decorating possibilities, they’re as fun to make as they are to eat!
Ingredients You’ll Need
You’ll be amazed at how just a handful of pantry staples can transform into the most delightful Christmas Butter Cookies. Each ingredient plays an important role, from ensuring perfect texture to infusing the cookies with irresistible flavor and cheerful color.
- Unsalted butter (1 cup, softened): The star of the show—gives the cookies their rich, melt-in-your-mouth texture and flavor.
- Granulated sugar (3/4 cup): Adds sweetness and helps create that tender, crisp bite.
- Large egg (1): Binds the dough and adds a hint of richness.
- Vanilla extract (1 teaspoon): Brings warm, cozy notes that perfectly suit the holiday season.
- All-purpose flour (2 1/4 cups): Forms the structure of the cookies, ensuring they hold their shape when baked and decorated.
- Baking powder (1/2 teaspoon): Lends a tender lift to the cookies without making them overly cakey.
- Salt (1/4 teaspoon): Enhances all the flavors and balances the sweetness.
- Colored sugar or holiday sprinkles: For decorating and adding that unmistakable festive sparkle!
How to Make Christmas Butter Cookies
Step 1: Prep Your Baking Sheets
Start by preheating your oven to 350°F (175°C) and lining a couple of baking sheets with parchment paper. This not only prevents sticking but also makes cleanup a breeze—so you can focus on the fun part: decorating!
Step 2: Cream the Butter and Sugar
In a large mixing bowl, beat the softened butter and granulated sugar together until the mixture is light and fluffy. This step is key to achieving that signature Christmas Butter Cookie texture, so don’t rush—let the mixer run for a few minutes until the mixture is pale and airy.
Step 3: Add Egg and Vanilla
Crack in your egg and pour in the vanilla extract, then beat until everything is smooth and creamy. The dough might look a bit glossy at this stage—that’s exactly what you want!
Step 4: Combine the Dry Ingredients
In a separate bowl, whisk together the flour, baking powder, and salt. Gradually add these dry ingredients to your wet mixture, mixing just until combined. Be careful not to overwork the dough—stop as soon as no streaks of flour remain.
Step 5: Chill the Dough
Divide the dough into two portions and wrap each in plastic wrap. Chill in the refrigerator for at least 30 minutes. This makes the dough much easier to roll and helps the cookies keep their crisp edges while baking.
Step 6: Roll, Cut, and Decorate
On a lightly floured surface, roll the dough to about 1/4-inch thickness. Use your favorite festive cookie cutters to create classic holiday shapes, and place them about 2 inches apart on your prepared baking sheets. Sprinkle generously with colored sugar or holiday sprinkles before baking.
Step 7: Bake and Cool
Bake for 8–10 minutes, just until the edges are starting to turn golden. Let the cookies cool on the baking sheets for 5 minutes before transferring them to a wire rack to cool completely. Resist the urge to move them too soon—they’re delicate when hot!
How to Serve Christmas Butter Cookies

Garnishes
The beauty of Christmas Butter Cookies is in the finishing touches! A dusting of powdered sugar, a drizzle of royal icing, or even a few edible gold stars can take these cookies to the next level. For a classic look, stick to vibrant sprinkles and colored sugars that shimmer under the holiday lights.
Side Dishes
Pair these cookies with a warm mug of cocoa, festive spiced tea, or a creamy glass of eggnog for the ultimate holiday treat. They also look gorgeous alongside other Christmas classics like gingerbread men or peppermint bark on a dessert table.
Creative Ways to Present
Arrange your Christmas Butter Cookies in decorative tins lined with festive parchment, or stack them in clear cellophane bags tied with pretty ribbons for an easy homemade gift. For a fun family activity, set up a decorating station and let everyone personalize their own cookies!
Make Ahead and Storage
Storing Leftovers
Keep your Christmas Butter Cookies fresh by storing them in an airtight container at room temperature. They’ll stay delicious for up to a week, making them ideal for holiday nibbling or last-minute guests.
Freezing
Both the unbaked dough and finished cookies freeze beautifully. Wrap dough portions tightly in plastic wrap and freeze for up to two months, or tuck baked cookies between layers of parchment in a freezer-safe container. Simply thaw at room temperature before serving or decorating.
Reheating
If you prefer your cookies warm, pop them in a low oven (about 250°F) for 3–5 minutes—just until they’re gently heated through. This revives their irresistible buttery aroma without over-baking.
FAQs
Can I make Christmas Butter Cookies ahead of time?
Absolutely! The dough can be prepared, wrapped, and refrigerated up to 48 hours in advance, or frozen for several weeks. You can even bake the cookies a few days before your celebration; just store them in an airtight container and they’ll taste fresh when you need them.
Do these cookies hold their shape when baked?
Yes! Thanks to the combination of butter, flour, and the chilling step, Christmas Butter Cookies keep their crisp edges and detailed shapes. They’re perfect for intricate cookie cutters and decorating with icing or sprinkles.
Is it possible to add different flavors?
Definitely. While classic vanilla is always a hit, try adding 1/2 teaspoon of almond extract or even a pinch of cinnamon for a unique twist. Just be sure not to overpower that lovely buttery base.
How do I avoid tough cookies?
The secret is not to overmix the dough once you add the flour and not to overbake the cookies. Mix just until combined and pull them from the oven as soon as the edges turn golden for a tender, melt-in-your-mouth bite.
Can I decorate with royal icing?
Yes! Let the cookies cool completely, then have fun decorating with royal icing, colored sugars, or edible glitter. The sturdy but tender surface of these Christmas Butter Cookies is the perfect canvas for all your festive designs.
Final Thoughts
If you’re looking to add a touch of homemade magic to your holidays, you can’t go wrong with Christmas Butter Cookies. Every bite is a blend of nostalgia, flavor, and festive fun—so gather your loved ones, get creative, and let the holiday baking tradition continue!
Print
Christmas Butter Cookies Recipe
- Total Time: 1 hour
- Yield: 36 cookies 1x
- Diet: Vegetarian
Description
These classic Christmas Butter Cookies are tender, buttery, and perfectly sweet, making them an ideal treat for the holiday season. With a subtle vanilla flavor and a crisp edge, these cookies hold their shape well, allowing you to decorate them beautifully with colored sugar or festive sprinkles. Easy to prepare and perfect for sharing, they’re a delightful addition to any holiday cookie platter.
Ingredients
Butter Cookie Dough
- 1 cup unsalted butter, softened
- 3/4 cup granulated sugar
- 1 large egg
- 1 teaspoon vanilla extract
- 2 1/4 cups all-purpose flour
- 1/2 teaspoon baking powder
- 1/4 teaspoon salt
Decoration
- Colored sugar or holiday sprinkles for decorating
Instructions
- Preheat and Prepare Pans: Preheat your oven to 350°F (175°C) and line baking sheets with parchment paper to prevent sticking and ensure even baking.
- Cream Butter and Sugar: In a large bowl, cream together the softened unsalted butter and granulated sugar until the mixture is light and fluffy, which should take about 3-5 minutes with an electric mixer.
- Add Egg and Vanilla: Beat in the large egg and vanilla extract until the dough becomes smooth and fully combined, ensuring an even flavor throughout.
- Combine Dry Ingredients: In a separate bowl, whisk together the all-purpose flour, baking powder, and salt to distribute the leavening agents evenly.
- Mix Dry and Wet Ingredients: Gradually add the dry ingredients to the wet ingredients, mixing gently just until the dough comes together to avoid overworking which can toughen the cookies.
- Chill the Dough: Divide the dough into two portions; wrap each in plastic wrap and chill in the refrigerator for 30 minutes. This step helps the dough firm up for easier rolling and better shape retention during baking.
- Roll and Cut Dough: Roll out the chilled dough on a lightly floured surface to about 1/4-inch thickness. Use festive cookie cutters to cut out shapes and transfer them to prepared baking sheets, spacing them about 2 inches apart.
- Decorate: Sprinkle colored sugar or holiday sprinkles on top of each cookie before baking to add festive flair and texture.
- Bake: Bake the cookies in the preheated oven for 8–10 minutes, or until the edges are just beginning to turn golden, indicating they are perfectly baked.
- Cool: Allow the cookies to cool on the baking sheets for 5 minutes to firm up, then transfer them to a wire rack to cool completely before serving or decorating further.
Notes
- For extra flavor, add 1/2 teaspoon almond extract to the dough for a delightful almond accent.
- These cookies hold their shape exceptionally well, making them perfect for detailed decorating, including royal icing.
- Store cookies in an airtight container at room temperature for up to one week to maintain freshness.
- For longer storage, freeze the cookies in an airtight container for several months.
- Prep Time: 20 minutes (plus 30 minutes chilling time)
- Cook Time: 10 minutes
- Category: Dessert, Cookies
- Method: Baking
- Cuisine: American, European-inspired
Nutrition
- Serving Size: 1 cookie
- Calories: 95
- Sugar: 5 g
- Sodium: 30 mg
- Fat: 5 g
- Saturated Fat: 3 g
- Unsaturated Fat: 2 g
- Trans Fat: 0 g
- Carbohydrates: 11 g
- Fiber: 0 g
- Protein: 1 g
- Cholesterol: 15 mg


