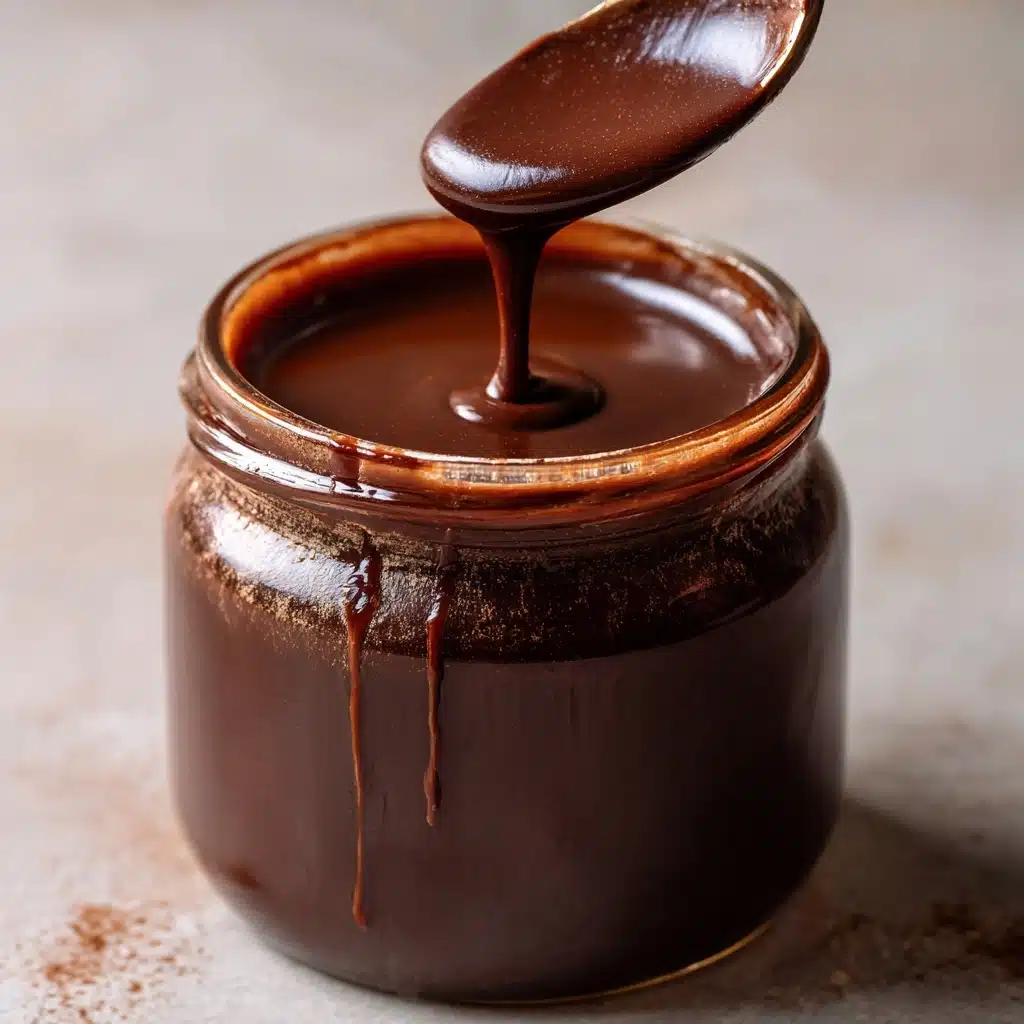
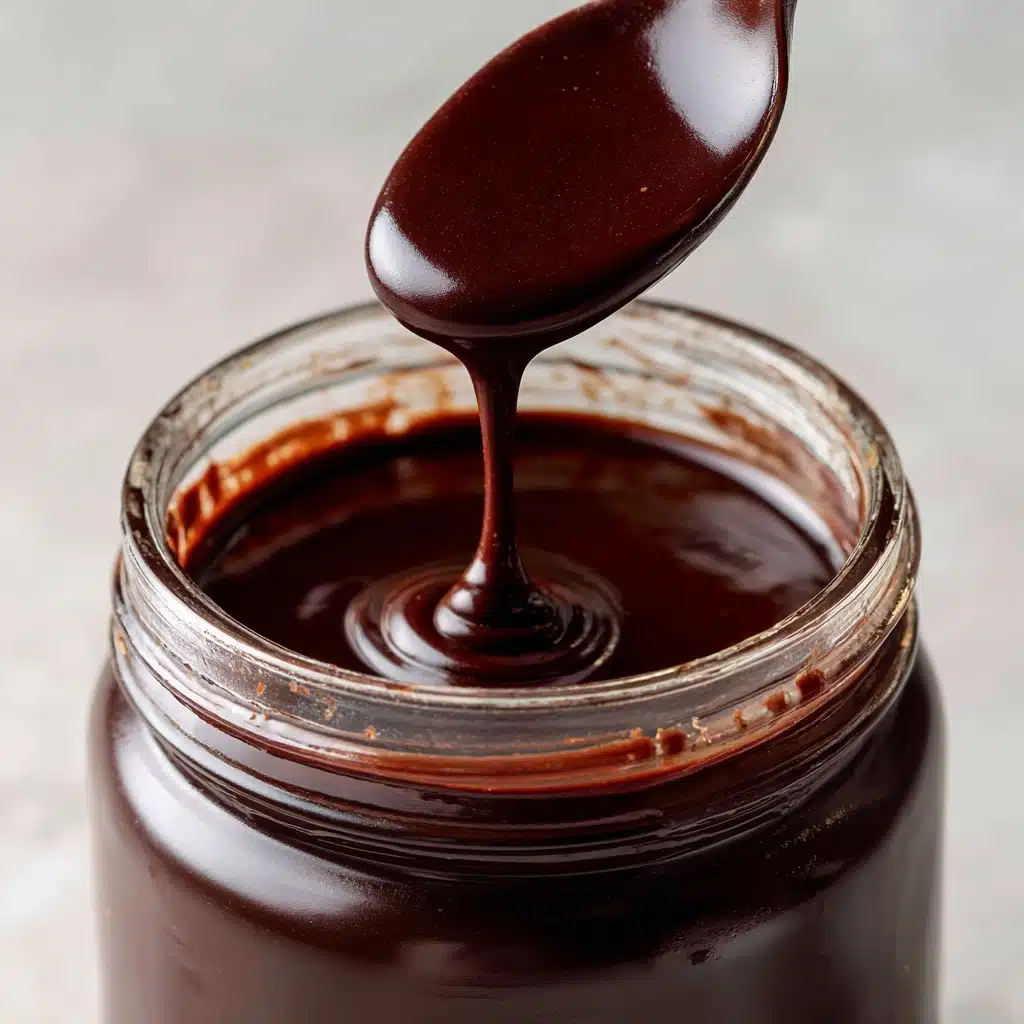
If you’re craving a versatile, decadent treat that’s ready in minutes and leagues better than anything you’ll find at the store, Homemade Chocolate Syrup is your new secret weapon. This luscious syrup is silky, deeply chocolaty, and just the right amount of sweet, perfect for drizzling over ice cream, swirling into milk, or sneaking a spoonful straight from the jar. Once you see how easy and rewarding it is to make your own Homemade Chocolate Syrup, you’ll wonder why you ever settled for bottled versions.
Ingredients You’ll Need
The beauty of this Homemade Chocolate Syrup is in its simplicity. Each ingredient plays a starring role, working together to create a rich, glossy syrup with the perfect balance of flavor and texture. Here’s what you’ll need and why each is essential:
- Granulated Sugar: The foundation of sweetness, it dissolves into the syrup and gives it that classic, pourable consistency.
- Unsweetened Cocoa Powder: This is where all the chocolate magic happens! Choose a high-quality cocoa for the deepest flavor.
- Water: Helps blend the sugar and cocoa into a smooth, glossy syrup that’s easy to pour or drizzle.
- Salt: Just a pinch brings out the boldness of the chocolate and balances the sweetness beautifully.
- Vanilla Extract: Adds warmth and aroma, rounding out the flavors with a hint of cozy sweetness.
How to Make Homemade Chocolate Syrup
Step 1: Whisk Together Dry Ingredients
Start by grabbing a medium saucepan and whisking together the sugar, unsweetened cocoa powder, and salt. This ensures that the cocoa is evenly distributed and the syrup turns out lump-free and wonderfully smooth. It’s a small step, but it makes all the difference in achieving that perfect, glossy texture.
Step 2: Add Water and Heat
Pour in the water and set your saucepan over medium heat. Keep whisking as everything combines—the mixture will look a bit grainy at first, but as it heats up, it’ll transform into a rich, chocolatey pool. Don’t rush this part; let the ingredients meld together and start to bubble gently.
Step 3: Simmer to Thicken
Once your mixture comes to a boil, reduce the heat and let it simmer for 5 to 7 minutes. Stir frequently so nothing sticks and burns. As it simmers, you’ll notice the syrup thickening ever so slightly. Don’t worry if it still seems a bit thin; it will continue to thicken as it cools to room temperature.
Step 4: Stir in Vanilla
Remove the saucepan from the heat and immediately stir in the vanilla extract. That aromatic burst is what sets Homemade Chocolate Syrup apart, giving it the signature depth and roundness that makes every drizzle irresistible.
Step 5: Cool and Store
Let your syrup cool completely before transferring it to a clean jar or bottle. The anticipation is real, but letting it cool ensures you get that perfect, pourable consistency. Once cool, pop it in the fridge where it’ll keep beautifully for up to two weeks—if it lasts that long!
How to Serve Homemade Chocolate Syrup

Garnishes
A swirl of Homemade Chocolate Syrup instantly turns any dessert into something special. For a finishing touch, try adding a sprinkle of sea salt, a dusting of powdered sugar, or a handful of chocolate shavings. Even a few fresh berries or a dollop of whipped cream will turn a simple treat into a showstopper.
Side Dishes
This syrup is a dream drizzled over classic vanilla ice cream, pancakes, or waffles. It’s also fantastic alongside fresh fruit, like sliced bananas or strawberries, for a healthy-meets-indulgent snack. If you’re in the mood for something cozy, a generous pour into a mug of hot milk makes the silkiest homemade hot chocolate.
Creative Ways to Present
Let your creativity shine! Try layering the syrup in parfait glasses with yogurt and granola, swirling it into brownie batter before baking, or using it as a dip for churros or doughnuts. You can even hand out small jars of Homemade Chocolate Syrup as heartfelt gifts—just add a ribbon and a handwritten label for a personal touch.
Make Ahead and Storage
Storing Leftovers
Homemade Chocolate Syrup keeps beautifully in the refrigerator for up to two weeks. Store it in a glass jar or a squeeze bottle for easy pouring. If it thickens or separates a bit, just give it a good shake or stir before using—it’ll be as good as new.
Freezing
Want to make a big batch for later? You can freeze Homemade Chocolate Syrup in a freezer-safe container for up to three months. Thaw overnight in the fridge when you’re ready to use it, and whisk well to restore its smooth texture.
Reheating
If your syrup has thickened in the fridge and you’d like it warm and pourable, just microwave it in short bursts (10–15 seconds at a time), stirring between each burst until it’s silky again. Alternatively, set the jar in a bowl of warm water for a gentle reheat.
FAQs
Can I use Dutch-processed cocoa powder?
Absolutely! Dutch-processed cocoa will give your Homemade Chocolate Syrup a deeper color and more intense chocolate flavor. It’s a fantastic option if you love a really rich syrup.
Is this syrup suitable for vegan and gluten-free diets?
Yes, this recipe is naturally vegan and gluten-free, provided you use pure cocoa powder and vanilla extract. It’s a wonderful all-purpose treat for anyone with dietary restrictions.
Can I reduce the sugar for a less sweet syrup?
You can experiment by cutting back the sugar slightly, but keep in mind that sugar not only sweetens but also helps with the syrup’s consistency. If you reduce it too much, the texture may be thinner and less glossy.
Why does my syrup separate in the fridge?
It’s completely normal for Homemade Chocolate Syrup to separate a little after chilling. Just give it a good shake or stir before each use, and it will come right back together.
What should I do if my syrup is too thick or too thin?
If your syrup thickens more than you’d like, simply stir in a tiny splash of water until it reaches your preferred consistency. If it’s too thin after cooling, return it to the saucepan and simmer for another minute or two.
Final Thoughts
If you’ve never tried making Homemade Chocolate Syrup from scratch, you’re in for a real treat. It’s quick, easy, and endlessly delicious—perfect for elevating desserts or adding a little joy to your everyday treats. Give it a try, and don’t be surprised if you find yourself making an extra batch just to have on hand!
Print
Homemade Chocolate Syrup Recipe
- Total Time: 12 minutes
- Yield: 1¼ cups 1x
- Diet: Vegan
Description
This Homemade Chocolate Syrup is a rich, smooth, and versatile sauce made from simple pantry ingredients. Perfect for drizzling over ice cream, pancakes, or mixing into chocolate milk, this easy-to-make syrup provides a natural chocolate flavor without preservatives or artificial additives. With just five ingredients and a quick stovetop method, you can enjoy fresh, delicious chocolate syrup anytime.
Ingredients
Dry Ingredients
- 1 cup granulated sugar
- 1 cup unsweetened cocoa powder
- ¼ teaspoon salt
Wet Ingredients
- 1 cup water
- 1 teaspoon vanilla extract
Instructions
- Combine Ingredients: In a medium saucepan, whisk together the granulated sugar, unsweetened cocoa powder, salt, and water over medium heat until the mixture is smooth and well blended.
- Heat the Mixture: Continue whisking as the mixture heats. Allow it to come to a boil, ensuring no lumps form and the mixture remains smooth.
- Simmer: Reduce the heat to low and let the syrup simmer for 5 to 7 minutes, stirring frequently to prevent sticking or burning. The syrup will thicken slightly during this time.
- Add Vanilla: Remove the saucepan from heat and stir in the vanilla extract to enhance the flavor of the syrup.
- Cool and Store: Allow the syrup to cool completely before transferring it into a jar or bottle. Store the syrup in the refrigerator for up to 2 weeks. Shake or stir before each use to recombine if it separates.
Notes
- For a richer, more intense chocolate flavor, substitute regular cocoa powder with dark cocoa powder.
- This chocolate syrup is ideal for chocolate milk, ice cream toppings, desserts, or drizzling over pancakes and waffles.
- If the syrup separates after refrigeration, simply shake or stir it before use to restore smoothness.
- Prep Time: 5 minutes
- Cook Time: 7 minutes
- Category: Condiment
- Method: Stovetop
- Cuisine: American
Nutrition
- Serving Size: 1 tablespoon
- Calories: 50
- Sugar: 10g
- Sodium: 20mg
- Fat: 0.5g
- Saturated Fat: 0g
- Unsaturated Fat: 0g
- Trans Fat: 0g
- Carbohydrates: 12g
- Fiber: 1g
- Protein: 0g
- Cholesterol: 0mg


