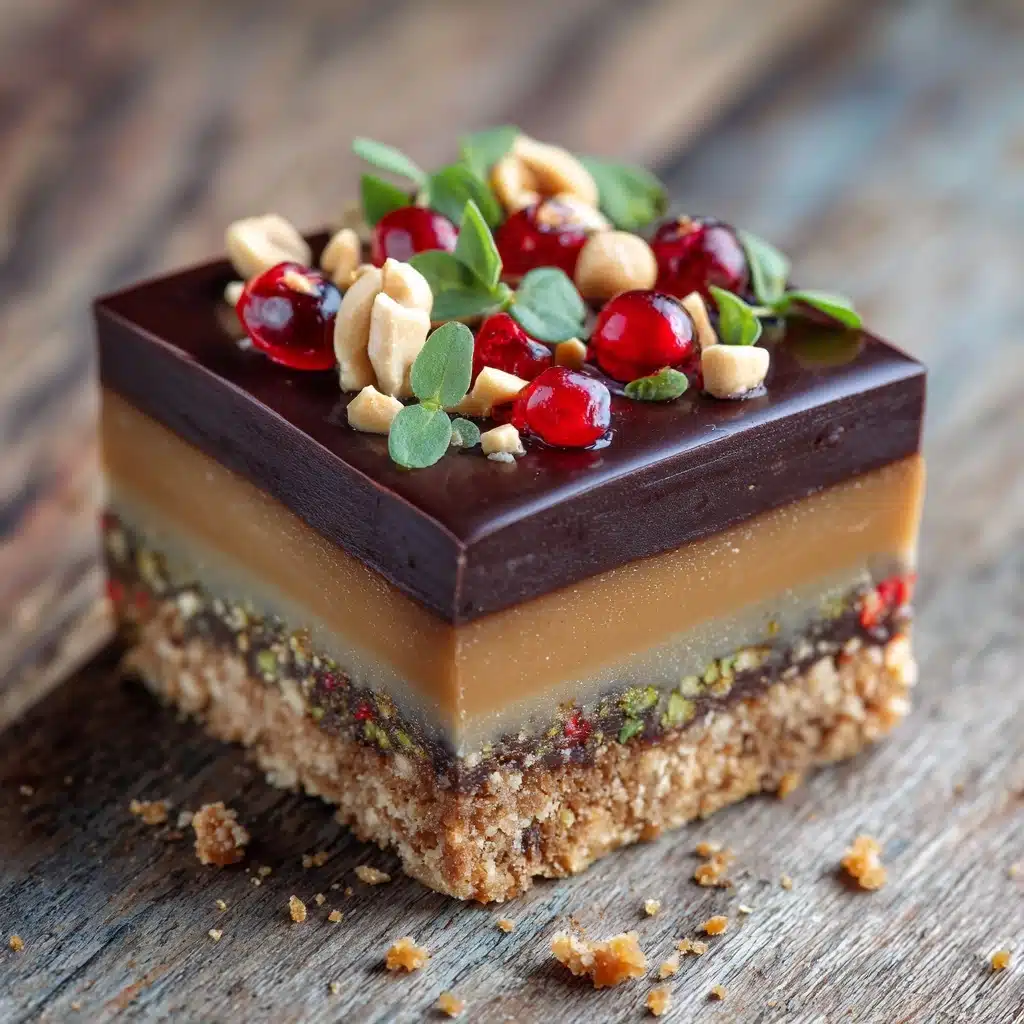
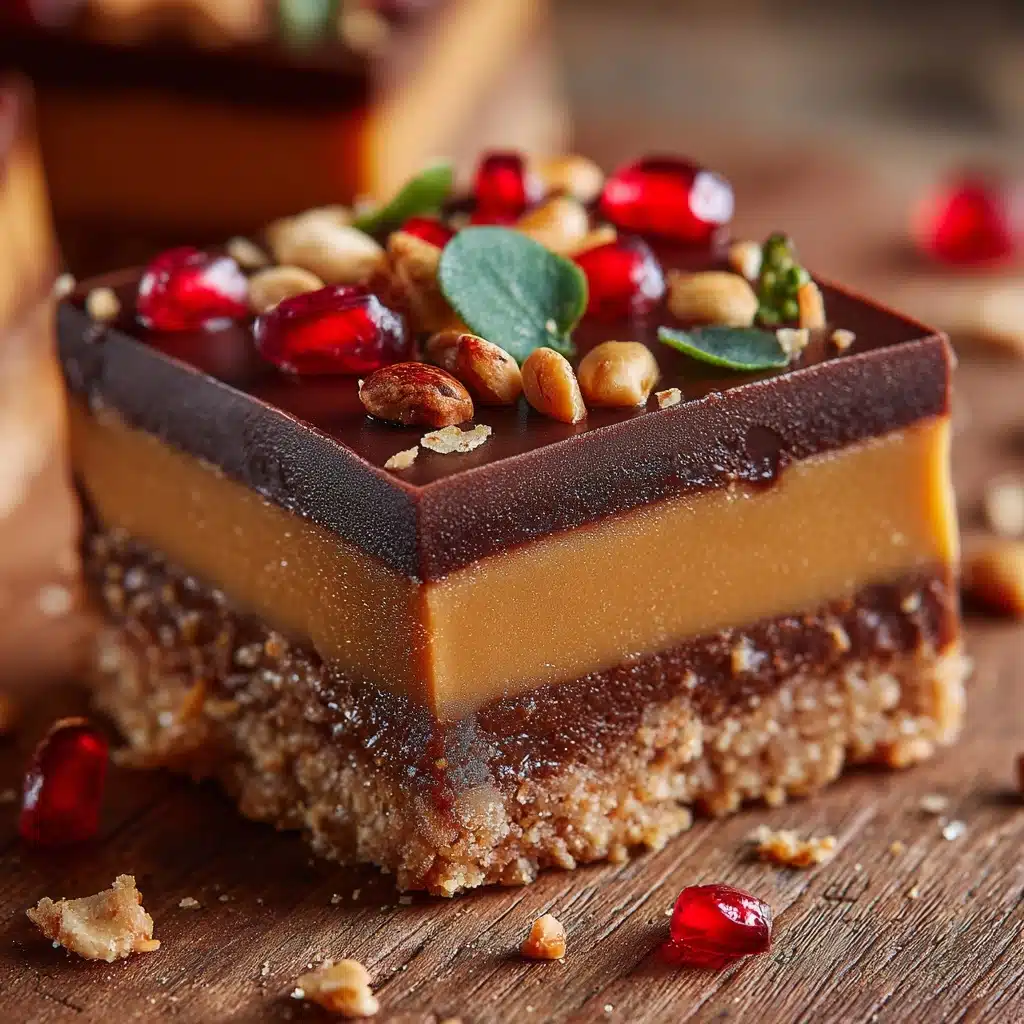
Meet your next favorite no-bake dessert: Sweet Simplicity: Peanut Butter Bars. Imagine that perfect marriage of creamy peanut butter and rich chocolate, all on a buttery, crumbly base—ready in minutes, no oven required! These bars are the definition of crowd-pleasing, with a texture that’s both soft and satisfyingly dense, and a flavor combination that instantly transports you to dessert bliss. Whether you’re prepping for a busy week, a potluck, or simply craving a nostalgic treat, Sweet Simplicity: Peanut Butter Bars deliver unbeatable ease and irresistible taste every single time.
Ingredients You’ll Need
The beauty of Sweet Simplicity: Peanut Butter Bars is how a handful of pantry staples come together to create layers of flavor and texture. Each ingredient plays a starring role, ensuring every bite is rich, creamy, and just the right amount of sweet.
- Unsalted Butter (1 cup, melted): Provides a rich, luscious base and helps bind the layers together for that perfect, sliceable texture.
- Graham Cracker Crumbs (2 cups): Add a toasty, slightly crunchy foundation that balances the creamy elements and gives structure to the bars.
- Powdered Sugar (2 cups): Sweetens the base without any graininess, keeping it melt-in-your-mouth smooth.
- Creamy Peanut Butter (1 cup, plus 1/4 cup for topping): Delivers that classic, nutty flavor and velvet-like consistency; use the extra for a glossy, chocolate-peanut butter topping.
- Semi-Sweet Chocolate Chips (1 1/2 cups): Melt into a rich, satisfying top layer that pairs perfectly with the peanut butter base.
How to Make Sweet Simplicity: Peanut Butter Bars
Step 1: Prepare the Peanut Butter Base
Start by grabbing a large mixing bowl and combining the melted butter, graham cracker crumbs, powdered sugar, and 1 cup of creamy peanut butter. Stir everything together until it forms a cohesive, thick mixture. This is the foundation of your bars—don’t be afraid to get in there with a spatula (or even your hands) to make sure all the crumbs are moistened and the base is uniform.
Step 2: Press Into the Pan
Take a 9×13-inch pan and either lightly grease it or line it with parchment paper for easy removal later. Press the peanut butter mixture firmly and evenly into the pan, making sure to reach every corner. A flat-bottomed glass or measuring cup works wonders to create a perfectly even, compact layer that will hold up to slicing.
Step 3: Make the Chocolate Topping
In a microwave-safe bowl, combine the semi-sweet chocolate chips with the remaining 1/4 cup of creamy peanut butter. Microwave in 30-second bursts, stirring after each interval, until the mixture is completely melted and smooth. This little addition of peanut butter to the chocolate ensures a glossy, soft set that slices beautifully and won’t crack.
Step 4: Assemble and Spread
Pour the melted chocolate-peanut butter mixture over the prepared peanut butter base. Use a spatula to spread it evenly, coaxing the chocolate into every corner for full coverage. Take a moment to admire those glossy swirls—this is the moment when Sweet Simplicity: Peanut Butter Bars really start to come together!
Step 5: Chill and Slice
Pop the pan into the refrigerator and let the bars chill for at least 2 hours, or until the chocolate is set and the base is firm to the touch. When ready, use a sharp knife to slice into neat bars. For the cleanest cuts, run your knife under hot water and wipe it dry between slices.
How to Serve Sweet Simplicity: Peanut Butter Bars

Garnishes
While these bars are delicious just as they are, a sprinkle of flaky sea salt, a handful of chopped roasted peanuts, or a drizzle of melted white chocolate can make them even more irresistible. Each garnish adds a touch of flair and a boost of flavor, making your Sweet Simplicity: Peanut Butter Bars look as good as they taste.
Side Dishes
Pair your bars with a tall glass of cold milk, a steaming mug of coffee, or even a scoop of vanilla ice cream for an indulgent dessert plate. If you’re serving at a party, arrange them alongside a fruit platter or other no-bake treats for a beautiful, crowd-pleasing dessert spread.
Creative Ways to Present
For a fun twist, cut the bars into bite-sized squares and arrange them in mini cupcake liners for easy, grab-and-go treats. You can also layer them in jars with extra chocolate drizzle or package them in pretty boxes as sweet homemade gifts. The possibilities for presenting Sweet Simplicity: Peanut Butter Bars are as endless as your imagination!
Make Ahead and Storage
Storing Leftovers
Sweet Simplicity: Peanut Butter Bars are champions of make-ahead convenience. Store any leftovers in an airtight container in the refrigerator, where they’ll stay fresh and delicious for up to a week. The chilled chocolate layer keeps its snap, while the base stays perfectly rich and moist.
Freezing
If you want to prep even further ahead, these bars freeze beautifully. Layer them between sheets of parchment in a freezer-safe container and freeze for up to 2 months. When ready to enjoy, simply thaw in the refrigerator for a few hours—no need to compromise on texture or flavor!
Reheating
These bars are best enjoyed chilled or at room temperature, so there’s no need to reheat. However, if you prefer a softer base or a slightly melty topping, let them sit out at room temperature for about 20 minutes before serving. That’s all it takes to bring Sweet Simplicity: Peanut Butter Bars to the perfect texture.
FAQs
Can I use crunchy peanut butter instead of creamy?
Absolutely! Crunchy peanut butter adds a lovely bit of texture and a little extra peanut flavor. For even more crunch, sprinkle some chopped peanuts into the base before adding the chocolate layer.
How do I prevent the chocolate layer from cracking when slicing?
The secret is patience and a hot knife. Let the bars chill until firm, then use a sharp knife run under hot water and wiped dry for each cut. This will give you clean, neat slices without cracking the chocolate topping.
Can I make these gluten-free?
Yes! Simply swap in gluten-free graham cracker crumbs. All the other ingredients in Sweet Simplicity: Peanut Butter Bars are naturally gluten-free, so it’s an easy adaptation for anyone with dietary needs.
What’s the best way to transport these to a party?
Once sliced, layer the bars in a sturdy container with parchment between the layers to prevent sticking. Keep them chilled until you’re ready to serve—these bars hold up well at room temperature for a few hours, making them ideal for potlucks and gatherings.
Can I reduce the sugar in this recipe?
If you’d like a less-sweet version, you can cut back slightly on the powdered sugar or use a natural sweetener blend. Keep in mind, though, that the sugar also helps bind the base, so don’t reduce it too drastically or the bars might not hold together as well.
Final Thoughts
There’s just something magical about Sweet Simplicity: Peanut Butter Bars—the way they bring together comfort, nostalgia, and pure joy in every bite. They’re easy enough for a weeknight, decadent enough for a special occasion, and always a hit with anyone who tries them. Give these bars a spot in your dessert rotation and let them become your new go-to treat; you truly can’t go wrong with Sweet Simplicity: Peanut Butter Bars!
Print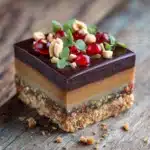
Sweet Simplicity: Peanut Butter Bars Recipe
- Total Time: 2 hours 15 minutes
- Yield: 24 bars 1x
- Diet: Non-Vegetarian
Description
Delight in the rich and creamy flavors of these no-bake peanut butter bars, perfectly layered with a buttery graham cracker base, a sweet peanut butter filling, and topped with a luscious chocolate peanut butter glaze. Easy to make and irresistibly delicious, these bars are ideal for potlucks, make-ahead treats, or simply satisfying a sweet tooth with minimal effort.
Ingredients
Base Layer
- 1 cup unsalted butter, melted
- 2 cups graham cracker crumbs
- 2 cups powdered sugar
- 1 cup creamy peanut butter
Topping
- 1 1/2 cups semi-sweet chocolate chips
- 1/4 cup creamy peanut butter (for topping)
Instructions
- Prepare the Base: In a large bowl, combine melted butter, graham cracker crumbs, powdered sugar, and 1 cup of creamy peanut butter. Mix thoroughly until the mixture is smooth and evenly combined.
- Press the Base: Firmly press the mixture into a greased or parchment-lined 9×13-inch baking pan, ensuring the layer is even and compact, creating the foundation for the bars.
- Melt the Chocolate Topping: Place semi-sweet chocolate chips and 1/4 cup peanut butter in a microwave-safe bowl. Microwave in 30-second intervals, stirring after each, until the mixture is fully melted and smooth.
- Spread the Topping: Pour the melted chocolate mixture over the peanut butter base layer and spread evenly with a spatula, covering the entire surface.
- Chill: Place the pan in the refrigerator and chill for at least 2 hours or until the bars are firm and set.
- Serve: Once firm, slice into 24 bars and serve chilled for the best texture and flavor.
Notes
- For added texture, opt for crunchy peanut butter or sprinkle crushed peanuts into the base mixture.
- These bars store well in the refrigerator, making them convenient for make-ahead desserts or potluck contributions.
- Prep Time: 15 minutes
- Cook Time: 0 minutes
- Category: Dessert
- Method: No-Bake
- Cuisine: American
Nutrition
- Serving Size: 1 bar
- Calories: 270
- Sugar: 20g
- Sodium: 120mg
- Fat: 18g
- Saturated Fat: 7g
- Unsaturated Fat: 10g
- Trans Fat: 0g
- Carbohydrates: 25g
- Fiber: 1g
- Protein: 4g
- Cholesterol: 15mg


