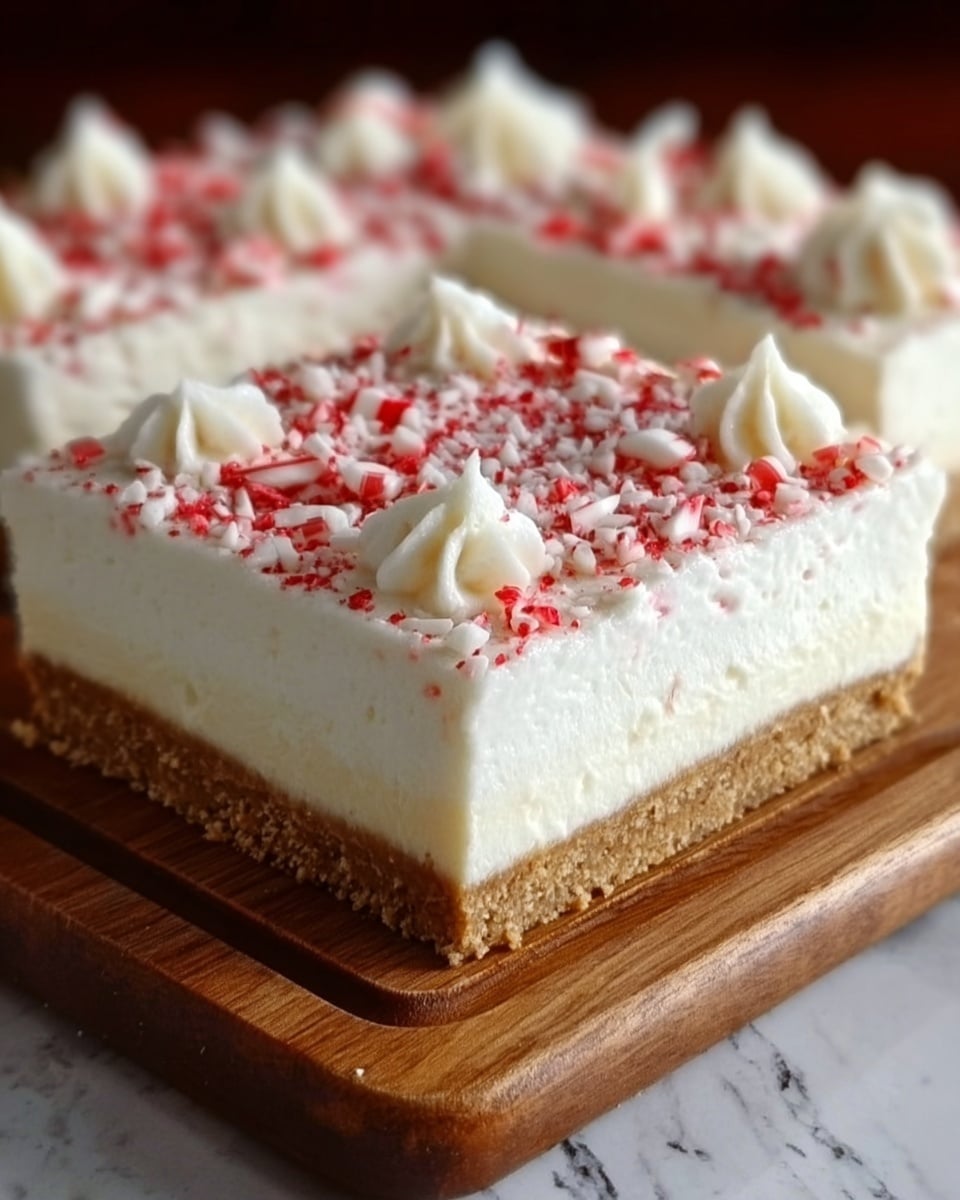
If you’ve been searching for a dessert that brings festive cheer with zero fuss, this No-Bake Candy Cane Pie Recipe is exactly what you need. Imagine a creamy, minty filling that perfectly balances sweetness and a hint of peppermint bite, all nestled inside a crunchy graham cracker crust. It’s a holiday treat that doesn’t require turning on your oven and comes together beautifully with simple ingredients that pack loads of flavor. Whether you’re hosting a party or just craving something special, this pie is a guaranteed crowd-pleaser that’s as delightful to look at as it is to eat.

Ingredients You’ll Need
The magic behind this pie happens thanks to just a handful of ingredients, each playing an important role in flavor and texture. From the tangy cream cheese to the refreshing peppermint extract, every element ensures your pie turns out smooth, sweet, and festive.
- Pre-made graham cracker crust: Saves time and provides a perfectly crunchy, buttery base for the pie.
- Cream cheese (8 oz, softened): Adds richness and a slight tang that balances the sweetness beautifully.
- Powdered sugar (1 cup): Sweetens the filling and helps it stay smooth without graininess.
- Heavy whipping cream (1 cup): Whipped to fluffy perfection, it lightens the texture and adds creaminess.
- Peppermint extract (1 tsp): Delivers that unmistakable candy cane flavor with a subtle refreshing kick.
- Crushed candy canes (1/2 cup, reserve some for topping): Provides crunch and festive color while reinforcing the peppermint taste.
- Mini marshmallows (1/2 cup, optional): A playful addition for extra texture and sweetness on top.
- Red food coloring (optional): Perfect for adding a pop of festive color to your pie filling.
- Whipped cream (for topping): Softens the presentation and adds an indulgent finishing touch.
How to Make No-Bake Candy Cane Pie Recipe
Step 1: Prepare the Cream Cheese Mixture
Start by softening your cream cheese to room temperature so it blends easily. Beat it together with powdered sugar until the mixture is velvety smooth and free of lumps. This ensures your pie’s base is creamy and sweet without any gritty bits—an essential step for that luscious mouthfeel.
Step 2: Whip the Cream
Next, whip your heavy cream until soft peaks form. This aerates the filling, making it fluffy and light. Gently fold the whipped cream into the cream cheese mixture to keep all the airiness intact, which turns your filling gloriously smooth and spoonable.
Step 3: Add Peppermint Flavor and Color
Mix in the peppermint extract carefully; a little goes a long way in delivering that iconic candy cane flavor. If you want your pie to look extra festive, add a few drops of red food coloring now and fold it in gently to create beautiful swirls of holiday cheer.
Step 4: Incorporate Crushed Candy Canes
Fold in half of your crushed candy canes into the filling to add lovely bursts of peppermint crunch and vibrant red flecks throughout the pie. This little touch gives the filling texture and makes every bite interesting and festive.
Step 5: Assemble the Pie
Pour the creamy filling evenly into your pre-made graham cracker crust. Use a spatula to smooth the top so it looks neat and inviting. Then sprinkle the reserved crushed candy canes and optional mini marshmallows on top for extra texture and festive flair.
Step 6: Chill to Set
Place your pie in the refrigerator for at least 4 hours, or until fully set. This chilling time allows the flavors to meld perfectly and the filling to firm up into the ideal sliceable consistency without baking anything at all.
How to Serve No-Bake Candy Cane Pie Recipe

Garnishes
Top each slice with a generous dollop of whipped cream and a sprinkle of crushed candy canes for a snowy, festive look. If you have mini marshmallows, a few toasted on top add a cozy, slightly caramelized flavor that perfectly complements the pie’s refreshing mint.
Side Dishes
This pie pairs wonderfully with hot chocolate or a spiced winter cider, both balancing the cool peppermint flavor with warm, comforting drinks. Add a small fresh fruit salad on the side to lighten the richness and offer a burst of natural sweetness.
Creative Ways to Present
Serve the pie in clear, individual dessert cups layered with crushed candy canes and whipped cream for a charming alternative to the classic slice. Or create a candy cane pie trifle layering the filling, crust crumbs, and marshmallows in a glass bowl for a show-stopping holiday centerpiece.
Make Ahead and Storage
Storing Leftovers
Your No-Bake Candy Cane Pie Recipe leftovers keep well in the fridge covered tightly with plastic wrap or in an airtight container for up to 3 days. This ensures the pie stays fresh and maintains its delightful texture and flavor without drying out.
Freezing
You can freeze this pie, but be aware the texture may soften slightly upon thawing. Wrap it well in plastic wrap and foil, and freeze for up to 1 month. Thaw overnight in the fridge before serving to keep the creaminess intact.
Reheating
Since this is a no-bake and chilled dessert, reheating is not recommended—it’s best enjoyed cold and fresh. Simply take it out of the fridge a few minutes before serving for the ideal texture and flavor release.
FAQs
Can I use homemade graham cracker crust instead of store-bought?
Absolutely! A homemade graham cracker crust adds a lovely personal touch and you can adjust the sweetness or spices to match your preference. Just be sure it’s fully cooled before filling your pie.
What can I substitute for heavy whipping cream?
If you don’t have heavy cream, chilled coconut cream is a good non-dairy alternative that whips nicely and adds a subtle coconut undertone. Keep in mind this may slightly alter flavor and texture.
Can I make this no-bake pie ahead of time for a party?
Yes! This pie actually benefits from chilling time. Preparing it a day ahead allows the flavors to fully develop and the filling to set perfectly, making it a stress-free dessert option for gatherings.
Is there a way to adjust the peppermint flavor intensity?
Certainly. Peppermint extract is potent, so start with one teaspoon and taste the filling as you go. You can add a bit more if you prefer a stronger mint bite or reduce it for a subtler hint of candy cane.
Can I skip the red food coloring if I want a more natural pie?
Definitely. The pie will still taste amazing without any added color. The crushed candy canes provide plenty of festive red flecks for visual appeal, so the coloring is completely optional.
Final Thoughts
If you’re looking for a festive dessert that’s quick, easy, and absolutely delicious, the No-Bake Candy Cane Pie Recipe is your perfect holiday companion. It’s a simple way to celebrate the season with creamy minty bliss and crunchy candy cane bits all wrapped up in a buttery crust. I can’t wait for you to try it and share the joy of this fun and fabulous treat with your loved ones!
Print
No-Bake Candy Cane Pie Recipe
- Total Time: 4 hours 20 minutes
- Yield: 8 servings 1x
- Diet: Vegetarian
Description
This No-Bake Candy Cane Pie is a festive and creamy holiday dessert featuring a smooth peppermint-flavored cream cheese filling with crushed candy canes for a delightful crunch. It’s set in a pre-made graham cracker crust and topped with whipped cream, extra crushed candy canes, and optional mini marshmallows for added texture and color. Perfect for a quick and easy holiday treat that requires no oven baking.
Ingredients
Crust
- 1 pre-made graham cracker crust
Filling
- 8 oz cream cheese, softened
- 1 cup powdered sugar
- 1 cup heavy whipping cream
- 1 tsp peppermint extract
- 1/2 cup crushed candy canes (reserve some for topping)
Toppings
- Whipped cream (for topping)
- 1/2 cup mini marshmallows (optional, for topping)
- Red food coloring (optional, for a festive touch)
- Additional crushed candy canes (reserved for topping)
Instructions
- Prepare the filling: In a large mixing bowl, beat the softened cream cheese until smooth and creamy. Gradually add the powdered sugar and continue to mix until fully combined and smooth.
- Whip the cream: In a separate chilled bowl, whip the heavy whipping cream until stiff peaks form. If desired, add a few drops of red food coloring to achieve a festive pink hue and gently fold it in.
- Combine peppermint and crushed candy canes: Stir the peppermint extract into the cream cheese mixture. Then gently fold in the whipped cream and crushed candy canes, reserving some candy canes for topping. Mix until the filling is well incorporated and fluffy.
- Assemble the pie: Pour the filling into the pre-made graham cracker crust and smooth the top with a spatula.
- Chill to set: Refrigerate the pie for at least 4 hours, or until firm and set.
- Add toppings: Before serving, garnish the pie with whipped cream, the reserved crushed candy canes, and optional mini marshmallows for a festive presentation.
- Serve: Slice into 8 servings and enjoy the creamy, peppermint-flavored treat!
Notes
- For an extra festive look, add a few drops of red food coloring to the whipped cream before folding it into the filling to create a peppermint swirl effect.
- Mini marshmallows add a nice texture contrast but are optional.
- Use candy canes crushed by placing them in a sealed plastic bag and gently crushing with a rolling pin or heavy pan.
- The pie needs at least 4 hours to set properly in the refrigerator so plan ahead.
- For a gluten-free option, ensure the graham cracker crust is gluten-free.
- Prep Time: 20 minutes
- Cook Time: 0 minutes
- Category: Dessert
- Method: No-Cook
- Cuisine: American
