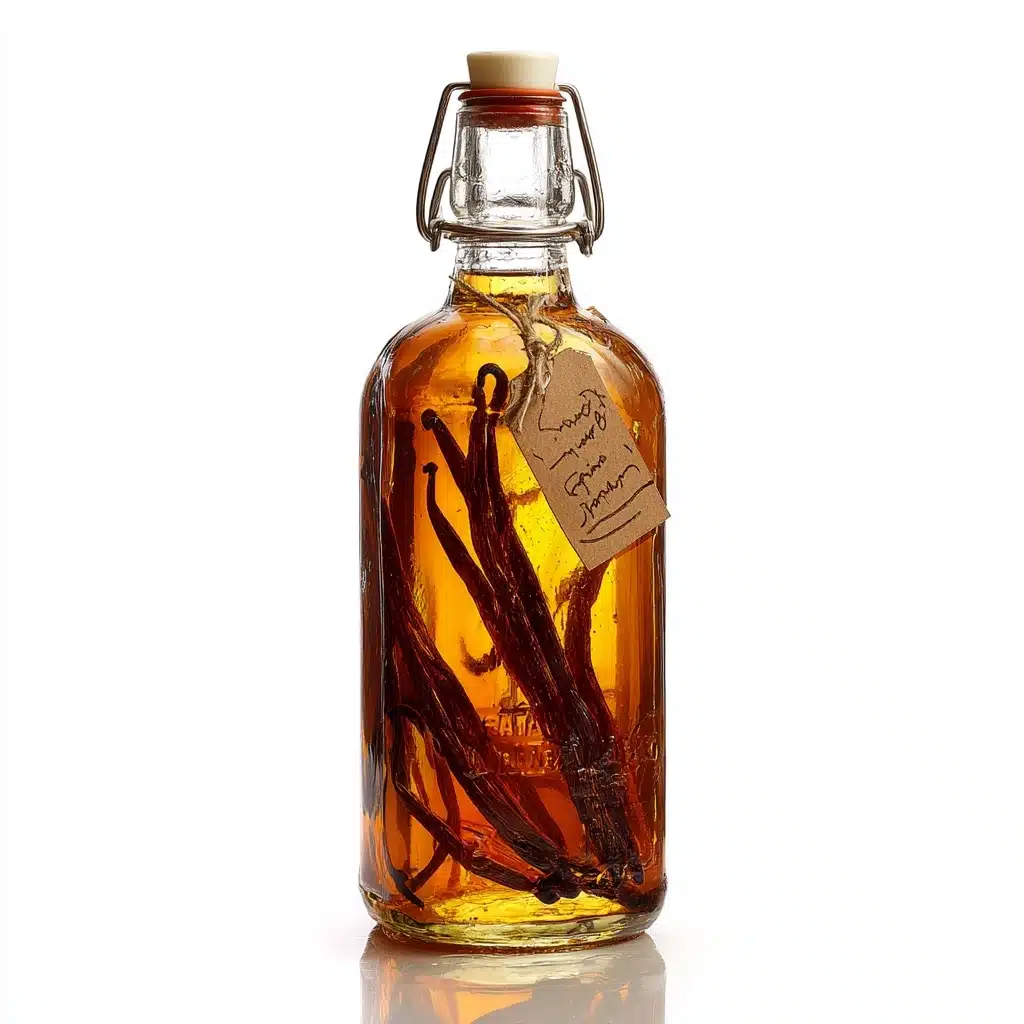
There’s just something magical about Homemade Vanilla Extract. Not only does it fill your kitchen with the sweetest, most comforting aroma, but making it yourself infuses every baked good and cup of coffee with a depth you simply can’t get from the store-bought stuff. Whether you’re a passionate baker or simply love a beautiful DIY project for your pantry, crafting your own vanilla extract is delightfully simple, cost-effective, and so much fun!
Ingredients You’ll Need
-
Ingredients:
- 6 whole vanilla beans
- 1 1/2 cups vodka (or bourbon or rum)
How to Make Homemade Vanilla Extract
Step 1: Prep the Vanilla Beans
Using a sharp knife, carefully slice each vanilla bean lengthwise down the middle to expose all those fragrant seeds inside. This simple step unlocks the maximum flavor for your vanilla extract—it’s a little like unwrapping a present!
Step 2: Combine in a Jar
Pop the sliced vanilla beans into a clean glass jar or bottle with a tight-fitting lid. Nothing fancy required; just something that seals well so the magic can happen undisturbed.
Step 3: Pour in the Alcohol
Now for the fun part—pour 1 1/2 cups of vodka, bourbon, or rum over your vanilla beans, making sure they’re fully submerged. The alcohol acts as a solvent, extracting all the beautiful vanilla flavors and aromas from the beans.
Step 4: Seal and Shake
Seal your jar tightly and give it a gentle shake. Not only does this mix everything together, but it’s also the beginning of your infusion adventure!
Step 5: Store and Infuse
Tuck the jar away in a cool, dark spot for at least 8 weeks—yes, patience is key here, but it’s so worth it. Give it a shake once or twice a week to help the flavors meld and deepen.
Step 6: Enjoy and Replenish
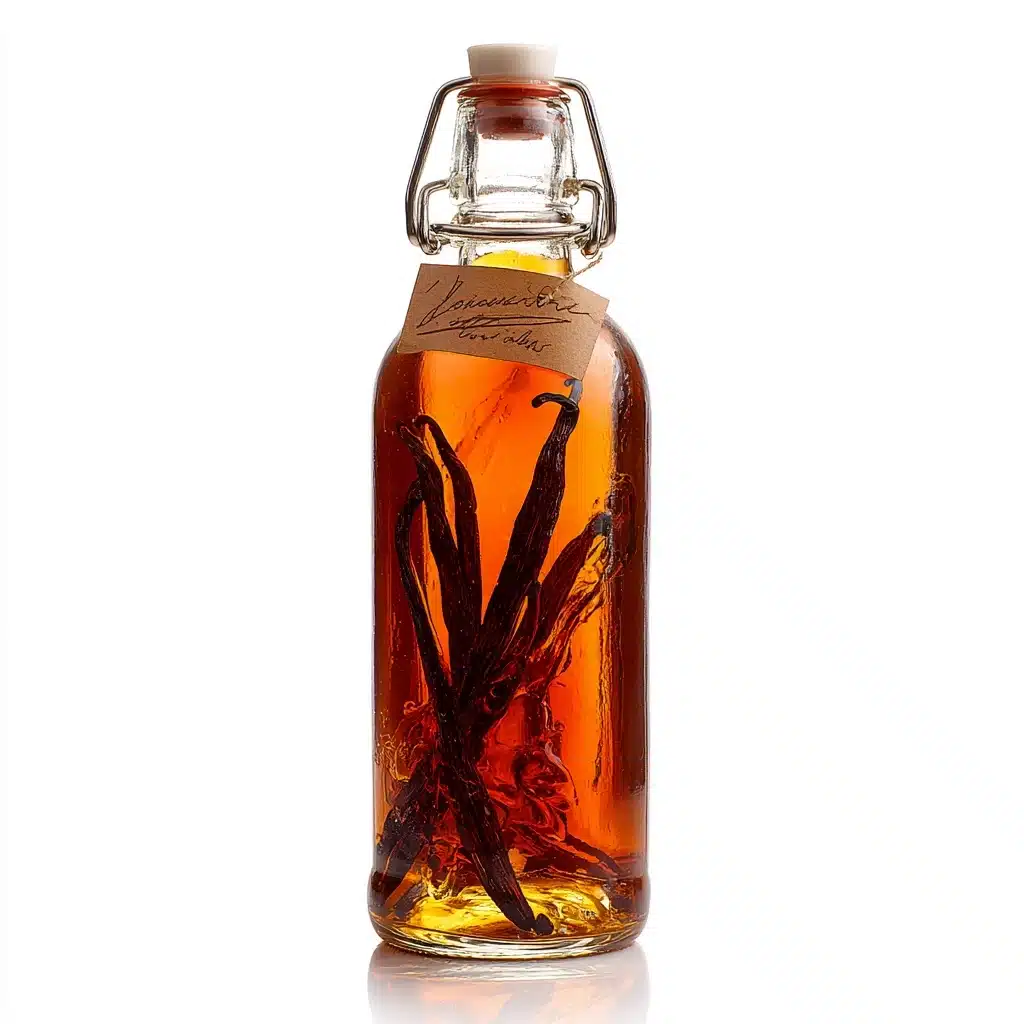
After 8 weeks, your Homemade Vanilla Extract will be dark, fragrant, and ready to work its magic in your favorite recipes. Even better, you can keep topping off the jar with vodka as you use it, making your extract last and last.
How to Serve Homemade Vanilla Extract

Garnishes
For gifting or just to make it look extra special in your own pantry, slip a whole vanilla bean into each bottle of extract. It’s a simple touch that announces, “This is the real deal!” and the vanilla will continue to infuse the extract over time.
Side Dishes
While vanilla extract isn’t for spooning over a meal, it truly shines in side dishes and desserts—think buttery pound cakes, fluffy pancakes, or a rich homemade whipped cream. Just a teaspoon added to your batter or cream can transform the entire flavor experience.
Creative Ways to Present
Homemade Vanilla Extract makes a thoughtful, personal gift! Pour it into pretty glass bottles, tie with a rustic twine or ribbon, and add a handmade label. It’s the kind of kitchen treasure friends and family will rave about long after the holidays pass.
Make Ahead and Storage
Storing Leftovers
Once your Homemade Vanilla Extract is ready, keep it sealed in a cool, dark cupboard. Because of the alcohol content, it will stay fresh and aromatic for years—truly a pantry staple that just gets better with age.
Freezing
There’s no need to freeze vanilla extract. The alcohol acts as a natural preservative, so it won’t spoil or lose its punch at room temperature. Just keep it tightly sealed and away from direct sunlight.
Reheating
No reheating necessary! In fact, heat would actually diminish the velvety, complex notes that you’ve so carefully infused over weeks. Use your extract straight from the bottle, just as it is.
FAQs
How long does it take to make Homemade Vanilla Extract?
You’ll need to let your vanilla beans infuse in alcohol for at least 8 weeks to develop that signature deep flavor and gorgeous color, but if you can wait even longer—up to 6 months—it only gets richer and smoother.
Can I use different kinds of alcohol?
Absolutely! While traditional Homemade Vanilla Extract uses vodka for a clean vanilla taste, bourbon or dark rum can bring bold new notes to your extract. Play around and find your favorite version.
Do I need to strain the extract before using?
It’s not strictly necessary to strain. Those little flecks of vanilla bean add rustic charm and even more flavor, but if you prefer a absolutely clear extract, you can strain it with a fine mesh sieve or cheesecloth before bottling.
Is Homemade Vanilla Extract safe for gluten-free and vegan diets?
Yes, it’s naturally gluten-free and vegan, just be sure to choose an alcohol that fits your dietary preferences (most plain vodkas, rums, and bourbons are friendly, but always check the label if there are concerns).
Can I keep topping off the jar with more alcohol?
Absolutely! As you use the extract, refill the jar with more vodka to keep the beans submerged. Eventually, after several uses and months, it’s best to swap in fresh beans to keep your Homemade Vanilla Extract vibrant.
Final Thoughts
If you’ve never tried crafting your own Homemade Vanilla Extract, now is the perfect time to jump in! It’s simple, satisfying, and guaranteed to add a touch of homemade magic to every baking day. Give it a try—your kitchen (and your taste buds) will thank you!
Print
Homemade Vanilla Extract Recipe
- Total Time: 8 weeks (infusion time)
- Yield: About 1 1/2 cups 1x
- Diet: Vegan, Gluten-Free
Description
Learn how to make your own Homemade Vanilla Extract with this simple recipe. With just two ingredients and a bit of patience, you can have a fragrant, flavorful vanilla extract that beats anything store-bought.
Ingredients
Ingredients:
- 6 whole vanilla beans
- 1 1/2 cups vodka (or bourbon or rum)
Instructions
- Slice the Vanilla Beans: Slice each vanilla bean lengthwise down the middle to expose the seeds.
- Prepare the Extract: Place the sliced vanilla beans into a clean glass jar or bottle with a tight-fitting lid. Pour the vodka (or your chosen alcohol) over the beans, ensuring they are fully submerged.
- Infusion Process: Seal the jar tightly and shake gently. Store the jar in a cool, dark place for at least 8 weeks, shaking it once or twice a week to help infuse the flavors.
- Finish and Store: After 8 weeks, the vanilla extract will be dark and fragrant and is ready to use. You can continue to add vodka to the jar as you use the extract to keep it replenished.
Notes
- Use high-quality vanilla beans for the best flavor.
- Bourbon or rum can be used instead of vodka for a different flavor profile.
- Extract improves with longer aging, up to 6 months or more.
- Prep Time: 10 minutes
- Cook Time: 0 minutes
- Category: Condiment
- Method: Infusion
- Cuisine: American
Nutrition
- Serving Size: 1 teaspoon
- Calories: 12
- Sugar: 0g
- Sodium: 0mg
- Fat: 0g
- Saturated Fat: 0g
- Unsaturated Fat: 0g
- Trans Fat: 0g
- Carbohydrates: 0g
- Fiber: 0g
- Protein: 0g
- Cholesterol: 0mg

