
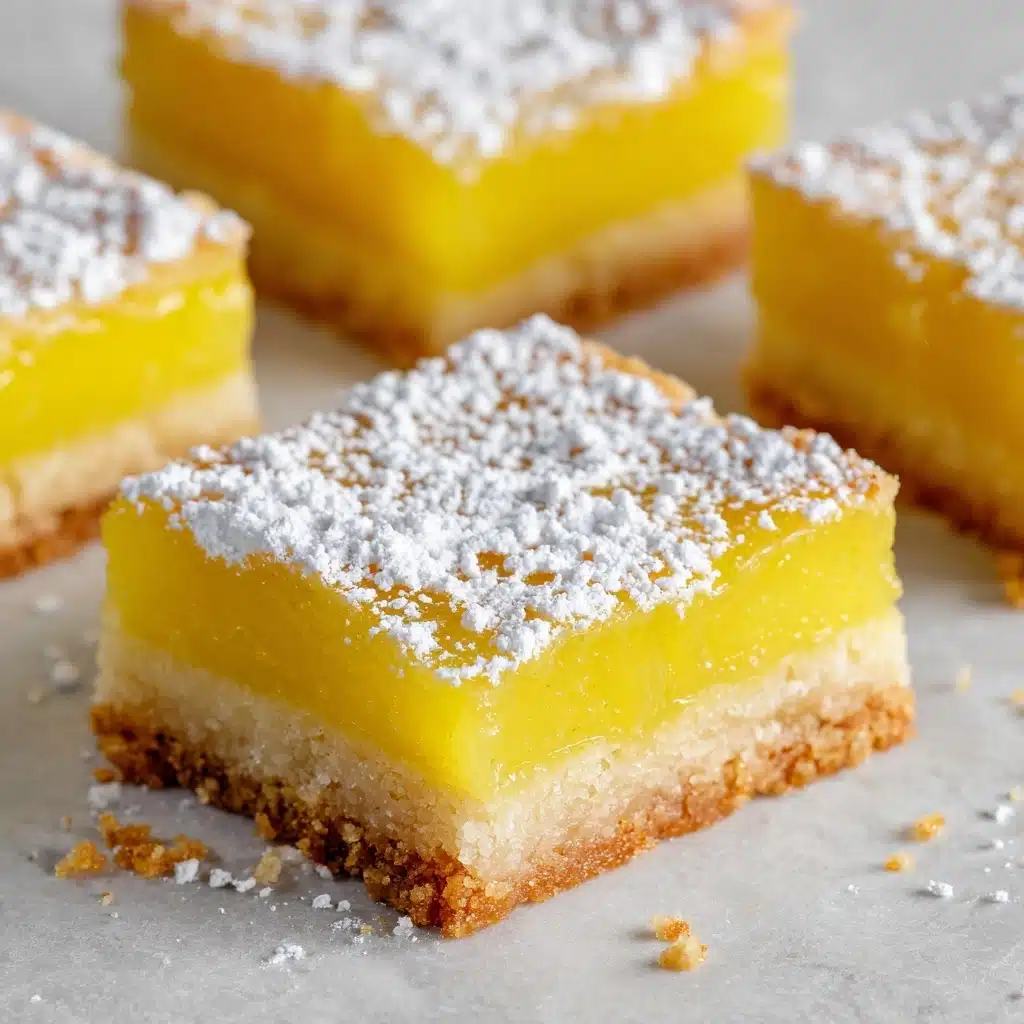
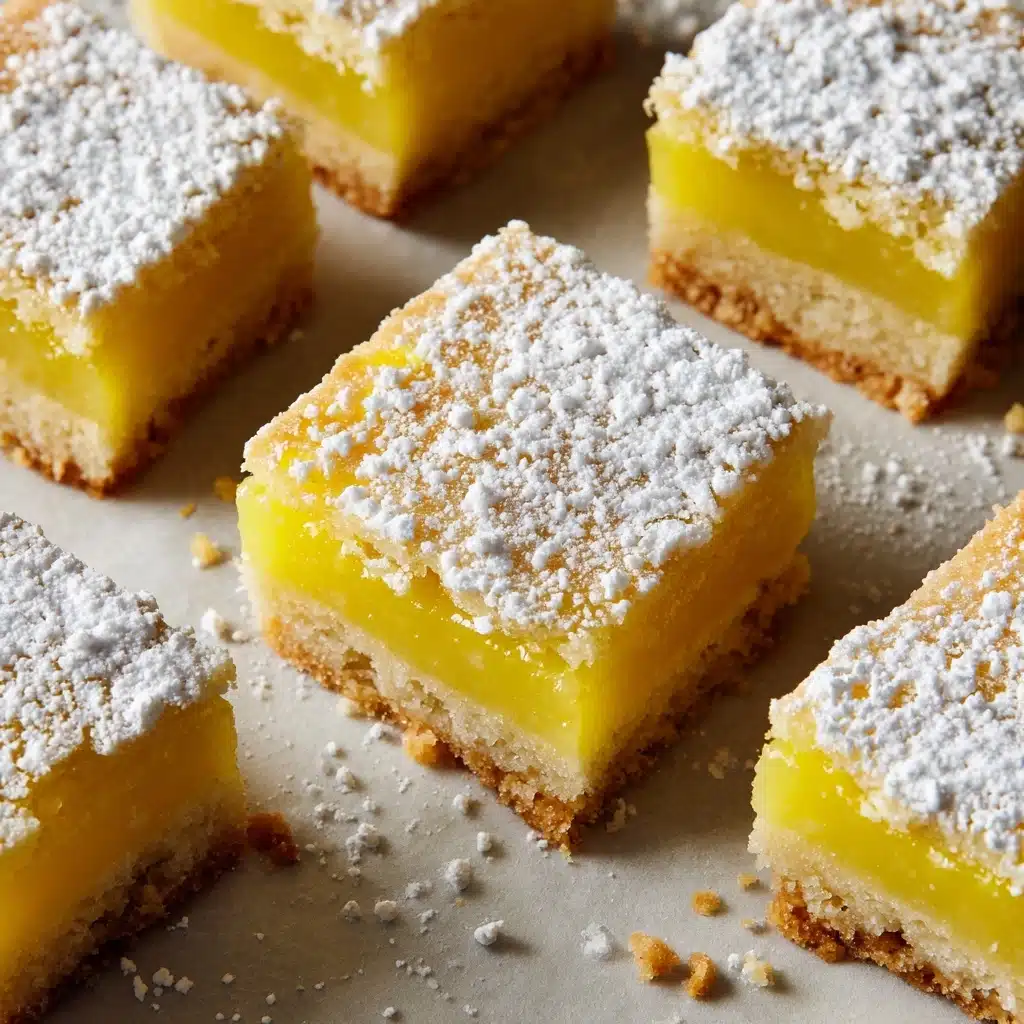
If you’re looking for a dessert that sings with bright flavor and brings a little sunshine to your table, these Lemon Bars are about to become your new favorite treat. With a buttery shortbread crust, a silky-smooth lemony filling, and a final dusting of snowy powdered sugar, each bite is a delightful balance of sweet and tart. Whether you’re sharing with friends, serving after a family meal, or sneaking a bar for yourself with afternoon tea, Lemon Bars never disappoint!
Ingredients You’ll Need
One of the best things about Lemon Bars is how they transform simple, everyday ingredients into something truly special. Each part plays a crucial role in the irresistible taste, melt-in-your-mouth texture, and that classic sunshiny color we all love.
- Unsalted Butter (1 cup): This is the backbone of your crust, giving you that rich, tender bite and deliciously buttery flavor.
- Granulated Sugar (2 cups, divided): Sweetens both the crust and filling for perfect balance without being cloying.
- All-Purpose Flour (2 1/4 cups, divided): Ensures a sturdy crust while also thickening the luscious lemon layer.
- Salt (1/4 teaspoon): Just a pinch to highlight and round out all the flavors.
- Large Eggs (4): Essential for setting up the lemon filling to that dreamy, custardy consistency.
- Fresh Lemon Juice (2/3 cup): Nothing beats the zing of freshly squeezed lemons for bright, vibrant flavor.
- Lemon Zest (1 tablespoon): Adds another layer of citrus fragrance that truly lifts the filling.
- Powdered Sugar (1/4 cup): That signature dusting gives your Lemon Bars their classic look and an extra touch of sweetness.
How to Make Lemon Bars
Step 1: Prepare Your Pan and Oven
Start by preheating your oven to 350°F (175°C). To make removing your Lemon Bars a breeze later, line a 9×13-inch baking dish with parchment paper, leaving enough extra on the sides to act as a handle. These little steps set you up for a flawless finish!
Step 2: Make the Shortbread Crust
In a medium bowl, cream together the softened butter and 1/2 cup of granulated sugar until the mixture is creamy and pale. Stir in the flour and salt, mixing just until a crumbly dough forms. Gently press this dough into your prepared pan, smoothing it into an even layer. Bake for 18 to 20 minutes—you’re looking for lightly golden edges that promise a crisp, tender bite.
Step 3: Prepare the Lemon Filling
While your crust is baking, whip up the glorious heart of your Lemon Bars! Whisk together the remaining 1 1/2 cups of granulated sugar with 1/4 cup of flour. Add the eggs, freshly squeezed lemon juice, and the zest. Keep whisking until it’s luxuriously smooth, sunshine-yellow, and well combined.
Step 4: Assemble and Bake
As soon as the crust comes out of the oven, immediately pour your lemon filling over the hot base. This helps the lemon filling bond beautifully with the crust. Slide the pan back into the oven for another 20 to 25 minutes. You’ll know it’s ready when the center is set and doesn’t jiggle if you gently nudge the pan.
Step 5: Cool, Chill, and Slice
Patience is key! Let the bars cool completely in the pan on a wire rack, then transfer them to the fridge for at least 2 hours. This firm chilling makes cutting into perfect squares super easy. Use the parchment overhang to lift the whole slab out and dust generously with powdered sugar before slicing and serving.
How to Serve Lemon Bars
Garnishes
These bright beauties absolutely sparkle with a generous dusting of powdered sugar, but if you’re feeling fancy, try adding a sprinkle of extra lemon zest or a few thin lemon slices on top. A little dollop of freshly whipped cream is never a bad idea either for an elegant touch.
Side Dishes
Lemon Bars pair nicely with fresh summer berries like raspberries or blueberries—their juicy sweetness perfectly complements the tart-citrusy filling. For a more decadent spread, add a bowl of vanilla ice cream or a light, creamy yogurt on the side.
Creative Ways to Present
Want to wow your crowd? Serve Lemon Bars in decorative cupcake liners for a fuss-free grab-and-go option at parties. For spring showers or bridal brunches, stack the bars on a tiered cake stand and scatter edible flowers or mint leaves for a whimsical vibe.
Make Ahead and Storage
Storing Leftovers
If you manage to have leftovers, Lemon Bars keep beautifully! Store them in an airtight container in the refrigerator for up to 5 days. The chill helps them stay fresh and ensures the lemon filling remains creamy and just the right amount of tart.
Freezing
Lemon Bars are freezer-friendly—a lifesaver for prepping ahead! Layer them between sheets of parchment in an airtight container, and they’ll keep in the freezer for up to 3 months. Thaw in the fridge overnight before serving and add a fresh dusting of powdered sugar to revive their sparkle.
Reheating
There’s really no need to reheat Lemon Bars since they’re traditionally enjoyed chilled. If you prefer them closer to room temperature, simply set out however many you like about 20 minutes before serving for the perfect texture.
FAQs
Can I use bottled lemon juice instead of fresh?
While it’s possible, freshly squeezed lemon juice makes all the difference. The flavor of Lemon Bars really shines with the brightness only fresh lemons can offer. Your taste buds will thank you!
Why is my filling runny or not set?
This usually happens if the bars are underbaked or not sufficiently chilled. Make sure to bake until the center looks firm and to let the bars chill completely for the best texture and clean slices.
Can I make this recipe gluten-free?
Absolutely! Swap the all-purpose flour for a 1:1 gluten-free flour blend and you’ll still get a lovely, tender crust and filling—no one will even notice the difference.
How do I get sharp, neat slices?
For those beautiful bakery-style squares, chill the bars thoroughly and use a sharp knife wiped clean between cuts. You can even dip the knife in hot water, wipe it dry, and then slice for extra precision.
Do Lemon Bars need to be refrigerated?
Yes, they do! Because of the egg-based filling, Lemon Bars are safest and tastiest when stored in the fridge (plus, the flavor and texture are at their best when cold).
Final Thoughts
There’s just something special about the homemade magic of Lemon Bars—every bite is sun-kissed, sweetly tangy, and absolutely irresistible. Give this recipe a try, share it with friends, and watch these classic treats disappear faster than you can say “just one more bar”!
Print
Lemon Bars Recipe
- Total Time: 1 hour (plus chilling time)
- Yield: 16 bars 1x
- Diet: Vegetarian
Description
These classic Lemon Bars are the perfect combination of sweet and tangy, with a buttery crust and a luscious lemon filling. Easy to make and always a crowd-pleaser!
Ingredients
For the crust:
- 1 cup unsalted butter, softened
- 1/2 cup granulated sugar
- 2 cups all-purpose flour
- 1/4 teaspoon salt
For the filling:
- 1 1/2 cups granulated sugar
- 1/4 cup all-purpose flour
- 4 large eggs
- 2/3 cup fresh lemon juice (about 3–4 lemons)
- 1 tablespoon lemon zest
For topping:
- 1/4 cup powdered sugar
Instructions
- Preheat the oven: Preheat the oven to 350°F (175°C). Line a 9×13-inch baking dish with parchment paper.
- Make the crust: Cream butter and sugar, add flour and salt, press into pan, and bake until golden.
- Prepare the filling: Whisk sugar and flour, add eggs, lemon juice, and zest. Pour over crust and bake until set.
- Cool and serve: Cool bars, refrigerate, cut into squares, and dust with powdered sugar.
Notes
- Use freshly squeezed lemon juice for the best flavor.
- Store bars in the refrigerator for up to 5 days.
- Prep Time: 15 minutes
- Cook Time: 45 minutes
- Category: Dessert
- Method: Baking
- Cuisine: American
Nutrition
- Serving Size: 1 bar
- Calories: 220
- Sugar: 21g
- Sodium: 50mg
- Fat: 9g
- Saturated Fat: 5g
- Unsaturated Fat: 3g
- Trans Fat: 0g
- Carbohydrates: 33g
- Fiber: 0g
- Protein: 3g
- Cholesterol: 60mg


