
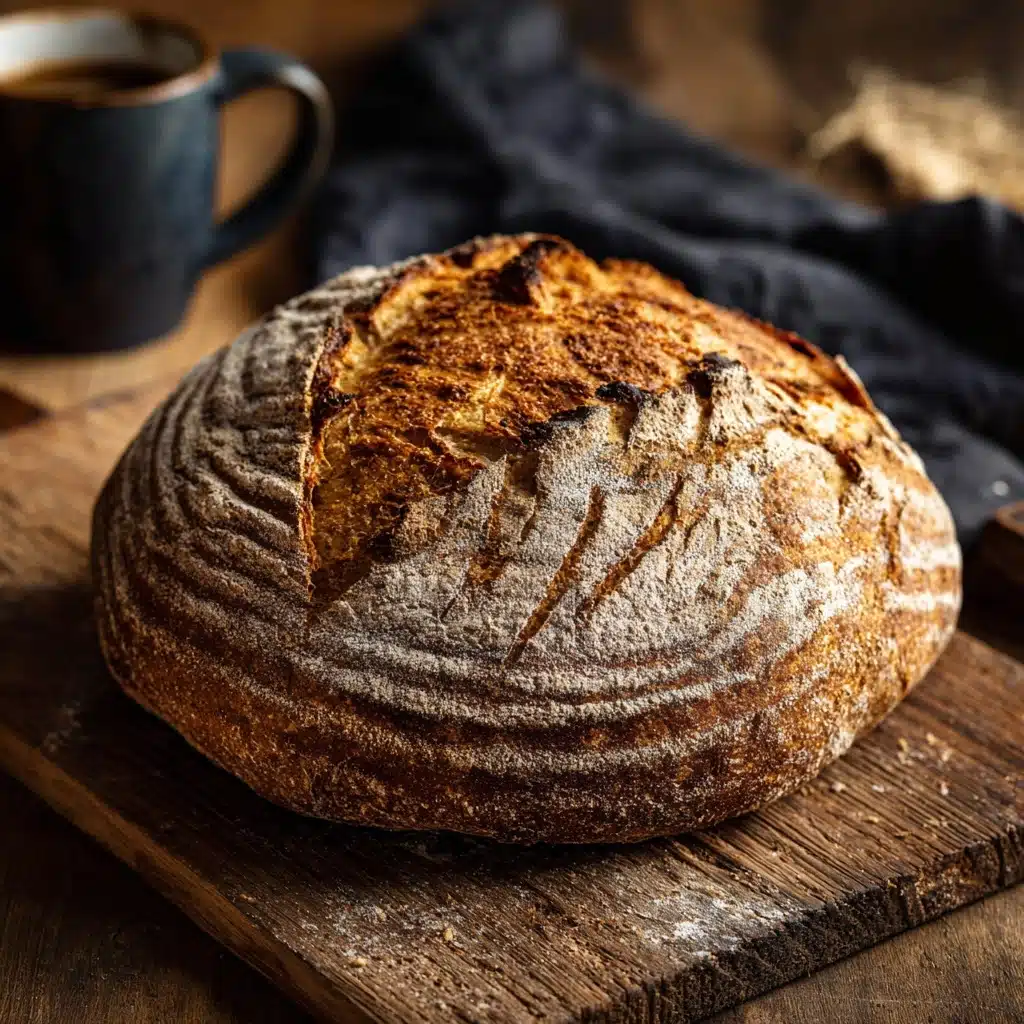
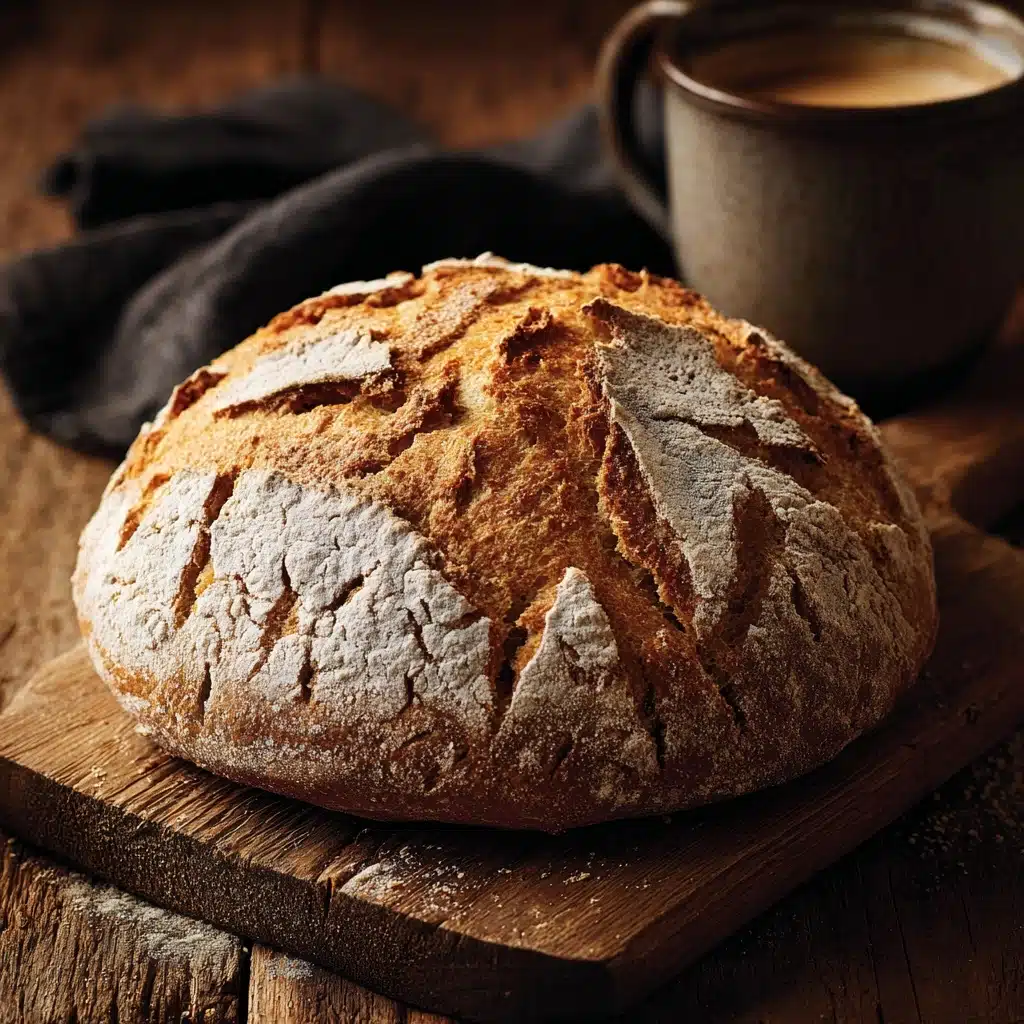
There’s nothing quite like the magic of pulling a piping hot, golden loaf of Artisan Bread out of your own oven. With its crisp, crackly crust and irresistibly airy crumb, this simple recipe transforms the most basic pantry staples into a showstopping centerpiece you’ll want to share with everyone you love. Whether you’re new to bread baking or already a yeast whisperer, you’ll be amazed at how this effortless technique delivers bakery-quality results every single time.
Ingredients You’ll Need
Every ingredient here is chosen with purpose: just a handful of essentials create the iconic flavor, chewy bite, and burnished color that sets artisan bread apart. Don’t be tempted to skip or substitute—each piece of the puzzle has a role to play in turning out a truly spectacular loaf.
- All-purpose or bread flour: The foundation of structure and stretch, allowing the crumb to develop those swoon-worthy holes.
- Salt: Not just a flavor booster, but also a key player in controlling yeast activity for a perfect rise.
- Instant yeast: This shortcut gives you big lift with minimal effort—no need to proof, just whisk it right in.
- Warm water (about 110°F/43°C): Encourages gentle fermentation, which is essential for flavor and texture.
- Extra flour or cornmeal for dusting: Ensures your masterpiece releases cleanly and develops a rustic, bakery-worthy crust.
How to Make Artisan Bread
Step 1: Mix the Dough
In a large mixing bowl, whisk together your flour, salt, and instant yeast, making sure everything is evenly distributed. Pour in the warm water and stir with a wooden spoon or your hand until you have a loose, sticky dough that looks messy but promising. Don’t worry about perfection—this recipe is all about simplicity!
Step 2: Let It Rise (the Beauty of Patience)
Cover the bowl tightly with plastic wrap and place it somewhere at room temperature. Now, let the dough slowly work its magic for 12 to 18 hours. By morning (or evening, if you started later), you’ll see a dough that has at least doubled in size, dotted with bubbles that promise airy, gorgeous artisan bread.
Step 3: Shape the Loaf
Generously flour your countertop and gently tip the dough out. With floured hands, shape it into a ball by folding the edges toward the center, being careful not to deflate those precious air pockets. Set your dough on a piece of parchment paper and loosely cover with a kitchen towel while your oven heats up.
Step 4: Preheat the Dutch Oven
About 30 minutes before baking, place a Dutch oven (with its lid) into your oven and preheat to 450°F (230°C). This will mimic the blistering heat of a professional bakery, crucial for that shatteringly crisp crust.
Step 5: Bake to Perfection
Carefully lift the parchment with the dough and place it straight into the blazing hot Dutch oven. Cover with the lid and bake for 30 minutes—this traps steam, allowing the bread to rise dramatically. Afterward, remove the lid and keep baking for another 10–15 minutes until the crust is deeply golden and irresistible. Let it cool on a wire rack for just long enough to keep you from burning your fingers!
How to Serve Artisan Bread
Garnishes
Dress your artisan bread with a glistening brush of olive oil, a scattering of flaky sea salt, or a sprinkle of fresh rosemary just before serving. For an elegant twist, a light dusting of finely grated Parmesan offers both aroma and indulgence.
Side Dishes
This bread is made for sharing at the center of the table. Serve generous slices with creamy garlic soup, nestle beside a vibrant salad, or pair with a rich stew—the chewy crumb soaks up every drop.
Creative Ways to Present
Let your artisan bread shine as a rustic bread board centerpiece, surrounded by soft cheeses, cured meats, and marinated veggies. Or transform thick slices into luxurious toast, loaded with smashed avocado, ricotta, or jam for breakfast bliss.
Make Ahead and Storage
Storing Leftovers
To keep that artisan bread texture at its best, wrap any leftover loaf in a clean kitchen towel and store it at room temperature. This preserves the crusty exterior better than sealing in plastic. Enjoy within two days for maximum flavor and freshness.
Freezing
For longer storage, slice the bread once it’s cooled, then freeze the pieces in a zip-top bag. This lets you pull out just what you need for toast on busy mornings, with no fear of soggy crusts.
Reheating
Refresh your artisan bread by popping slices into a 350°F (175°C) oven for 5–7 minutes, or warming briefly in the toaster. A quick mist of water before reheating can help restore that glorious bakery crunch.
FAQs
Can I use active dry yeast instead of instant yeast?
Absolutely! Simply dissolve an equal amount of active dry yeast in the warm water and let it sit for 5–10 minutes until foamy before combining with the flour and salt.
What if I don’t have a Dutch oven?
No Dutch oven? No problem! Use any heavy, oven-safe pot with a lid, or even a cast iron skillet—just make sure it’s large enough to allow the bread to rise without touching the sides.
Why does my dough look so sticky?
Sticky dough is actually a good sign in artisan bread baking—it means plenty of hydration for a light, airy crumb. Flour your hands and surface well, and embrace a bit of mess for amazing results.
Can I add mix-ins like cheese, herbs, or nuts?
Absolutely! Fold in your favorite shredded cheese, chopped herbs, roasted garlic, or toasted seeds right after the first mix. These additions make each loaf truly your own.
How do I know when my bread is fully baked?
Your loaf should sound hollow when tapped on the bottom and look deeply golden. For precision, an internal temperature of about 200°F (93°C) signals perfection.
Final Thoughts
If you’ve ever dreamed of baking a loaf that rivals your favorite bakery, this artisan bread is your ticket. Give it a try, share it with your people, and savor every golden, crackly bite—there’s nothing quite as satisfying as homemade!
Print
Artisan Bread Recipe
- Total Time: 13 hours (including resting time)
- Yield: 1 loaf 1x
- Diet: Vegan
Description
Learn how to make a delicious artisan bread with a crispy crust and soft interior using this simple no-knead recipe. Perfect for any meal or as a snack, this bread is sure to impress with its rustic charm and delightful flavor.
Ingredients
All-Purpose Bread:
- 3 cups all-purpose flour or bread flour
- 1 1/2 teaspoons salt
- 1/2 teaspoon instant yeast
Additional Ingredients:
- 1 1/2 cups warm water (about 110°F/43°C)
- Extra flour or cornmeal for dusting
Instructions
- Mix Dry Ingredients: In a large mixing bowl, whisk together the flour, salt, and instant yeast.
- Add Water: Pour in the warm water and stir until a sticky dough forms.
- Rest Dough: Cover the bowl and let the dough rest for 12-18 hours.
- Preheat Oven: Place a Dutch oven in the oven and preheat to 450°F (230°C).
- Shape Dough: Turn out the dough, shape it into a ball, and let it rest while the oven heats.
- Bake: Transfer the dough to the hot Dutch oven and bake covered for 30 minutes, then uncovered for 10-15 minutes.
- Cool and Serve: Cool the bread on a wire rack before slicing.
Notes
- For added flavor, try incorporating fresh herbs, garlic, or cheese into the dough.
- Store leftover bread wrapped in a towel at room temperature for up to 2 days.
- Prep Time: 10 minutes (plus resting time)
- Cook Time: 45 minutes
- Category: Bread
- Method: Baking
- Cuisine: American, European
Nutrition
- Serving Size: 1 slice (1/12 loaf)
- Calories: 140
- Sugar: 0g
- Sodium: 290mg
- Fat: 0g
- Saturated Fat: 0g
- Unsaturated Fat: 0g
- Trans Fat: 0g
- Carbohydrates: 29g
- Fiber: 1g
- Protein: 4g
- Cholesterol: 0mg


