
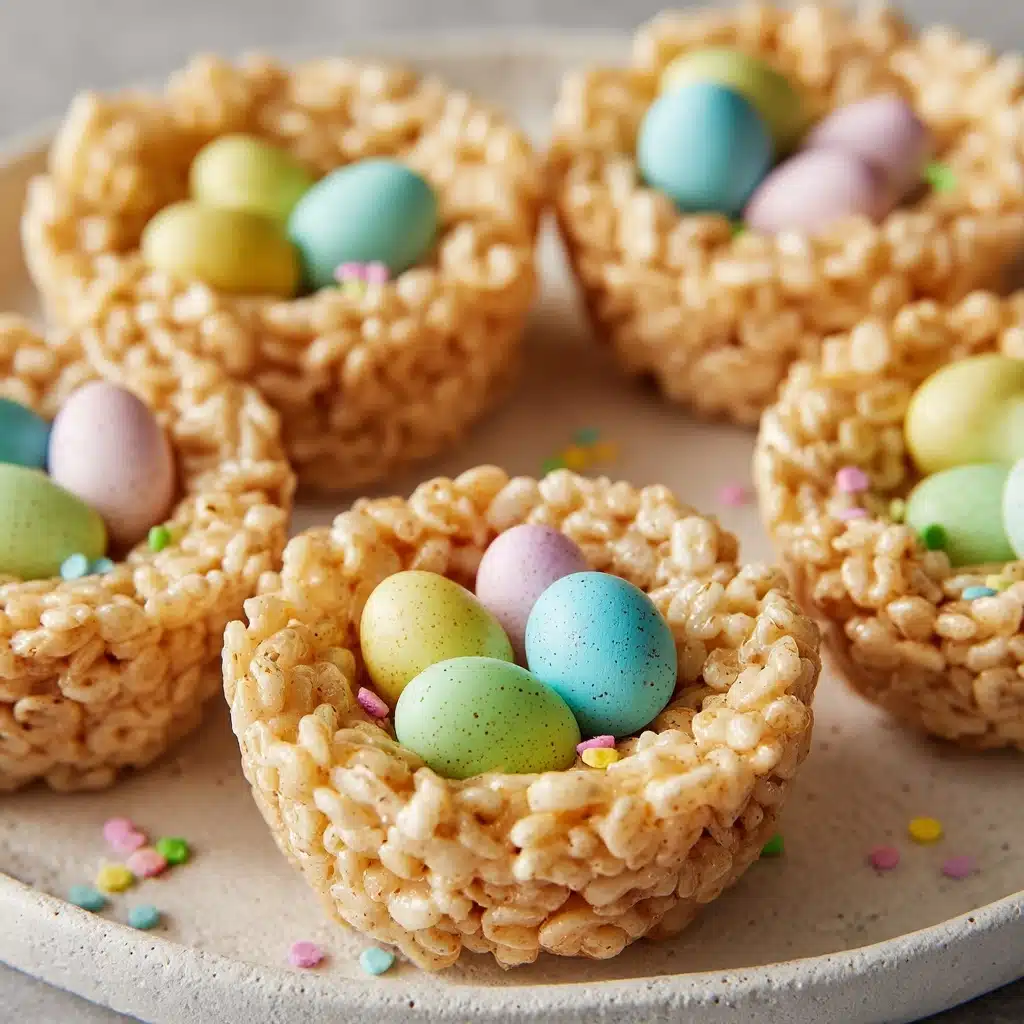
If you’re hunting for a festive treat that’s guaranteed to charm both kids and adults, Easter Rice Krispie & Chocolate Mini Egg Nests might just become your new seasonal favorite. These whimsical little nests are chewy, gooey, and loaded with chocolatey goodness, with a pop of color from adorable mini eggs right on top. They’re impossibly cute on a dessert table and so easy to whip up that you’ll find yourself making them every spring. Best of all, they taste as delightful as they look — perfectly marshmallowy, slightly crispy, and with that magical hit of chocolate that makes everyone smile.
Ingredients You’ll Need
One of the best things about Easter Rice Krispie & Chocolate Mini Egg Nests is just how few ingredients they require. Each component plays its own role — from soft and sticky to crunchy and rich — resulting in an irresistible, colorful spring snack.
- Unsalted Butter: Melting the butter first gives the nests their rich, buttery base and prevents sticking.
- Mini Marshmallows: These are the secret to that gooey, chewy texture everyone adores in classic treats.
- Rice Krispies Cereal: Provides crunch and structure, helping the nests hold their adorable shape.
- Vanilla Extract: Adds a subtle, sweet depth of flavor that makes these treats pop.
- Semi-Sweet Chocolate Chips: Melted down, they become the decadent “nest liner” and hold the eggs in place.
- Mini Chocolate Eggs: A pop of color and a fun Easter vibe — plus, who can resist that candy shell?
How to Make Easter Rice Krispie & Chocolate Mini Egg Nests
Step 1: Melt the Butter and Marshmallows
Start by placing the unsalted butter in a large saucepan over low heat. Once it begins to melt, add in all the mini marshmallows. Stir continually until the marshmallows are completely melted and silky smooth. Keep the heat low and steady so nothing gets scorched — patience is key here for the perfect texture!
Step 2: Stir in Vanilla and Rice Krispies
With the marshmallow mixture smooth and dreamy, remove the pan from heat. Stir in the vanilla extract; it’ll give your Easter Rice Krispie & Chocolate Mini Egg Nests a wonderful aroma. Working quickly, add the Rice Krispies cereal and gently mix until every grain is evenly coated in gooey marshmallow goodness.
Step 3: Shape Your Nests
Let the mixture cool just enough so it’s easy to handle (but not so cool it hardens!). Lightly grease your hands with butter or spray to prevent sticking. Scoop about 1/4 cup of the mixture into each cup of a standard muffin tin. Use your fingers or the back of a spoon to form a nest shape, pressing the center down to create a little crater for the “eggs.”
Step 4: Add Melted Chocolate Centers
Gently melt your semi-sweet chocolate chips (20-second bursts in the microwave, stirring between each, works wonders). Spoon or drizzle about a tablespoon of rich, melted chocolate into the center of each nest, filling the well you made. This not only amps up the flavor but also helps hold the mini eggs in place.
Step 5: Decorate with Mini Eggs
Before the chocolate sets, nestle three or four mini chocolate eggs into the center of each nest. Their vibrant pastel colors make these treats really pop and give them that unmistakable Easter charm.
Step 6: Set and Serve
Let the Easter Rice Krispie & Chocolate Mini Egg Nests set at room temperature for about 30 minutes, or speed things up by popping them in the fridge for 15 minutes. Once firm, carefully lift each nest from the muffin tin using a butter knife. They’re now ready to brighten up your holiday table!
How to Serve Easter Rice Krispie & Chocolate Mini Egg Nests

Garnishes
These nests are already bursting with fun, but a little extra garnish never hurts! Try a sprinkle of powdered sugar for a dewy “morning” effect, or a few shreds of coconut for that authentic nest vibe (bonus points if you dye the coconut green with a drop of food coloring for grassy flair).
Side Dishes
Pair your Easter Rice Krispie & Chocolate Mini Egg Nests with a bowl of fresh spring berries, or a platter of crisp carrot sticks and creamy dip for a whimsical, bunny-inspired snack station. Lemonade, iced tea, or a fruity punch are also lovely drink partners for these sweet treats.
Creative Ways to Present
To really wow your guests, display the nests in mini cupcake liners or place a few on a bed of edible “grass” (like shredded coconut or green-tinted Rice Krispies spread across a platter). For parties, tuck each nest inside a clear cellophane bag and tie with a pastel ribbon for a gorgeous, ready-to-gift treat.
Make Ahead and Storage
Storing Leftovers
Store any leftover Easter Rice Krispie & Chocolate Mini Egg Nests in an airtight container at room temperature. They’ll keep their delightful chew and crunch for up to three days, making them a perfect make-ahead Easter activity or lunchbox treat.
Freezing
If you want to prep far in advance, these nests actually freeze surprisingly well! After they’re completely set, place them in a single layer in a freezer-safe container (separate layers with parchment paper). They’ll stay fresh for up to one month. Thaw at room temp for 30–60 minutes before serving.
Reheating
No need to reheat these, as they’re meant to be enjoyed at room temperature. However, if they’ve been chilled or frozen and you want them extra soft, a super quick (5-10 second) zap in the microwave is all it takes to restore their gooey magic.
FAQs
Can I use regular marshmallows instead of mini marshmallows?
Absolutely! Just use about 40 regular-sized marshmallows to equal one 10-ounce package. Cut them up for easier melting if you’d like; the process and result are the same.
What if I don’t have a muffin tin?
No worries! Simply shape the Rice Krispie mixture into nests using your hands and place them on a lined baking sheet. They may be a bit more rustic but will taste just as wonderful.
Can I make these treats gluten-free?
Yes, just be sure to use a gluten-free crispy rice cereal — most major brands offer a gluten-free version. Double-check your chocolate candies as well, as some may contain traces of gluten.
How do I keep the mixture from sticking to my hands?
Lightly grease your hands with butter or nonstick spray before shaping the nests. This simple trick works wonders and helps you mold the mixture quickly and with less mess.
Can I add extra mix-ins to the nests?
Absolutely! Feel free to stir in shredded coconut, sprinkles, or even a handful of crushed pretzels for some salty crunch. Just keep proportions in mind so the nests hold their shape well.
Final Thoughts
If you’re in the mood to create something bright, playful, and delicious this spring, don’t let Easter pass by without trying these Easter Rice Krispie & Chocolate Mini Egg Nests. They’re quick to make, easy to customize, and sure to be a hit with everyone who takes a bite. Gather your ingredients, invite a friend or two to help, and make memories that are as sweet as these little nests themselves!
Print
Easter Rice Krispie & Chocolate Mini Egg Nests Recipe
- Total Time: 25 minutes
- Yield: 12 nests 1x
- Diet: Vegetarian
Description
These Easter Rice Krispie and Chocolate Mini Egg Nests are a delightful and easy-to-make treat perfect for the holiday season. They are a fun and festive dessert that both kids and adults will enjoy.
Ingredients
Main Ingredients:
- 3 tablespoons unsalted butter
- 1 package (10 ounces) mini marshmallows
- 4 cups Rice Krispies cereal
- 1/2 teaspoon vanilla extract
Additional Ingredients:
- 1 cup semi-sweet chocolate chips, melted
- 1 cup mini chocolate eggs (such as Cadbury Mini Eggs)
Instructions
- Melt Butter and Marshmallows: In a large saucepan over low heat, melt the butter. Add the mini marshmallows and stir constantly until completely melted and smooth.
- Combine Ingredients: Remove from heat and stir in the vanilla extract. Add the Rice Krispies cereal and mix until evenly coated.
- Shape Nests: Let the mixture cool slightly, then grease your hands and press the mixture into muffin tin cups to form nest shapes with an indent in the center of each.
- Add Chocolate and Eggs: Drizzle or spread melted chocolate in the center of each nest. Place mini chocolate eggs in the center of each nest.
- Set and Serve: Let the nests set at room temperature or refrigerate until firm. Carefully remove from the tin and serve.
Notes
- For extra flavor, add shredded coconut to the Rice Krispies mixture before shaping.
- Store nests in an airtight container for up to 3 days.
- Prep Time: 20 minutes
- Cook Time: 5 minutes
- Category: Dessert
- Method: No-Bake
- Cuisine: American
Nutrition
- Serving Size: 1 nest
- Calories: 180
- Sugar: 17g
- Sodium: 90mg
- Fat: 6g
- Saturated Fat: 4g
- Unsaturated Fat: 2g
- Trans Fat: 0g
- Carbohydrates: 30g
- Fiber: 0g
- Protein: 1g
- Cholesterol: 10mg


