
There’s just something magical about Classic Apple Pie—the buttery, flaky crust, the jammy, warmly spiced apples, and that irresistible, golden finish. This beloved dessert is the ultimate comfort food, reminding so many of home, holidays, and special gatherings. Whether you’re sharing it with loved ones around the table or sneaking a leftover slice for breakfast, Classic Apple Pie has a way of making any moment feel like a celebration.
Ingredients You’ll Need
The magic of Classic Apple Pie lies in its simplicity. Each ingredient has a purpose, from the tart apples that give it zest to the perfectly balanced mix of spices that fill your kitchen with mouthwatering aromas.
- Granny Smith or Honeycrisp apples (2 1/2 pounds, about 6 cups, peeled, cored, and thinly sliced): These add just the right amount of tartness and structure, ensuring your pie isn’t overly sweet or mushy.
- Granulated sugar (3/4 cup): Sweetens the apples and helps create that delicious syrupy filling.
- Light brown sugar (1/4 cup, packed): Adds a lovely molasses depth, for a more complex flavor.
- All-purpose flour (2 tablespoons): Thickens the juices so your pie isn’t watery.
- Lemon juice (1 tablespoon): Brightens up the flavors and prevents the apples from browning.
- Ground cinnamon (1 teaspoon): The classic spice that makes apple pie taste like a warm hug.
- Ground nutmeg (1/4 teaspoon): Just enough to give another cozy layer of flavor.
- Salt (1/4 teaspoon): Balances all the sweetness and enhances every bite.
- Unsalted butter (2 tablespoons, cut into small pieces): Melts into the filling, making it rich and glossy.
- Refrigerated pie crusts (1 package, 14 ounces, or homemade double crust): Save time or go from scratch—either way, you’ll get that crave-worthy flaky texture.
- Egg (1, beaten with 1 tablespoon water): The secret to a shiny, golden pie top.
- Coarse sugar (for sprinkling, optional): Adds sparkle and a little crunch to the finished crust.
How to Make Classic Apple Pie
Step 1: Prep the Apples
Start by peeling, coring, and thinly slicing your apples. Time spent here is never wasted—thin slices cook more evenly and give you that perfectly tender filling that’s neither mushy nor crunchy. Pop the slices in a big bowl so you have plenty of room to toss them later.
Step 2: Mix the Filling
In that large mixing bowl with your apples, add both sugars, flour, lemon juice, cinnamon, nutmeg, and salt. Now, don’t be shy—toss everything together until each apple slice is coated in the spiced sugar mixture. This step is where the flavors really start coming together and your kitchen will already start to smell like apples and spice.
Step 3: Prepare the Pie Crust
On a lightly floured surface, roll out one pie crust and carefully fit it into a 9-inch pie dish. Let a bit of the crust hang over the edges—this will make sealing the pie later much easier (and more beautiful).
Step 4: Assemble the Pie
Pile the apple filling into the crust, mounding them higher in the center because they’ll shrink as they bake. Dot the top of the apples with the butter pieces; they’ll melt into the filling and make everything gloriously rich.
Step 5: Top and Seal
Roll out your second crust and lay it gently over the apples. Trim away any excess dough, then fold the edges under and crimp them (use your fingers or a fork for a pretty pattern). Cut 4 to 5 small slits in the top crust to let the steam escape as the pie bakes.
Step 6: Egg Wash and Sugar
Brush the top of your pie with the egg wash for that irresistible, shiny golden finish. Sprinkle over some coarse sugar if you like a little crunch and sparkle.
Step 7: Bake
Heat your oven to 425°F (220°C). Set the pie on a baking sheet to catch drips—no one likes cleaning burnt sugar from the oven! Bake for 45-50 minutes, until your kitchen smells amazing and the crust is beautifully golden. If the edges brown too fast, cover them with foil to keep everything just right.
Step 8: Let It Set
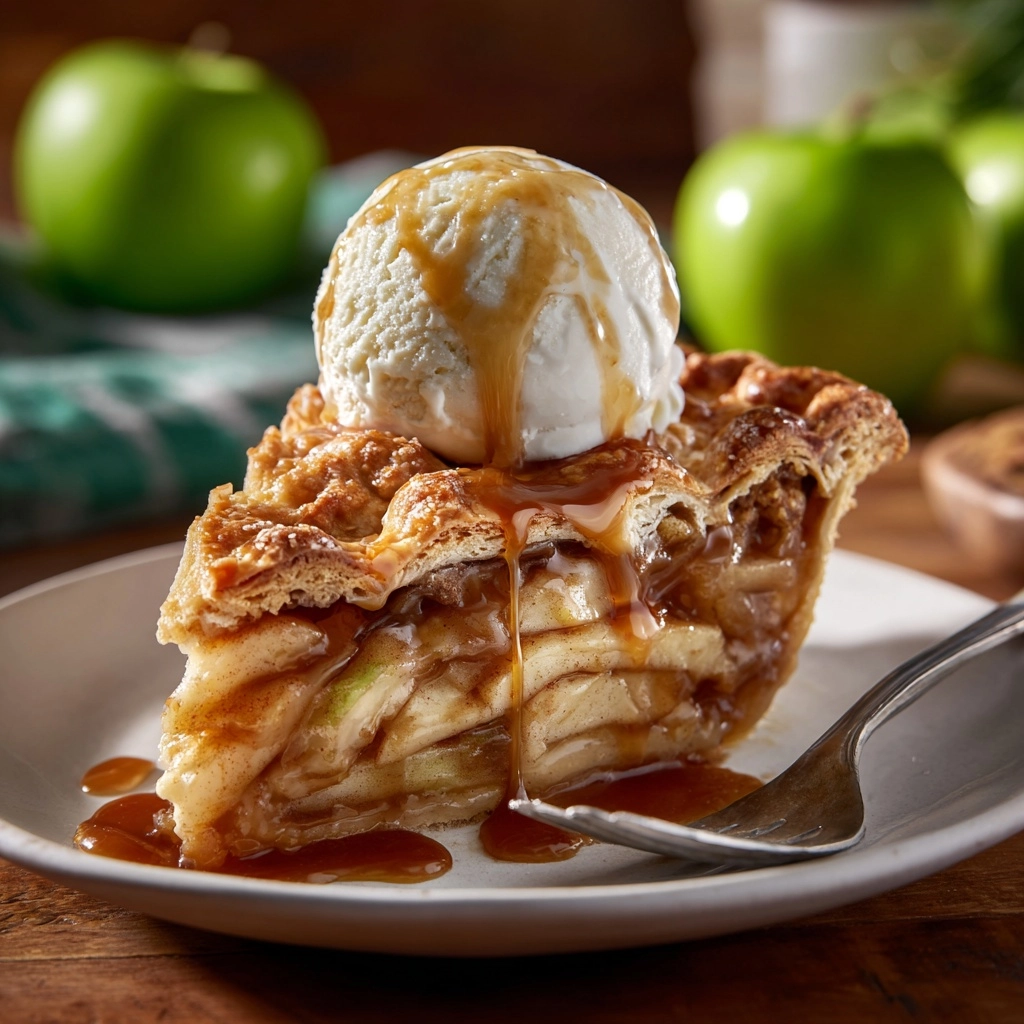
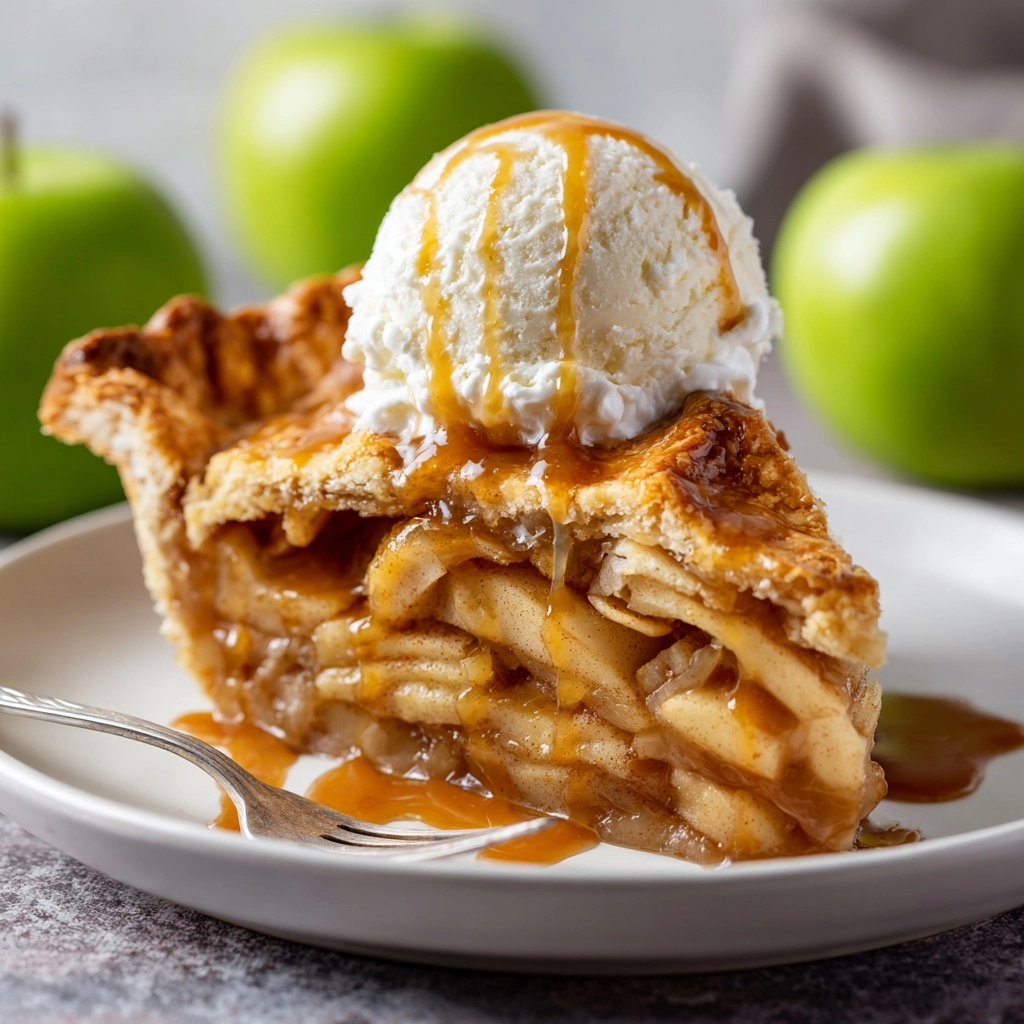
This part is tough, but let your Classic Apple Pie cool for at least 2 hours. The filling needs this time to settle and become sliceable. Serve warm or at room temperature, with a scoop of vanilla ice cream or dollop of whipped cream for the classic experience.
How to Serve Classic Apple Pie
Garnishes
A dollop of freshly whipped cream or a generous scoop of vanilla ice cream is the easiest way to turn Classic Apple Pie into a dreamy dessert. For an extra special touch, dust a little cinnamon or drizzle caramel sauce on top before serving.
Side Dishes
Classic Apple Pie pairs beautifully with a sharp cheddar cheese wedge—a traditional combo for good reason! If you like, serve it alongside coffee, chai, or a warm mug of mulled cider to bring out the pie’s autumn flavors.
Creative Ways to Present
Try baking your Classic Apple Pie filling in individual ramekins for a fun twist, or cut the baked pie into squares for easy sharing at parties and potlucks. You can even serve warm slices with a drizzle of salted caramel or a handful of toasted nuts for extra crunch and flavor.
Make Ahead and Storage
Storing Leftovers
If you find yourself with extra Classic Apple Pie (lucky you!), cover the pie loosely and keep it at room temperature for up to 2 days. Shift it to the refrigerator after that, where it will stay delicious for up to 4 days—just be sure it’s covered well to prevent it from drying out.
Freezing
Classic Apple Pie freezes beautifully! Cool the baked pie completely, then wrap it tightly in plastic wrap and aluminum foil. It will keep in the freezer for up to 3 months. To serve, thaw overnight in the fridge and warm gently in the oven.
Reheating
For the best flavor and texture, reheat leftover slices of Classic Apple Pie in a 300°F (150°C) oven for about 10-15 minutes. This keeps the crust crisp and the filling gooey, just like it came straight out of the oven.
FAQs
Can I use other types of apples?
Absolutely! While Granny Smith and Honeycrisp are favorites for Classic Apple Pie because of their firm texture and tart-sweet flavor balance, you can mix in other varieties like Fuji, Braeburn, or Gala for extra dimension—just aim for apples that hold their shape when baked.
Do I have to make pie crust from scratch?
Nope! Using store-bought refrigerated pie crust keeps things simple without sacrificing that classic flakiness. If you have a homemade crust recipe you love, by all means, use it—classic apple pie shines either way.
How do I prevent a soggy bottom crust?
Baking the pie in the lower third of your oven helps the bottom crust get crisp. You can also sprinkle a bit of flour or breadcrumbs on the bottom crust before adding filling to absorb extra juice. Always be sure to let your pie cool so the filling isn’t too runny.
Can I make Classic Apple Pie ahead of time?
Definitely! Classic Apple Pie is actually even better made ahead, as this allows the flavors to deepen. Bake it the day before and let it cool completely, loosely covered, at room temperature, then reheat before serving for ultimate convenience.
What should I do if the crust edges are browning too quickly?
If you notice the edges turning dark before the pie is done, simply cover them with strips of foil or a pie crust shield partway through baking. This will keep the crust golden without burning while the center finishes baking.
Final Thoughts
There’s honestly nothing more comforting or crowd-pleasing than pulling a Classic Apple Pie from the oven and sharing it with the people you love. Whether it’s your first homemade pie or your hundredth, each slice is a little slice of happiness—so gather your ingredients, preheat that oven, and let’s make some delicious memories!
Print
Classic Apple Pie Recipe
- Total Time: 3 hours
- Yield: 8 servings 1x
- Diet: Vegetarian
Description
Indulge in the comforting flavors of a Classic Apple Pie with its buttery flaky crust and sweet, spiced apple filling. This timeless dessert is perfect for any occasion.
Ingredients
For the Filling:
- 2 1/2 pounds (about 6 cups) Granny Smith or Honeycrisp apples, peeled, cored, and thinly sliced
- 3/4 cup granulated sugar
- 1/4 cup packed light brown sugar
- 2 tablespoons all-purpose flour
- 1 tablespoon lemon juice
- 1 teaspoon ground cinnamon
- 1/4 teaspoon ground nutmeg
- 1/4 teaspoon salt
- 2 tablespoons unsalted butter, cut into small pieces
For the Crust:
- 1 package (14 ounces) refrigerated pie crusts (or homemade double crust)
- 1 egg, beaten with 1 tablespoon water (for egg wash)
- Coarse sugar for sprinkling (optional)
Instructions
- Preheat the Oven: Preheat your oven to 425°F (220°C).
- Prepare the Filling: In a large bowl, combine sliced apples, granulated sugar, brown sugar, flour, lemon juice, cinnamon, nutmeg, and salt. Toss well to coat.
- Assemble the Pie: Roll out one pie crust and fit it into a 9-inch pie dish. Fill the crust with the apple mixture and dot the filling with butter pieces. Place the second crust over the filling, trim excess dough, and crimp the edges to seal.
- Bake: Cut slits in the top crust, brush with egg wash, sprinkle with coarse sugar, and place on a baking sheet. Bake for 45-50 minutes until golden brown and bubbling.
- Cool and Serve: Allow the pie to cool for at least 2 hours before slicing. Serve warm or at room temperature with ice cream or whipped cream.
Notes
- Enhance the flavor with vanilla extract or raisins in the filling.
- Store leftovers covered at room temperature for up to 2 days or refrigerated for up to 4 days.
- Prep Time: 30 minutes
- Cook Time: 50 minutes
- Category: Dessert
- Method: Baking
- Cuisine: American
Nutrition
- Serving Size: 1 slice
- Calories: 380
- Sugar: 28g
- Sodium: 220mg
- Fat: 16g
- Saturated Fat: 7g
- Unsaturated Fat: 8g
- Trans Fat: 0g
- Carbohydrates: 58g
- Fiber: 4g
- Protein: 3g
- Cholesterol: 35mg


