
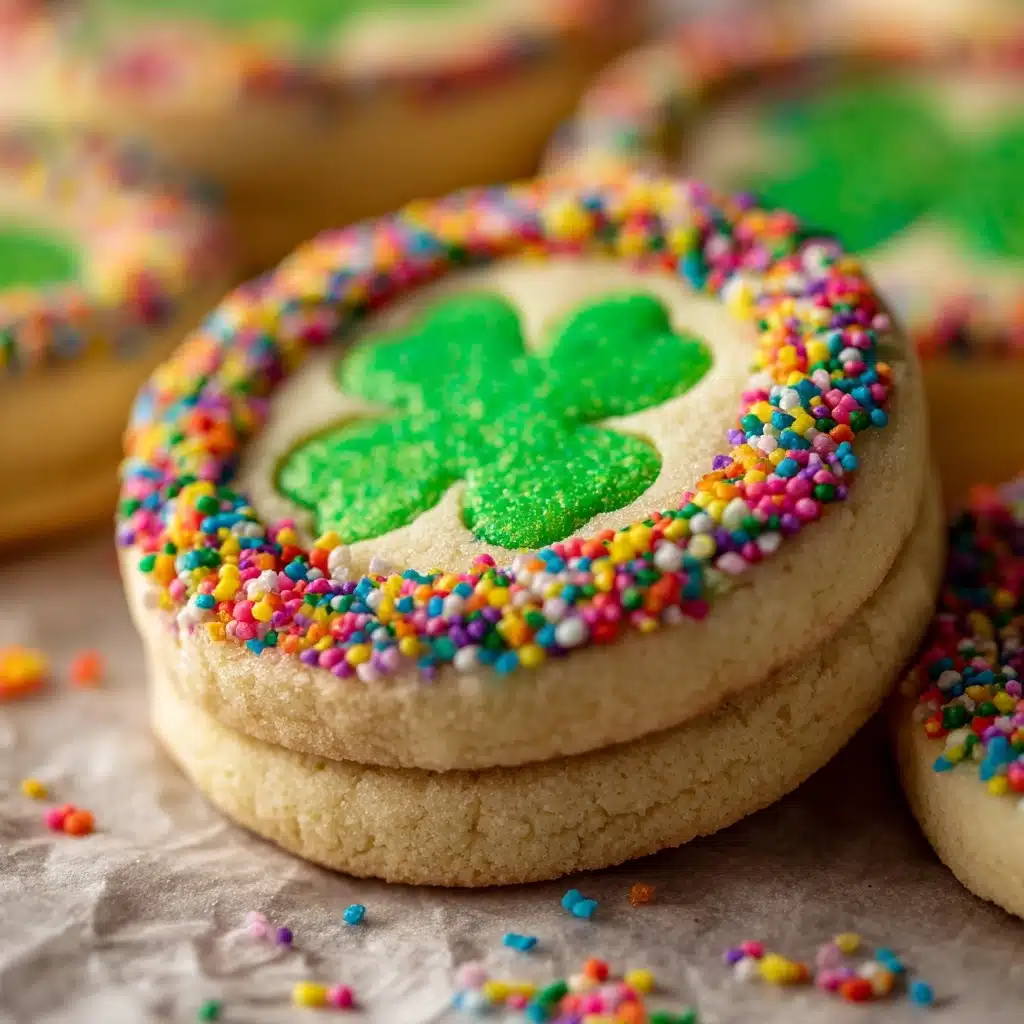
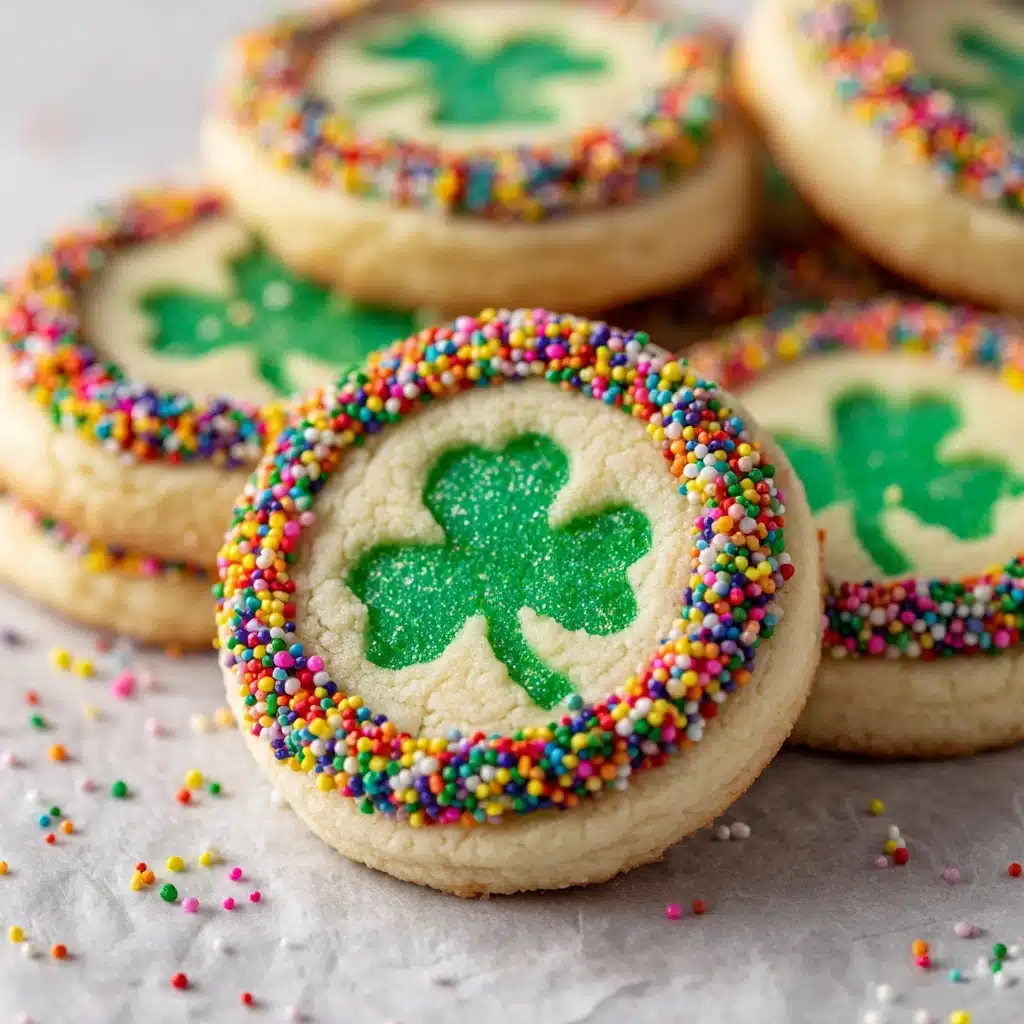
If you’re hunting for the ultimate festive treat, look no further than these Shamrock St cookies! These tender, buttery sugar cookies tinted a lucky shade of green are a must for celebrating St. Patrick’s Day with fun and flavor. Whether you’re making them for a classroom party, an office potluck, or just as a sweet project with kids, Shamrock St delivers on charm and taste in every bite. Deliciously simple to create and absolutely crowd-pleasing, they’re a tradition you’ll want to invite into your kitchen every March!
Ingredients You’ll Need
Every ingredient in Shamrock St is selected with care to guarantee cookies that are as vibrant as they are delicious. With a handful of kitchen basics and a pop of green, you’ll create magic that disappears fast!
- All-purpose flour: Gives these cookies the perfect soft, sturdy structure for cookie cutting and decorating.
- Unsalted butter (softened): The key to melt-in-your-mouth texture and subtle richness in every bite.
- Granulated sugar: Sweetens the dough and encourages that signature light, golden edge.
- Large egg: Acts as a binder, adding tenderness and helping everything hold together as you roll and cut.
- Vanilla extract: Rounds out the cookie’s flavor for a classic, cozy aroma.
- Almond extract (optional): Adds a sophisticated, subtle nutty twist if you’re feeling a little fancy.
- Baking powder: Lightly lifts the cookies so they’re soft with just the right touch of crumb.
- Salt: A tiny pinch wakes up all the flavors and balances the sweetness.
- Green food coloring: The star ingredient for that cheerful Shamrock St finish—adjust to your favorite shade!
- Green sanding sugar or sprinkles: Adds sparkle and crunch; sprinkle over the top for cookie shop-level looks.
How to Make Shamrock St
Step 1: Whisk the Dry Ingredients
Start by combining the all-purpose flour, baking powder, and salt in a medium bowl. Whisk them together so the baking powder and salt are evenly distributed. This simple step helps those festive Shamrock St cookies bake up evenly and gives each bite the perfect crumb.
Step 2: Cream Butter and Sugar
In a large mixing bowl, use a hand or stand mixer to beat the softened butter and granulated sugar until the mixture turns light and fluffy—about 2 to 3 minutes. This whipping action incorporates air, ensuring your cookies are delightfully soft and ready to soak up all that green fun!
Step 3: Mix in Egg & Extracts
Add the large egg, vanilla extract, and a splash of almond extract if you’re using it. Beat on medium speed until fully combined. Both extracts help layer the classic flavors that make Shamrock St cookies so irresistible, while the egg ties everything together for dough that’s a dream to handle.
Step 4: Add the Green Color
Now for the magic: squeeze in a few drops of green food coloring and mix until you see a brilliant, St. Patrick’s Day hue in the dough. You can add an extra drop or two for a bold Shamrock St look, or keep it pastel for a softer vibe.
Step 5: Combine Wet and Dry Ingredients
Gradually add your dry flour mixture to the green wet ingredients, mixing on low until just combined. Be careful not to overmix; this keeps the cookies tender. The dough should be smooth, evenly green, and thick but not sticky.
Step 6: Chill the Dough
Divide the dough in half and shape each piece into a disk. Wrap each disk tightly in plastic wrap and let them chill in the refrigerator for at least an hour. This chilling step keeps your Shamrock St cookies from spreading and gives you crisp, tidy shapes after baking.
Step 7: Roll, Cut, and Decorate
Preheat your oven to 350°F (175°C) and line baking sheets with parchment paper. On a lightly floured surface, roll out one dough disk to about 1/4 inch thickness. Grab your favorite shamrock-shaped cookie cutter and cut out as many cookies as you can, placing them onto the lined sheets. Dust the tops with green sanding sugar or sprinkles for a charming Shamrock St sparkle.
Step 8: Bake and Cool
Bake the cookies for 8 to 10 minutes, just until the edges are barely golden. Let them cool on the baking sheet for five minutes—this helps them firm up—then transfer gently to a wire rack to cool completely. That’s it; your Shamrock St beauties are ready for their moment in the spotlight!
How to Serve Shamrock St
Garnishes
The finishing touch is everything! A drizzle of royal icing or a shower of extra green sanding sugar takes your Shamrock St cookies from lovely to legendary. For extra flair, you can pipe white icing for “veins” on each shamrock leaf or sprinkle edible gold dust for a pot o’ gold sparkle.
Side Dishes
Serve your cookies alongside a mug of Irish cream coffee, a glass of cold milk, or classic hot cocoa. They’re a playful, colorful centerpiece on any dessert tray—or perfect for pairing with fresh fruit and a bowl of vanilla ice cream at your St. Patrick’s Day spread.
Creative Ways to Present
Get festive and arrange Shamrock St cookies in a rainbow circle on a platter, tuck them into treat bags with green ribbon as party favors, or use them as edible place cards for a holiday dinner. Stack a few with ribbon for a cookie “bouquet” centerpiece that everyone will love taking home!
Make Ahead and Storage
Storing Leftovers
Keep your leftover Shamrock St cookies fresh and soft by storing them in an airtight container at room temperature. They’ll stay tasty for up to five days—assuming you can resist them that long!
Freezing
If you want to plan ahead (or save some for next year!), both baked cookies and unbaked dough freeze beautifully. Layer the cooled cookies between sheets of parchment and freeze for up to three months. For dough, wrap tightly and freeze the disks, then thaw in the refrigerator before rolling out and baking fresh Shamrock St for the next big occasion.
Reheating
Need to revive cookies that have been frozen or chilled? A quick 5-second zap in the microwave brings back all their softness, or you can warm them in a 300°F oven for a couple of minutes to refresh the classic Shamrock St cookie texture—just don’t overdo it, or they’ll dry out.
FAQs
Can I use salted butter instead of unsalted?
Absolutely! If you only have salted butter on hand, go for it—just reduce or omit the added salt in the recipe to balance everything out in your Shamrock St cookies.
Do I have to chill the dough?
Chilling is key for the perfect Shamrock St shape. It firms up the dough, making it easier to cut out and prevents the cookies from spreading too much while baking, ensuring sharp edges and a soft, tender bite.
How can I make the cookies gluten-free?
Substitute a cup-for-cup gluten-free flour blend for the all-purpose flour. The cookies will still be delicious and festive, so everyone can enjoy the fun of Shamrock St!
How do I get vibrant green color?
Start with a good quality gel or paste food coloring—these tend to be more vibrant and concentrated than liquid ones. Add a drop at a time until you hit your ideal bright green Shamrock St shade, stirring well after each addition.
Can kids help with this recipe?
Definitely! Kids love mixing in the color and using shamrock-shaped cutters. Decorating Shamrock St cookies is a fun family activity, turning baking into a holiday memory (and mess) everyone will treasure.
Final Thoughts
There’s a certain magic in rolling out a batch of fresh, green, and cheerful Shamrock St cookies. Whether you’re starting a new March tradition or simply adding more fun to your cookie jar, these treats guarantee smiles and sweet moments. Give them a try—and may a little extra luck find you in every bite!
Print
Shamrock St Recipe
- Total Time: 1 hour 30 minutes (including chill time)
- Yield: 24 cookies 1x
- Diet: Vegetarian
Description
These Shamrock St. Patrick’s Day Cookies are a festive treat perfect for celebrating the holiday. A buttery sugar cookie dough is tinted green, cut into shamrock shapes, and adorned with sparkling green sugar. Delightful and delicious!
Ingredients
Dry Ingredients:
- 2 1/2 cups all-purpose flour
- 1/2 teaspoon baking powder
- 1/4 teaspoon salt
Wet Ingredients:
- 1 cup unsalted butter, softened
- 1 cup granulated sugar
- 1 large egg
- 1 teaspoon vanilla extract
- 1/4 teaspoon almond extract (optional)
- Green food coloring
- Green sanding sugar or sprinkles for decoration
Instructions
- Dry Ingredients: In a medium bowl, whisk together the flour, baking powder, and salt.
- Wet Ingredients: In a large bowl, cream the softened butter and sugar together until light and fluffy. Beat in the egg, vanilla extract, and almond extract if using. Add a few drops of green food coloring and mix until the dough reaches your desired shade of green. Gradually add the dry ingredients to the wet ingredients, mixing until just combined.
- Shaping and Baking: Divide the dough in half, shape into disks, and wrap in plastic wrap. Chill for at least 1 hour. Preheat the oven to 350°F (175°C) and line baking sheets with parchment paper. On a lightly floured surface, roll out one disk of dough to about 1/4 inch thick. Use a shamrock-shaped cookie cutter to cut out cookies and place them on the prepared baking sheets. Sprinkle with green sanding sugar or sprinkles if desired. Bake for 8-10 minutes or until the edges are just starting to turn golden. Allow cookies to cool on the baking sheet for 5 minutes before transferring to a wire rack to cool completely.
Notes
- For extra flavor, add a bit of mint extract instead of almond.
- These cookies freeze well for up to 3 months.
- Decorate with royal icing for more detailed designs.
- Prep Time: 20 minutes
- Cook Time: 10 minutes
- Category: Dessert
- Method: Baking
- Cuisine: American
Nutrition
- Serving Size: 1 cookie
- Calories: 140
- Sugar: 9g
- Sodium: 35mg
- Fat: 7g
- Saturated Fat: 4g
- Unsaturated Fat: 2g
- Trans Fat: 0g
- Carbohydrates: 18g
- Fiber: 0g
- Protein: 1g
- Cholesterol: 25mg


