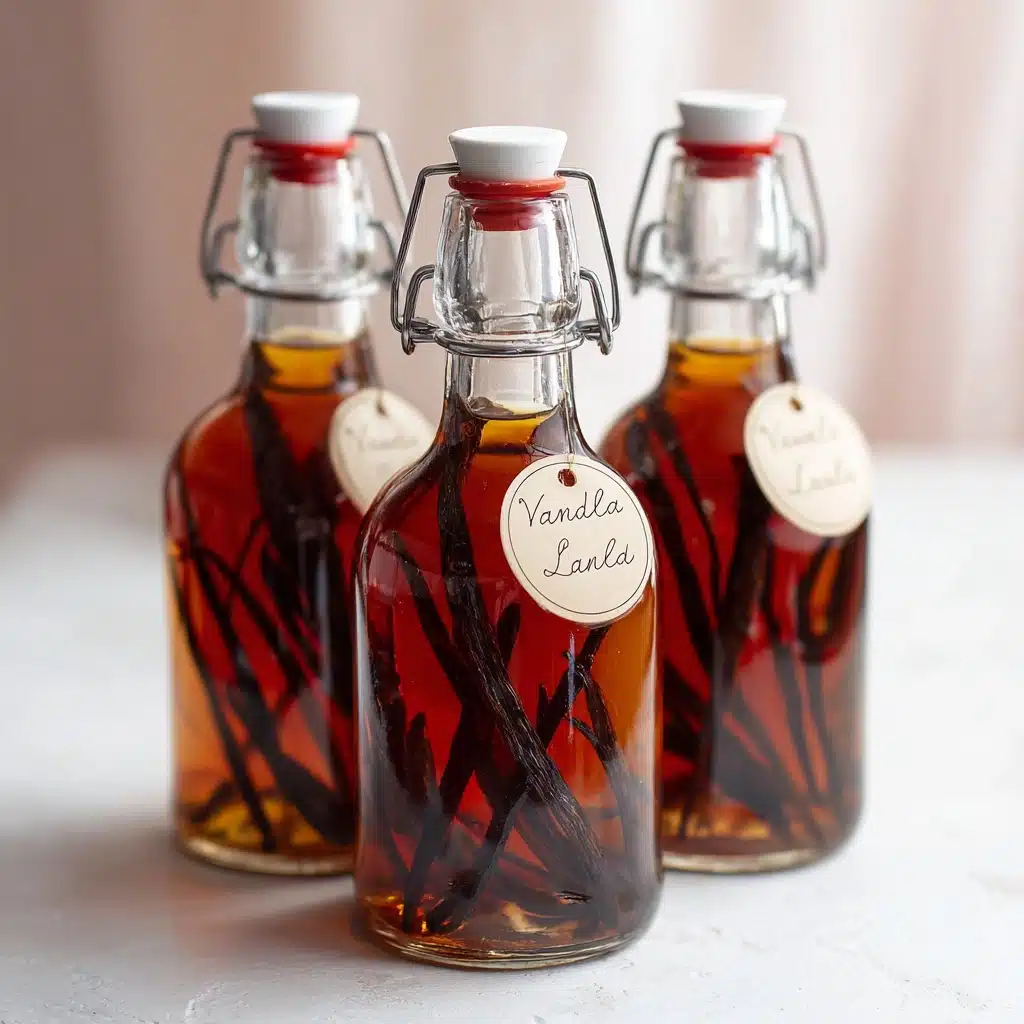
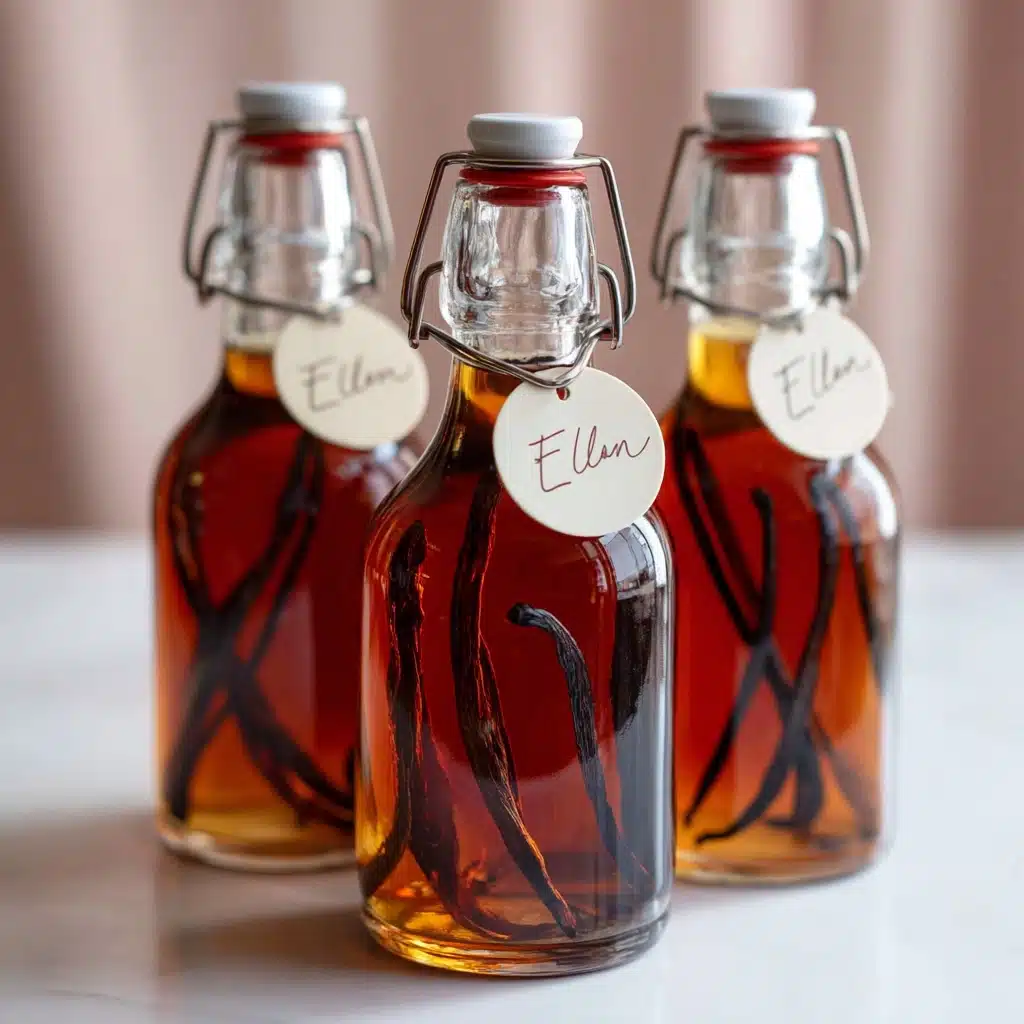
If you’ve never tried Homemade Vanilla Extract, get ready to transform your baking and desserts forever! This simple DIY is proof that something as essential as vanilla extract, usually relegated to the back of the pantry, can become a flavor-packed star all on its own. Infusing rich, aromatic vanilla beans in alcohol creates a depth of flavor that far surpasses anything store-bought. Plus, making your own lets you control the quality, savor the process, and even gift a little bottle of your culinary magic to friends and family.
Ingredients You’ll Need
-
Ingredients:
- 5-6 whole vanilla beans
- 1 cup vodka (or rum or bourbon)
How to Make Homemade Vanilla Extract
Step 1: Prep Your Vanilla Beans
Grab your sharpest paring knife for this job. Place each vanilla bean flat on a cutting board, then slice lengthwise down the center, stopping about an inch from one end so the two halves stay attached. Splitting the beans exposes those incredibly fragrant seeds, which means maximum vanilla goodness infusing into your extract.
Step 2: Fill the Jar
Tuck your split vanilla beans into a clean, dry glass jar or bottle with a tight-fitting lid. The jar size is important: a standard pint jar works well for one cup of alcohol, ensuring your beans are fully submerged and infusing evenly.
Step 3: Add the Alcohol
Carefully pour your chosen alcohol (vodka, rum, or bourbon) over the beans, filling the jar until the beans are completely covered. Alcohol acts as the extracting agent—drawing out every ounce of flavor, color, and aroma while also preserving your Homemade Vanilla Extract for months to come.
Step 4: Seal and Shake
Seal the jar tightly. Give it a hearty shake, making sure the beans move around and release more of their fragrant oils into the mixture. Expect the liquid to take on a golden hue right from the start, deepening as time passes.
Step 5: The Waiting Game
Stash your jar in a cool, dark spot—think pantry or cupboard. Here’s where the magic happens: shake it once a week, marveling at the increasingly rich color and aroma. You can technically taste-test at 8 weeks, though the flavor intensifies the longer you wait. If you’re patient enough, 3 to 6 months rewards you with an exceptionally bold Homemade Vanilla Extract.
Step 6: Strain or Leave as Is
When your extract reaches your desired richness, you can strain out the spent beans if you prefer a totally smooth liquid. Some cooks leave the beans in for ongoing infusing, and add extra alcohol and beans over time for an everlasting stash of flavor.
How to Serve Homemade Vanilla Extract

Garnishes
While garnishes might not be your first thought for extracts, there’s something magical about tucking a spent vanilla bean pod into a gift bottle—the visual cue promises homemade quality before the recipient even opens the cap. Or, slip a vanilla bean half into homemade sugar jars for an elegant touch.
Side Dishes
Think beyond cakes and cookies! Drizzle a few drops of Homemade Vanilla Extract over fresh fruit, yogurt parfaits, or even morning oatmeal. You’ll be amazed at how just a hint enhances both savory and sweet side dishes that deserve a subtle floral lift.
Creative Ways to Present
Homemade Vanilla Extract shines as a homemade gift. Decant your finished extract into small decorative bottles, label with the date and type Condiment. It’s a thoughtful touch for teachers, neighbors, or fellow food-loving friends.
Make Ahead and Storage
Storing Leftovers
Simply store your jar of Homemade Vanilla Extract at room temperature in a cool, dark pantry. The alcohol preserves the extract, so it stays fresh for months—even years. Just be sure the beans are always submerged in liquid to prevent any molding or drying out.
Freezing
Freezing isn’t necessary—or recommended—for vanilla extract. The alcohol content keeps everything shelf-stable, so your Homemade Vanilla Extract is happiest staying at room temperature. Freezing could cloud the liquid or dull its vibrant aroma.
Reheating
No reheating required here! In fact, gentle patience is the only “cooking” your extract needs. If your extract has thickened over time, simply give it a good shake. Warming it in any way isn’t necessary and could even degrade its delicate flavors.
FAQs
Can I use other spirits besides vodka for Homemade Vanilla Extract?
Absolutely! While vodka delivers a pure vanilla taste, dark rum or bourbon add a warm, robust twist. Just make sure to select unflavored spirits with a high enough alcohol content for proper extraction.
What’s the best way to judge when my extract is ready?
You’ll notice the extract darkening over time. For baking, you can technically use it at 8 weeks, but patience pays off—the flavor becomes noticeably more concentrated and nuanced after 3-6 months. When the aroma is bold and inviting, your extract is ready to shine!
Do I need to sterilize the jar or bottle?
It’s always wise to start with a super clean jar to avoid any possible spoilage. Wash it with hot, soapy water, rinse well, and let it dry completely before adding your beans and alcohol.
Can I keep topping off my extract with more vodka and beans?
Yes! You can maintain a perpetual Homemade Vanilla Extract by topping off as you use it. Just remember, flavor may become milder over time if you don’t occasionally swap in fresh vanilla beans.
Is it safe for kids to eat treats made with this extract?
Yes; in baked goods, the alcohol cooks off, leaving behind just the delicious vanilla flavor. For no-bake recipes, keep in mind there will be trace alcohol content—though it’s typically minimal per serving.
Final Thoughts
There’s something truly rewarding about creating Homemade Vanilla Extract from scratch. Each bottle not only saves you money and trips to the store, but it packs your baking with the kind of rich, pure vanilla flavor that just can’t be replicated any other way. Give it a try: your pantry (and future desserts) will thank you!
Print
Homemade Vanilla Extract Recipe
- Total Time: 10 minutes plus 8 weeks steeping time
- Yield: 1 cup 1x
- Diet: Vegetarian
Description
Learn how to make your own homemade vanilla extract using just two simple ingredients. This DIY vanilla extract recipe is easy to follow and results in a rich, flavorful extract that is perfect for baking and as a thoughtful homemade gift.
Ingredients
Ingredients:
- 5–6 whole vanilla beans
- 1 cup vodka (or rum or bourbon)
Instructions
- Prepare the Vanilla Beans: Using a sharp knife, split each vanilla bean lengthwise, leaving about an inch at one end intact so the bean stays connected.
- Infuse the Vanilla: Place the split beans in a clean glass jar or bottle with a tight-fitting lid. Pour the vodka over the beans, ensuring they are completely submerged.
- Steep the Mixture: Seal the jar tightly and shake well. Store in a cool, dark place for at least 8 weeks, shaking it weekly. For optimal flavor, let it infuse for 3-6 months before use.
- Finish and Strain: Once ready, strain out the beans if desired or leave them in for a stronger flavor.
Notes
- Use high-quality vanilla beans for the best results.
- Top off the extract with more vodka and add fresh beans occasionally to maintain the infusion.
- Prep Time: 10 minutes
- Cook Time: 0 minutes
- Category: Condiment
- Method: No-Cook
- Cuisine: American
Nutrition
- Serving Size: 1 teaspoon
- Calories: 12
- Sugar: 0g
- Sodium: 0mg
- Fat: 0g
- Saturated Fat: 0g
- Unsaturated Fat: 0g
- Trans Fat: 0g
- Carbohydrates: 0g
- Fiber: 0g
- Protein: 0g
- Cholesterol: 0mg

