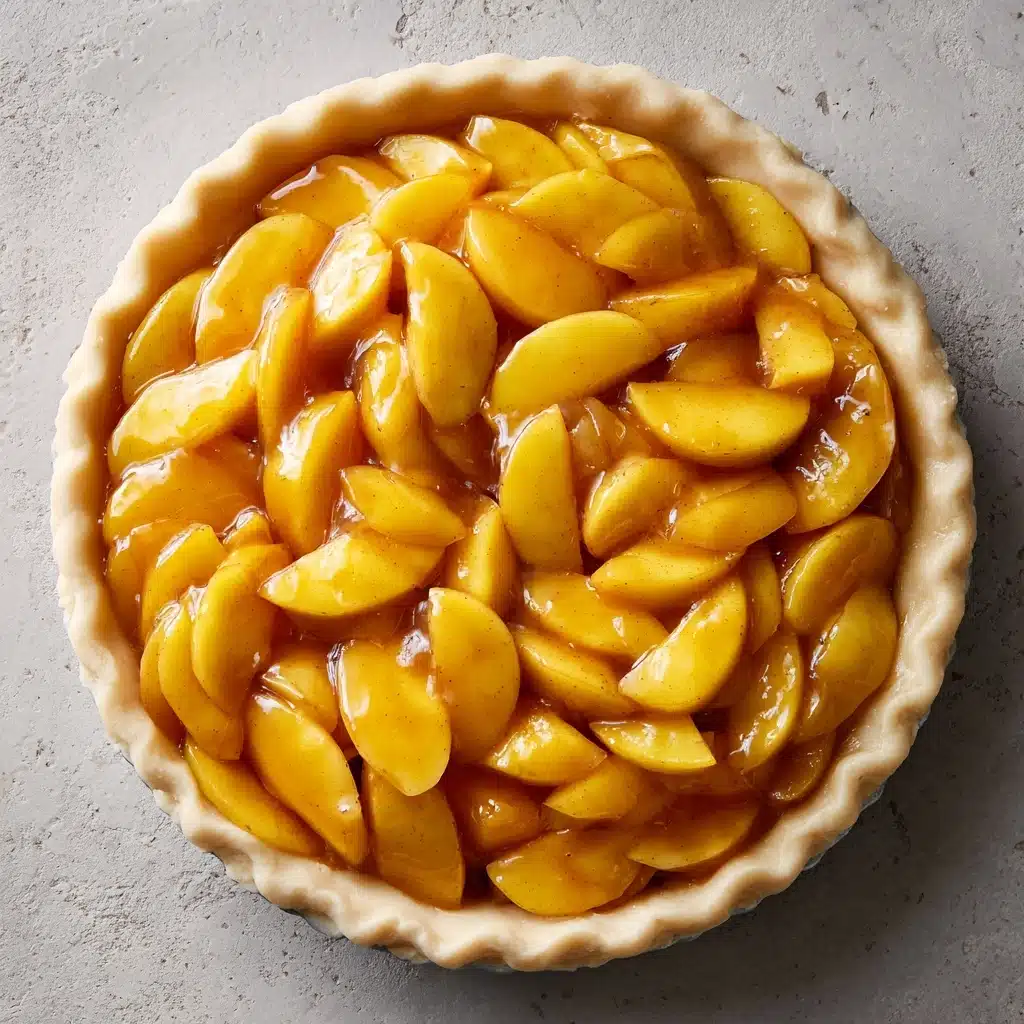
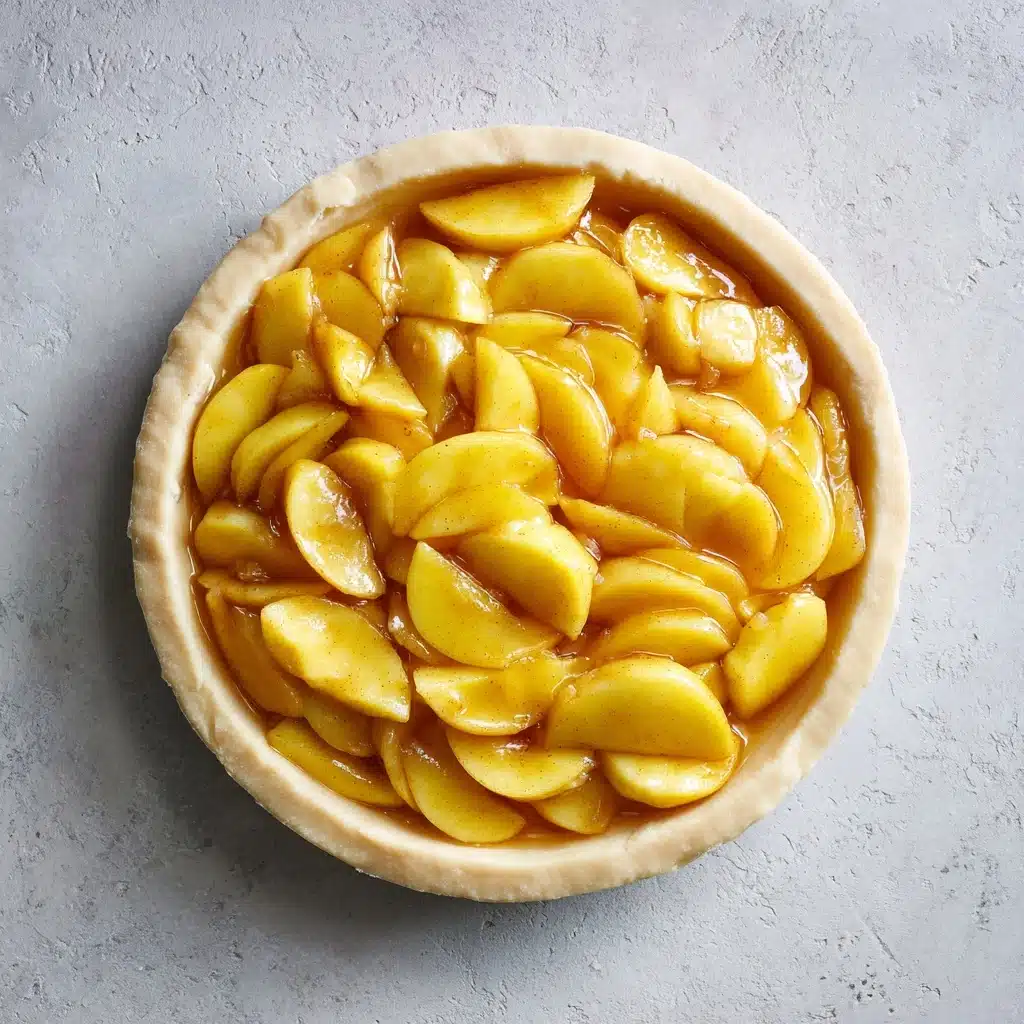
If you’ve ever dreamed of a warm, homemade slice of comfort, Apple Pie Filling is your shortcut to classic, nostalgic goodness. Imagine luscious, perfectly spiced apples nestled in a silky, glossy sauce—ready to transform your favorite pie crust or elevate your morning toast. With this easy stovetop Apple Pie Filling recipe, you can savor the heartwarming flavors of cinnamon, nutmeg, and sweet apples any time of year. Trust me, this batch never lasts long in my kitchen!
Ingredients You’ll Need
These simple yet essential ingredients are the backbone of every great Apple Pie Filling. Each one brings something special, from tangy brightness to cozy spice, creating a filling that’s bursting with homemade flavor and gorgeous color.
- Apples (6 cups, peeled and sliced): Choose a mix of tart Granny Smith and sweet Honeycrisp for irresistible bite and balanced flavor.
- Granulated sugar (3/4 cup): Sweetens the filling perfectly without overpowering the apples’ natural taste.
- Packed light brown sugar (1/4 cup): Adds rich, caramel notes and deepens the color of the sauce.
- Lemon juice (2 tablespoons): Brightens the filling and keeps apples from browning.
- Cornstarch (1/4 cup): Thickens the sauce to that perfect, glossy consistency we all love.
- Ground cinnamon (1 teaspoon): The classic spice that makes Apple Pie Filling so inviting and warm.
- Ground nutmeg (1/4 teaspoon): Adds a subtle, nutty warmth that melds effortlessly with the apples.
- Ground allspice (1/4 teaspoon): Brings a spicy, complex aroma for that extra special “secret ingredient” touch.
- Salt (1/8 teaspoon): Just enough to sharpen all the sweet flavors and make them pop.
- Water (1 cup): Helps everything meld together and creates the base for a smooth sauce.
- Unsalted butter (2 tablespoons): A final swirl of richness that makes the filling utterly luscious.
How to Make Apple Pie Filling
Step 1: Prep and Toss the Apples
The magic begins with prepping your apples. Peel, core, and slice them about 1/4-inch thick for even cooking. In a large bowl, toss the slices with fresh lemon juice—this gives the Apple Pie Filling a delightful hint of tartness and prevents browning. I always find that tossing apples feels like the official start of pie season in my kitchen!
Step 2: Whisk Together the Sweet Sauce
In a medium saucepan over medium heat, whisk the granulated sugar, brown sugar, cornstarch, cinnamon, nutmeg, allspice, salt, and water until the mixture is completely smooth. This base creates that velvety, glossy sauce we all adore. The aroma as it warms up is enough to make anyone’s mouth water!
Step 3: Thicken the Sauce
Keep whisking as the mixture comes to a gentle boil. Continue stirring for about 2 minutes, or until it thickens and takes on a beautiful amber hue. You’re looking for a pudding-like consistency that coats the back of a spoon—this ensures the Apple Pie Filling won’t be runny or watery when you use it in pies or pastries.
Step 4: Cook the Apples to Perfection
Carefully stir the apple slices into the thickened sauce. Lower the heat to medium-low and let the apples cook for around 8 to 10 minutes, stirring often. The goal is to get the apples just tender—soft enough to bite through, but still holding their shape. This balance keeps your Apple Pie Filling stunningly textured and never mushy.
Step 5: Finish with Butter and Cool
Once your apples are perfectly tender, remove the pan from heat and stir in the butter. It will melt right in, making the Apple Pie Filling silky and robust in flavor. Let the filling cool completely before using it in a pie, layering onto desserts, or storing for later. The wait is tough, but so worth it!
How to Serve Apple Pie Filling

Garnishes
Add a little extra flourish to your Apple Pie Filling by finishing with a dusting of powdered sugar, a sprinkle of cinnamon, or even a dollop of freshly whipped cream. For a dazzling touch, try a handful of toasted chopped nuts like pecans or walnuts—the crunch is irresistible!
Side Dishes
This comforting Apple Pie Filling loves to be paired with simple sides. Serve it warm over vanilla ice cream, spooned onto creamy Greek yogurt, or even with a slice of sharp cheddar cheese for a sweet-savory twist. Each combination brings out different, delicious notes in the filling.
Creative Ways to Present
Stretch your creativity by using this Apple Pie Filling as a topping for pancakes or waffles, folded into crêpes, baked into hand pies, or swirled through oatmeal. I even love layering it in parfaits or using it as a filling for turnovers. The options are as limitless as your imagination!
Make Ahead and Storage
Storing Leftovers
Any leftover Apple Pie Filling can be kept in an airtight container in the refrigerator for up to five days. It’s perfect for spontaneous baking projects or quick dessert fixes—trust me, once you have it on hand, you’ll find excuses to use it everywhere.
Freezing
If you want to prep ahead, this filling freezes beautifully. Spoon completely cooled Apple Pie Filling into a freezer-safe container or zip-top bag, press out excess air, and freeze for up to three months. Thaw overnight in the fridge and it’ll be ready to go the next day.
Reheating
To reheat, scoop the Apple Pie Filling into a saucepan and warm gently over low heat, stirring occasionally until it’s soft and bubbling. Alternatively, microwave it in 30-second bursts, stirring between each. It’ll taste fresh and delicious either way, ready to brighten any dessert or breakfast.
FAQs
What apples work best for Apple Pie Filling?
A blend of tart and sweet apples like Granny Smith and Honeycrisp is ideal. The mix adds complexity and ensures you get both a great bite and amazing flavor in every spoonful of Apple Pie Filling.
Can I use this filling for things other than pie?
Absolutely! Apple Pie Filling isn’t just for traditional pies. Try it on pancakes, with oatmeal, stirred into yogurt, or as a quick ice cream topping—it’s delicious wherever you use it.
How do I prevent my filling from becoming too runny?
The cornstarch in this recipe does most of the heavy lifting by thickening the sauce. Just be sure to simmer it until it’s glossy and pudding-like before adding the apples, and don’t skip cooling—it helps set the perfect consistency.
Can I make Apple Pie Filling ahead of time?
Yes! This filling is the ultimate make-ahead treat. Prepare it up to five days in advance and store it in the fridge, or freeze it for holiday baking emergencies. Either way, you’ll be ready when sweet cravings strike.
Is this Apple Pie Filling gluten-free?
Yes, it’s naturally gluten-free since cornstarch is used as the thickener. Check your cornstarch packaging to make sure it isn’t processed in facilities with gluten if cross-contamination is a concern.
Final Thoughts
Homemade Apple Pie Filling brings a dash of comfort and a spoonful of joy to countless desserts, breakfasts, and snacks. Once you see how easy and delicious it is, you’ll never want to buy the canned stuff again. It’s the secret to making every meal feel just a little more special—so grab those apples and get simmering!
Print
Apple Pie Filling Recipe
- Total Time: 27 minutes
- Yield: About 4 cups filling 1x
- Diet: Vegetarian
Description
This homemade apple pie filling is the perfect balance of sweet and tart, with warm spices adding a cozy flavor to any pie. Make it ahead for easy pie-making or use it as a topping for ice cream or pancakes!
Ingredients
For the Filling:
- 6 cups peeled and sliced apples (such as Granny Smith, Honeycrisp, or a mix)
- 3/4 cup granulated sugar
- 1/4 cup packed light brown sugar
- 2 tablespoons lemon juice
- 1/4 cup cornstarch
- 1 teaspoon ground cinnamon
- 1/4 teaspoon ground nutmeg
- 1/4 teaspoon ground allspice
- 1/8 teaspoon salt
- 1 cup water
- 2 tablespoons unsalted butter
Instructions
- Toss Apples: In a large bowl, toss the sliced apples with lemon juice to prevent browning.
- Make Filling: In a saucepan, whisk sugars, cornstarch, spices, salt, and water until smooth. Boil, then simmer until thick.
- Cook Apples: Add apples, cook until tender but not mushy. Stir in butter until melted.
- Cool: Let filling cool completely before using or storing.
Notes
- This filling can be made ahead and stored in the refrigerator for up to 5 days or frozen for up to 3 months.
- Thaw in the fridge before using.
- Prep Time: 15 minutes
- Cook Time: 12 minutes
- Category: Dessert
- Method: Stovetop
- Cuisine: American
Nutrition
- Serving Size: 1/2 cup
- Calories: 120
- Sugar: 24g
- Sodium: 20mg
- Fat: 2g
- Saturated Fat: 1g
- Unsaturated Fat: 1g
- Trans Fat: 0g
- Carbohydrates: 30g
- Fiber: 3g
- Protein: 0g
- Cholesterol: 5mg


