
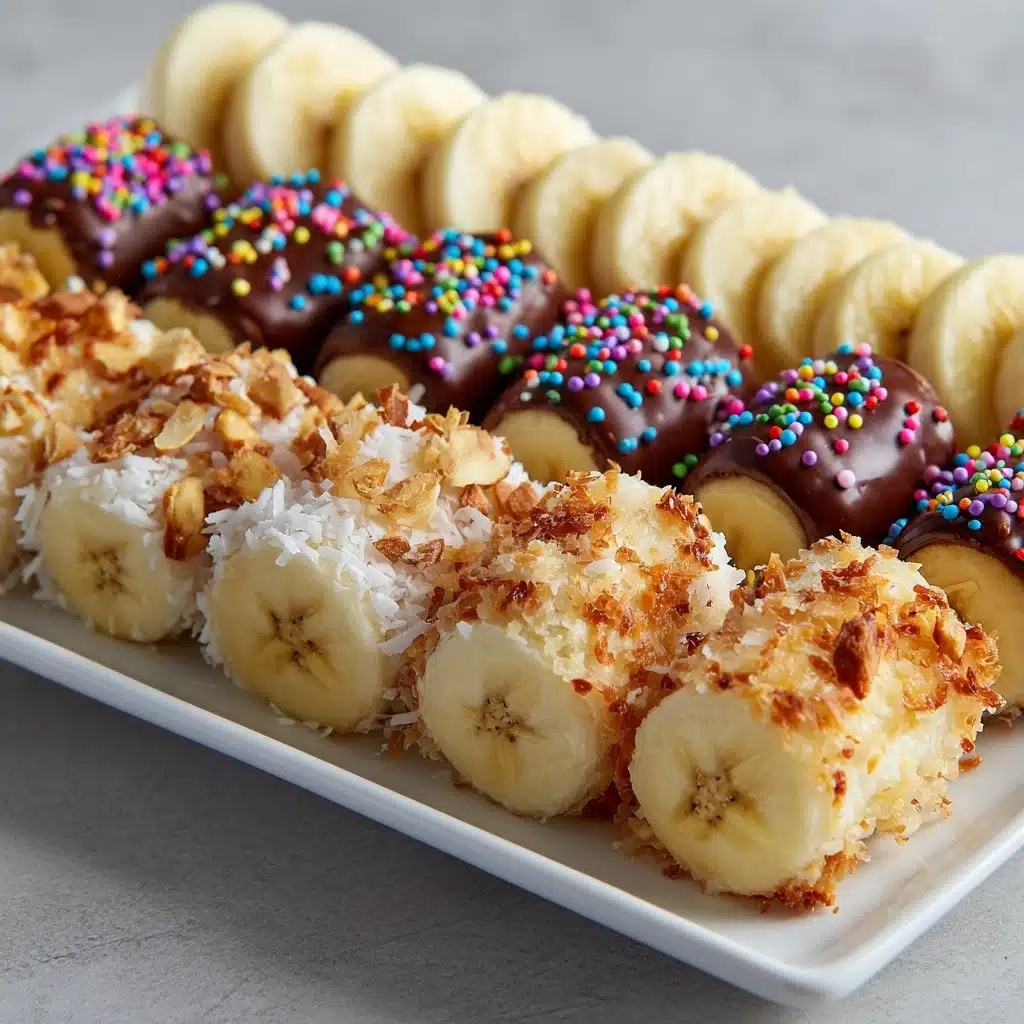
Say hello to your new favorite playful snack: the Banana Sushi Recipe! Whether you’re a parent looking for a fun way to get fruit into your kiddos or you just love a no-fuss, sweet treat, this dish delivers in the tastiest way possible. Think creamy nut butter, a sprinkle of crunch, and that irresistible banana base, all sliced up to look just like little sushi rounds. It’s a bright, cheerful option for breakfast or snack time and always feels just a little bit special—no rolling mat required!
Ingredients You’ll Need
-
Ripe Bananas:
- 2 ripe bananas
Peanut Butter or Almond Butter:
- 2 tbsp
Nutella or Chocolate Spread (optional):
- 2 tbsp
Granola or Crushed Cereal:
- 1/4 cup
Mini Chocolate Chips:
- 2 tbsp
Shredded Coconut (optional):
- 1 tbsp
Whole Wheat or Regular Tortilla (optional, for wrap variation):
- 1
How to Make Banana Sushi Recipe
Step 1: Prep Your Bananas
Gently peel the bananas and place them on a flat plate or cutting board. If you want your Banana Sushi Recipe to look especially neat when cut, trim off any overly curved ends so the banana sits flat.
Step 2: Add the Spread
Using a butter knife or spoon, generously spread peanut butter or almond butter all over each banana. If you’re feeling decadent, add a layer of Nutella or chocolate spread right on top of the nut butter. Make sure every bit gets a nice, even coating—this sticky layer helps the toppings adhere and adds loads of flavor.
Step 3: Roll in Toppings
Pour your granola, crushed cereal, mini chocolate chips, and shredded coconut (if using) onto a wide plate. Gently roll your coated banana in the mixture, pressing lightly so the toppings stick to the outside. Go back in with your fingers to patch up any bare spots—you want maximum coverage!
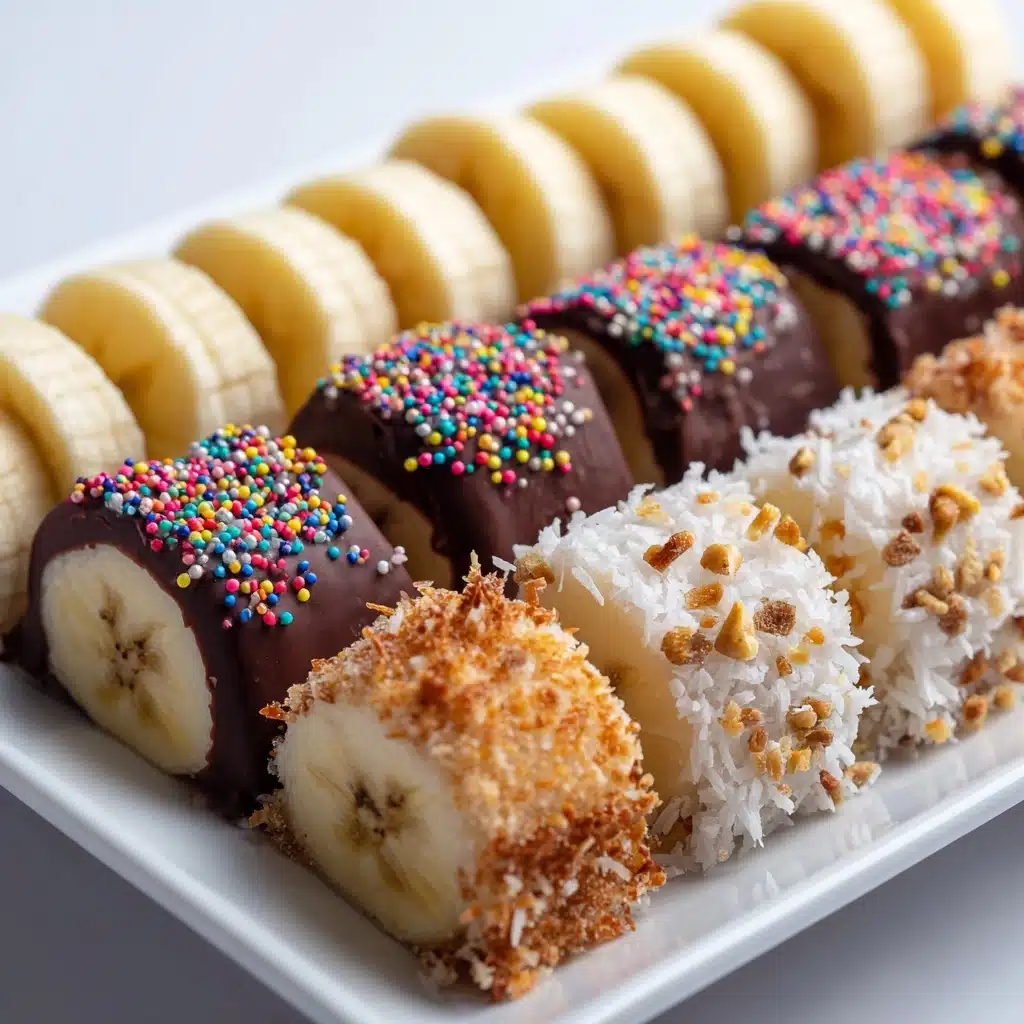
Step 4: Slice Into “Sushi”
Carefully slice each coated banana crosswise into rounds about 1/2 inch thick. For a classic Banana Sushi Recipe look, keep your knife clean between cuts for neat slices. If you opted for the tortilla variation, roll your coated banana tightly inside the tortilla, then slice into rounds just like a sushi roll.
Step 5: Serve or Chill
Arrange your finished banana sushi pieces on a plate. They’re fantastic fresh, but if you prefer a slightly firmer texture or want to prep ahead, pop them in the fridge for 10–15 minutes before serving.
How to Serve Banana Sushi Recipe
Garnishes
A little extra flair goes a long way! A sprinkle of chia seeds, an extra dusting of coconut, or even a drizzle of melted chocolate over the top gives your Banana Sushi Recipe some party pizzazz. Mint leaves or a tiny touch of cinnamon can also add color and a burst of aroma.
Side Dishes
Pair this snack roll with a small yogurt parfait, a handful of berries, or a cup of iced green tea for a truly refreshing breakfast or snack platter. It also works wonders alongside a smoothie for a power-packed start to your day.
Creative Ways to Present
Have some fun and serve Banana Sushi Recipe on a wooden board with chopsticks for a full “sushi experience.” Want more variety? Offer a build-your-own banana sushi bar at parties, letting everyone choose their favorite spreads and toppings. Kids love it, and adults secretly do too!
Make Ahead and Storage
Storing Leftovers
If you’ve got extras (though honestly, they tend to disappear fast!), pop them in an airtight container in the fridge. They’re best eaten within a day, as the granola and cereal toppings can soften over time.
Freezing
While the Banana Sushi Recipe is usually best fresh, you can freeze the finished rounds on a baking sheet, then transfer to a freezer bag for up to 1 month. The texture will be firmer once thawed—a fun frosty twist, especially in summer!
Reheating
This recipe is no-cook, so there’s no need to reheat. If serving after refrigeration or freezing, let the slices sit at room temperature for a few minutes to soften and bring out their best flavors.
FAQs
Can I make this Banana Sushi Recipe nut-free?
Absolutely! Swap the peanut or almond butter for sunflower seed butter or soy nut butter. They taste great and stick the toppings just as well.
How can I keep the bananas from browning?
If you’re prepping in advance, lightly brush the banana slices with a bit of lemon juice before assembly. Serve soon after slicing for the freshest look and taste.
Which granola or cereal works best for this recipe?
Any granola or crunchy cereal you love will work nicely. Look for ones that aren’t too clumpy, so they coat the banana evenly, or try rice crisps for extra lightness!
Can I prepare Banana Sushi Recipe ahead for kids’ lunches?
Yes! Just assemble, pack tightly in a lunch container, and pop in an ice pack to keep them cool. Using a tortilla wrap helps hold everything together in a lunchbox.
Are there fun variations to try?
Let your creativity run wild! Add fresh berries, swap in white chocolate chips, or even try a drizzle of caramel for a decadent touch. The Banana Sushi Recipe is endlessly customizable.
Final Thoughts
If you’re searching for a snack that’s equal parts nourishing, easy, and fun, you simply have to give this Banana Sushi Recipe a try. It’s one of those playful treats that brings a smile to everyone’s face, whether you’re serving toddlers or adults. Grab those bananas and get rolling—happy snacking!
Print
Banana Sushi Recipe
- Total Time: 10 minutes
- Yield: 2 servings 1x
- Diet: Vegetarian
Description
This Banana Sushi recipe is a fun and healthy snack or breakfast option that kids and adults will love. It’s easy to customize and requires no cooking, making it a quick and delicious choice for any time of day.
Ingredients
Ripe Bananas:
- 2 ripe bananas
Peanut Butter or Almond Butter:
- 2 tbsp
Nutella or Chocolate Spread (optional):
- 2 tbsp
Granola or Crushed Cereal:
- 1/4 cup
Mini Chocolate Chips:
- 2 tbsp
Shredded Coconut (optional):
- 1 tbsp
Whole Wheat or Regular Tortilla (optional, for wrap variation):
- 1
Instructions
- Peel and Prep: Peel the bananas and place them on a plate or cutting board.
- Spread Nut Butter: Spread peanut butter evenly over the surface of each banana. Add Nutella or chocolate spread if desired.
- Coat and Slice: Roll the bananas in granola, chocolate chips, and coconut. Slice each banana crosswise into bite-sized pieces.
- Wrap Variation: If using a tortilla, spread nut butter, place the banana inside, roll tightly, and slice into rounds.
- Serve: Serve immediately or chill briefly before enjoying.
Notes
- This recipe is easy to customize—try using sunflower seed butter for a nut-free version or sprinkle chia seeds for added nutrition.
- Best enjoyed fresh for optimal crunch.
- Prep Time: 10 minutes
- Cook Time: 0 minutes
- Category: Snack, Breakfast
- Method: No-Cook
- Cuisine: American
Nutrition
- Serving Size: ½ banana (about 6 pieces)
- Calories: 210
- Sugar: 12 g
- Sodium: 65 mg
- Fat: 11 g
- Saturated Fat: 3 g
- Unsaturated Fat: 6 g
- Trans Fat: 0 g
- Carbohydrates: 25 g
- Fiber: 3 g
- Protein: 4 g
- Cholesterol: 0 mg
