
If you are craving a dessert that is creamy, crunchy, and packed with irresistible peanut butter and chocolatey Butterfinger goodness, you have to try this Butterfinger Peanut Butter Pie Recipe. This pie is the perfect marriage of smooth peanut butter filling, a buttery graham cracker crust, and chunks of crunchy Butterfinger candy bars that add just the right amount of texture. Every bite is like a little slice of heaven that makes any gathering or cozy night in feel extra special. Trust me, once you dive into this luscious pie, it will quickly become your go-to dessert for celebrations or just because moments.

Ingredients You’ll Need
This Butterfinger Peanut Butter Pie Recipe calls for a handful of simple yet essential ingredients that come together beautifully to create a rich, smooth, and crunchy treat. Each item has a job to do—from the buttery crust to the creamy filling and finally, the candy bits that provide sweetness and snap.
- Graham Cracker Crumbs (2 cups): This forms a crunchy, buttery base that perfectly supports the creamy filling.
- Unsalted Butter (1/2 cup or 1 stick, melted): Binds the crust crumbs together and adds richness.
- Creamy Peanut Butter (1 cup): The star of the show, delivering that classic peanut butter flavor and smooth texture.
- Cream Cheese (8 oz, softened): Adds tang and a silky creaminess to balance the sweetness.
- Powdered Sugar (1 cup): Sweetens the filling without any grainy texture.
- Vanilla Extract (1 tsp): Enhances the flavors and brings depth.
- Whipped Topping (8 oz, thawed): Lightens the filling, making it fluffy and airy.
- Butterfinger Candy Bars (4 bars, 2.1 oz each, crushed): Added inside the filling and sprinkled on top for that signature crunch and chocolate-peanut punch.
How to Make Butterfinger Peanut Butter Pie Recipe
Step 1: Prepare the Crust
Start by mixing the graham cracker crumbs with melted butter until everything is evenly coated and holds together. Press this mixture firmly into the bottom and sides of a 9-inch pie dish. This forms a sturdy and buttery foundation, giving a crisp contrast to the creamy filling. Pop the crust into the refrigerator while you prepare the luscious filling so it sets nicely.
Step 2: Make the Filling Base
Next, take your softened cream cheese and creamy peanut butter, then beat them together until completely smooth and combined. This step ensures that the filling will be silky with no lumps, making every bite melt in your mouth. The cream cheese adds a subtle tang that keeps the peanut butter from being overwhelmingly sweet.
Step 3: Sweeten and Flavor
Add the powdered sugar and vanilla extract to your peanut butter and cream cheese mixture. Beat everything well until it’s smooth and creamy. The powdered sugar sweetens the filling without any gritty texture, while the vanilla pulls all the flavors together beautifully.
Step 4: Fold in the Whipped Topping
Now, gently fold the thawed whipped topping into your peanut butter mixture. Folding carefully keeps the filling light and fluffy instead of dense. This airy texture is key to a perfect Butterfinger Peanut Butter Pie Recipe because it balances the richness of peanut butter and cream cheese.
Step 5: Add Butterfinger Candy Pieces
Crush three out of the four Butterfinger bars into small chunks and fold them into the filling. These crunchy candy bits bring delightful texture and that iconic chocolatey peanut butter flavor in every bite. Save one Butterfinger bar to top the pie for a stunning finishing touch.
Step 6: Assemble the Pie
Pour the creamy filling into the chilled graham cracker crust. Use a spatula to smooth out the top evenly. This will give you a clean and attractive pie surface to garnish with the final candy pieces.
Step 7: Add the Topping
Crush the remaining Butterfinger bar and sprinkle the pieces evenly over the top of the pie. The candy on top adds a beautiful crunchy contrast and makes the pie look incredibly tempting.
Step 8: Chill to Set
Refrigerate your pie for at least 4 hours or even overnight if possible. This chilling time helps the filling firm up perfectly, so when you slice into it, the texture stays creamy and luscious without being runny.
Step 9: Serve and Enjoy
When ready to serve, slice your pie carefully. For the cleanest slices, dip your knife in hot water and wipe it dry between each cut. This keeps the slices neat and showcases your delicious Butterfinger Peanut Butter Pie Recipe beautifully to guests or family.
How to Serve Butterfinger Peanut Butter Pie Recipe

Garnishes
This pie practically dresses itself up with those crushed Butterfinger pieces on top, but you can elevate it further with a few thoughtfully chosen garnishes. Try a dollop of extra whipped cream, a drizzle of chocolate syrup, or some chopped roasted peanuts for crunch and an appealing contrast. A sprinkle of cocoa powder dusted lightly over the top can also add a touch of elegance.
Side Dishes
Since Butterfinger Peanut Butter Pie Recipe is rich and indulgent, pair it with something light and fresh. A crisp bowl of mixed berries or a simple fruit salad gives a juicy counterpoint that balances the pie’s sweetness. A cup of freshly brewed coffee or a rich dark roast tea also complements the deep peanut butter flavors perfectly.
Creative Ways to Present
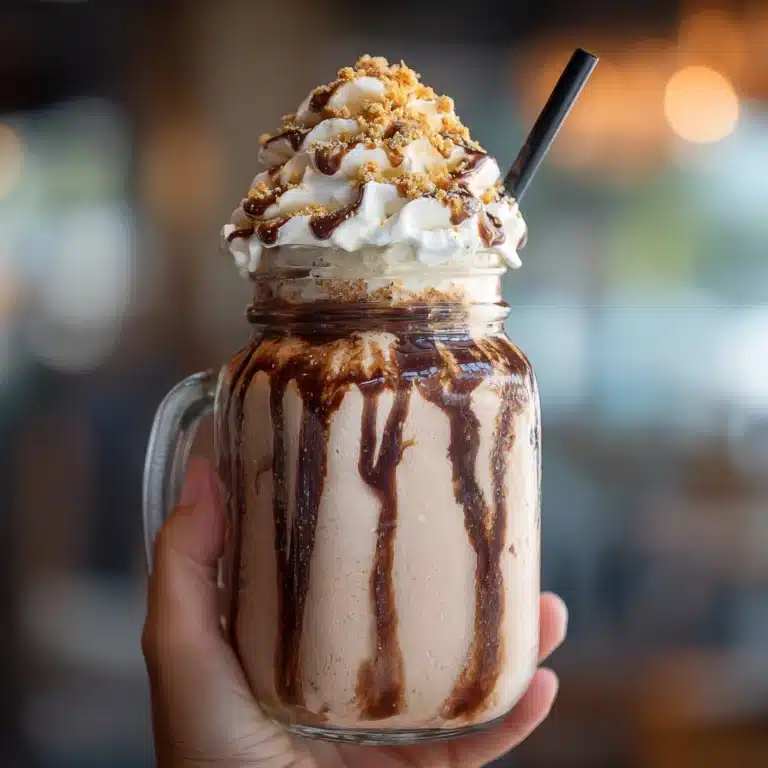
You can get playful with presentation to impress your guests. Serve pie slices in clear dessert plates to showcase the layers and textures. For a party, offer mini versions in individual glass jars topped with mini Butterfinger bits for a cute and convenient treat. Adding edible gold leaf or chocolate curls on top can make it look extra festive for special occasions.
Make Ahead and Storage
Storing Leftovers
This pie keeps wonderfully in the fridge for up to 3-4 days. Store any leftovers in an airtight container or cover the pie tightly with plastic wrap to prevent it from absorbing other fridge odors. The flavors actually deepen as it sits, so it tastes great even the next day.
Freezing
Butterfinger Peanut Butter Pie Recipe can be frozen for longer storage. Wrap the pie (or individual slices) tightly in plastic wrap and then foil to protect against freezer burn. Freeze up to 2 months for best quality. When ready to eat, thaw overnight in the refrigerator for optimal texture.
Reheating
This pie is best enjoyed chilled, so no need to reheat. Simply allow slices to come to room temperature for 15-20 minutes if they feel too firm straight from the fridge. This way, you’ll enjoy the creamy, luscious filling at its best.
FAQs
Can I use crunchy peanut butter instead of creamy?
Yes, you can! Using crunchy peanut butter will add even more texture to your pie, giving it a delightful nutty crunch in every bite. Just keep in mind the filling might be a little less smooth.
What can I substitute for the Butterfinger bars?
If you can’t find Butterfinger bars, chopped peanut butter cups or crushed Heath bars make excellent alternatives. Both provide chocolatey crunch that complements the peanut butter filling nicely.
Is there a way to make this pie gluten-free?
Absolutely! Simply swap the graham cracker crumbs for gluten-free graham crackers or gluten-free cookie crumbs. Everything else remains the same, so you still get that same delicious pie experience.
Can I make this pie without cream cheese?
Cream cheese adds tang and structure to the filling, so omitting it will change the texture and flavor. You could try substituting with mascarpone for a milder tang or extra peanut butter and whipped cream, but the traditional texture might be a bit different.
How long can I leave the pie out before serving?
Since this pie contains dairy and whipped topping, it’s best to keep it refrigerated until just before serving. Avoid leaving it out for more than 2 hours to ensure freshness and food safety.
Final Thoughts
I can’t recommend the Butterfinger Peanut Butter Pie Recipe enough for anyone who loves a dessert that’s creamy, rich, and packed with delightful crunch. It’s simple to prepare, uses readily available ingredients, and always impresses everyone who tries it. Give yourself the gift of this wonderfully indulgent pie, and I promise it will quickly become a cherished favorite in your dessert rotation.
Print
Butterfinger Peanut Butter Pie Recipe
- Total Time: 4 hours 20 minutes
- Yield: 8 servings 1x
Description
This delicious Butterfinger Pie with Peanut Butter is a no-bake dessert featuring a crunchy graham cracker crust, creamy peanut butter and cream cheese filling, and plenty of crushed Butterfinger candy bars folded throughout and sprinkled on top. It’s a perfect treat that requires minimal effort and just a few simple ingredients, ideal for peanut butter lovers looking for a rich, sweet pie to chill and serve.
Ingredients
Crust
- 2 cups graham cracker crumbs
- 1/2 cup (1 stick) unsalted butter, melted
Filling
- 1 cup creamy peanut butter
- 8 oz cream cheese, softened
- 1 cup powdered sugar
- 1 tsp vanilla extract
- 8 oz whipped topping (like Cool Whip, thawed)
- 3 Butterfinger candy bars (2.1 oz each), crushed
Topping
- 1 Butterfinger candy bar (2.1 oz), crushed
Instructions
- Prepare the crust: In a medium bowl, combine the graham cracker crumbs and melted butter until well mixed. Press this mixture firmly into the bottom and up the sides of a 9-inch pie dish. Place it in the refrigerator to chill while preparing the filling.
- Make the filling: In a large bowl, beat together the peanut butter and softened cream cheese until smooth and creamy, about 2 minutes. Add the powdered sugar and vanilla extract, continuing to mix until everything is well incorporated and smooth, about 1 to 2 minutes more.
- Fold in whipped topping: Gently fold the whipped topping into the peanut butter and cream cheese mixture until just combined, being careful not to overmix to keep it light and fluffy.
- Add Butterfinger pieces: Crush 3 Butterfinger bars and carefully fold them into the creamy peanut butter mixture evenly.
- Assemble the pie: Pour the filling mixture into the prepared crust and smooth the top with a spatula to create an even surface.
- Add topping: Crush the remaining Butterfinger bar and sprinkle it evenly over the top of the pie for extra crunch and flavor.
- Chill: Refrigerate the assembled pie for at least 4 hours or overnight to allow it to fully set and develop flavors.
- Serve: When ready to serve, slice the pie using a sharp knife dipped in hot water and wiped dry between cuts for clean slices. Enjoy your delicious Butterfinger peanut butter pie!
Notes
- For best results, let the pie chill overnight to fully set.
- If you prefer a crunchier crust, you can bake the crust for 5-7 minutes at 350°F before adding the filling (optional).
- Use creamy peanut butter for the smoothest texture.
- Store any leftovers covered in the refrigerator for up to 3 days.
- For a nut-free variation, substitute peanut butter with sunflower seed butter and omit the Butterfinger bars as they contain peanuts.
- Prep Time: 20 minutes
- Cook Time: 0 minutes
- Category: Dessert
- Method: No-Cook
- Cuisine: American

