If you love classic Italian cannoli as much as I do, you’re going to flip for these Cannoli Cookie Cups! Imagine the crisp, buttery flavor of a cookie, shaped into a little cup and packed full of creamy, dreamy cannoli filling—each bite is a party in your mouth. With hints of cinnamon, chocolate chips, and that sweet ricotta-mascarpone blend, these bites are perfect for gatherings, after-dinner treats, or whenever you crave a touch of Italy at home. Cannoli Cookie Cups are the ultimate mashup dessert that’s as fun to make as it is to share!
Ingredients You’ll Need
Don’t let the elegant appearance fool you—these Cannoli Cookie Cups come together with a handful of pantry-friendly ingredients. Each one is chosen to perfect the texture and flavor balance, so don’t skip any! Here’s what you’ll need, plus a tip for every component.
- Unsalted Butter (softened): Using unsalted butter means you control the saltiness, ensuring a rich, melt-in-your-mouth cookie cup.
- Granulated Sugar: Adds classic sweetness and helps the cookie cups brown beautifully.
- Brown Sugar: Lends a touch of caramel flavor and gives the cookie cups a soft, chewy center.
- Large Egg: Binds everything together for the perfect cookie dough texture.
- Vanilla Extract: Don’t skimp—vanilla brings both the cookie and the filling layers to life.
- All-Purpose Flour: The foundation of your cookie cups; measure with care for the best structure.
- Baking Soda: Helps the dough rise just enough to form a sturdy but tender cup.
- Salt: Balances the sweetness and boosts all the other flavors.
- Whole Milk Ricotta (well drained): For authentic cannoli flavor—drain overnight for the dreamiest, non-watery filling.
- Mascarpone Cheese: Adds rich creaminess and a slightly sweet, tangy note to the filling.
- Powdered Sugar: Dissolves easily into the filling for a smooth, cloud-like texture.
- Cinnamon: Just a pinch makes the filling taste like classic cannoli from your favorite Italian bakery.
- Mini Chocolate Chips: Tiny bits of chocolate manage to sneak into every bite, making each cup extra special.
- Extra Mini Chocolate Chips and Powdered Sugar (for topping): These are optional, but they deliver a pretty and irresistible finish!
How to Make Cannoli Cookie Cups
Step 1: Prepare Your Tools and Ingredients
Begin by prepping your mini muffin pan with either a generous greasing or a light mist of nonstick spray. Gather all your ingredients (especially the ricotta, which should be well-drained) and set your oven to preheat at 350°F. The right prep sets you up for super-smooth baking, so don’t rush this part!
Step 2: Make the Cookie Cup Dough
In a large bowl, beat together the softened butter, granulated sugar, and brown sugar until it’s light and fluffy. This ensures an ultra-tender cookie base! Next, beat in the egg and vanilla; your dough should look creamy and cohesive. In a separate bowl, whisk together flour, baking soda, and salt. Then, slowly add the dry mix to the butter mixture, mixing on low until a soft dough forms—don’t overmix or you’ll lose that delightful cookie texture.
Step 3: Shape and Bake the Cookie Cups
Scoop tablespoon-sized balls of dough into each mini muffin cavity. Press them down gently and use your fingers (or the back of a spoon) to create a little well in the center—this is where your filling will snuggle in later! Bake at 350°F for 10 to 12 minutes, until they’re golden at the edges. As soon as they come out, press the centers down again gently to reinforce the wells, then let them cool in the pan for 10 minutes before transferring to a rack to cool completely.
Step 4: Make the Cannoli Filling
In a medium bowl, blend your well-drained ricotta with mascarpone cheese, powdered sugar, vanilla extract, and cinnamon until smooth and creamy. This step is where your Cannoli Cookie Cups gain that authentic flavor twist! Gently fold in the mini chocolate chips, distributing them evenly for chocolatey surprises in every bite.
Step 5: Fill and Finish the Cups
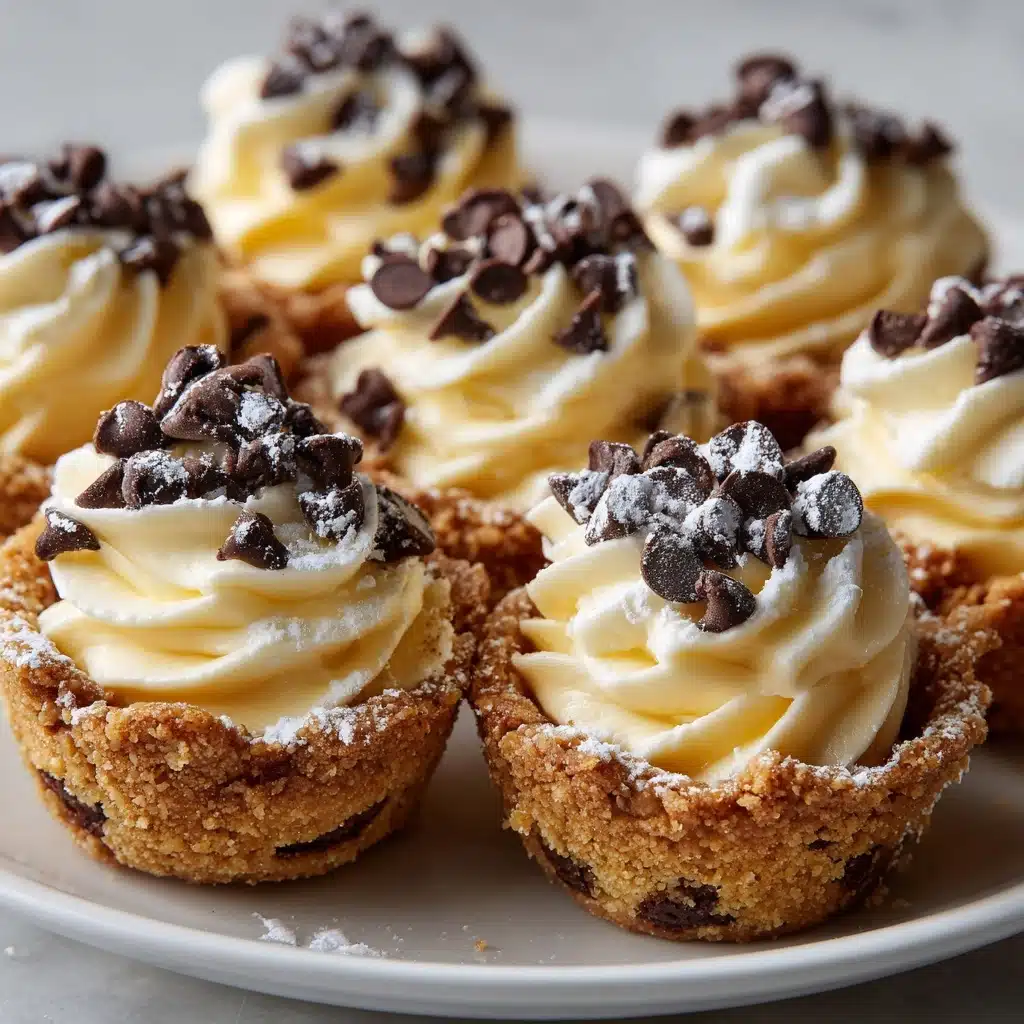
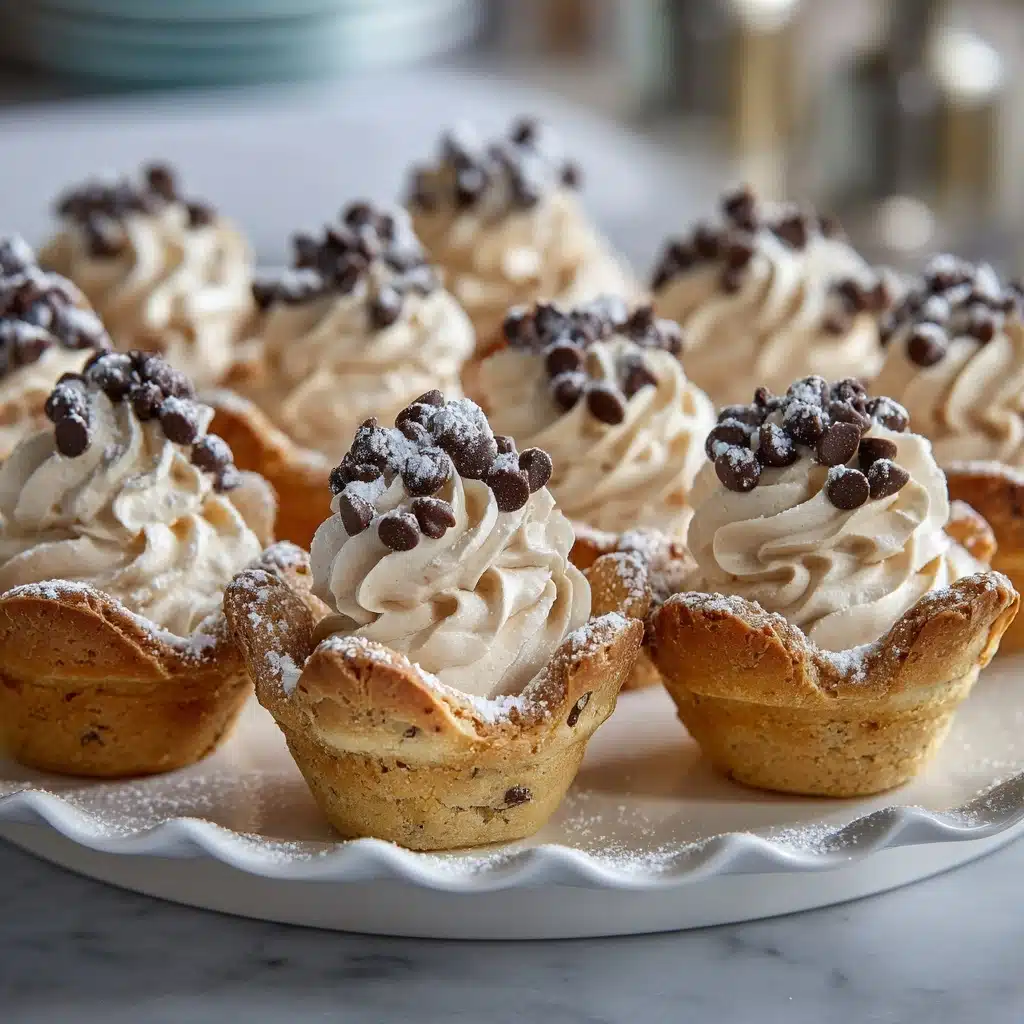
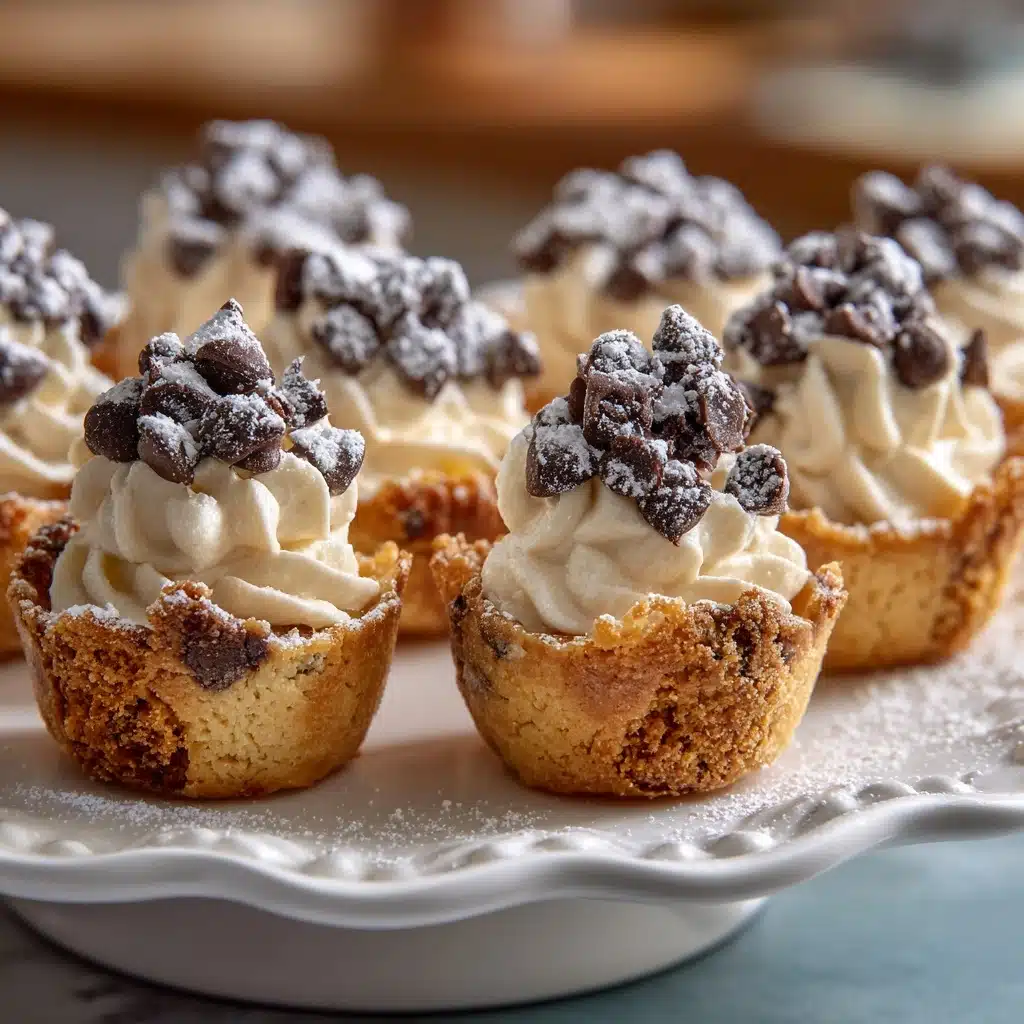
Once the cookie cups are cool, pipe or spoon the luscious cannoli filling into each. Don’t be shy—heap it right to the brim for maximum delight! Sprinkle with extra mini chocolate chips and give them a light dusting of powdered sugar for a bakery-worthy touch.
How to Serve Cannoli Cookie Cups
Garnishes
Cannoli Cookie Cups really shine with a final sprinkle of extra mini chocolate chips and a flutter of powdered sugar. If you want, finish with a tiny twist of orange zest or a few chopped pistachios for a pop of color and crunch. It’s those little touches that make dessert feel like a celebration!
Side Dishes
Pair your Cannoli Cookie Cups with an espresso or a simple after-dinner coffee—they’re ideal together. If you’re going bigger, offer a platter of fresh berries or a fruit salad to add a juicy contrast to the creamy-sweet cups. Guests will appreciate the bright flavors alongside their dessert!
Creative Ways to Present
Serve Cannoli Cookie Cups on a festive platter, arranged in rows for a party, or stack them in a pretty glass jar for a grab-and-go treat. They also make stunning edible gifts—just nestle them in tissue-lined boxes and tie with a ribbon for the ultimate homemade present.
Make Ahead and Storage
Storing Leftovers
Once filled, Cannoli Cookie Cups are best enjoyed within a day for that irresistible combination of crunchy cup and creamy filling. Store any leftovers in an airtight container in the fridge for up to 2 days—they’ll still taste delicious, but the cookie may soften slightly over time.
Freezing
For longer storage, freeze the baked (unfilled) cookie cups in an airtight container or zip-top bag for up to one month. The filling doesn’t freeze well due to its creamy texture, so make it fresh just before serving. Thaw the cups at room temperature and fill them as usual for a just-baked experience!
Reheating
If you love a crisp cookie, pop the unfilled cookie cups in a 300°F oven for 2 to 3 minutes to refresh their texture before filling. Avoid heating after filling, as the creamy cannoli filling is best served cold.
FAQs
Can I use part-skim ricotta for the filling?
You can, but whole milk ricotta creates a richer, creamier texture. If using part-skim, drain it very well to avoid a watery filling in your Cannoli Cookie Cups.
How do I keep the cookie cups crisp?
The key is to drain the ricotta well and fill the cups just before serving. Pre-baking the wells firmly also helps prevent sogginess for that irresistible crunch!
Can I make Cannoli Cookie Cups gluten-free?
Absolutely! Substitute your favorite 1:1 gluten-free flour blend in the cookie dough. The results are still delicious, though the texture may be slightly different.
What’s the best way to drain ricotta?
Spoon ricotta into a fine mesh sieve or cheesecloth-lined colander. Set it over a bowl, cover, and let it drain in the refrigerator overnight for the best consistency!
Can I make the filling ahead?
Yes, you can make the cannoli filling up to 24 hours in advance. Store it in an airtight container in the fridge and give it a quick stir before piping into your cups.
Final Thoughts
There’s something so joyful about sharing Cannoli Cookie Cups with friends and family—they’re playful, beautiful, and full of flavor. Whether you’re looking to impress at a party or just want a sweet escape to Italy right in your kitchen, these treats are guaranteed to bring smiles. Give them a try and see how quickly they disappear!
Print
Cannoli Cookie Cups Recipe
- Total Time: 37 minutes
- Yield: 24 cookie cups 1x
- Diet: Vegetarian
Description
Indulge in the delightful fusion of traditional cannoli flavors in a bite-sized form with these Cannoli Cookie Cups. Crispy cookie cups filled with a creamy ricotta and mascarpone mixture, topped with mini chocolate chips for a perfect finish.
Ingredients
Cookie Cups:
- 1/2 cup unsalted butter (softened)
- 1/2 cup granulated sugar
- 1/4 cup brown sugar
- 1 large egg
- 1 teaspoon vanilla extract
- 1 1/4 cups all-purpose flour
- 1/2 teaspoon baking soda
- 1/4 teaspoon salt
Cannoli Filling:
- 1 cup whole milk ricotta (drained well)
- 1/2 cup mascarpone cheese
- 1/2 cup powdered sugar
- 1/2 teaspoon vanilla extract
- 1/4 teaspoon cinnamon
- 1/4 cup mini chocolate chips
Topping (optional):
- Extra mini chocolate chips
- Powdered sugar for dusting
Instructions
- Preheat oven to 350°F. Grease a mini muffin pan.
- In a large bowl, cream together the butter, granulated sugar, and brown sugar until light and fluffy. Beat in the egg and vanilla.
- In a separate bowl, whisk together the flour, baking soda, and salt. Gradually mix the dry ingredients into the wet until a soft dough forms.
- Scoop tablespoon-sized portions and press into each mini muffin cup, pressing down in the center to form a well. Bake for 10–12 minutes or until lightly golden.
- As soon as they come out of the oven, use the back of a spoon or a tart shaper to gently press the centers down again. Let cool in the pan for 10 minutes, then remove and cool completely.
- For the filling, beat together the drained ricotta, mascarpone, powdered sugar, vanilla, and cinnamon until smooth. Fold in mini chocolate chips. Pipe or spoon the filling into the cooled cookie cups. Garnish with extra chocolate chips and dust with powdered sugar before serving.
Notes
- Make sure to drain the ricotta well to prevent a watery filling—strain overnight for best results.
- Cookie cups can be made a day in advance and filled just before serving.
- Keep refrigerated after filling.
- Prep Time: 25 minutes
- Cook Time: 12 minutes
- Category: Dessert
- Method: Baking
- Cuisine: Italian-American
Nutrition
- Serving Size: 1 cookie cup
- Calories: 130
- Sugar: 9g
- Sodium: 55mg
- Fat: 7g
- Saturated Fat: 4g
- Unsaturated Fat: 2g
- Trans Fat: 0g
- Carbohydrates: 14g
- Fiber: 0g
- Protein: 2g
- Cholesterol: 20mg


