
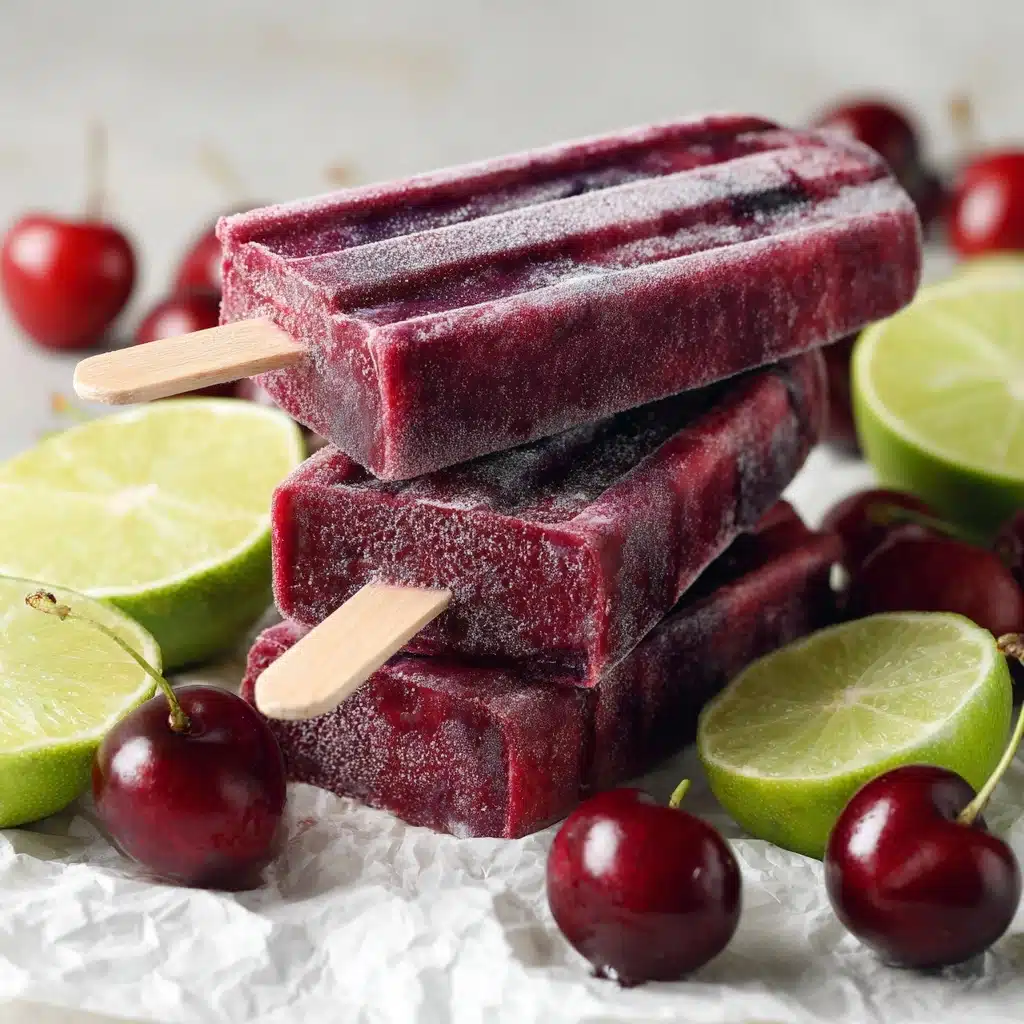
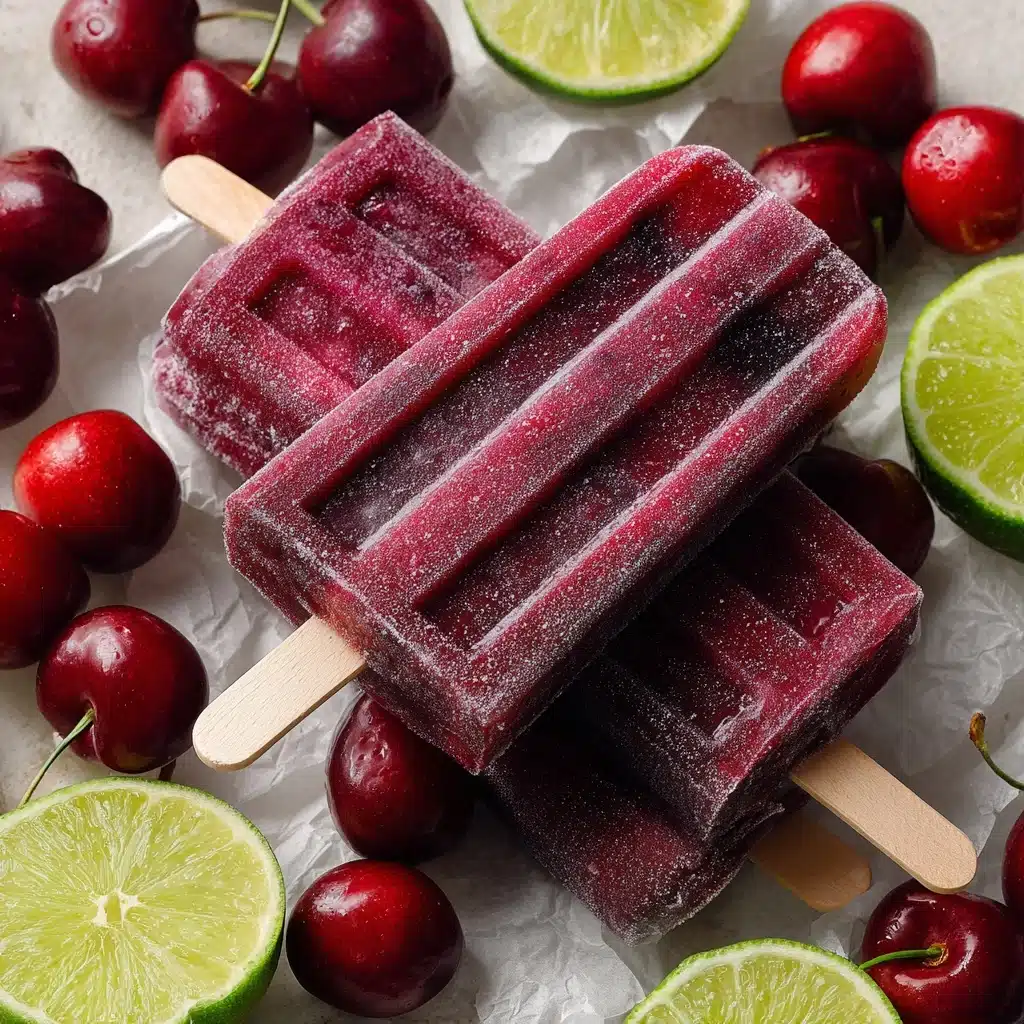
Get ready to fall in love with homemade treats all over again, because these Cherry Lime Ice Pops are about to become your new sunny-day obsession. Juicy cherries blend with zesty lime and a hint of honey for a frozen snack that walks the perfect line between tart and sweet. With vivid color from ripe cherries and the naturally bright flavor of fresh citrus, every bite is a crisp, cold refresher. Whether you’re cooling off by the pool, handing them out as a healthier dessert, or just want a cheerful freezer staple, these Cherry Lime Ice Pops are as irresistibly fun to make as they are to eat.
Ingredients You’ll Need
-
Fruit Mixture:
- 2 cups fresh or frozen cherries, pitted
- 1/2 cup fresh lime juice (about 4–5 limes)
- 1/3 cup honey or agave syrup (adjust to taste)
- 1/2 cup water
- 1 teaspoon lime zest
How to Make Cherry Lime Ice Pops
Step 1: Blend Everything Together
Pop your cherries, lime juice, honey (or agave), water, and vibrant lime zest into a blender. Whiz everything on high until the mixture is completely smooth. This is the time to sneak a little taste and add more sweetener if you want your Cherry Lime Ice Pops extra sweet or a touch of tart.
Step 2: Pour and Prepare the Molds
Carefully pour the mixture into your popsicle molds, making sure to leave a small gap at the top to give the mixture room to expand as it freezes. Slip in the popsicle sticks. For pops with personality, try sprinkling in a handful of chopped fresh cherries or whole berries before sealing up the molds.
Step 3: Freeze Until Solid
Slide your popsicle molds into the freezer and let them work their magic for at least 4 to 6 hours (overnight is even better if you can wait!). Once they’re solid, they’re ready to make every summer day sweeter.
Step 4: Unmold and Enjoy
When the craving hits, dip the molds in warm water for a second or two to make the pops release easily. Gently pull each Cherry Lime Ice Pop free, and get ready for the ultimate frosty delight.
How to Serve Cherry Lime Ice Pops
Garnishes
If you want to impress, roll your Cherry Lime Ice Pops in a little extra lime zest or scatter with tiny bits of chopped cherries as soon as they come out of the mold. Even a sprinkle of sanding sugar adds a sparkle and a fun crunch.
Side Dishes
Pairing these ice pops with a fresh fruit salad or a bowl of cool watermelon cubes turns snack time into a fruit lover’s fiesta. For a grown-up treat, serve alongside sparkling water or a homemade cherry-lime mocktail.
Creative Ways to Present
For a party, display your Cherry Lime Ice Pops in a glass filled with ice or nestle them on a chilled platter among slices of lime and fresh cherries. You can even freeze them with popsicle sticks that have cute ribbons or handwritten names for a personal touch.
Make Ahead and Storage
Storing Leftovers
Any leftover Cherry Lime Ice Pops can happily stay in their molds or be popped out and wrapped individually in parchment or waxed paper. Tuck them into a freezer bag for quick, grab-and-go snacks that keep well for about one month.
Freezing
Freezing is the entire method here, and the best part is how beautifully these ice pops store! After unmolding, arrange them in a single layer until fully frozen, then store grouped together so they don’t stick.
Reheating
No reheating necessary—these are made to stay cool! If your ice pops feel too frozen, just let them sit at room temperature for a minute or two to soften up for the perfect texture.
FAQs
Can I use bottled lime juice instead of fresh?
Fresh lime juice gives your Cherry Lime Ice Pops that vibrant citrusy kick, but bottled juice can work in a pinch. If using bottled, look for one without added sugar or preservatives for the best flavor.
Can I substitute another fruit for cherries?
Absolutely! While the classic mix is unbeatable, you can try strawberries, raspberries, or even blueberries. Just be sure to taste and adjust your sweetener because some berries are more tart than others.
How do I make these pops vegan?
Simply use agave syrup in place of honey. Everything else in Cherry Lime Ice Pops is naturally vegan, so you’ll have a plant-based treat ready in no time.
Can I use sweet or tart cherries?
Both work! Sweet cherries give you a mellow pop, while tart (like Montmorency) cherries pack a punch. If you go tart, add a bit extra sweetener for balance.
How long do Cherry Lime Ice Pops keep in the freezer?
Stored properly, these ice pops are at their best within a month, but they’ll last even longer—they just might lose a bit of flavor punch after that.
Final Thoughts
There’s nothing quite like a homemade Cherry Lime Ice Pop on a warm day—bright, fresh, and bursting with summer flavor! Whether you’re making them for little hands, a weekend barbecue, or just to treat yourself, these pops are guaranteed to bring a smile. Give them a try; you might never crave store-bought again.
Print
Cherry Lime Ice Pops Recipe
- Total Time: 10 minutes (plus freezing)
- Yield: 8 ice pops 1x
- Diet: Vegetarian
Description
Cool off this summer with these refreshing and naturally sweet Cherry Lime Ice Pops. Made with fresh cherries, zesty lime, and a touch of honey, these homemade popsicles are a guilt-free treat for all ages.
Ingredients
Fruit Mixture:
- 2 cups fresh or frozen cherries, pitted
- 1/2 cup fresh lime juice (about 4–5 limes)
- 1/3 cup honey or agave syrup (adjust to taste)
- 1/2 cup water
- 1 teaspoon lime zest
Instructions
- Blend Ingredients: In a blender, combine cherries, lime juice, honey, water, and lime zest. Blend until smooth. Taste and adjust sweetness if needed.
- Pour into Molds: Pour the mixture into popsicle molds, leaving a little space at the top for expansion. Insert sticks.
- Freeze: Freeze for at least 4–6 hours, or until solid.
- Release Pops: To release, run the mold under warm water for a few seconds before gently removing the pops.
Notes
- Add chopped cherries or whole berries to the molds for a textured look.
- You can also substitute sweet cherries with tart cherries and increase the sweetener to balance the flavor.
- Prep Time: 10 minutes
- Cook Time: 0 minutes
- Category: Dessert, Snack
- Method: Freezing
- Cuisine: American
Nutrition
- Serving Size: 1 ice pop
- Calories: 60
- Sugar: 11g
- Sodium: 0mg
- Fat: 0g
- Saturated Fat: 0g
- Unsaturated Fat: 0g
- Trans Fat: 0g
- Carbohydrates: 14g
- Fiber: 1g
- Protein: 0g
- Cholesterol: 0mg


