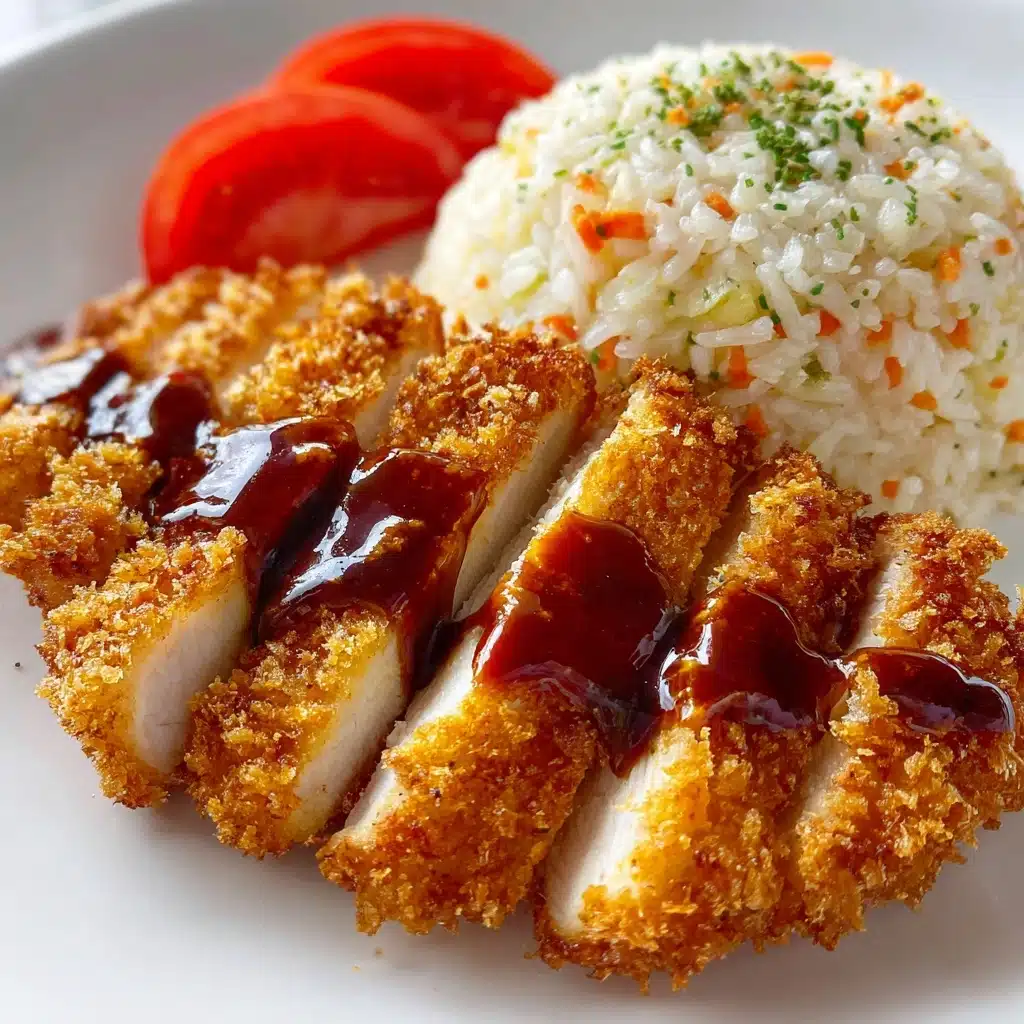
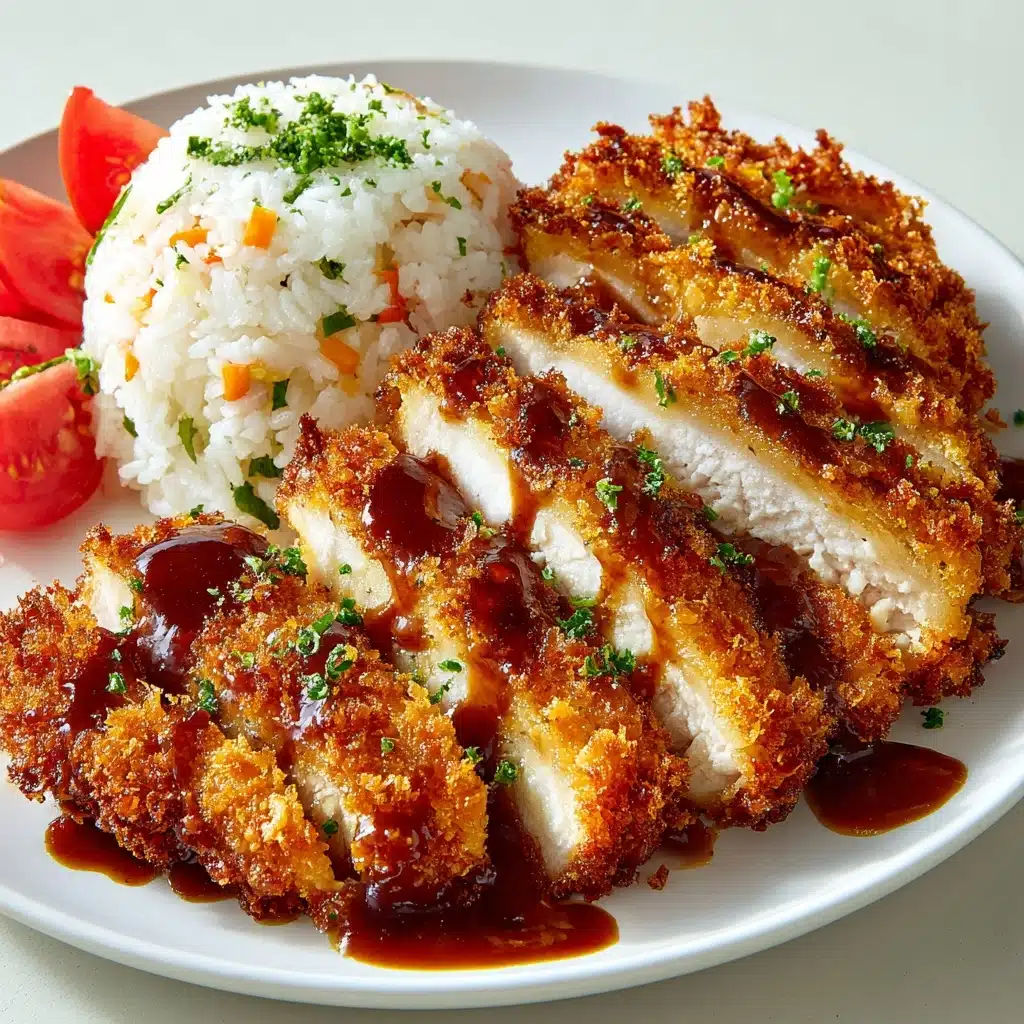
There’s something absolutely irresistible about Chicken Katsu–that iconic Japanese fried chicken cutlet that boasts a craggy, shatteringly crisp exterior and a tender, juicy interior. My very first bite of Chicken Katsu was a revelation: savory, crunchy, impossibly satisfying when dipped in tangy tonkatsu sauce and nestled beside a pile of fresh cabbage. If you love comfort food with a golden twist, this is the recipe to bring a bit of magic to your table!
Ingredients You’ll Need
What I adore most about Chicken Katsu is how straightforward the ingredients are. Each element plays a starring role in creating the perfect texture and flavor, so don’t skip a thing! Let’s break down why you’ll want each item within arm’s reach before you start frying.
- Chicken thighs or breasts: Choose boneless, skinless pieces for easy pounding and juicy results—thighs bring extra richness, while breasts are beautifully lean.
- Salt: A touch of salt seasons the meat and brings out its natural flavors.
- Black pepper: Adds an understated kick to balance the savoriness.
- All-purpose flour: The crucial base layer that ensures the egg and breadcrumbs stick like a dream.
- Eggs: Beaten eggs create the all-important glue for an even, golden crumb coating.
- Panko breadcrumbs: The secret to that impossibly crisp, airy crust—don’t substitute with regular breadcrumbs if you want true Chicken Katsu crunch!
- Vegetable oil: A neutral oil with a high smoke point will fry your cutlets to perfection without overpowering the dish.
- Tonkatsu sauce: Sweet, tangy, and just a little savory—this dipping sauce is classic and not to be missed.
- Lemon wedges and shredded cabbage (optional): Brighten things up and add crunch with these optional, but highly recommended garnishes.
How to Make Chicken Katsu
Step 1: Pound and Season the Chicken
Begin by placing your chicken pieces between two sheets of plastic wrap on a sturdy surface. With a meat mallet or the bottom of a heavy pan, gently pound each cutlet until it’s about ½-inch thick. This step ensures even cooking and that signature tender bite. Generously season both sides with salt and pepper—you want flavor in every morsel.
Step 2: Set Up Your Dredging Station
Arrange three shallow bowls side by side: one filled with flour, the next with your beaten eggs, and the last with a heaping mound of crisp panko breadcrumbs. This assembly line makes quick work of coating each piece and keeps your kitchen tidy.
Step 3: Dredge for Maximum Crunch
For each chicken cutlet, start by coating it lightly in flour, making sure to shake off any excess. Next, dip it into the beaten eggs so it’s nicely moistened. Finally, press the cutlet into the panko breadcrumbs, patting gently and ensuring every nook is generously coated for that signature Chicken Katsu crunch.
Step 4: Fry to Golden Perfection
Pour enough vegetable oil into a large skillet to reach about ½-inch deep. Heat the oil over medium until it shimmers—ideally at 350°F for the perfect fry. Carefully lower the chicken cutlets in, working in batches if needed, and fry each side for 3–4 minutes. You’re looking for a deep golden hue and for the chicken to be fully cooked through. Once done, transfer the cutlets to a plate lined with paper towels to drain away any excess oil.
Step 5: Slice and Serve
Let the chicken rest for a minute, then use a sharp knife to cut it into strips. This not only makes it easy to eat but also shows off that irresistible crispy crust. Serve immediately with tonkatsu sauce for dipping, plus lemon wedges and a tangle of shredded cabbage if you want the classic Chicken Katsu experience.
How to Serve Chicken Katsu

Garnishes
Keep it traditional by serving your Chicken Katsu with juicy lemon wedges for a citrusy pop, and a pile of finely shredded fresh cabbage on the side. A drizzle of tonkatsu sauce over the top or served on the side lets everyone control their own sauciness. For a touch of freshness, sprinkle over some sliced scallions or even a scattering of sesame seeds.
Side Dishes
Chicken Katsu is fabulous all on its own, but turns into a full meal when paired with steaming hot Japanese rice and maybe a little miso soup. Japanese pickles or a simple cucumber salad also make for great partners by adding crunch and a bit of tang to balance the richness of the fried chicken.
Creative Ways to Present
Feeling inspired? Try slicing Chicken Katsu and layering it into a sandwich for an epic katsu sando. Or turn it into a donburi by serving the crispy cutlets over a bowl of rice, drizzled with extra tonkatsu sauce and a handful of scallions. If you’re making lunchboxes, tuck Chicken Katsu into a bento box with your favorite sides for a gorgeous and satisfying meal on the go.
Make Ahead and Storage
Storing Leftovers
If you end up with extra Chicken Katsu (lucky you!), allow it to cool completely before transferring it to an airtight container. Store cutlets in the refrigerator for up to 3 days. I recommend keeping the sauce and cabbage separate so everything stays fresh and crispy.
Freezing
Chicken Katsu actually freezes well, making it a winner for future quick meals. Lay the fully cooked and cooled cutlets flat on a baking sheet and freeze until solid, then wrap them tightly in foil or plastic wrap and stash in a freezer bag. They’ll keep for up to a month and can be reheated straight from frozen—so handy for nights when you’re craving crunch in a hurry!
Reheating
For the crispiest results, reheat Chicken Katsu in a 350°F oven for 10-12 minutes, or air fry at 350°F for 5-7 minutes. Microwaving is quick, but the crust will lose its crunch—still tasty, but not the signature texture you love! Always serve with fresh garnishes and tonkatsu sauce for the best experience.
FAQs
Can I use chicken breasts instead of thighs for Chicken Katsu?
Absolutely! Both options work beautifully. Chicken thighs provide more juiciness and rich flavor, while breasts yield a slightly leaner result. Whichever you choose, be sure to pound them to an even thickness for perfect cooking.
What makes panko breadcrumbs special for Chicken Katsu?
Panko breadcrumbs are lighter and airier than traditional breadcrumbs, which is what gives Chicken Katsu its famously crisp and flaky crust. They’re easy to find in most grocery stores these days, and well worth seeking out!
How do I know when the chicken is cooked through?
Chicken is fully cooked when the internal temperature reaches 165°F and the juices run clear. The breading should be a deep golden brown, and the chicken should feel firm but not dry. If you’re unsure, slice into the thickest piece to check.
Is Chicken Katsu gluten-free?
Classic Chicken Katsu is not gluten-free, as it uses wheat flour and panko. However, you can easily swap in gluten-free flour and gluten-free panko breadcrumbs for an allergy-friendly version that’s still every bit as delicious.
What’s the difference between tonkatsu and Chicken Katsu?
Great question! Tonkatsu uses pork cutlets, while Chicken Katsu swaps in chicken for the star protein. Otherwise, they’re made almost identically, with crispy panko breading and a signature sauce. Feel free to try both to see which you love most!
Final Thoughts
Bringing Chicken Katsu into your kitchen is about more than just chasing a crispy bite—it’s about enjoying a little tradition, sharing something comforting, and treating yourself and your loved ones to a meal that’s simple yet special. Give this recipe a try, and prepare yourself for rave reviews and plenty of happy, satisfied smiles!
Print
Chicken Katsu Recipe
- Total Time: 25 minutes
- Yield: 4 servings 1x
- Diet: Non-Vegetarian
Description
Learn how to make delicious Chicken Katsu, a Japanese-style fried chicken cutlet that is crispy on the outside and juicy on the inside. Serve it with tonkatsu sauce, lemon wedges, and shredded cabbage for a delightful meal.
Ingredients
Chicken Katsu:
- 4 boneless, skinless chicken thighs or breasts
- 1 teaspoon salt
- ½ teaspoon black pepper
- ½ cup all-purpose flour
- 2 large eggs (beaten)
- 1 cup panko breadcrumbs
- vegetable oil for frying
- tonkatsu sauce for serving
- lemon wedges and shredded cabbage for garnish (optional)
Instructions
- Pound and Season Chicken: Place the chicken between two sheets of plastic wrap and gently pound until ½-inch thick. Season with salt and pepper.
- Prepare Dredging Station: Set up three bowls with flour, beaten eggs, and panko breadcrumbs.
- Dredge Chicken: Coat each chicken piece in flour, then egg, and finally panko.
- Fry Chicken: Fry in hot oil for 3–4 minutes per side until golden brown and cooked through.
- Drain and Serve: Place on paper towels to drain, then slice and serve with tonkatsu sauce, lemon, and cabbage.
Notes
- Press panko firmly onto chicken for extra crispiness.
- Substitute pork for chicken to make tonkatsu.
- Serve over rice or in a bento box for a complete meal.
- Prep Time: 15 minutes
- Cook Time: 10 minutes
- Category: Main Course
- Method: Frying
- Cuisine: Japanese
Nutrition
- Serving Size: 1 cutlet
- Calories: 390
- Sugar: 2g
- Sodium: 520mg
- Fat: 22g
- Saturated Fat: 4g
- Unsaturated Fat: 15g
- Trans Fat: 0g
- Carbohydrates: 25g
- Fiber: 1g
- Protein: 25g
- Cholesterol: 115mg


