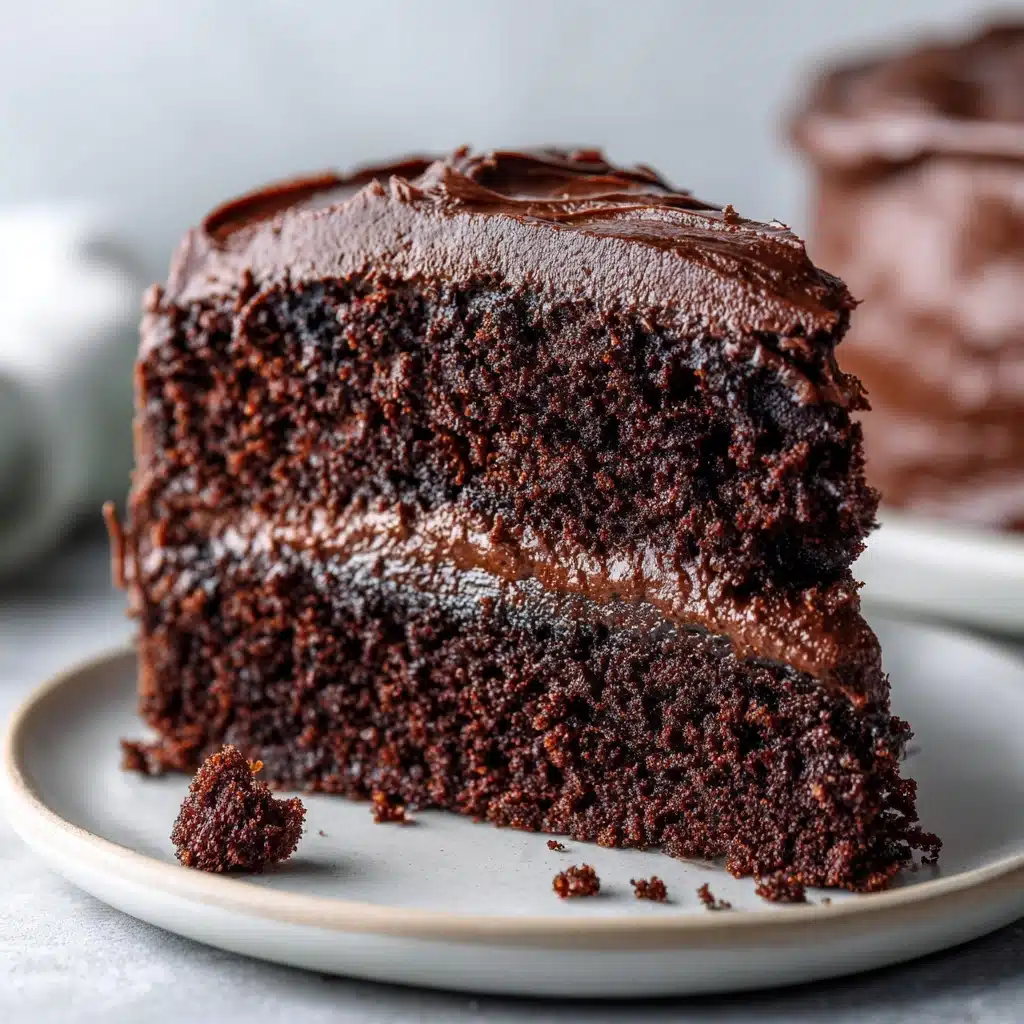
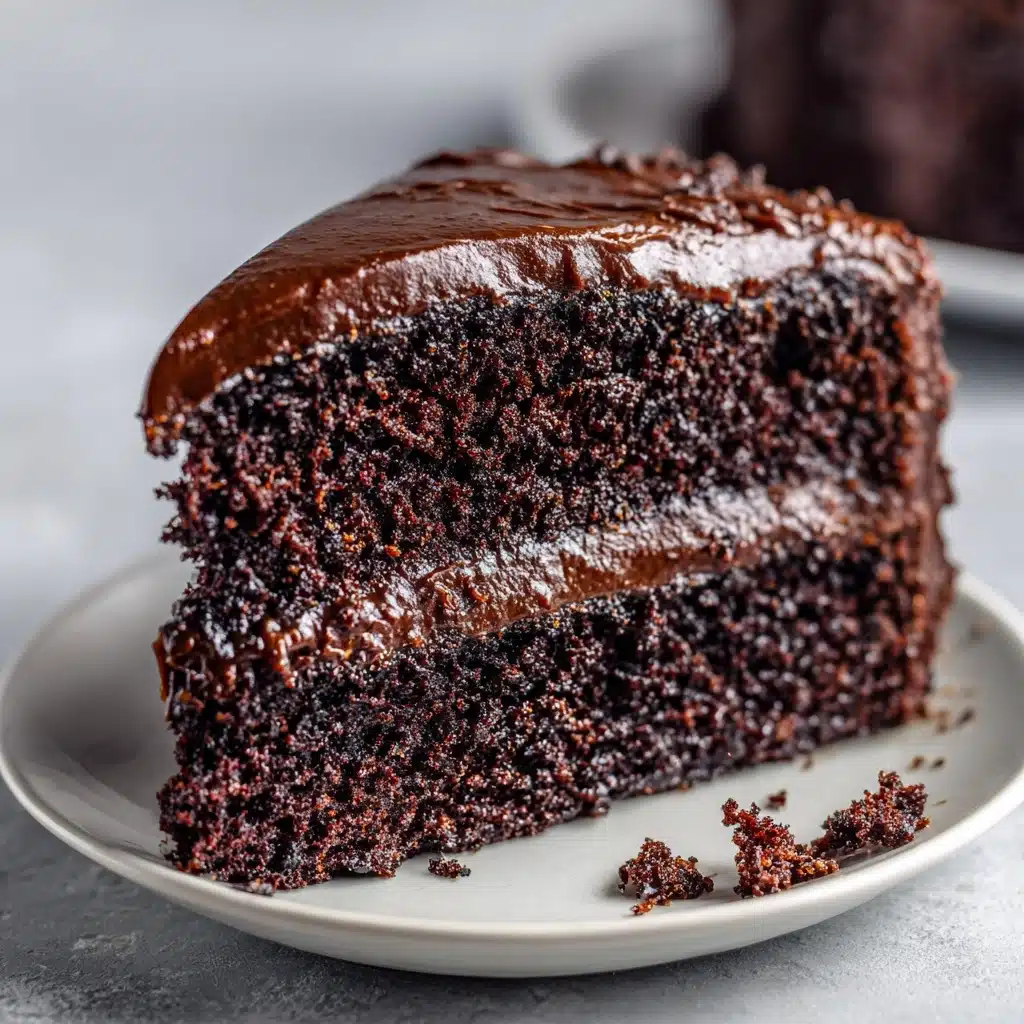
If you’re on a quest for the ultimate chocolate cake experience, this Chocolate Blackout Cake is pure, decadent bliss in dessert form. Originally made famous by legendary Brooklyn bakeries, this rich, ultra-dark cake layers moist cocoa cake, creamy chocolate pudding, and fluffy chocolate frosting, all wrapped up in a shower of cake crumbs. It’s bold, dramatic, and pure comfort food—perfect for celebrations, special occasions, or whenever your inner chocoholic calls. Prepare to fall head over heels for each gloriously messy bite of this unforgettable chocolate masterpiece!
Ingredients You’ll Need
There’s something wonderfully satisfying about how straightforward the ingredient list is for Chocolate Blackout Cake. Each component, from the cocoa to the buttermilk, brings its own magic to the taste, texture, and color, ensuring every slice is impossibly rich and impressive.
- All-purpose flour: This forms the sturdy yet tender base of your cake—don’t substitute with cake flour for this one.
- Granulated sugar: Crucial for sweetness and moisture retention in both cake and pudding layers.
- Unsweetened cocoa powder: Use the best quality for deep, chocolate intensity; it affects both color and flavor.
- Baking powder & baking soda: Together, they ensure a lofty, soft crumb with just the right amount of rise.
- Salt: Balances sweetness and brings out every chocolatey note.
- Buttermilk (room temperature): Adds a delicate tang and extra moisture for a truly tender crumb.
- Vegetable oil: Keeps everything soft and helps the cake retain its fudgy richness even after chilling.
- Eggs (room temperature): Bind everything together while building a luscious texture.
- Vanilla extract: Rounds out the flavor profile and adds warmth to both cake and filling.
- Hot coffee or boiling water: Deepens the chocolate flavor and ensures a beautifully moist batter.
- Whole milk (for pudding): Creates the smooth, dreamy base for your pudding filling.
- Semi-sweet chocolate chips: Melt into the pudding for a silky, rich chocolate layer.
- Cornstarch: Thickens the pudding to the perfect consistency.
- Unsalted butter (softened): The essential backbone of a dreamy, airy chocolate frosting.
- Powdered sugar: Sifts into the frosting for sweetness and that delicate, fluffy structure.
- Heavy cream: Whips into the frosting for luxurious lightness.
How to Make Chocolate Blackout Cake
Step 1: Prepare and Bake the Cake Layers
Preheat your oven to 350°F (175°C), then grease and line two 9-inch round cake pans with parchment paper. In a large bowl, whisk together the flour, sugar, cocoa, baking powder, baking soda, and salt. Add in the buttermilk, oil, eggs, and vanilla, then beat until smooth—about 2 minutes. Stir in the hot coffee or water so the batter is thin and glossy. Divide it evenly between pans and bake for 30–35 minutes, until a toothpick emerges clean. Cool in pans for 10 minutes, then turn out onto a wire rack and let cool completely before layering.
Step 2: Make the Silky Chocolate Pudding Filling
While the cakes bake, whisk sugar, cocoa, cornstarch, and salt in a saucepan. Gradually add milk, whisking until no lumps remain. Cook over medium heat, whisking constantly, until it thickens and just starts to bubble. Take off the heat and stir in chocolate chips until they completely melt. Finish with vanilla extract for richness. Pour the pudding into a bowl, press plastic wrap directly on its surface, and refrigerate until it’s completely cold and set. This step ensures your Chocolate Blackout Cake has that classic, creamy center.
Step 3: Whip Up the Dreamiest Chocolate Frosting
Beat the softened butter on medium-high until light and creamy. Add powdered sugar, cocoa powder, and salt, mixing on low until combined. Pour in heavy cream and vanilla, then increase the speed and beat until fluffy—about 2 minutes. The result is a rich, billowy chocolate frosting that spreads like a dream and makes every slice shine.
Step 4: Assemble and Crumb-Coat Your Masterpiece
If needed, use a serrated knife to level the cake layers. Save the trimmings—these become the signature crumbs! Place one cake layer on your serving plate and evenly spread the cooled pudding over the top. Gently place the second cake layer on top, then frost the entire cake in a thick, swirled coat of chocolate frosting. Crumble the reserved cake scraps and press them onto the top and sides until your Chocolate Blackout Cake is fully cloaked. Chill for an hour before slicing for neat, bakery-style pieces.
How to Serve Chocolate Blackout Cake

Garnishes
This is a showstopper all on its own, but a little flourish always takes things up a notch. Try a sprinkle of shaved dark chocolate, a cloud of whipped cream, or even fresh raspberries for a gorgeous color contrast. A few mint leaves or a light dusting of powdered sugar can add a subtle, elegant touch to your Chocolate Blackout Cake presentation.
Side Dishes
Serve thick slices with a scoop of vanilla bean ice cream for an absolute classic. A tall glass of cold milk, a rich espresso, or a spiced chai latte on the side also works beautifully, balancing out the cake’s richness. If you want to lean into decadence, pair with a drizzle of raspberry or salted caramel sauce.
Creative Ways to Present
For parties, try turning the cake into miniature “Blackout” cupcakes, each topped with extra pudding and a sprinkle of crumbs. Or, layer shards of leftover cake, pudding, and whipped cream into parfait glasses for an irresistible trifle. For special occasions, use a stencil and powdered sugar to add a decorative message or burst of design on top of your Chocolate Blackout Cake.
Make Ahead and Storage
Storing Leftovers
Chocolate Blackout Cake keeps surprisingly well! Store leftover slices in an airtight container in the fridge; the pudding and frosting help maintain moisture, so every bite is just as luscious for up to 4 days. The flavors can even deepen slightly over time, making tomorrow’s indulgence even better.
Freezing
If you want to plan ahead, you can safely freeze the individual (unfrosted) cake layers wrapped tightly in plastic, or even the fully assembled and unfrosted cake. Thaw in the fridge before adding pudding and frosting. For ready-to-eat portions, wrap slices and freeze up to 2 months, then thaw overnight in the fridge.
Reheating
While Chocolate Blackout Cake is best served chilled or at room temperature, you can gently microwave individual slices for a few seconds if you prefer a slightly warmed, gooier center. Just be sure not to overheat, as the pudding can become too runny.
FAQs
Can I make Chocolate Blackout Cake without coffee?
Absolutely! Hot water will work perfectly if you prefer to skip the coffee. Coffee simply intensifies the chocolate flavor, but won’t make the cake taste like coffee itself.
Is there a good substitute for buttermilk?
If you don’t have buttermilk, add 1 tablespoon of lemon juice or vinegar to a cup of milk, let it sit for 5 minutes, and use it in place of buttermilk. This gives the cake its signature tender crumb.
My pudding filling seems runny. What did I do wrong?
Make sure the pudding is cooked until thickened and just starting to bubble. Cornstarch must reach a boil to activate its thickening power. Also, be sure it’s fully chilled before using in the cake.
Can I use Dutch-process cocoa powder instead of natural cocoa?
Yes, but keep in mind it may slightly change the cake’s texture and flavor. Use the best quality you can find for the richest Chocolate Blackout Cake possible.
How do I get neat, clean slices?
Chill the cake for at least an hour before slicing, and use a sharp, thin-bladed knife wiped clean between each cut. This helps achieve those gorgeous, bakery-style slices every time.
Final Thoughts
If you’ve never had the pleasure of baking or tasting a true Chocolate Blackout Cake, prepare for an experience that’s as fun to make as it is impressive to serve. Each layer tells a story of chocolatey goodness, and every crumb shouts celebration. Give it a try—you just might discover your new favorite cake!
Print
Chocolate Blackout Cake Recipe
- Total Time: 3 hours
- Yield: 12 slices 1x
- Diet: Vegetarian
Description
Indulge in the ultimate chocolate lover’s dream with this decadent Chocolate Blackout Cake. Moist layers of rich chocolate cake sandwich a creamy chocolate pudding filling, all frosted with a velvety chocolate frosting. This bakery-style cake is a showstopper dessert that will impress any crowd.
Ingredients
Cake:
- 1 3/4 cups all-purpose flour
- 2 cups granulated sugar
- 3/4 cup unsweetened cocoa powder
- 2 teaspoons baking powder
- 1 1/2 teaspoons baking soda
- 1 teaspoon salt
- 1 cup buttermilk, room temperature
- 1/2 cup vegetable oil
- 2 large eggs, room temperature
- 2 teaspoons vanilla extract
- 1 cup hot coffee or boiling water
Chocolate Pudding Filling:
- 1/2 cup granulated sugar
- 2 tablespoons unsweetened cocoa powder
- 2 tablespoons cornstarch
- 1/4 teaspoon salt
- 1 1/2 cups whole milk
- 1/2 cup semi-sweet chocolate chips
- 1 teaspoon vanilla extract
Chocolate Frosting:
- 1 cup unsalted butter, softened
- 3 cups powdered sugar
- 3/4 cup unsweetened cocoa powder
- 1/2 teaspoon salt
- 1/2 cup heavy cream
- 2 teaspoons vanilla extract
Instructions
- Preheat Oven: Preheat oven to 350°F (175°C) and prepare cake pans.
- Make Cake: Mix dry ingredients, add wet ingredients, pour into pans, and bake.
- Prepare Filling: Cook pudding filling ingredients on stovetop until thickened; cool.
- Make Frosting: Beat butter, sugar, cocoa, and cream until fluffy.
- Assemble Cake: Level cakes, spread filling, stack, and frost.
- Chill: Press cake crumbs on top, chill, and slice.
Notes
- Use good-quality cocoa powder for a rich flavor.
- The pudding filling should be completely cool before assembling.
- Store leftovers in an airtight container in the refrigerator for up to 4 days.
- Prep Time: 30 minutes
- Cook Time: 35 minutes
- Category: Dessert
- Method: Baking
- Cuisine: American
Nutrition
- Serving Size: 1 slice
- Calories: 580
- Sugar: 52g
- Sodium: 370mg
- Fat: 28g
- Saturated Fat: 16g
- Unsaturated Fat: 10g
- Trans Fat: 0g
- Carbohydrates: 78g
- Fiber: 5g
- Protein: 7g
- Cholesterol: 95mg


