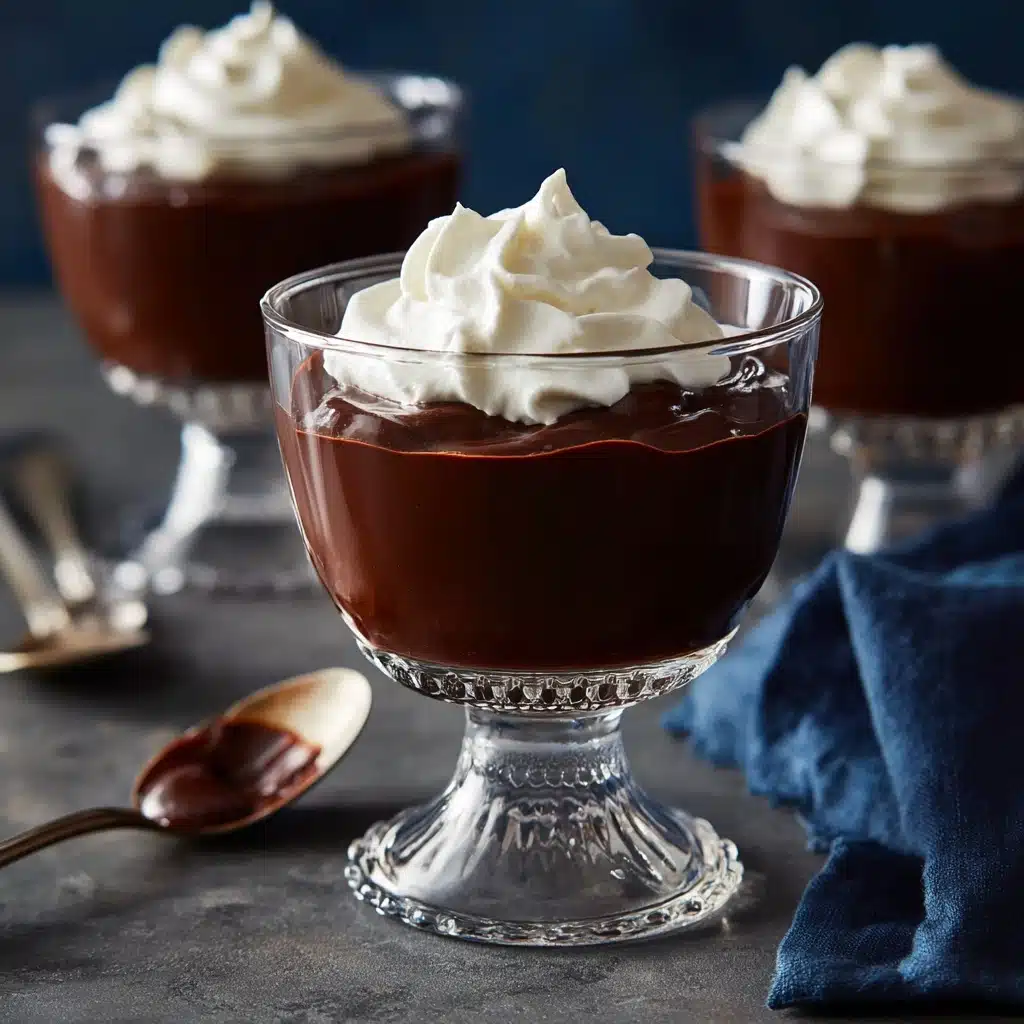
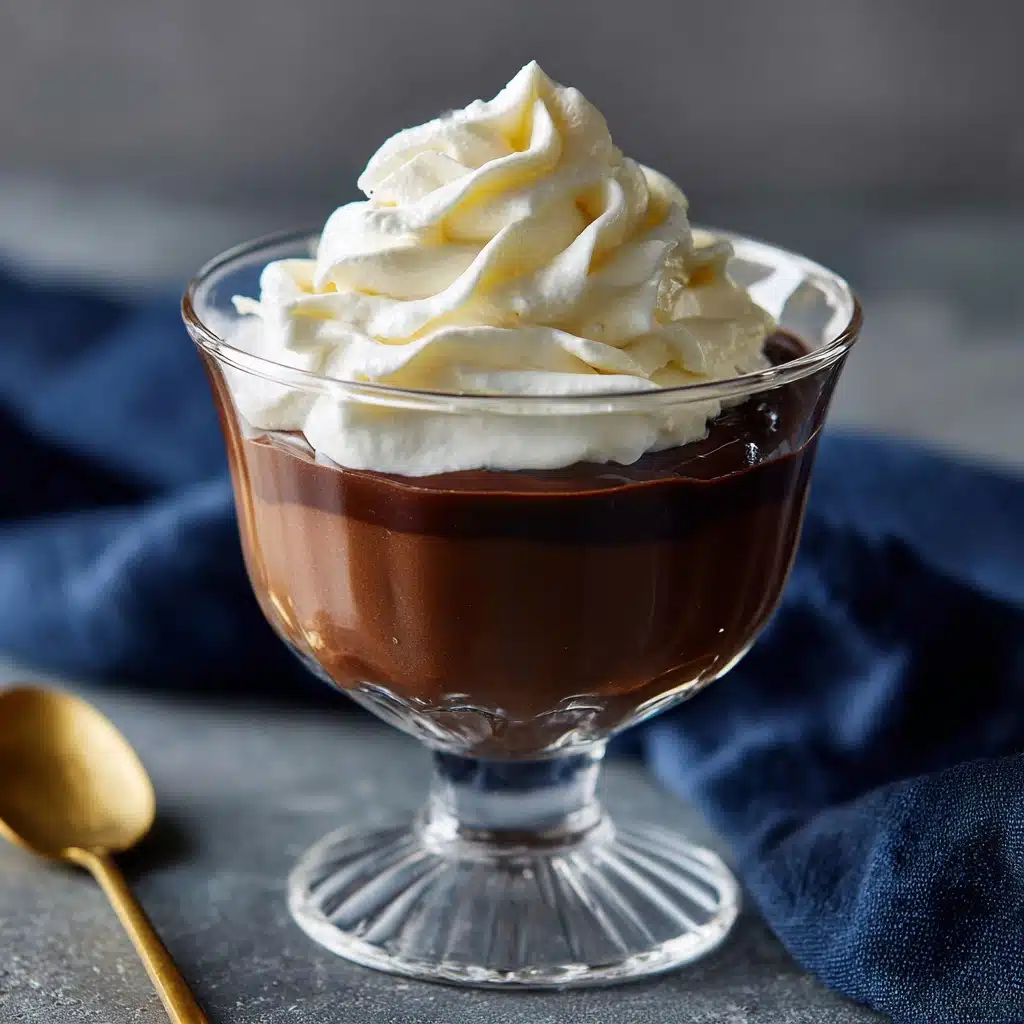
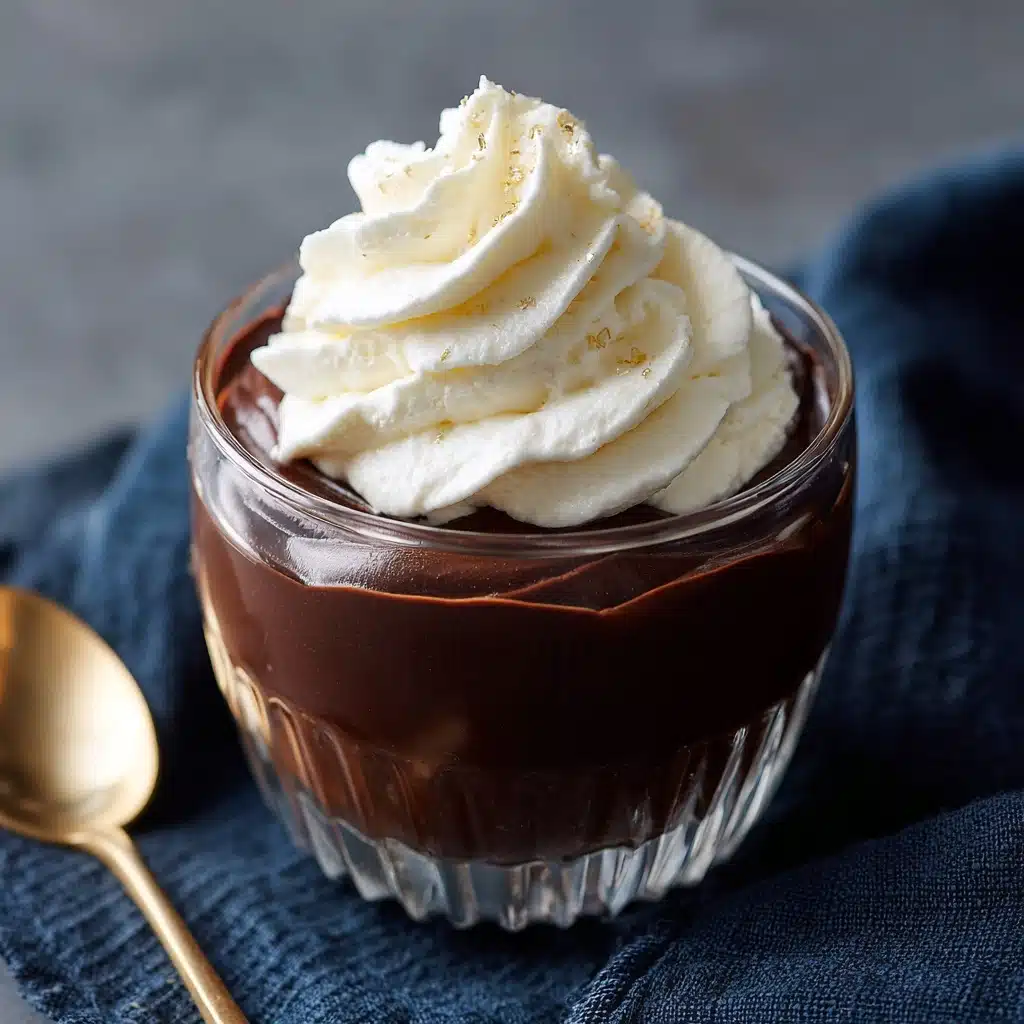
If you’re in the mood for comfort food that’s both classic and ultra-satisfying, Chocolate Pudding is a must-make dessert that never disappoints. Thick, silky, and rich with real chocolate flavor, every spoonful is pure nostalgia. Whether you’re making it for an after-dinner treat or a special celebration, this recipe delivers a beautifully creamy pudding that anyone can whip up — and be proud to serve. The best part? You only need a handful of pantry staples and a few minutes on the stovetop to create pure chocolate bliss.
Ingredients You’ll Need
It’s amazing how a handful of humble ingredients can create a Chocolate Pudding that feels so decadent. Each item in this recipe plays its own important role, building the dessert’s perfect texture, deep chocolatey taste, and that unforgettable smoothness.
- Whole milk: This is the creamy backbone of the pudding; using whole milk gives a luxuriously rich texture.
- Granulated sugar: The right amount of sweetness enhances the chocolate’s flavor without overpowering it.
- Unsweetened cocoa powder: This delivers a deep, authentic cocoa note and a beautiful dark hue.
- Cornstarch: Essential for thickening — it gives Chocolate Pudding its signature silky consistency.
- Salt: Just a pinch makes the chocolate pop and balances the sweetness.
- Semisweet or bittersweet chocolate, chopped: Real chocolate adds intensity and melts into the creamiest texture imaginable.
- Pure vanilla extract: Rounds out the flavors with mellow warmth, making every bite irresistible.
How to Make Chocolate Pudding
Step 1: Mix the Dry Ingredients
Start by grabbing a medium saucepan. Whisk together the granulated sugar, cocoa powder, cornstarch, and salt until fully blended. This step ensures the dry ingredients are evenly distributed, so your Chocolate Pudding cooks up silky-smooth, with no lumps or clumps of powder.
Step 2: Incorporate the Milk
While continuing to whisk, slowly pour in the whole milk. Go gradually here; steady whisking helps the cornstarch dissolve completely for a creamy, lump-free base. Once the mixture looks completely smooth, you’re ready for the next step.
Step 3: Cook Until Thickened
Place the saucepan over medium heat. Whisk constantly as the pudding base warms up, making sure to reach all the edges and keep things moving. After 5 to 8 minutes, the mixture will thicken and start bubbling — that’s your cue! Lower the heat and cook for another 1 to 2 minutes, continuing to stir, so it thickens to the perfect consistency.
Step 4: Add Chocolate and Vanilla
Take the pan off the heat and immediately stir in the chopped chocolate and pure vanilla extract. Watch as the chocolate melts right in, turning your pudding glossy and extra luscious. Keep stirring until every bit is melted and you have a smooth, shiny Chocolate Pudding.
Step 5: Chill and Set
Pour your hot pudding into individual serving dishes or a single large bowl. The secret to that flawless top? Press a piece of plastic wrap directly onto the surface to prevent a skin from forming while it chills. Refrigerate for at least 2 hours — this wait is crucial for the pudding to set up into that dreamy, spoonable texture we all love.
How to Serve Chocolate Pudding
Garnishes
Serving Chocolate Pudding is an invitation to get creative! Top each bowl with a swirl of freshly whipped cream, a sprinkle of chocolate shavings, or a dusting of cocoa powder for that irresistible “wow” factor. For a whimsical touch, try fresh berries or a few chocolate chips.
Side Dishes
A dish of homemade Chocolate Pudding can absolutely stand alone, but pairing it with the right side treats makes it even more special. Crisp butter cookies or almond biscotti are perfect for dipping, while a handful of juicy raspberries provides a burst of freshness against the creamy chocolate.
Creative Ways to Present
Think beyond the bowl! Try serving your pudding in mini mason jars, espresso cups, or even wine glasses for a chic look. Layer it with crushed cookies or fresh fruit for a playful parfait, or pipe it into chocolate tart shells for bite-sized decadence at your next gathering.
Make Ahead and Storage
Storing Leftovers
Leftover Chocolate Pudding is a happy problem to have! Simply cover the surface of the pudding with plastic wrap so it touches the pudding (to keep that pesky skin away), then store in the refrigerator. It’ll keep well for up to 4 days, making it a fantastic option for make-ahead desserts or a surprise lunchbox treat.
Freezing
While traditional Chocolate Pudding doesn’t love the freezer (freezing can slightly affect the texture), you technically can stash it away for up to one month. Thaw gently overnight in the refrigerator and give it a good whisk before serving to restore as much smoothness as possible.
Reheating
If you crave warm pudding or want to revive refrigerated leftovers, gently reheat in the microwave in short 10-second bursts, stirring each time. Prefer stovetop? Warm over very low heat, stirring constantly, until just heated through. Avoid bringing it to a simmer, as this can alter the noble texture.
FAQs
Can I use dairy-free milk for Chocolate Pudding?
Yes, you can swap in unsweetened almond milk, soy milk, or oat milk for a dairy-free version. Just know it may be a little less creamy than using whole milk, but still delicious!
How do I avoid lumpy pudding?
Whisking is your best friend! Mix the dry ingredients thoroughly before adding the milk, and keep the whisk moving constantly as you cook. If you do spot lumps, quickly strain the hot pudding through a fine-mesh sieve to smooth it out.
Can I double the recipe?
Absolutely! Doubling works perfectly — just be sure to use a large enough saucepan and take a little extra time to ensure everything heats evenly and thickens properly.
Why do I need to cover Chocolate Pudding with plastic wrap?
Placing plastic wrap right against the surface prevents a rubbery “skin” from forming as the pudding cools, keeping it satiny and soft all the way through.
How do I make the pudding extra rich?
If you’re craving a decadent treat, try swapping up to ½ cup of the whole milk with heavy cream. The added fat makes Chocolate Pudding even silkier and more indulgent.
Final Thoughts
This homemade Chocolate Pudding is as easy as it is irresistible, and there’s nothing quite like sharing a ramekin with someone you love. I hope you’ll give it a try — it’s the kind of simple, cozy dessert that always brings smiles. Don’t be surprised if it becomes an instant favorite in your home!
Print
Chocolate Pudding Recipe
- Total Time: 15 minutes (plus chilling time)
- Yield: 4 servings 1x
- Diet: Vegetarian, Gluten-Free
Description
Indulge in the rich and creamy goodness of homemade Chocolate Pudding. This easy stovetop dessert is a chocolate lover’s dream, perfect for any occasion.
Ingredients
For the Chocolate Pudding:
- 2 cups whole milk
- ½ cup granulated sugar
- ⅓ cup unsweetened cocoa powder
- ¼ cup cornstarch
- ¼ teaspoon salt
- 3 oz semisweet or bittersweet chocolate (chopped)
- 1 teaspoon pure vanilla extract
Instructions
- Prepare the Pudding Mixture: In a medium saucepan, whisk together sugar, cocoa powder, cornstarch, and salt. Gradually whisk in milk until smooth.
- Cook the Mixture: Place over medium heat and cook, whisking constantly, until thickened and starts to bubble, about 5–8 minutes. Reduce heat to low and cook for an additional 1–2 minutes.
- Finish the Pudding: Remove from heat, stir in chopped chocolate and vanilla extract until smooth. Pour into serving cups, cover with plastic wrap, and chill for at least 2 hours.
Notes
- For extra richness, you can substitute ½ cup of milk with heavy cream.
- Top with whipped cream or chocolate shavings for added decadence.
- Prep Time: 5 minutes
- Cook Time: 10 minutes
- Category: Dessert
- Method: Stovetop
- Cuisine: American
Nutrition
- Serving Size: ½ cup
- Calories: 220
- Sugar: 20g
- Sodium: 130mg
- Fat: 9g
- Saturated Fat: 5g
- Unsaturated Fat: 3g
- Trans Fat: 0g
- Carbohydrates: 33g
- Fiber: 2g
- Protein: 4g
- Cholesterol: 10mg


