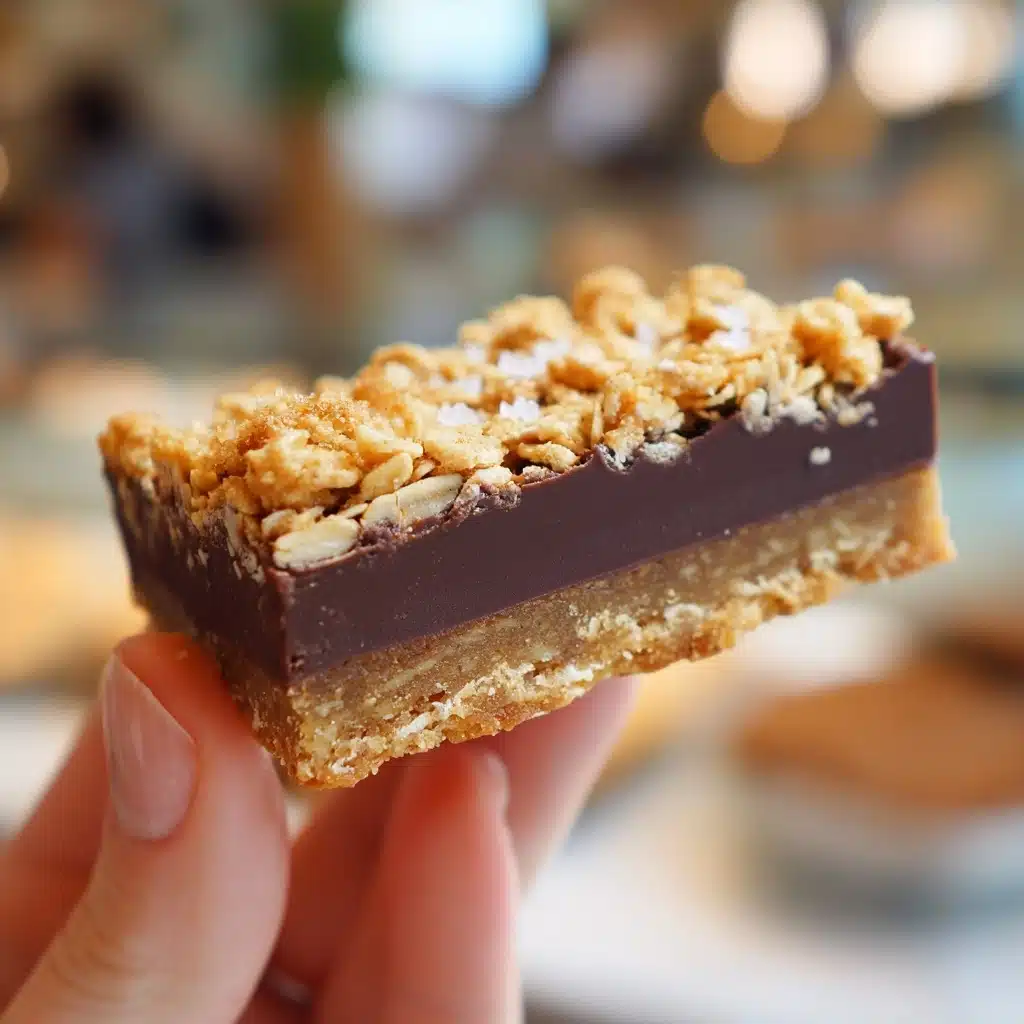
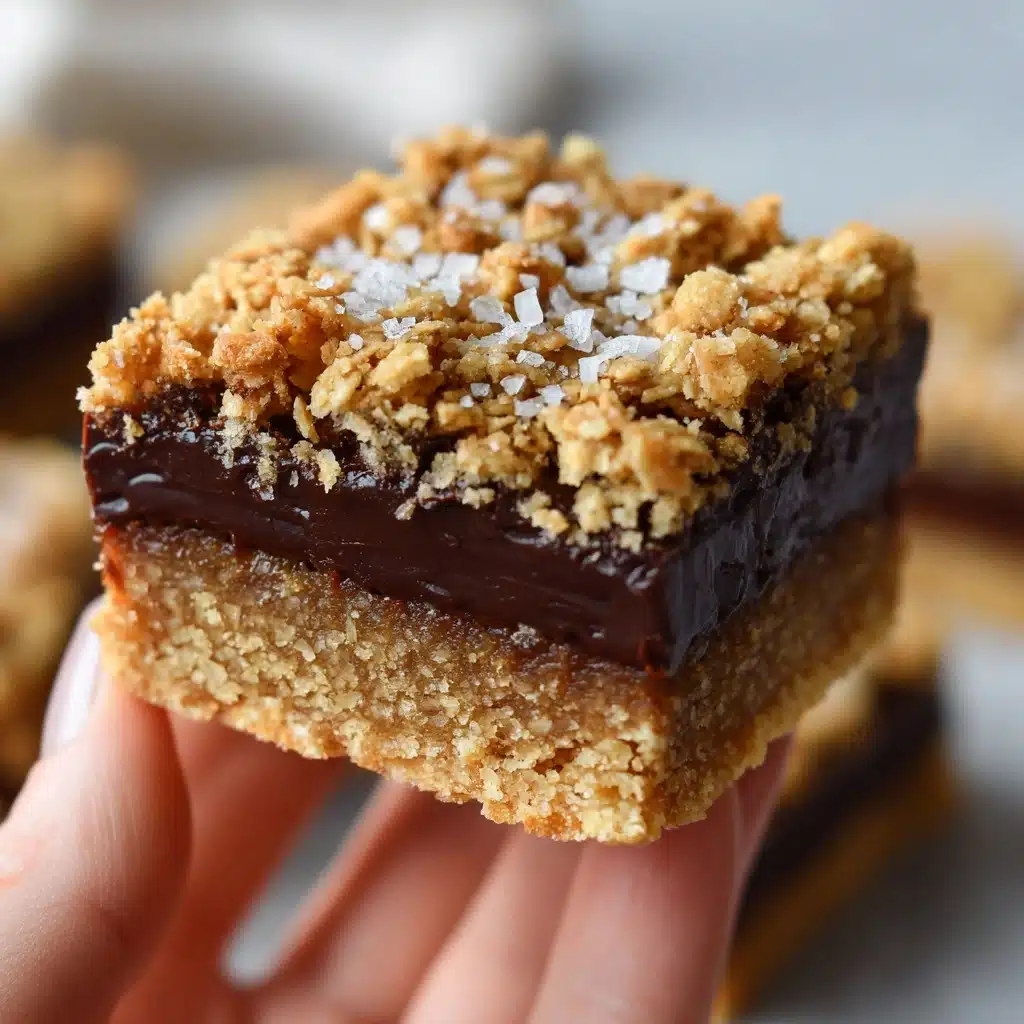
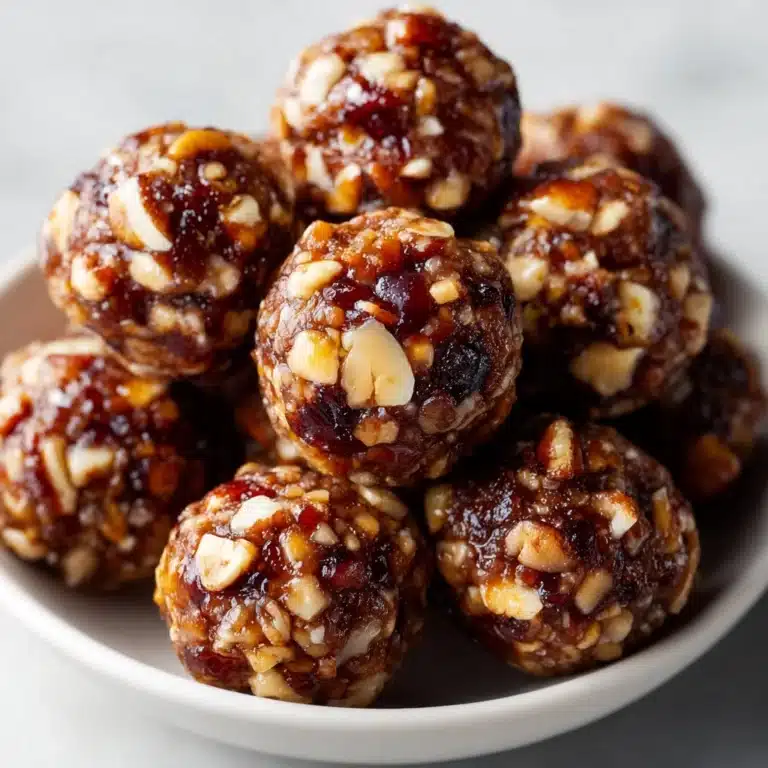
If you’re searching for a treat that checks all the boxes—simple, satisfying, and loaded with chocolate—these Chocolate Snack Bars are about to become your new obsession. Imagine chewy oats mingling with creamy nut butter, kissed with honey and flecked with gooey chocolate chips, all held together without ever turning on the oven. Whether you need a fuss-free lunchbox hero, a mid-afternoon pick-me-up, or a dessert that feels just a tiny bit healthy, these bars are pretty much destined for star status in your kitchen!
Ingredients You’ll Need
Trust me, you don’t need a mysterious mix of fancy ingredients to make unforgettable Chocolate Snack Bars—just the right handful of pantry staples that each shine in their own way. Here’s how they all bring this magic together.
- Old-fashioned rolled oats: They give the bars their hearty, chewy texture and add a wholesome bite.
- Almond butter or peanut butter: Acts as the creamy glue that holds everything together, while adding richness and a little savory contrast to the chocolate.
- Honey or maple syrup: Brings natural sweetness and helps bind the mixture; choose according to your flavor preference or dietary needs.
- Coconut oil (melted): This makes the bars luscious and helps them set beautifully in the fridge.
- Pure vanilla extract: Adds a warm, cozy aroma and heightens the overall flavor.
- Salt: Just a pinch really brings out the other flavors and balances the sweetness.
- Semi-sweet chocolate chips: The star ingredient for all the chocolatey goodness in every bite.
- Chopped nuts or seeds (optional): For extra crunch, flavor, and a dash of good-for-you energy—totally customizeable to your taste!
How to Make Chocolate Snack Bars
Step 1: Prep the Pan
First, line an 8×8-inch baking pan with parchment paper, making sure there’s a little extra hanging over the edges for easy lifting later. This step makes removals and cleanup a total breeze, so don’t skip it!
Step 2: Mix the Base
In a large bowl, stir together the rolled oats, your nut butter of choice, honey or maple syrup, melted coconut oil, vanilla extract, and salt. At first it might seem like it won’t quite come together, but keep mixing—soon it’ll transform into a thick, sticky mixture that smells absolutely dreamy.
Step 3: Add the Chocolate (and Extras!)
Fold in the semi-sweet chocolate chips and, if you like, a handful of chopped nuts or seeds. This is your moment to personalize—think walnuts, sunflower seeds, or even a sprinkle of chia for something a little unexpected. The chocolate will stay mostly intact, melting just a touch from the warmth of the mixture.
Step 4: Press Into the Pan
Spoon your mixture into the lined pan and press it down firmly and evenly. The more compact you make it, the better the bars will hold together once chilled. You can use the back of a spoon or even lightly dampen your hands for this part—whatever helps you get a nice, neat layer.
Step 5: Chill Until Firm
Pop the pan in the fridge and leave it for at least two hours, or until the bars are totally set. If you’re impatient (who isn’t around chocolate?), you can speed this up by placing the pan in the freezer for 30 minutes for an extra-firm texture.
Step 6: Slice and Serve
When you’re ready, simply lift the bars out using the parchment, set them on a cutting board, and slice into 12 snack-sized squares. Voila—your batch of Chocolate Snack Bars is ready for snacking, gifting, or stashing just for you!
How to Serve Chocolate Snack Bars

Garnishes
Dress up your Chocolate Snack Bars with a drizzle of melted chocolate, a sprinkle of flaky salt, or a dusting of finely chopped nuts. Even a handful of toasted coconut flakes scattered on top can really take these bars from everyday to extra-special.
Side Dishes
While these bars are a treat all on their own, they’re also perfect alongside fresh fruit—think strawberries, orange slices, or apple wedges—to balance their sweet richness. If you’re all about coffee breaks, pair them with an iced latte or a cozy mug of herbal tea for a snack that truly feels indulgent.
Creative Ways to Present
For parties or gift-giving, wrap individual bars in parchment and tie with a cute ribbon. Layer them on a cake stand at brunch for a fun DIY grab-and-go treat or cut them into bite-sized squares and serve as part of a dessert board with berries and more chocolate accents.
Make Ahead and Storage
Storing Leftovers
Chocolate Snack Bars store wonderfully in an airtight container in the refrigerator for up to a week, making them ideal for meal prep or grab-and-go snacks. Just make sure they’re well covered so they stay fresh and chewy.
Freezing
Want to make a double batch? These bars freeze beautifully! Place them in a single layer separated by parchment in a freezer-safe container, and they’ll be good for up to three months. Let them thaw in the fridge or at room temp for a few minutes before enjoying.
Reheating
One of the beauties of these Chocolate Snack Bars is that they’re delicious straight from the fridge or freezer—no reheating necessary! If you like a softer bite, just let them sit at room temperature for 10–15 minutes before eating.
FAQs
Can I make Chocolate Snack Bars nut-free?
Absolutely! Simply substitute sunflower seed butter or another nut-free spread for the almond or peanut butter. And swap chopped nuts for more seeds or dried fruit if you like.
Are these bars gluten-free?
If you use certified gluten-free rolled oats, your Chocolate Snack Bars will be completely gluten-free, making them safe for those with celiac or gluten sensitivities.
Can I use a different sweetener?
You can definitely use agave nectar or brown rice syrup in place of honey or maple. Just be aware that it might slightly change the flavor and how firm the bars become.
What’s the best way to keep them from crumbling?
Pressing the mixture down firmly into the pan before chilling is key! Letting them chill thoroughly also helps them hold their shape when you slice them.
How do I make these Chocolate Snack Bars vegan?
To make them fully vegan, simply use maple syrup instead of honey and choose dairy-free chocolate chips. You’ll still get all the glorious flavor and texture!
Final Thoughts
There’s something genuinely joyful about having a stash of homemade Chocolate Snack Bars waiting for you in the fridge. Whether you’re sharing with friends or savored solo, these bars are pure snack-time magic. Go ahead—give them a try, and get ready to fall in love!
Print
Chocolate Snack Bars Recipe
- Total Time: 10 minutes (plus chilling)
- Yield: 12 bars 1x
- Diet: Vegetarian
Description
These Chocolate Snack Bars are a delicious and wholesome treat that is perfect for satisfying your sweet cravings. Made with oats, almond butter, honey, and chocolate chips, these no-bake bars are easy to make and great for a quick energy boost.
Ingredients
Main Ingredients:
- 2 cups old-fashioned rolled oats
- 1 cup almond butter or peanut butter
- 1/2 cup honey or maple syrup
- 1/4 cup coconut oil, melted
- 1 teaspoon pure vanilla extract
- 1/4 teaspoon salt
Additional:
- 1 cup semi-sweet chocolate chips
- 1/4 cup chopped nuts or seeds (optional)
Instructions
- Prepare the Base: Line an 8×8-inch baking pan with parchment paper.
- Mix Ingredients: In a large bowl, combine oats, almond butter, honey, melted coconut oil, vanilla extract, and salt. Mix well.
- Add Mix-Ins: Fold in chocolate chips and nuts/seeds if using.
- Press into Pan: Press the mixture firmly into the prepared pan.
- Chill: Refrigerate for at least 2 hours until firm.
- Cut and Store: Cut into bars and store in the refrigerator in an airtight container.
Notes
- For a firmer texture, freeze the bars for 30 minutes before slicing.
- You can drizzle melted chocolate on top for extra decadence.
- Prep Time: 10 minutes
- Cook Time: 0 minutes
- Category: Snack
- Method: No-Bake
- Cuisine: American
Nutrition
- Serving Size: 1 bar
- Calories: 220
- Sugar: 10g
- Sodium: 60mg
- Fat: 12g
- Saturated Fat: 5g
- Unsaturated Fat: 6g
- Trans Fat: 0g
- Carbohydrates: 24g
- Fiber: 3g
- Protein: 5g
- Cholesterol: 0mg


