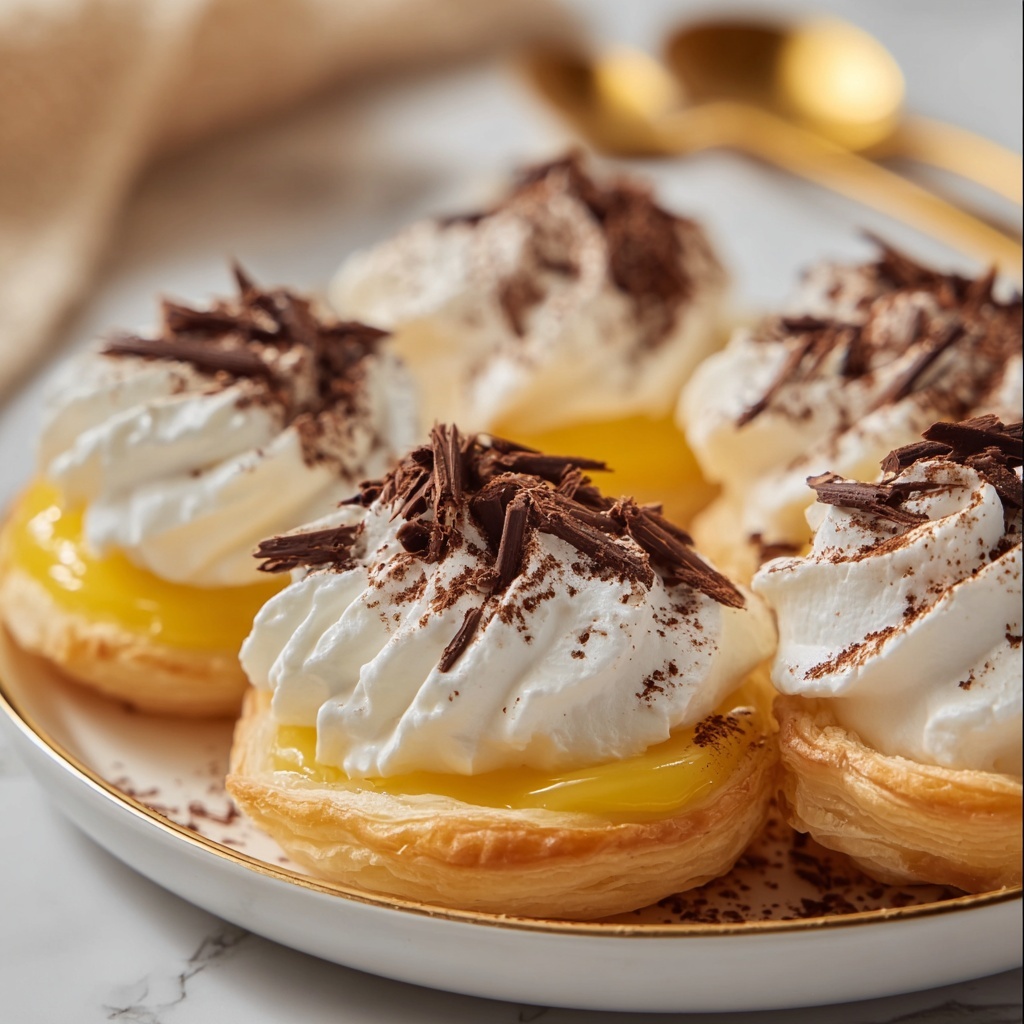
If you’ve ever wanted to master a timeless dessert that effortlessly combines light, airy pastry with lush, creamy sweetness, the Classic Cream Puffs Recipe is your golden ticket. These delicate, puffy delights boast a crisp exterior encasing a cloud-like whipped cream filling that melts in your mouth. Whether you’re preparing an elegant gathering or simply craving a nostalgic treat, this recipe captures all the charm and comfort of homemade indulgence with ingredients that come together beautifully every time.

Ingredients You’ll Need
This Classic Cream Puffs Recipe requires just a handful of simple, pantry-friendly ingredients. Each one plays a crucial role in creating that perfect balance of texture and flavor, ensuring a puff that’s crisp on the outside and luxuriously soft on the inside.
- Water (1 cup): The base that steams the dough to create those characteristic hollow pockets inside the puffs.
- Unsalted butter (1/2 cup): Adds richness and helps develop the dough’s tender crumb and golden color.
- All-purpose flour (1 cup): Provides the structure necessary for the puffs to hold their airy shape while baking.
- Salt (1/4 teaspoon): Enhances all the other flavors, balancing the sweetness in the final cream filling.
- Large eggs (4): Essential for the dough’s rise and creating that signature glossy and elastic texture.
- Heavy whipping cream (1 cup): Whipped to create the luscious, velvety filling inside each puff.
- Powdered sugar (1 tablespoon): Adds a subtle sweetness and smooth texture to the whipped cream filling.
- Vanilla extract (1 teaspoon): Infuses the cream with a warm, inviting flavor that complements the pastry perfectly.
How to Make Classic Cream Puffs Recipe
Step 1: Prepare the oven and baking sheet
First things first, get your oven heating to 400°F (200°C) and line a baking sheet with parchment paper. This ensures your cream puffs bake evenly and don’t stick, setting the stage for beautifully crisp pastries.
Step 2: Boil water and butter
In a medium saucepan, combine your water and butter and bring to a boil over medium-high heat. Watching that butter melt and swirl into the water is the start of transformation from simple ingredients into something magical.
Step 3: Mix in flour and salt
Once the mixture is boiling and butter fully melted, remove from heat and stir in the flour and salt vigorously until a smooth dough ball forms. This step is crucial because it creates a thick paste that will puff up beautifully in the oven.
Step 4: Cook the dough slightly
Place the pan back over the heat and stir continuously for 1 to 2 minutes. This helps dry out the dough just enough so the puffs won’t be soggy inside, ensuring a nice crust as they bake.
Step 5: Incorporate the eggs
Allow the dough to cool for a few minutes to avoid scrambling the eggs. Then, add the eggs one at a time, mixing thoroughly after each addition. The dough will become glossy and elastic—a sign it’s ready to form into puffs.
Step 6: Shape the puffs
Using a spoon or piping bag, drop small mounds about 1.5 inches wide onto your prepared baking sheet, spacing them roughly 2 inches apart. This spacing gives them room to puff up without sticking together.
Step 7: Bake to golden perfection
Bake for 20-25 minutes until the puffs turn a beautiful golden brown and have doubled in size. Once baked, transfer to a wire rack and let them cool completely, which is key to maintaining their crisp texture.
Step 8: Whip the filling
While the puffs cool, whip together the heavy cream, powdered sugar, and vanilla extract until stiff peaks form. This fluffy cream is the heart of your Classic Cream Puffs Recipe and makes each bite so dreamy.
Step 9: Fill the puffs
Carefully slice the cooled puffs in half horizontally. Pipe or spoon the whipped cream generously inside each one, making sure every bite is full of creamy goodness.
Step 10: Serve or chill
Replace the puff tops like a lid and serve immediately for that fresh, airy experience. If not serving right away, refrigerate to keep the whipped cream fresh and the pastry crisp until you’re ready.
How to Serve Classic Cream Puffs Recipe

Garnishes
Classic cream puffs shine best with simple garnishes. A light dusting of powdered sugar creates a delicate, snowy finish that makes the puffs feel even more special. You can also drizzle a bit of chocolate or caramel sauce for a rich twist that’s irresistible.
Side Dishes
Pair your cream puffs with fresh berries or a small fruit salad to add a bright, tangy contrast to the creamy and buttery flavors. A cup of coffee or tea is also a perfect companion, bringing warmth to every bite.
Creative Ways to Present
Looking to impress your guests? Arrange your filled cream puffs in a pyramid or “croquembouche” style tower for an elegant dessert centerpiece. Alternatively, serve them alongside a scoop of ice cream or a drizzle of raspberry coulis to elevate your presentation.
Make Ahead and Storage
Storing Leftovers
If you have leftover cream puffs, store the shells and filling separately to keep them from getting soggy. The shells stay crisp in an airtight container at room temperature, while the whipped cream filling should be refrigerated.
Freezing
You can freeze the unfilled puff shells for up to two months in an airtight bag. When you’re ready to enjoy them, simply thaw completely and fill with fresh whipped cream before serving to keep that perfect texture intact.
Reheating
To refresh the puff shells, warm them lightly in a preheated oven at 300°F (150°C) for 5-7 minutes. Avoid heating filled cream puffs as the cream might melt. Instead, fill them after reheating for that fresh-from-the-oven crisp surface paired with cool, fluffy filling.
FAQs
What makes cream puffs puff up so well?
The steam created from the water and butter mixture combined with the elasticity from the eggs causes the dough to expand and puff while baking. Properly drying out the dough before adding eggs is key to achieving the signature rise.
Can I use a different filling for classic cream puffs?
Absolutely! While whipped cream is traditional, pastry cream, custard, or even flavored mousse can be fantastic alternatives. Just keep the filling thick enough so it won’t make the pastry soggy.
How long can I keep filled cream puffs?
Filled cream puffs are best enjoyed the same day they are assembled because the cream can soften the pastry shell. If needed, store in the refrigerator and consume within 24 hours for optimal freshness.
Is it necessary to use unsalted butter?
Using unsalted butter lets you control the saltiness of the pastry precisely. Salted butter can work but may alter the final flavor slightly, so it’s best to adjust additional salt accordingly.
Why did my cream puffs collapse after baking?
Collapse typically happens if the puffs cool too quickly or the dough wasn’t cooked enough before baking. Make sure to dry the dough on the stove and cool the puffs gradually to maintain their airy structure.
Final Thoughts
There’s something truly special about mastering the Classic Cream Puffs Recipe. With just a handful of simple ingredients and a bit of care, you create a light, elegant dessert that never fails to delight. Why not give this recipe a try today and treat yourself and your loved ones to some homemade magic? I promise, once you have that first bite, you’ll be hooked just like I am!
Print
Classic Cream Puffs Recipe
- Total Time: 45 minutes
- Yield: 12 servings 1x
Description
Classic Cream Puffs are light, airy pastries made from choux dough, baked to golden perfection and filled with a sweet, fluffy whipped cream. This elegant French dessert is perfect for special occasions or a delightful treat anytime.
Ingredients
Choux Pastry Dough
- 1 cup water
- 1/2 cup unsalted butter
- 1 cup all-purpose flour
- 1/4 teaspoon salt
- 4 large eggs
Cream Filling
- 1 cup heavy whipping cream
- 1 tablespoon powdered sugar
- 1 teaspoon vanilla extract
Instructions
- Preheat Oven: Preheat the oven to 400°F (200°C) and line a baking sheet with parchment paper to prevent sticking and ensure easy cleanup.
- Boil Water and Butter: In a medium saucepan over medium-high heat, bring the water and unsalted butter to a vigorous boil, ensuring the butter is fully melted before proceeding.
- Add Flour and Salt: Remove the pan from heat and stir in the all-purpose flour and salt quickly until the mixture forms a cohesive ball, indicating the dough has come together.
- Cook Dough: Return the pan to medium heat and cook for 1-2 minutes while stirring constantly to slightly dry out the dough, which is crucial for the right texture in the baked puffs.
- Incorporate Eggs: Remove from heat and allow the dough to cool for a few minutes. Add the eggs one at a time, mixing thoroughly after each addition until the dough is smooth, glossy, and elastic.
- Shape Puff Mounds: Using a spoon or piping bag, form small mounds of dough about 1.5 inches in diameter on the prepared baking sheet, spacing them approximately 2 inches apart for proper expansion.
- Bake: Bake in the preheated oven for 20-25 minutes or until the cream puffs are golden brown and puffed up. Remove and let cool completely on a wire rack to maintain their crispness.
- Make the Cream Filling: In a large chilled bowl, whip the heavy cream, powdered sugar, and vanilla extract until stiff peaks form, creating a light and sweet filling.
- Fill the Puffs: Once the puffs have cooled, carefully slice each in half horizontally and fill generously with the whipped cream using a spoon or piping bag.
- Serve or Store: Replace the top of each puff, serve immediately for best texture, or refrigerate until ready to enjoy.
Notes
- Ensure the dough cools slightly before adding eggs to prevent scrambling.
- Use a piping bag for uniform-shaped puffs and neater presentation.
- Store filled cream puffs in the refrigerator and consume within 24 hours for optimal freshness.
- For a crispier shell, avoid opening the oven during the first 20 minutes of baking.
- Variations: Try adding a dusting of powdered sugar or a drizzle of chocolate over the filled puffs for extra indulgence.
- Prep Time: 15 minutes
- Cook Time: 25 minutes
- Category: Dessert
- Method: Baking
- Cuisine: French


