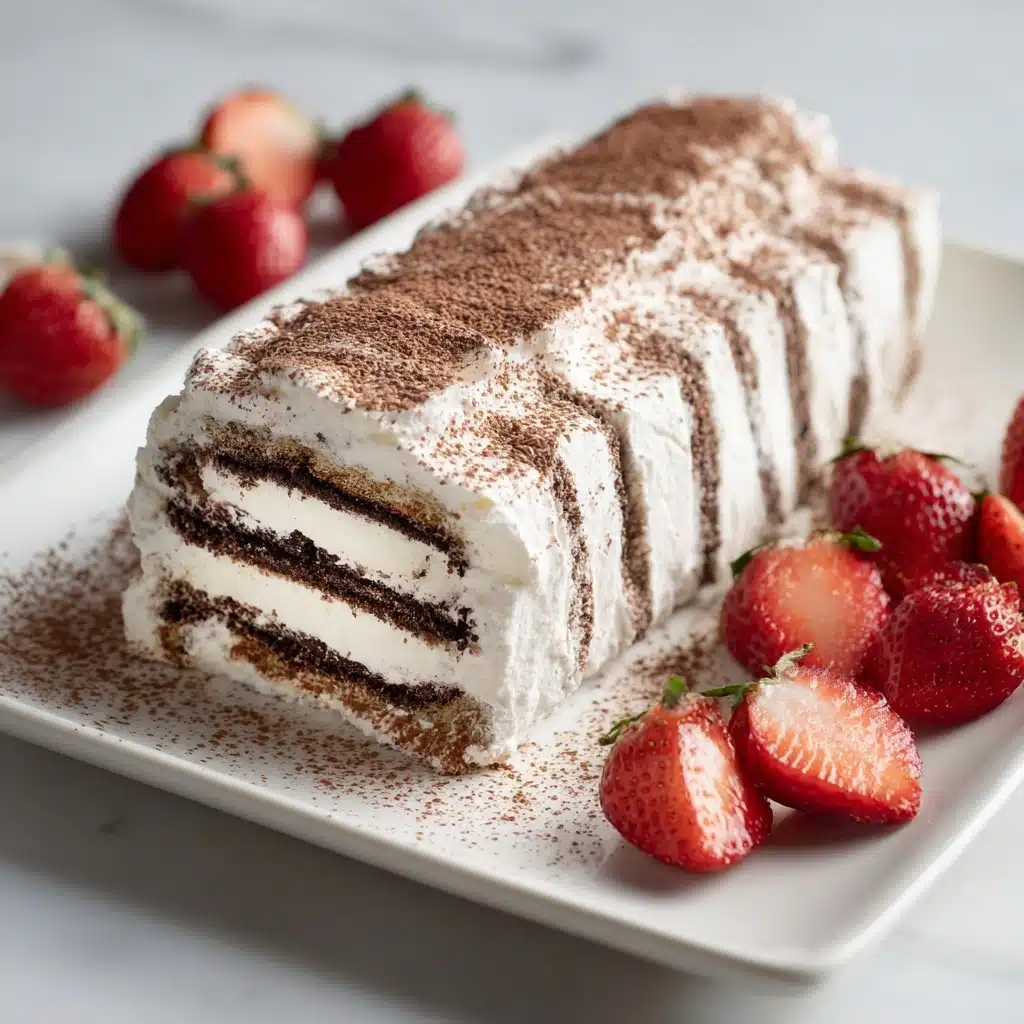
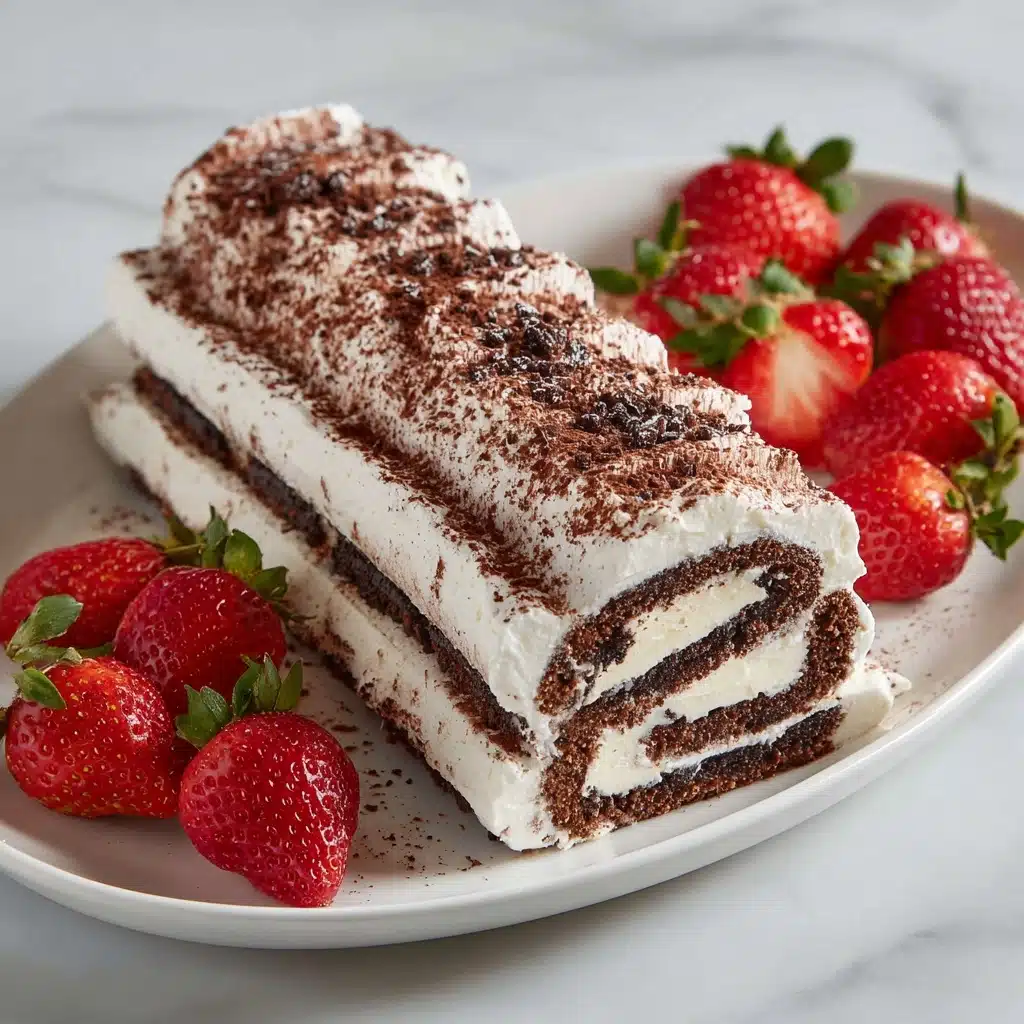
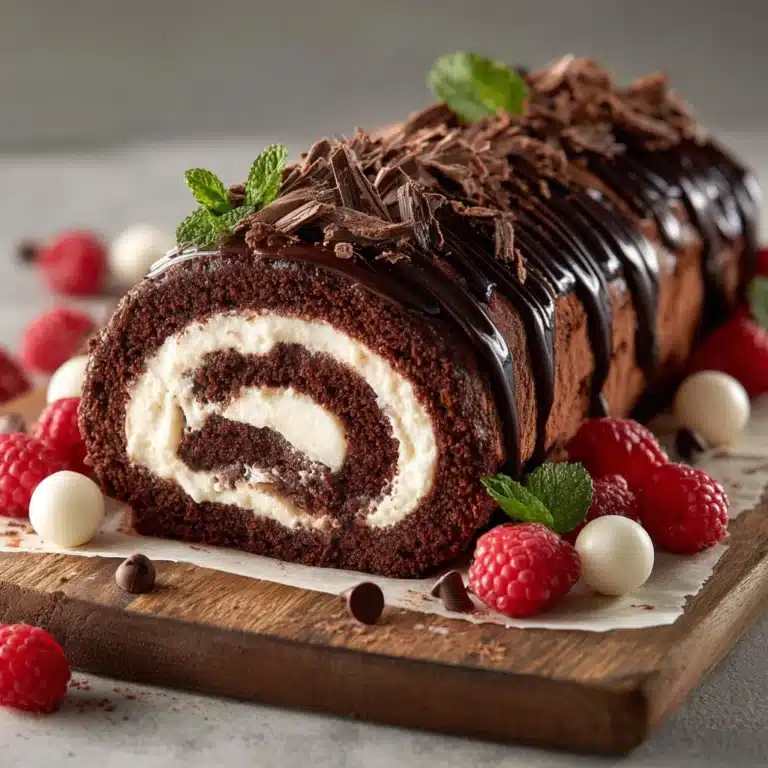
The Classic Icebox Cake is the ultimate crowd-pleaser that whispers nostalgia in every creamy, chocolatey bite. This no-bake beauty was a staple at family gatherings and potlucks for generations, and now it’s making a delicious comeback. Imagine delicate layers of crisp chocolate wafers softened by clouds of vanilla-kissed whipped cream, each mouthful melting effortlessly and leaving you wanting another slice. It’s one of those rare desserts where less fuss delivers more delight, and it is practically guaranteed to disappear in a flash at any celebration.

Ingredients You’ll Need
-
Whipped Cream:
- 3 cups heavy whipping cream
- 1/3 cup powdered sugar
- 2 teaspoons vanilla extract
Assembly:
- 1 (9 oz) package chocolate wafer cookies
- Chocolate shavings or cocoa powder for garnish (optional)
How to Make Classic Icebox Cake
Step 1: Whip the Cream
Start by pouring the heavy whipping cream into a large chilled bowl. Add the powdered sugar and vanilla extract, then whip the mixture with a hand mixer (or a stand mixer) on medium-high speed until stiff peaks form. This should take just a few minutes—stop as soon as the cream holds its shape. The whipped cream is your dreamy, cloud-like glue that brings the Classic Icebox Cake together.
Step 2: Make the Cream Anchor
Spoon a thin layer of whipped cream onto your serving platter—this acts as a cushion to keep your cake from slipping around as you build the layers. A little trick that makes all the difference for an effortlessly neat and stable cake.
Step 3: Layer the Cookies and Cream
Lay out 5 to 6 chocolate wafer cookies in a straight line on top of the cream anchor, slightly overlapping the edges so the structure holds as it chills. Spread about 1/2 cup of the whipped cream over the top and sides, covering the cookies completely. Be generous—these cookies love to soak up the cream!
Step 4: Continue Layering
Repeat the cookie and cream layering, forming a log or cake shape of your choice. Gently press each layer together so everything melds, then slather the entire exterior with the remaining whipped cream. Don’t worry if it looks rustic—imperfection is part of the Classic Icebox Cake’s vintage charm.
Step 5: Chill to Set
Cover the whole creation loosely with plastic wrap and refrigerate for at least 6 hours, though overnight is truly best. This crucial resting time is when the magic happens—the cookies soften, absorbing the cream, and become as tender as sponge cake.
Step 6: Garnish and Serve
Right before serving, sprinkle chocolate shavings or a dusting of cocoa powder over the top for an irresistible finish. Slice, serve, and get ready for the compliments to roll in!
How to Serve Classic Icebox Cake
Garnishes
Nothing beats a generous shower of chocolate shavings or a delicate veil of cocoa powder to crown your Classic Icebox Cake. Feeling extra playful? Add fresh berries, a drizzle of chocolate sauce, or a little powdered sugar for that bakery-worthy touch. The simple, understated beauty always draws people in for a second look (and a second slice).
Side Dishes
Pair your Classic Icebox Cake with a bowl of mixed berries or a scoop of vanilla ice cream to balance the richness with fresh, fruity sweetness. If you’re serving at a summer barbecue, some iced coffee or chilled espresso on the side is the cherry on top, making every bite feel even more celebratory and relaxed.
Creative Ways to Present
While the classic log shape is timeless, you can absolutely get creative for special occasions! Try shaping the cake in a springform pan for a more traditional round cake, or build individual mini stacks in mason jars for charming single-serves. A little strategic layering transforms this dessert from rustic retro to party showstopper in just minutes.
Make Ahead and Storage
Storing Leftovers
Any Classic Icebox Cake that survives the first round will keep beautifully in the fridge, covered, for up to 3 days. The flavors meld and the texture stays dreamy, so don’t worry about losing any of that homemade magic overnight.
Freezing
You can freeze slices of Classic Icebox Cake for longer storage. Wrap each piece tightly in plastic wrap and then foil, and freeze for up to one month. Thaw in the refrigerator overnight before serving for best results. The cake retains its creamy texture and still tastes fantastic.
Reheating
No reheating required (or recommended!) for this chilled treat. The beauty of the Classic Icebox Cake is its creamy, cool texture—perfect for hot days or when you want a refreshing, straight-from-the-fridge dessert.
FAQs
Can I use a different type Dessert
Absolutely! If you can’t find classic chocolate wafers, graham crackers or digestive biscuits work wonderfully. The main thing is to use a crisp, thin cookie that softens nicely during chilling.
How far in advance can I make Classic Icebox Cake?
This dessert actually gets better as it rests, so feel free to assemble it the night before. It will be perfectly set and delicious up to 24 hours later, making it an ideal make-ahead treat for parties.
Will the whipped cream get runny or separate?
If you whip your cream until stiff peaks form and refrigerate promptly, the whipped cream stays stable for several days. Avoid leaving the cake out at room temperature for too long, especially on a warm day, to maintain that dreamy texture.
Can I make a dairy-free version?
Yes! Swap the heavy cream for your favorite coconut or plant-based whipping cream. Choose dairy-free cookies, and you’ll still capture the essence of Classic Icebox Cake with a vegan twist.
How do I achieve nice, clean slices?
Use a sharp, thin-bladed knife dipped in hot water and wiped dry between cuts. This simple trick helps you slice through the creamy layers and cookies smoothly for a picture-perfect presentation.
Final Thoughts
If you’ve never tried making a Classic Icebox Cake, now’s the time to fall in love with its old-fashioned ease and irresistible charm. It’s hands-down one of the simplest yet most satisfying desserts you can whip together—so invite friends over, chill a cake, and get ready to savor every last bite!
Print
Classic Icebox Cake Recipe
- Total Time: 6 hours 20 minutes
- Yield: 8 servings 1x
- Diet: Vegetarian
Description
Indulge in the nostalgia of a Classic Icebox Cake, a simple yet decadent no-bake dessert that features layers of chocolate wafers and fluffy whipped cream. Perfect for any occasion!
Ingredients
Whipped Cream:
- 3 cups heavy whipping cream
- 1/3 cup powdered sugar
- 2 teaspoons vanilla extract
Assembly:
- 1 (9 oz) package chocolate wafer cookies
- Chocolate shavings or cocoa powder for garnish (optional)
Instructions
- Prepare the Whipped Cream: In a large bowl, whip the heavy cream with powdered sugar and vanilla extract until stiff peaks form.
- Assemble the Cake: On a serving platter, spread a thin layer of whipped cream to anchor the cake. Layer cookies and whipped cream alternately to form a log or cake shape.
- Chill and Serve: Cover the cake with remaining whipped cream, refrigerate for at least 6 hours, and garnish with chocolate shavings or cocoa powder before serving.
Notes
- This dessert can be shaped into a loaf, log, or round cake.
- Graham crackers or digestive biscuits can be substituted for chocolate wafers.
- Prep Time: 20 minutes
- Cook Time: 0 minutes
- Category: Dessert
- Method: No-Bake
- Cuisine: American
Nutrition
- Serving Size: 1 slice
- Calories: 340
- Sugar: 16g
- Sodium: 120mg
- Fat: 24g
- Saturated Fat: 15g
- Unsaturated Fat: 7g
- Trans Fat: 0g
- Carbohydrates: 27g
- Fiber: 1g
- Protein: 3g
- Cholesterol: 85mg


