
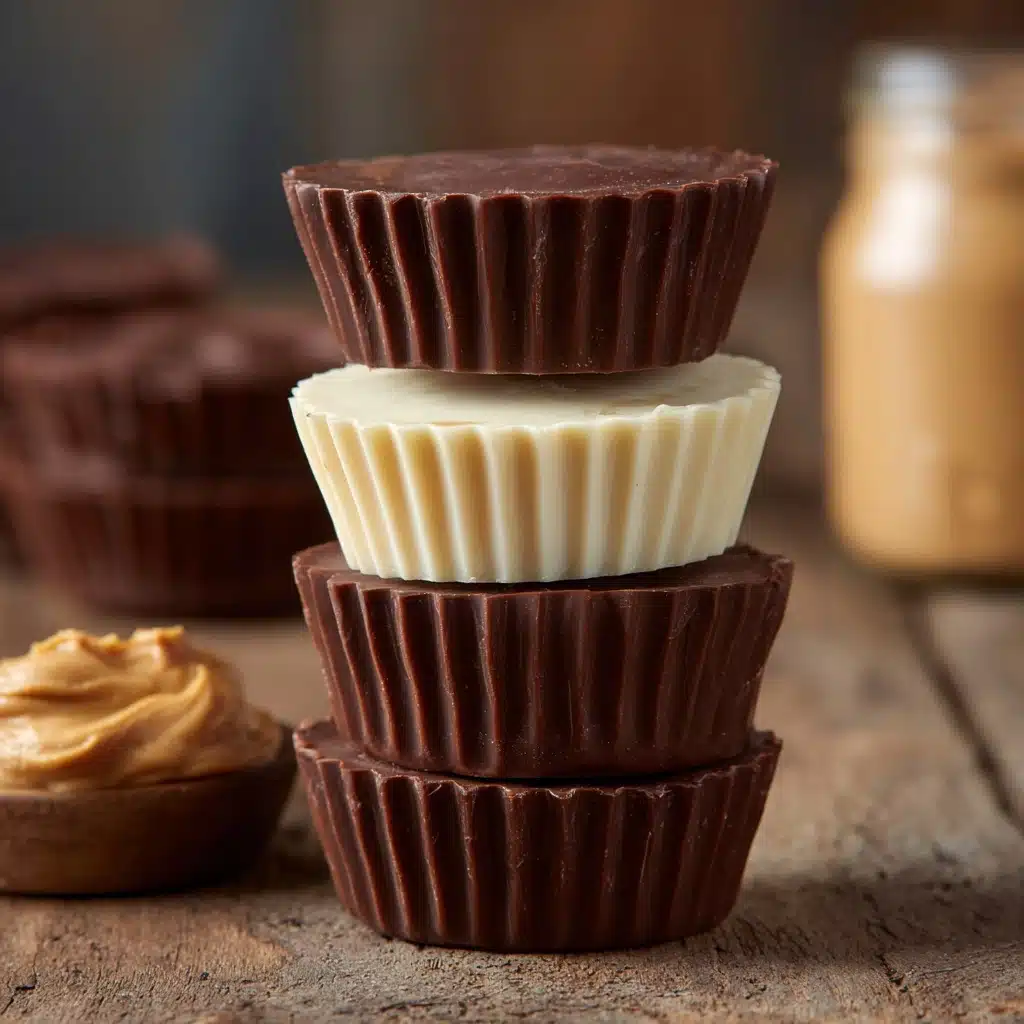
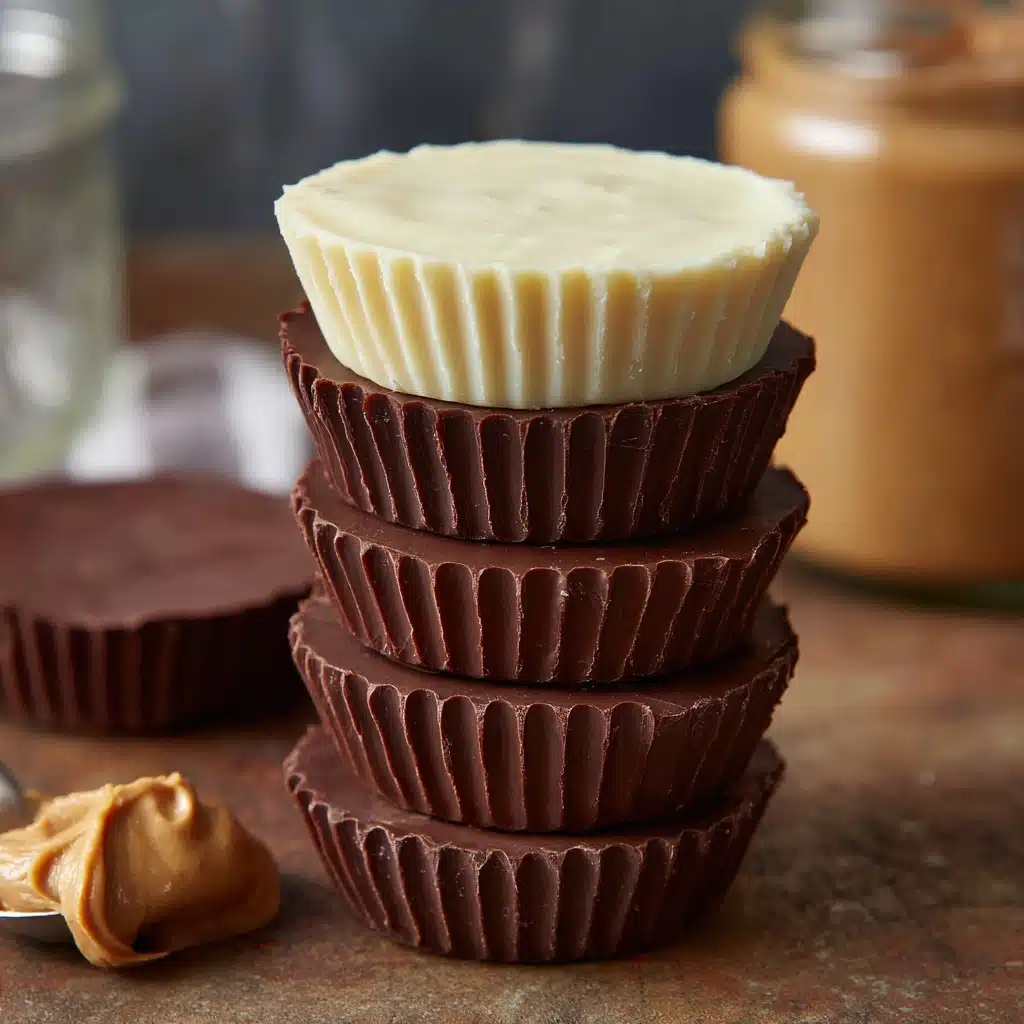
Cookie Butter Cups are the kind of treat that instantly lifts your mood with every single bite—decadent chocolate shells filled with a velvety, warmly spiced cookie butter center that feels both nostalgic and downright irresistible. Whether you’re crafting them for a special occasion, as a thoughtful homemade gift, or just to indulge in a quiet moment, these bite-sized wonders are pure bliss for anyone who’s ever fallen for that caramelized, almost magical flavor of cookie butter. This no-bake recipe comes together quickly and with minimal fuss, making it perfect for both seasoned bakers and enthusiastic beginners alike.
Ingredients You’ll Need
The beauty of Cookie Butter Cups is in their simple, high-impact ingredient list—every element brings something delightful to the party, whether it’s creaminess, sweetness, texture, or smooth finish. Here’s everything you need to create the ultimate homemade candy experience.
- Cookie Butter (1 cup): Biscoff spread is classic, but any brand brings that signature spiced, caramelized taste.
- Unsalted Butter (2 tablespoons, melted): Adds richness and helps the filling stay silky-smooth inside the cups.
- Powdered Sugar (1/4 cup): Sweetens the filling and creates that melt-in-your-mouth texture we all crave.
- Vanilla Extract (1/2 teaspoon): Gives the filling depth and natural warmth to enhance the cookie butter flavor.
- Semi-Sweet or Milk Chocolate Chips (2 cups): This is your chocolate shell; pick your favorite for classic or extra-sweet results.
- Coconut Oil (1 tablespoon, optional): Makes the melted chocolate shiny and easier to pour, but the recipe works well without it too.
How to Make Cookie Butter Cups
Step 1: Prep Your Pan
Start by lining a mini muffin tin with 24 paper liners—this is the secret to perfectly shaped, easy-to-release Cookie Butter Cups. If you’re out of liners, a quick spritz of non-stick spray works in a pinch, though liners make things tidier and cuter!
Step 2: Make the Creamy Filling
In a medium bowl, combine the cookie butter, melted unsalted butter, powdered sugar, and vanilla extract. Use a spatula or spoon to stir everything together until completely smooth and well blended. This takes just a minute, and the aroma alone will have you sneaking a taste!
Step 3: Melt the Chocolate
Add your chocolate chips and (if using) coconut oil to a microwave-safe bowl. Melt in 30-second bursts, stirring well after each, until the chocolate is completely fluid and glossy. Coconut oil helps the chocolate drizzle easily, but don’t fret if you skip it—the end result is still wonderfully decadent.
Step 4: Build the Base
Spoon about one teaspoon of your melted chocolate into each paper liner. Gently tap the muffin tin to level and spread the chocolate. Place the pan in the freezer for five minutes to let this base layer firm up, making the cups neat and easy to handle.
Step 5: Add the Filling
Next, scoop roughly one teaspoon of the cookie butter filling onto each set chocolate base. Gently press it down so it forms a slightly flattened mound, leaving just a little space at the sides for the top layer of chocolate to flow around the filling.
Step 6: Top and Chill
Cover each cup with another teaspoon of melted chocolate, ensuring the cookie butter filling is completely hidden. Tap the pan again for smooth tops, then freeze for 10 to 15 more minutes, until the Cookie Butter Cups are perfectly firm and ready for action.
How to Serve Cookie Butter Cups
Garnishes
Before the chocolate fully sets, sprinkle the tops with a pinch of flaky sea salt, crushed Biscoff cookies, or a little edible gold dust for a show-stopping finish. These little touches take your Cookie Butter Cups from wow to WHOA and create a bakery-worthy look.
Side Dishes
Serve Cookie Butter Cups alongside a pot of freshly brewed coffee, a tall glass of cold milk, or an assortment of fresh berries for a balanced dessert platter. They also make a perfect finish to a meal featuring spiced or nutty flavors.
Creative Ways to Present
Pile Cookie Butter Cups onto a tiered stand for a dramatic dessert centerpiece, or tuck them into colorful boxes or clear bags tied with ribbon for the ultimate edible gifts. They’re also adorable nestled among other small treats on a cookie or candy tray.
Make Ahead and Storage
Storing Leftovers
Leftover Cookie Butter Cups (if you have any!) can be kept in an airtight container in the refrigerator for up to two weeks. The chocolate stays snappy, and the filling remains dreamy and soft—just the way they should be.
Freezing
If you want to keep them even longer, these cups freeze beautifully. Arrange them in a single layer (or separate stacks with parchment paper) in a freezer-safe container, and you’ll have an emergency stash ready for up to three months. Thaw in the fridge or at room temperature before eating.
Reheating
No reheating is needed, but if you’ve kept the cups in the freezer and want a silkier bite, let them sit at room temperature for 10 to 15 minutes before serving. Avoid microwaving to keep their texture and structure perfect.
FAQs
Can I use white or dark chocolate instead of semi-sweet or milk chocolate?
Absolutely! Both white and dark chocolate work beautifully in Cookie Butter Cups. Dark chocolate gives a deeper, more bittersweet contrast, while white chocolate amps up the sweetness and creaminess. You can even swirl or layer different types for a gourmet twist.
What’s the best way to get smooth tops on my Cookie Butter Cups?
After spooning the melted chocolate over the filling, gently tap the muffin tin on the counter a few times. This helps the chocolate spread evenly and smooths out any bumps for that picture-perfect finish.
Is there a nut-free variation for school-safe treats?
Yes! Cookie butter is typically made from speculoos cookies and is nut-free, but double-check your brand to be sure. Look at the ingredients for potential cross-contamination if allergies are a concern.
How do I prevent my chocolate from seizing or burning in the microwave?
Always melt your chocolate in short bursts (about 30 seconds), stirring well between each round. This ensures even melting and prevents overheating. If you have a double boiler, you can also melt the chocolate gently over simmering water.
Can I make larger Cookie Butter Cups or use a regular muffin tin?
Definitely! A standard muffin tin will yield fewer, larger treats—just increase the amount of chocolate and filling per cup accordingly. The process is the same, and the wow factor is even bigger.
Final Thoughts
If you’re searching for a dessert that’s as fun to make as it is to eat, Cookie Butter Cups are a dream come true. I can’t wait for you to try them—your kitchen (and your sweet tooth) will thank you. So grab your ingredients and get ready to savor every little bite!
Print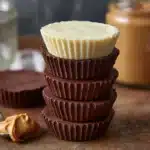
Cookie Butter Cups Recipe
- Total Time: 30 minutes
- Yield: 24 mini cups 1x
- Diet: Vegetarian
Description
Indulge in these delightful Cookie Butter Cups made with a luscious cookie butter filling encased in a chocolate shell. These no-bake treats are perfect for satisfying your sweet cravings!
Ingredients
Cookie Butter Filling:
- 1 cup cookie butter (such as Biscoff spread)
- 2 tablespoons unsalted butter, melted
- 1/4 cup powdered sugar
- 1/2 teaspoon vanilla extract
Chocolate Shell:
- 2 cups semi-sweet or milk chocolate chips
- 1 tablespoon coconut oil (optional, for smoother chocolate)
Instructions
- Prepare the Base: Line a mini muffin tin with 24 paper liners.
- Mix Cookie Butter Filling: In a medium bowl, combine cookie butter, melted butter, powdered sugar, and vanilla extract until smooth.
- Melt Chocolate: In a microwave-safe bowl, melt chocolate chips and coconut oil in 30-second intervals until smooth.
- Assemble Cups: Spoon a layer of melted chocolate into each liner, freeze briefly, add cookie butter filling, cover with more chocolate, and freeze until firm.
- Enjoy: Store the Cookie Butter Cups in the fridge and indulge as desired.
Notes
- For a richer taste, use dark chocolate.
- Store these treats in an airtight container in the refrigerator; they will keep well for up to 2 weeks.
- Prep Time: 15 minutes
- Cook Time: 0 minutes
- Category: Dessert
- Method: No-Bake
- Cuisine: American
Nutrition
- Serving Size: 1 mini cup
- Calories: 120
- Sugar: 10g
- Sodium: 20mg
- Fat: 7g
- Saturated Fat: 4g
- Unsaturated Fat: 3g
- Trans Fat: 0g
- Carbohydrates: 12g
- Fiber: 1g
- Protein: 1g
- Cholesterol: 2mg


