Get ready to fall in love with this Cornflake Cakes Recipe—a no-bake dessert that effortlessly blends creamy chocolate with the unforgettable crunch of cornflakes, all in one perfect little bite. Whether you’re looking for a nostalgic treat, a fun family project, or an easy party dessert, this recipe promises joy in every crumb. From school party trays to a late-night snack, these cakes shine with chocolaty charm, minimal fuss, and maximum deliciousness.
Ingredients You’ll Need
Ingredients You’ll Need
You won’t believe how a handful of familiar pantry staples come together to make something so delightful! Each ingredient in the Cornflake Cakes Recipe has a special role, building layers of flavor and texture that make these bites totally irresistible.
- Cornflakes: The star of the show—these bring the irresistible crispy crunch that defines this dessert.
- Milk chocolate chips: Lend a creamy, sweet chocolate flavor that melts perfectly over the cereal.
- Semi-sweet chocolate chips: Add a grown-up depth that balances the sweetness—feel free to use all of one type Dessert
- Unsalted butter: Gives a beautiful glossy finish and adds rich flavor, making every bite smooth and satisfying.
- Golden syrup or light corn syrup: Provides that signature sticky, chewy texture and a gentle caramel note—essential for helping everything hold together.
How to Make Cornflake Cakes Recipe
Step 1: Prep Your Liners
Start by lining a muffin tin with paper liners or arranging cupcake liners on a baking tray. This little move makes the cakes easy to serve, catch every crumb, and gives them that classic cupcake look. Trust me, it keeps things tidy and fun for all ages!
Step 2: Melt the Chocolate Mixture
In a heatproof bowl, add the chocolate chips, butter, and syrup. Melt them together using a double boiler on the stove or in the microwave in 30-second intervals, stirring between each zap. The result? A smooth, shiny, chocolatey pool that will have you licking the spoon (go ahead, I won’t judge)!
Step 3: Coat the Cornflakes
Drop the crispy cornflakes into a large mixing bowl. Pour in your warm chocolate mixture and gently fold everything together until each flake is fully enrobed in that glossy chocolate. This step is as fun as it sounds—just stir carefully so you keep those lovely flakes intact.
Step 4: Fill the Liners
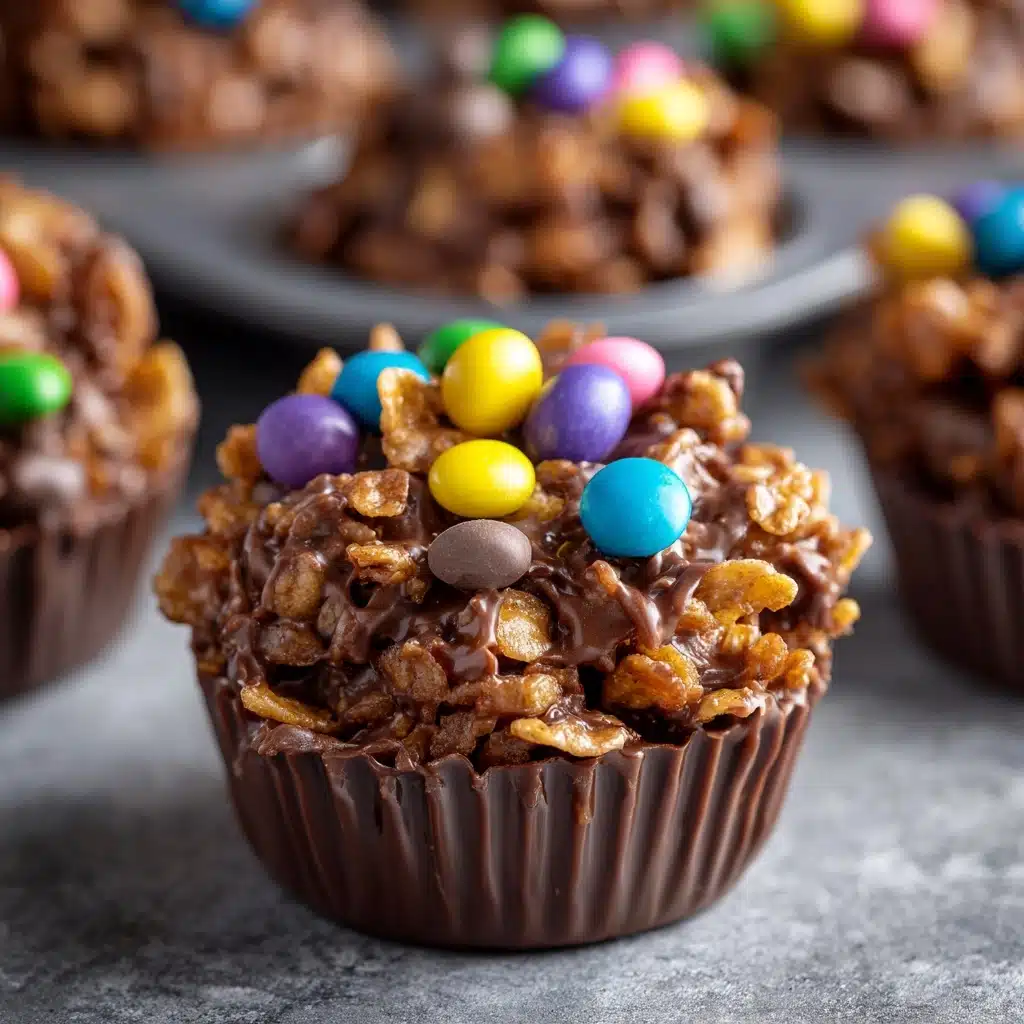
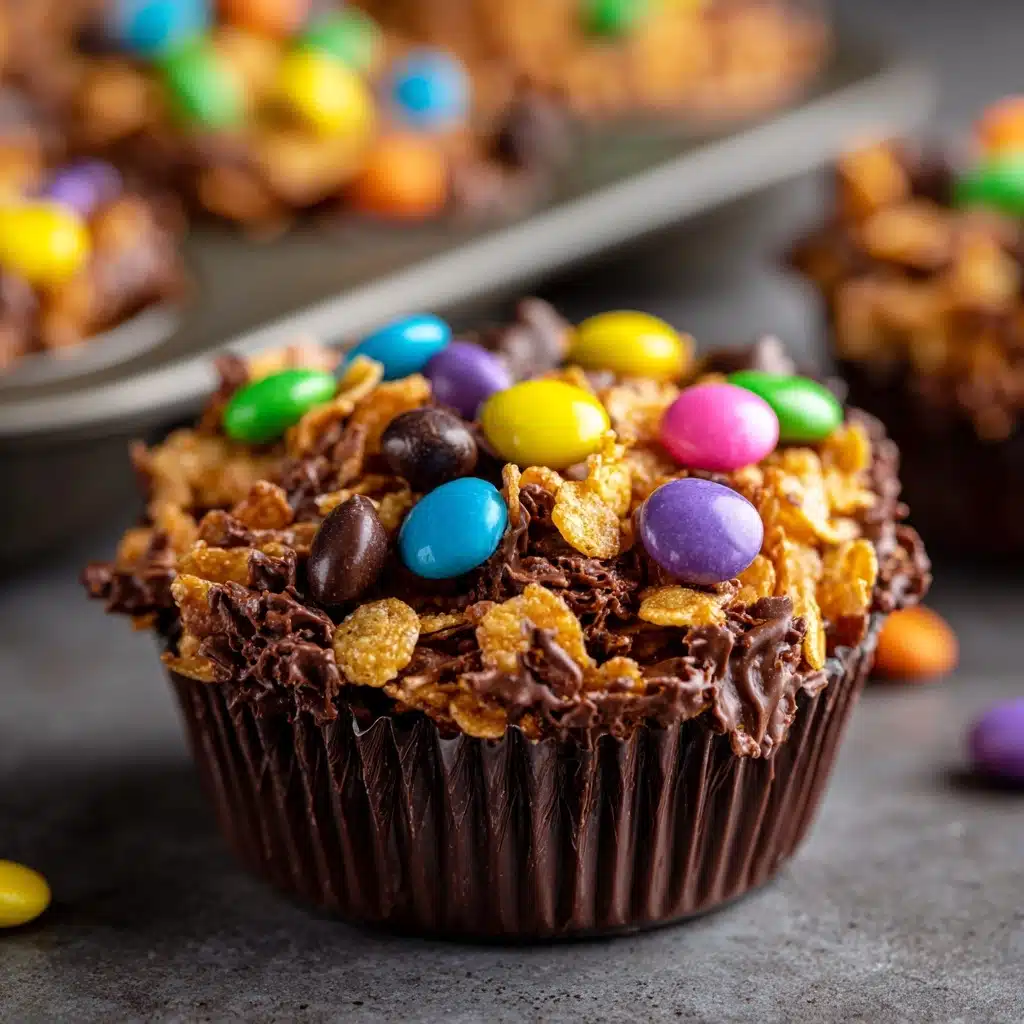
Spoon the chocolatey cornflake mixture into your prepared liners, dividing it evenly. Lightly press the mixture down with the back of the spoon to help it hold its shape. Each mound should look delightfully rustic, like a tiny chocolate nest!
Step 5: Chill Until Set
Pop the tray into the fridge for at least 1 hour, or until the Cornflake Cakes Recipe is firm. This is the hardest part—waiting! But it lets everything set up perfectly so you get that irresistibly crunchy, chewy texture.
How to Serve Cornflake Cakes Recipe
Garnishes
Top your Cornflake Cakes Recipe with a handful of mini chocolate eggs, colorful sprinkles, or even a sprinkle of flaky sea salt. It’s the small touch that makes them extra fun, and lets everyone put their own spin on each cake—kids especially love decorating their own!
Side Dishes
For a party tray, serve these alongside bowls of fresh berries, fruit kabobs, or a cool glass of milk. Their chocolatey crunch is also perfect with a hot coffee or tea—making them a sweet pick-me-up for both kids and grown-ups.
Creative Ways to Present
If you want a showstopper, arrange the cakes on a tiered dessert stand or pack them in a pretty box lined with parchment for a charming edible gift. Around holidays like Easter, tuck mini eggs in the center for a nest effect and you’ll have a centerpiece-worthy treat!
Make Ahead and Storage
Storing Leftovers
Keep any leftover Cornflake Cakes Recipe in an airtight container in the fridge for up to a week. They’ll stay perfectly crisp and delicious, ready for snacking when the craving strikes.
Freezing
You can freeze Cornflake Cakes (minus any delicate toppings) for up to 2 months. Place them in a single layer in a freezer-safe container, separating layers with parchment paper. Let them thaw in the fridge before enjoying for best texture.
Reheating
No reheating necessary for this no-bake delight! Just let them sit at room temperature for a few minutes after chilling or freezing, and they’ll be golden and ready to devour.
FAQs
Can I use all milk chocolate or all semi-sweet in this Cornflake Cakes Recipe?
Absolutely! Feel free to use any combination of chocolate that matches your taste. Using all milk chocolate gives a sweeter touch, while all semi-sweet brings a deeper, more intense cocoa flavor. It’s delicious both ways.
How do I make these nut-free or allergy-friendly?
This Cornflake Cakes Recipe is naturally nut-free if you use a brand of chocolate and cornflakes that are certified safe. Always double-check labels to be sure, especially if making for a group with allergies.
What can I substitute for golden syrup?
Golden syrup adds a unique, caramel-like flavor, but if you can’t find it, light corn syrup works just as well. Honey is another option if you don’t mind a slightly different taste.
Can I add other mix-ins to the Cornflake Cakes Recipe?
Yes, go wild! Try folding in mini marshmallows, chopped dried fruit, or even tiny pretzel bits before scooping into liners. Each addition offers its own spin on flavor and texture.
How far ahead can I make Cornflake Cakes for a party?
You can prepare Cornflake Cakes Recipe up to 2-3 days before your event. Just store them in an airtight container in the fridge and add fresh garnishes right before serving for the best look and taste.
Final Thoughts
If you haven’t tried the Cornflake Cakes Recipe yet, now is the perfect time! With its irresistible blend of chocolate and crunch, easy steps, and crowd-pleasing results, this is one treat you’ll want to make again and again. Go ahead—gather your ingredients and start stirring up some sweet, memorable moments!
Print
Cornflake Cakes Recipe
- Total Time: 1 hour 15 minutes (including chilling)
- Yield: 12 cakes 1x
- Diet: Vegetarian
Description
These Cornflake Cakes are a delightful treat made with a crunchy cornflake base coated in a decadent chocolate mixture. Perfect for a quick and easy dessert or a fun activity to make with kids.
Ingredients
Main Ingredients:
- 4 cups cornflakes
- 1/2 cup milk chocolate chips
- 1/2 cup semi-sweet chocolate chips (or use 1 cup of either)
- 1/4 cup unsalted butter
- 1/4 cup golden syrup or light corn syrup
Instructions
- Prepare Liners: Line a muffin tin with paper liners or place cupcake liners on a baking tray.
- Melt Chocolate Mixture: In a heatproof bowl, combine the chocolate chips, butter, and syrup. Melt together using a double boiler or in the microwave in 30-second intervals, stirring between each until smooth.
- Coat Cornflakes: Place the cornflakes in a large mixing bowl. Pour the melted chocolate mixture over the cornflakes and gently stir until the cereal is fully coated.
- Shape and Chill: Spoon the mixture into the paper liners, gently pressing to shape each one. Chill in the refrigerator for 1 hour or until set.
- Serve: Serve cold or at room temperature.
Notes
- For a fun twist, top with mini chocolate eggs, sprinkles, or sea salt.
- You can also use white chocolate or peanut butter chips instead of milk chocolate.
- Prep Time: 10 minutes
- Cook Time: 5 minutes (melt time)
- Category: Dessert
- Method: No-Bake
- Cuisine: British
Nutrition
- Serving Size: 1 cake
- Calories: 180
- Sugar: 12 g
- Sodium: 85 mg
- Fat: 10 g
- Saturated Fat: 6 g
- Unsaturated Fat: 3 g
- Trans Fat: 0 g
- Carbohydrates: 22 g
- Fiber: 1 g
- Protein: 2 g
- Cholesterol: 10 mg


