
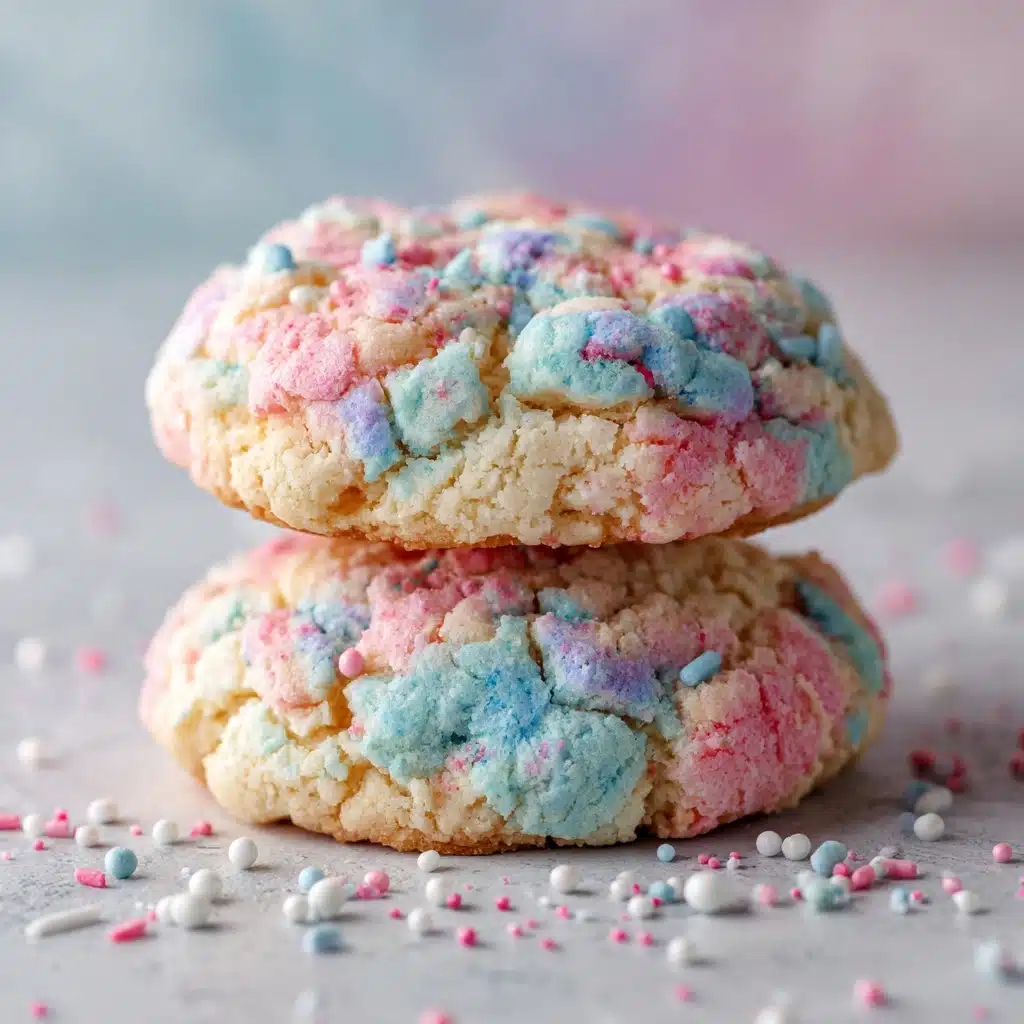
If you’re ready to bring the magic of a carnival right into your own kitchen, you absolutely need to try these Cotton Candy Cookies! These whimsical cookies are impossibly soft, marbled in cheerful pink and blue, and infused with all the nostalgic sweetness of classic cotton candy. Whether you’re baking for a birthday bash, a baby shower, or just want to brighten up a rainy afternoon, Cotton Candy Cookies are guaranteed to make everyone smile. Get ready for a recipe that’s as fun to make as it is to eat!

Ingredients You’ll Need
The list is simple but each ingredient plays a starring role in flavor, color, and those iconic soft centers. Don’t skip any part, and you’ll see how effortlessly the ingredients come together to transport you right back to your favorite childhood fair!
- Unsalted butter (1/2 cup, softened): The secret to melt-in-your-mouth cookies with a rich flavor base.
- Granulated sugar (3/4 cup): Classic sweetness, perfect for getting those edges just barely crisp.
- Large egg (1): Adds structure and helps create that satisfying chewy bite.
- Cotton candy extract (1 teaspoon): This gives the cookies their whimsical flavor; use vanilla if needed, but cotton candy really makes them pop.
- All-purpose flour (1 1/2 cups): Your tried-and-true cookie foundation for the ideal cookie crumb.
- Baking soda (1/4 teaspoon): Lends just the right amount of lift so your cookies puff up perfectly.
- Salt (1/4 teaspoon): Brightens the sweetness and balances all the flavors.
- Blue and pink food coloring: These transform the dough into a festive, marbled masterpiece.
- Sprinkles (2 tablespoons, optional): For extra pizzazz and a confetti-like finish that kids (and adults) go wild for.
How to Make Cotton Candy Cookies
Step 1: Prep Your Baking Sheet
Preheat your oven to 350°F and line a baking sheet with parchment paper. This not only keeps the cookies from sticking, but also helps them bake up soft and lift off with ease. Trust me, your cleanup will be a breeze!
Step 2: Cream the Butter and Sugar
In a large bowl, beat the softened butter and granulated sugar together until the mixture is light and fluffy. This is the moment to let your mixer work its magic—the air you beat in helps those Cotton Candy Cookies turn out tender with the perfect texture in every bite.
Step 3: Mix in Egg and Cotton Candy Extract
Add the egg and the cotton candy extract (or vanilla, if you’re taking a shortcut) right into your creamed mixture. Beat until everything is fully incorporated. This step is where the base of sweetness and that dreamlike cotton candy essence start to shine through.
Step 4: Whisk Dry Ingredients Separately
In a separate bowl, whisk together the flour, baking soda, and salt. Whisking them first ensures every bite has even flavor and texture, and keeps your cookies from developing those dreaded dense spots.
Step 5: Combine Wet and Dry Ingredients
Gradually add the dry ingredients to your wet bowl, mixing just enough for a dough to form. The trick here is to mix until combined but not a moment longer—overmixing can toughen your cookies and we’re aiming for that signature soft crumb!
Step 6: Color and Marble the Dough
Divide your finished dough in half, placing each portion into a separate bowl. Use blue food coloring in one and pink in the other. Mix until evenly colored—then comes the fun part! Pinch off pieces of each color and press them together, rolling gently in your palms to create that dreamy marbled effect. These whimsical colors are what make Cotton Candy Cookies so visually irresistible!
Step 7: Shape and Decorate
Take pinched, marbled dough and roll into 1-inch balls. Place them on your prepared baking sheet about 2 inches apart. Gently flatten each ball for just the right thickness, and if you’re feeling extra festive, sprinkle with a generous dash of colorful sprinkles.
Step 8: Bake and Cool
Slide your baking sheet into the preheated oven and bake for 9 to 11 minutes—just until the edges are set and centers look slightly underbaked. This ensures our Cotton Candy Cookies stay soft. Let them cool on the sheet for 5 minutes before transferring to a wire rack, where they’ll set up into cookie perfection.
How to Serve Cotton Candy Cookies
Garnishes
For the finishing touch, a handful of sprinkles adds sparkle and crunch, echoing the fun colors of cotton candy itself. If you want to go the extra mile, a tiny pinch of edible glitter is pure magic for party tables and bake sales alike!
Side Dishes
Cotton Candy Cookies are a star at dessert tables, but they pair delightfully with a tall glass of ice-cold milk, a fruity punch, or even a scoop of vanilla or bubblegum ice cream. Their bright flavor makes them perfect alongside simple treats that let their sweetness shine.
Creative Ways to Present
Stack Cotton Candy Cookies in pastel towers, tie a stack with a ribbon for edible party favors, or serve them atop a platter shaped like a Ferris wheel for the ultimate carnival vibe. For birthdays, nestle a candle into a cookie for an unforgettable alternative to cupcakes!
Make Ahead and Storage
Storing Leftovers
If you find yourself with leftovers (lucky you!), keep your Cotton Candy Cookies in an airtight container at room temperature. They stay perfectly soft and delicious for up to 5 days—although they rarely last that long in my house!
Freezing
Once baked and cooled, you can freeze these cookies in a freezer-safe bag or airtight container for up to 2 months. Just separate layers with parchment paper to prevent sticking. When the craving strikes, you’re always just a few minutes away from fresh-baked joy!
Reheating
To bring back that fresh-from-the-oven softness, pop a thawed Cotton Candy Cookie in the microwave for 5 to 10 seconds. The cookie will warm up beautifully and taste like you just made it.
FAQs
Can I make these without cotton candy extract?
Absolutely! While the extract gives that special fairground flavor, vanilla extract is a great swap. They’ll still be deliciously sweet and fun—and just a bit more classic sugar cookie.
How can I get bright, even colors in my cookies?
Use gel food coloring for the most vibrant pinks and blues. Liquid food coloring works too, but gel gives you more intensity without thinning out the dough. Mix well for even tones, or swirl for more of a tie-dyed look!
Can I add mix-ins to the dough?
Definitely! White chocolate chips or extra sprinkles mixed right into the dough add even more fun. Just keep mix-ins to about 1/2 cup total so the dough stays together nicely.
What’s the secret to keeping these cookies soft?
Underbaking just slightly and letting the cookies finish setting up as they cool is the key. Be sure to pull them from the oven when the edges are set but the centers still look a bit soft—they’ll firm up perfectly outside the oven.
Are these Cotton Candy Cookies suitable for themed parties?
Yes, they’re a party favorite! The vibrant colors and playful flavor make them a fun centerpiece for birthdays, baby showers, or any gathering that needs a pop of joy and nostalgia.
Final Thoughts
These Cotton Candy Cookies are pure happiness baked into a fun, colorful treat. You won’t believe how easy they are to make or just how quickly they’ll disappear once you share them. Whip up a batch, spread a little magic, and watch everyone’s faces light up!
Print
Cotton Candy Cookies Recipe
- Total Time: 25 minutes
- Yield: 20 cookies 1x
- Diet: Vegetarian
Description
These Cotton Candy Cookies are a whimsical and colorful treat that will delight both kids and adults. The unique flavor of cotton candy extract combined with marbled pink and blue dough creates a fun and festive cookie perfect for parties or special occasions.
Ingredients
Dough:
- 1/2 cup unsalted butter (softened)
- 3/4 cup granulated sugar
- 1 large egg
- 1 teaspoon cotton candy extract (or vanilla if unavailable)
- 1 1/2 cups all-purpose flour
- 1/4 teaspoon baking soda
- 1/4 teaspoon salt
Additional:
- Blue and pink food coloring
- 2 tablespoons sprinkles (optional)
Instructions
- Preheat oven and prepare baking sheet: Preheat oven to 350°F and line a baking sheet with parchment paper.
- Cream butter and sugar: In a large bowl, cream softened butter and sugar until light and fluffy.
- Add egg and extract: Mix in the egg and cotton candy extract until fully combined.
- Prepare dry ingredients: In a separate bowl, whisk together flour, baking soda, and salt.
- Combine wet and dry ingredients: Gradually add the dry ingredients to the wet mixture, mixing just until a dough forms.
- Color dough: Divide the dough into two bowls and color with blue and pink food coloring.
- Create marbled effect: Pinch off small pieces of each color and press them together to create a marbled effect, then roll into balls.
- Bake cookies: Place on baking sheet, flatten gently, and top with sprinkles if desired. Bake for 9–11 minutes.
- Cool and serve: Let cool on the baking sheet before transferring to a wire rack to cool completely.
Notes
- Cotton candy extract provides the unique flavor for these cookies and can be purchased online or at specialty baking stores.
- For a crisper texture, bake the cookies for an additional 1–2 minutes.
- These cookies freeze well after baking, making them a convenient make-ahead treat.
- Prep Time: 15 minutes
- Cook Time: 10 minutes
- Category: Dessert
- Method: Baking
- Cuisine: American
Nutrition
- Serving Size: 1 cookie
- Calories: 110
- Sugar: 9g
- Sodium: 55mg
- Fat: 5g
- Saturated Fat: 3g
- Unsaturated Fat: 2g
- Trans Fat: 0g
- Carbohydrates: 15g
- Fiber: 0g
- Protein: 1g
- Cholesterol: 20mg


