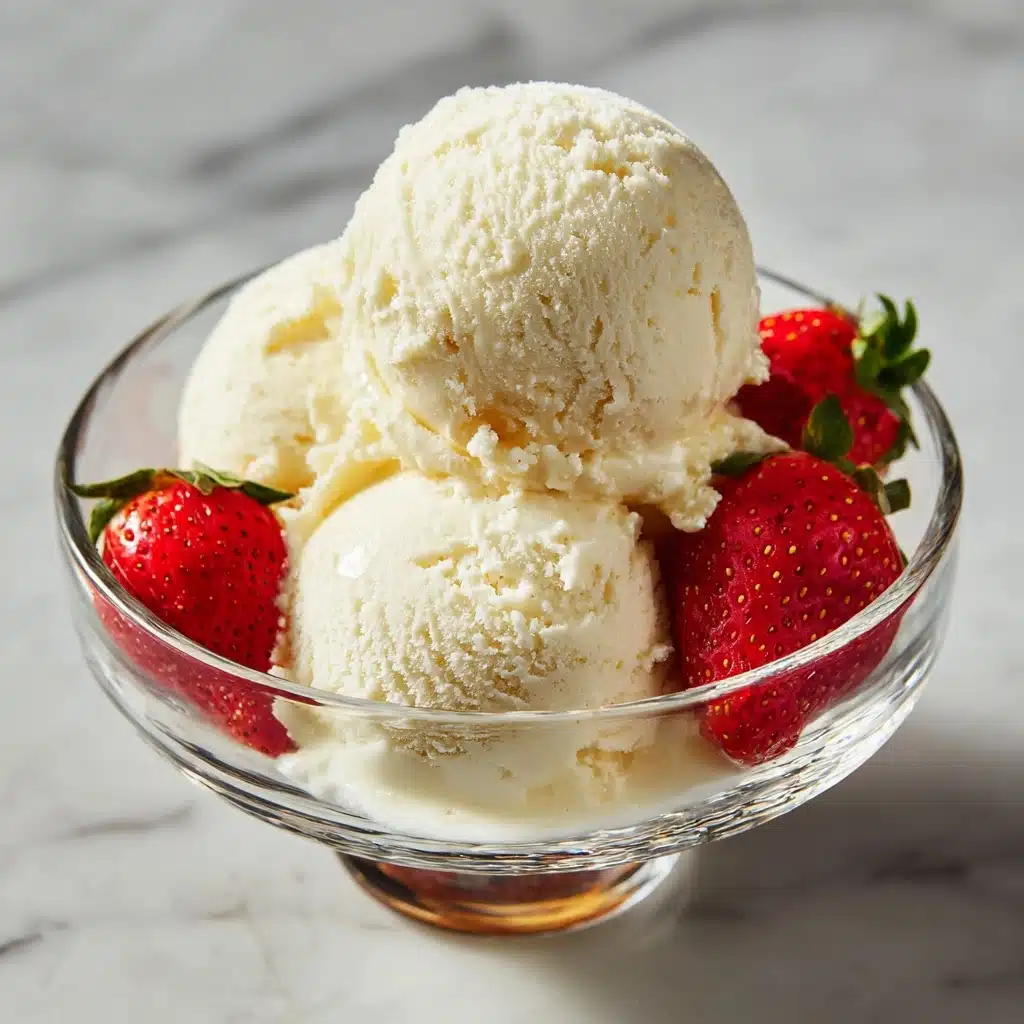
Nothing says summer joy like whipping up your very own batch of creamy, dreamy ice cream at home—no special gadgets required! Create Pure Happiness With This Easy Homemade Ice Cream Recipe and discover just how effortless homemade decadence can be. With a handful of basic ingredients and a sprinkle of imagination, you’ll craft a dessert that’s miles above store-bought, both in taste and nostalgia. Each bite offers smooth vanilla bliss, and you get to pick your own mix-ins and flavors. Get ready to fall in love, scoop by scoop!
Ingredients You’ll Need
What makes this recipe magical is how a few simple, quality ingredients come together for irresistible results. Each component brings its own special something, from lush texture to pure, comforting flavor.
- 2 cups heavy cream: The backbone of luxurious, silky ice cream; make sure it’s cold for best whipping results.
- 1 cup sweetened condensed milk: Adds rich sweetness and keeps your ice cream smooth without an ice cream maker.
- 1 teaspoon vanilla extract: Infuses classic flavor, but feel free to experiment with almond or mint extracts, too!
- Pinch of salt: Balances the sweetness and wakes up all the flavors in every bite.
- Optional mix-ins (chocolate chips, crushed cookies, fruit, caramel or fudge swirls): The chance to get creative and personalize your ice cream masterpiece!
How to Make Create Pure Happiness With This Easy Homemade Ice Cream Recipe
Step 1: Whip the Heavy Cream
In a large mixing bowl, pour in the cold heavy cream. Grab your hand mixer or stand mixer and whip on high speed for about 3–4 minutes, until stiff peaks form. Keep a close eye: you want soft, pillowy clouds, not butter! This step is the secret to that signature airy, melt-in-your-mouth texture.
Step 2: Stir Together the Sweetened Condensed Milk Mixture
In a separate bowl, add the sweetened condensed milk, vanilla extract, and a pinch of salt. Whisk until the mixture is velvety smooth and fully combined—this base is rich and sweet, like a hug in a bowl!
Step 3: Gently Fold Together
Take a spatula and gently fold your whipped cream into the condensed milk mixture. You want to keep as much air as possible to guarantee that classic, fluffy finish. Don’t rush—combine until no streaks remain, but stop before over-mixing.
Step 4: Add Mix-Ins and Freeze
Pour the luscious mixture into a loaf pan or any freezer-safe container. Now’s the fun part: scatter in chocolate chips, swirl in ripples of caramel, or fold in crushed cookies. Use a butter knife or spoon to gently swirl the add-ins, creating artful streaks throughout. Smooth the top, cover tightly, and pop it into your freezer for at least six hours, or until firm.
Step 5: Scoop and Serve
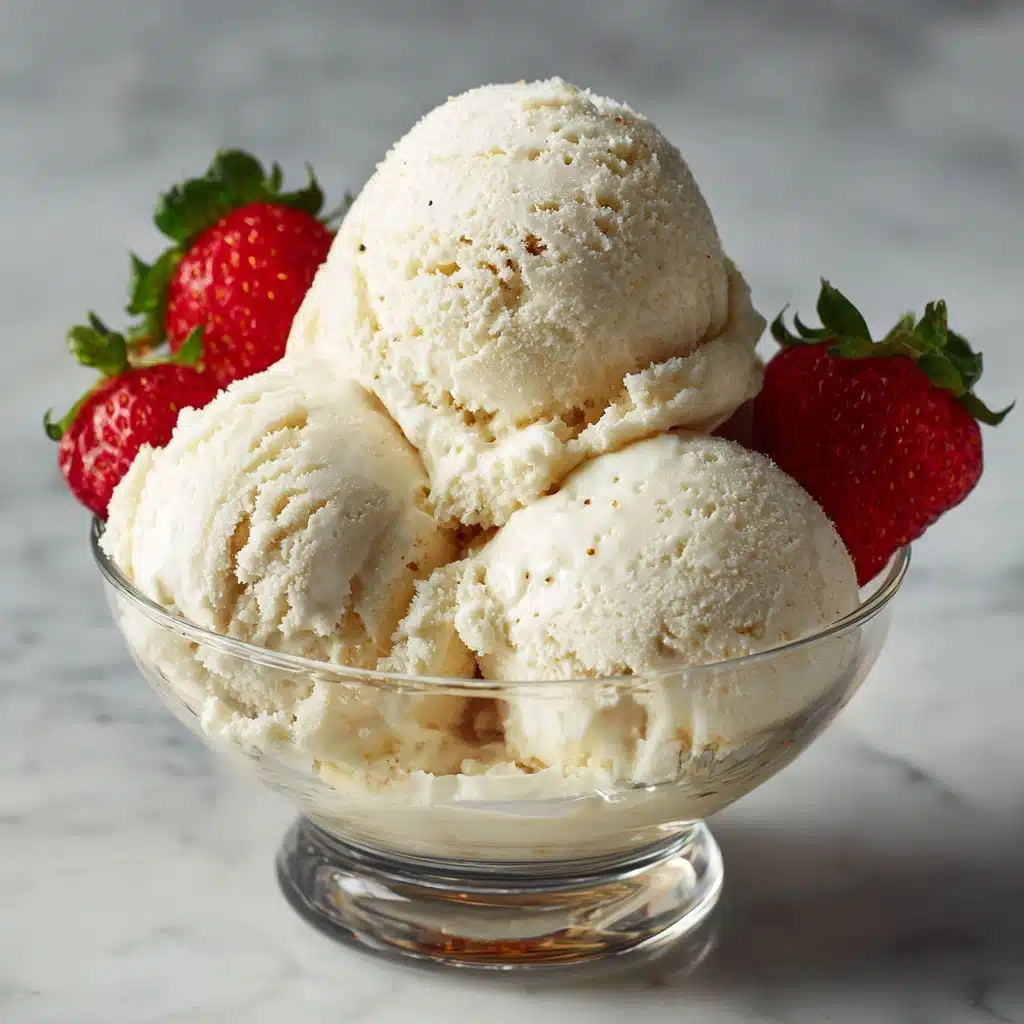
When you’re ready to indulge, let the ice cream sit on the counter for a couple minutes to soften slightly for easier scooping. Serve in cones, bowls, or straight from the container if you’re feeling bold. Every spoonful is testament to the joy of crafting happiness in your own kitchen.
How to Serve Create Pure Happiness With This Easy Homemade Ice Cream Recipe

Garnishes
All it takes is a simple finishing touch to elevate your ice cream to dessert royalty: try sprinkling toasted nuts, rainbow sprinkles, or a drizzle of homemade chocolate sauce for that extra pop of excitement. Even a dusting of sea salt or a few fresh berries can totally transform each scoop!
Side Dishes
Pair your homemade ice cream with warm brownies, freshly baked cookies, or crisp waffles for the ultimate treat. Not only do these classic sides add contrast, but they let you build your own sundae bar at home, making dessert time a true event everyone will remember!
Creative Ways to Present
Show off your masterpiece by serving it in vintage glass dishes, inside edible cookie cups, or sandwiched between two giant chocolate chip cookies for old-school ice cream sandwiches. Or go big: stack scoops in a tall sundae glass with whipped cream and maraschino cherries for throwback diner style.
Make Ahead and Storage
Storing Leftovers
Keep your ice cream tightly covered in its container to avoid pesky freezer burn. It will taste dreamy for up to two weeks—simply scoop out what you need, pop the lid back on, and return it to the freezer after each serving.
Freezing
The beauty of Create Pure Happiness With This Easy Homemade Ice Cream Recipe is its no-churn simplicity. Store your ice cream in a flat, shallow container for even freezing, ideally covered with both plastic wrap and a lid to lock in that signature creaminess.
Reheating
Okay, you can’t reheat ice cream—but if it’s too firm straight from the freezer, let it sit at room temperature for 5–10 minutes. This softens it just enough for the perfect scoop without melting your hard-earned swirls and textures.
FAQs
Can I make this ice cream without a mixer?
Yes! You can whisk the cream by hand, though it will take a bit more elbow grease and time. As long as you achieve stiff peaks, your ice cream will turn out perfectly fluffy.
What flavors can I add to Create Pure Happiness With This Easy Homemade Ice Cream Recipe?
The possibilities are endless! Swap out the vanilla for almond, coffee, or mint extract, or stir in pureed fruit, spices like cinnamon, or even a swirl of peanut butter for a whole new twist.
Is this recipe gluten-free?
Absolutely—just be sure your optional mix-ins (like cookies) are also gluten-free if needed. The base recipe itself is naturally gluten-free, so everyone can enjoy a scoop or two (or three).
How long does it take for the ice cream to set?
Plan for at least 6 hours in the freezer for your batch to become perfectly scoopable, though overnight is even better for a firmer, more classic consistency.
Can I double or halve the recipe?
Definitely! This recipe is very forgiving. Just use a larger or smaller container, and adjust the freeze time a little if you make a bigger batch. There’s no such thing as too much happiness here!
Final Thoughts
If you’ve ever wished you could enjoy that nostalgic, homemade ice cream flavor without all the fuss, now’s your chance. Create Pure Happiness With This Easy Homemade Ice Cream Recipe and discover just how easy it is to scoop up a little delight in your own kitchen, any day of the week. Your future self will thank you with every blissful bite!
Print
Create Pure Happiness With This Easy Homemade Ice Cream Recipe
- Total Time: 6 hours 10 minutes
- Yield: 8 servings 1x
- Diet: Vegetarian, Gluten-Free
Description
Indulge in pure happiness with this incredibly easy homemade ice cream recipe that requires no churn or ice cream maker. Creamy, rich, and fully customizable with your favorite mix-ins, this dessert is a delightful treat for any occasion.
Ingredients
Ice Cream Base:
- 2 cups heavy cream
- 1 cup sweetened condensed milk
- 1 teaspoon vanilla extract
- pinch of salt
Optional Mix-Ins:
- chocolate chips
- crushed cookies
- fruit
- swirls of caramel or fudge
Instructions
- Whip the Heavy Cream: In a large bowl, whip the heavy cream until stiff peaks form, about 3–4 minutes.
- Prepare Condensed Milk Mixture: Whisk together sweetened condensed milk, vanilla extract, and salt until smooth.
- Combine Mixtures: Gently fold whipped cream into condensed milk mixture until smooth.
- Transfer to Container: Pour mixture into a loaf pan or container, add mix-ins, and gently swirl.
- Freeze: Cover tightly and freeze for at least 6 hours until firm.
- Serve: Scoop and enjoy with your favorite toppings or cones.
Notes
- This no-churn ice cream can be personalized with various extracts, fruits, nuts, or cookies.
- Store the ice cream in the freezer for up to 2 weeks.
- Prep Time: 10 minutes
- Category: Dessert
- Method: Freezing (No-Churn)
- Cuisine: American
Nutrition
- Serving Size: 1/2 cup
- Calories: 290
- Sugar: 22g
- Sodium: 65mg
- Fat: 20g
- Saturated Fat: 13g
- Unsaturated Fat: 6g
- Trans Fat: 0g
- Carbohydrates: 24g
- Fiber: 0g
- Protein: 4g
- Cholesterol: 70mg


