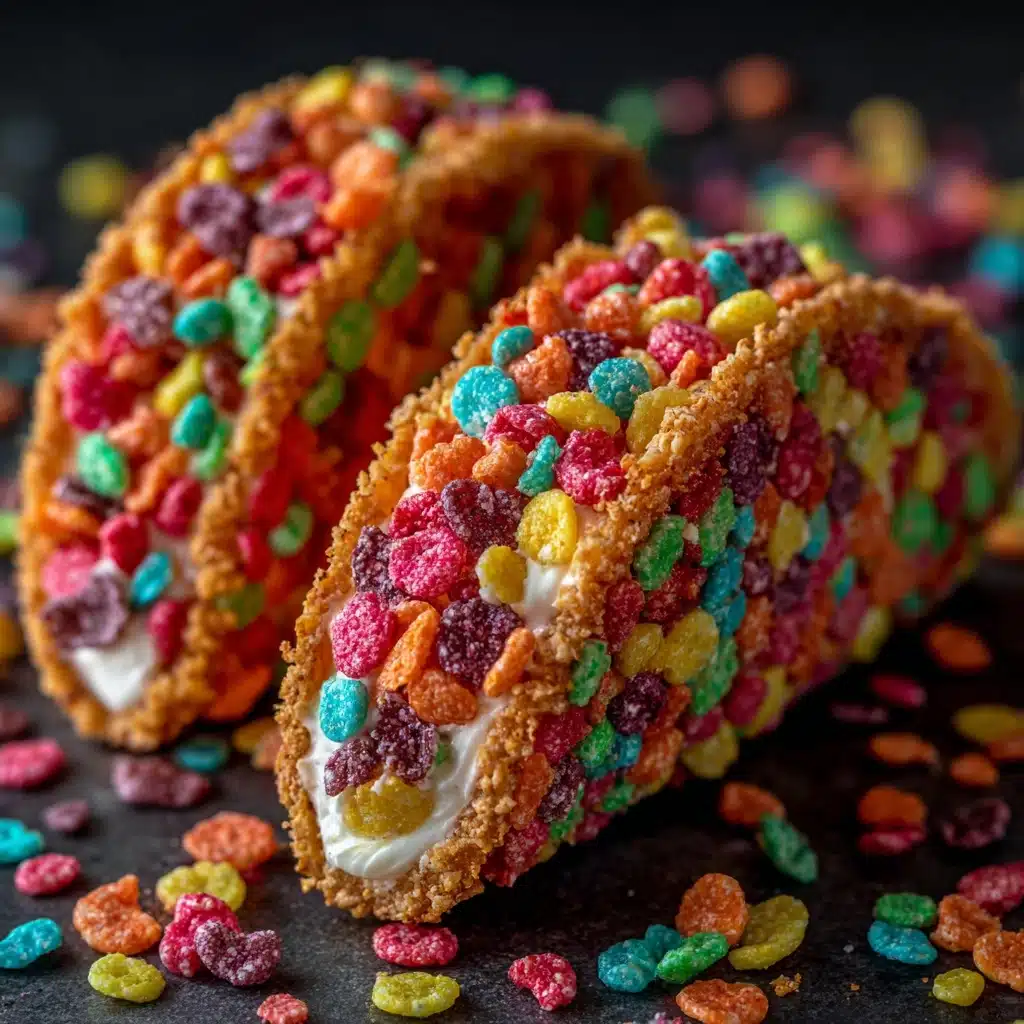
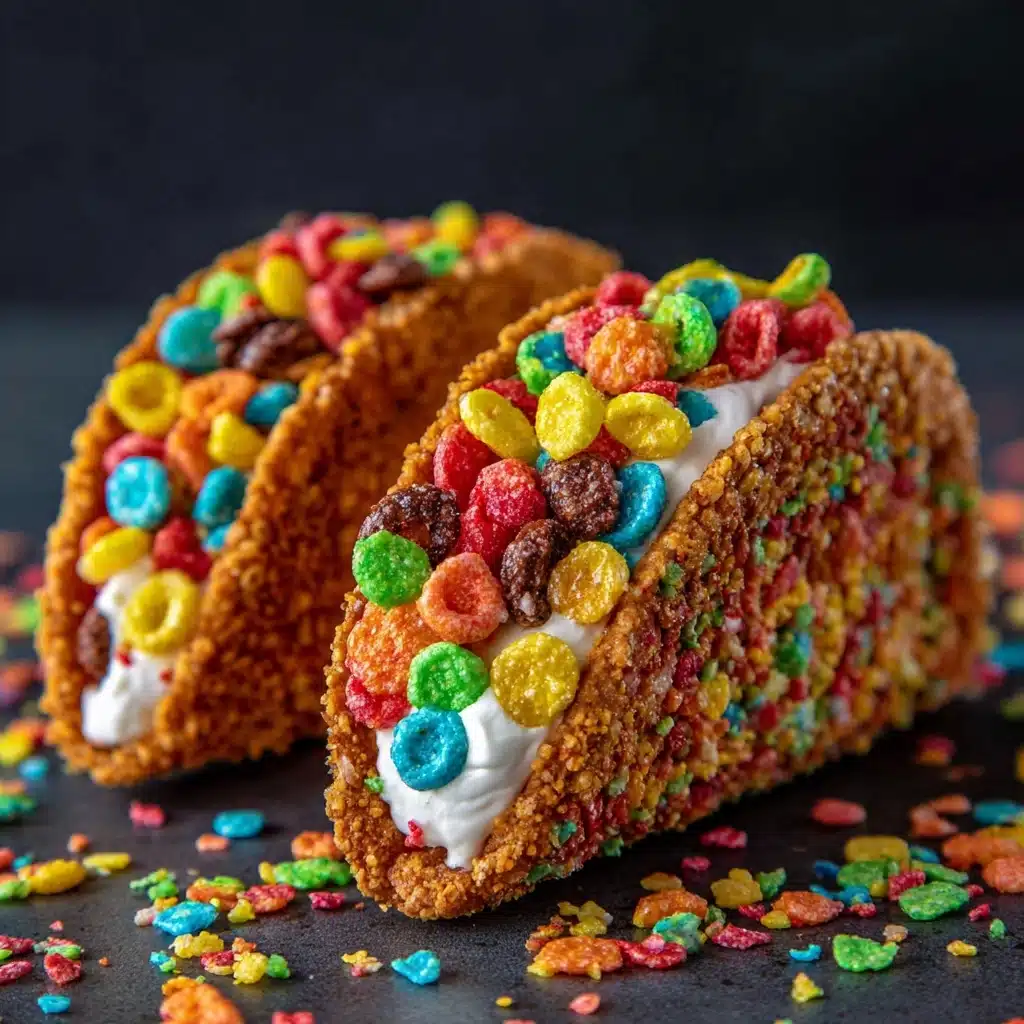
Get ready to fall head over heels for one of the most whimsical desserts you’ll ever bring to the table: Delicious Fruity Pebbles Cheesecake Tacos: Crunchy Treat! This magical treat is everything we love about classic no-bake cheesecake, taken to a whole new level of fun with crispy, vibrant Fruity Pebbles taco shells. Imagine a creamy, dreamy cheesecake filling piped into rainbow-colored cereal shells and finished with more Fruity Pebbles and playful sprinkles. Whether you’re making them for a party, a family night, or just because you love being the person who brings out the most unforgettable snack, these tacos are pure joy in every crunchy, creamy bite.
Ingredients You’ll Need
The magic of these tacos comes from just a few simple, easily found ingredients. Each component brings its own texture or pop of color to make Delicious Fruity Pebbles Cheesecake Tacos: Crunchy Treat a real showstopper in both taste and appearance.
- Fruity Pebbles cereal (1 1/2 cups): This is your rainbow-hued hero, delivering crunch, color, and that unmistakable fruity flavor.
- Mini marshmallows (1 1/2 cups): They melt down to form the sticky, sweet “glue” that holds your taco shells together.
- Unsalted butter (2 tablespoons): Adds a touch of richness and helps everything combine smoothly.
- Cream cheese, softened (8 oz): The creamy star of the filling, giving luxurious body and tang.
- Powdered sugar (1/2 cup): Sweetens the cheesecake filling while keeping it silky-smooth.
- Vanilla extract (1 teaspoon): Enhances all the flavors with its warm, aromatic notes.
- Heavy whipping cream (1 cup): When whipped, this makes your filling incredibly light and fluffy.
- Extra Fruity Pebbles for garnish: Sprinkle on top for extra crunch and color; because you can never have too many!
- Optional whipped cream and sprinkles for topping: If you want to go all-out on presentation, these are a must.
How to Make Delicious Fruity Pebbles Cheesecake Tacos: Crunchy Treat
Step 1: Make the Fruity Pebbles Taco Shells
Start by creating those iconic taco shells. In a large microwave-safe bowl, combine your unsalted butter and mini marshmallows. Microwave in 30-second intervals, stirring each time, until everything is melted and silky smooth. Stir in the Fruity Pebbles cereal until each piece is coated in sticky, marshmallowy goodness. Quickly spoon the mixture into your taco-shaped molds or press it over the back of a well-greased muffin tin. Work swiftly—marshmallow sets fast! Let the shells cool completely so they firm up and hold their shape. This is the key to getting that perfect, shatteringly crunchy bite in your Delicious Fruity Pebbles Cheesecake Tacos: Crunchy Treat.
Step 2: Whip Up the Cheesecake Filling
In a medium mixing bowl, use a hand mixer to beat the softened cream cheese until it’s completely smooth and lump-free—this ensures a velvety filling. Add the powdered sugar and vanilla extract, blending until fully combined and fluffy. In a separate bowl, whip the heavy cream until stiff peaks form, which means your whipped cream won’t flop over when you lift the beaters. Carefully fold the whipped cream into the cream cheese mixture—don’t rush! This gentle folding keeps your filling cloud-like and light.
Step 3: Fill the Taco Shells
Once the Fruity Pebbles taco shells have cooled and hardened, it’s time to fill them. Use a spoon for a classic look or a piping bag (even a zip-top bag with the corner snipped off works) to fill each shell generously with the fluffy cheesecake filling. This is where the creamy, tangy, and sweet layers come together for the ultimate Delicious Fruity Pebbles Cheesecake Tacos: Crunchy Treat experience.
Step 4: Garnish and Chill
Sprinkle extra Fruity Pebbles over the filled tacos for a burst of color and crunch. For the full “party on a plate” effect, add a swirl of whipped cream and a pinch of sprinkles on top. Place the assembled tacos in the refrigerator for at least 1 hour so the filling sets up and the flavors have a chance to meld.
How to Serve Delicious Fruity Pebbles Cheesecake Tacos: Crunchy Treat
Garnishes
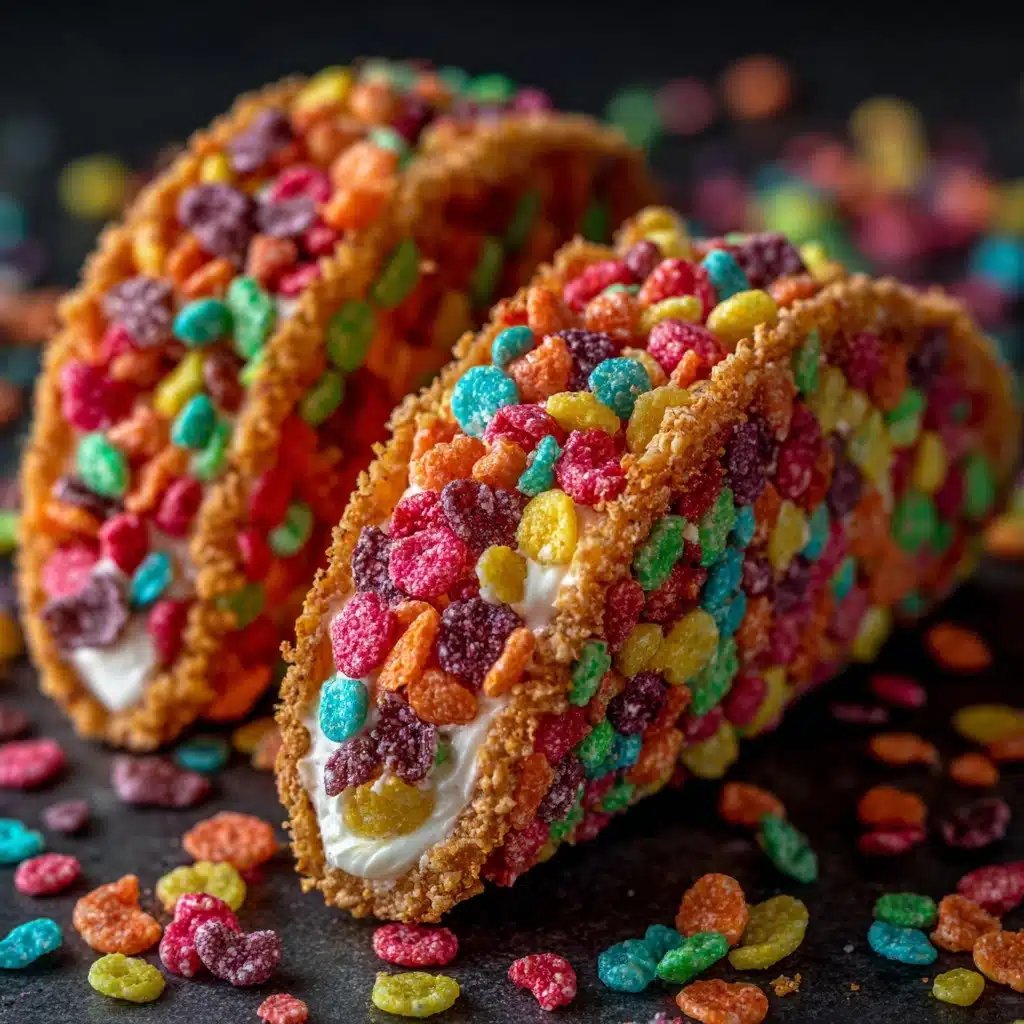
When it comes to garnishing, don’t hold back! A generous sprinkle of extra Fruity Pebbles instantly boosts the crunch factor and gives a fantastic color pop (and who doesn’t love that rainbow effect?). For a truly fun finish, dollop on some fresh whipped cream and shake on bright sprinkles. These toppings not only make every bite more festive, but they also invite everyone to grab a taco and dig in.
Side Dishes
Pair these colorful tacos with other light and bright desserts, like fresh fruit skewers or a tangy citrus salad, to balance out the sweetness. On the beverage side, a cold glass of milk is always a hit (especially with kids), or try fruit punch for a playful vibe. The key is to keep the accompaniments fresh and simple so the Delicious Fruity Pebbles Cheesecake Tacos: Crunchy Treat remain the star.
Creative Ways to Present
Let your creativity shine by displaying the tacos on a fun platter, standing upright in a taco holder for maximum wow-factor. You can even set up a decorating station with bowls of Fruity Pebbles, sprinkles, mini chocolate chips, or colored sugar, and let guests personalize their tacos. For birthdays, arrange the tacos in a rainbow arc or spell out a number or name—there’s really no wrong way to showcase their joyous color and crunch!
Make Ahead and Storage
Storing Leftovers
If you have leftovers (though it’s hard to imagine!), store the fully assembled Delicious Fruity Pebbles Cheesecake Tacos: Crunchy Treat in a single layer in an airtight container in the refrigerator. The taco shells may soften a bit with time, but they’ll still be tasty for up to 2 days. To keep them extra crisp, you can store shells and cheesecake filling separately and assemble just before serving.
Freezing
Freezing isn’t recommended for these tacos, as Fruity Pebbles tend to lose their crispiness and the marshmallow shells may become chewy when thawed. However, you can freeze the cheesecake filling alone—make sure to thaw in the fridge and whip it lightly before piping into freshly made shells for the best results.
Reheating
Since this is a no-bake, chilled dessert, reheating isn’t necessary! For the best experience, simply enjoy your Delicious Fruity Pebbles Cheesecake Tacos: Crunchy Treat straight from the fridge. If the shells lose a bit of their crunch, you can refresh them by briefly chilling in the freezer for 5 minutes before serving.
FAQs
Can I use regular marshmallows instead of mini marshmallows?
Absolutely! Just chop large marshmallows into smaller pieces to help them melt faster and more evenly. Use the same total amount by weight or volume for the shells.
What can I use if I don’t have a taco mold?
Great question! You can easily create the taco shape by draping the Fruity Pebbles mixture over the back of a greased muffin tin or even rolling pin handles until cooled. Just remember to work quickly since the mixture sets up fast.
Can I make these with other cereals?
Definitely! While Fruity Pebbles provide that signature color and flavor, feel free to experiment with Cocoa Pebbles or other crispy rice cereals for a twist on your Delicious Fruity Pebbles Cheesecake Tacos: Crunchy Treat. The basic method stays the same.
Is the cheesecake filling stable enough to pipe in advance?
Yes, the filling is quite stable due to the heavy cream and cream cheese, so you can pipe it into the shells a few hours ahead. Just be sure to refrigerate the tacos so they stay firm and fresh until serving.
How can I make the tacos even more fruity?
For an extra fruity punch, gently fold some crushed Fruity Pebbles into the cheesecake filling before piping it into your taco shells. You’ll get extra flavor and color in every single bite!
Final Thoughts
If you’re looking for a dessert that’s as fun to make as it is to eat, you can’t go wrong with Delicious Fruity Pebbles Cheesecake Tacos: Crunchy Treat. They’re the ultimate crowd-pleaser for kids, teens, and grownups alike! Step into the rainbow, whip up a batch, and let every crunchy, creamy bite remind you that playful desserts are the best kind. Share them with someone you love and let the good times roll!
Print
Delicious Fruity Pebbles Cheesecake Tacos: Crunchy Treat Recipe
- Total Time: 25 minutes (plus chilling)
- Yield: 6 tacos 1x
- Diet: Vegetarian
Description
Indulge in the delightful combination of creamy cheesecake filling nestled in crunchy Fruity Pebbles taco shells, topped with a colorful array of toppings. These no-bake treats are a fun and whimsical dessert perfect for any occasion.
Ingredients
Taco Shells:
- 1 1/2 cups Fruity Pebbles cereal
- 1 1/2 cups mini marshmallows
- 2 tablespoons unsalted butter
Cheesecake Filling:
- 8 oz cream cheese (softened)
- 1/2 cup powdered sugar
- 1 teaspoon vanilla extract
- 1 cup heavy whipping cream
- Extra Fruity Pebbles for garnish
- Optional whipped cream and sprinkles for topping
Instructions
- Taco Shells: In a large microwave-safe bowl, melt the butter and mini marshmallows together in 30-second intervals, stirring in between, until smooth. Stir in the Fruity Pebbles cereal until well coated. Using a spoon, press portions of the mixture into taco-shaped molds (or over the back of a greased muffin tin to form taco shells). Let them cool and harden completely.
- Cheesecake Filling: In a mixing bowl, beat the cream cheese until smooth. Add powdered sugar and vanilla extract, and mix until fully combined. In a separate bowl, whip the heavy cream until stiff peaks form. Gently fold the whipped cream into the cream cheese mixture until light and fluffy. Spoon or pipe the cheesecake filling into the Fruity Pebbles taco shells. Garnish with extra Fruity Pebbles, whipped cream, and sprinkles if desired. Refrigerate for at least 1 hour before serving.
Notes
- You can make the taco shells up to a day in advance and store them in an airtight container.
- For an extra fruity twist, mix crushed Fruity Pebbles into the cheesecake filling.
- Prep Time: 20 minutes
- Cook Time: 5 minutes
- Category: Dessert
- Method: No-Bake
- Cuisine: American
Nutrition
- Serving Size: 1 taco
- Calories: 310
- Sugar: 24g
- Sodium: 140mg
- Fat: 20g
- Saturated Fat: 12g
- Unsaturated Fat: 6g
- Trans Fat: 0g
- Carbohydrates: 29g
- Fiber: 0g
- Protein: 3g
- Cholesterol: 55mg
