
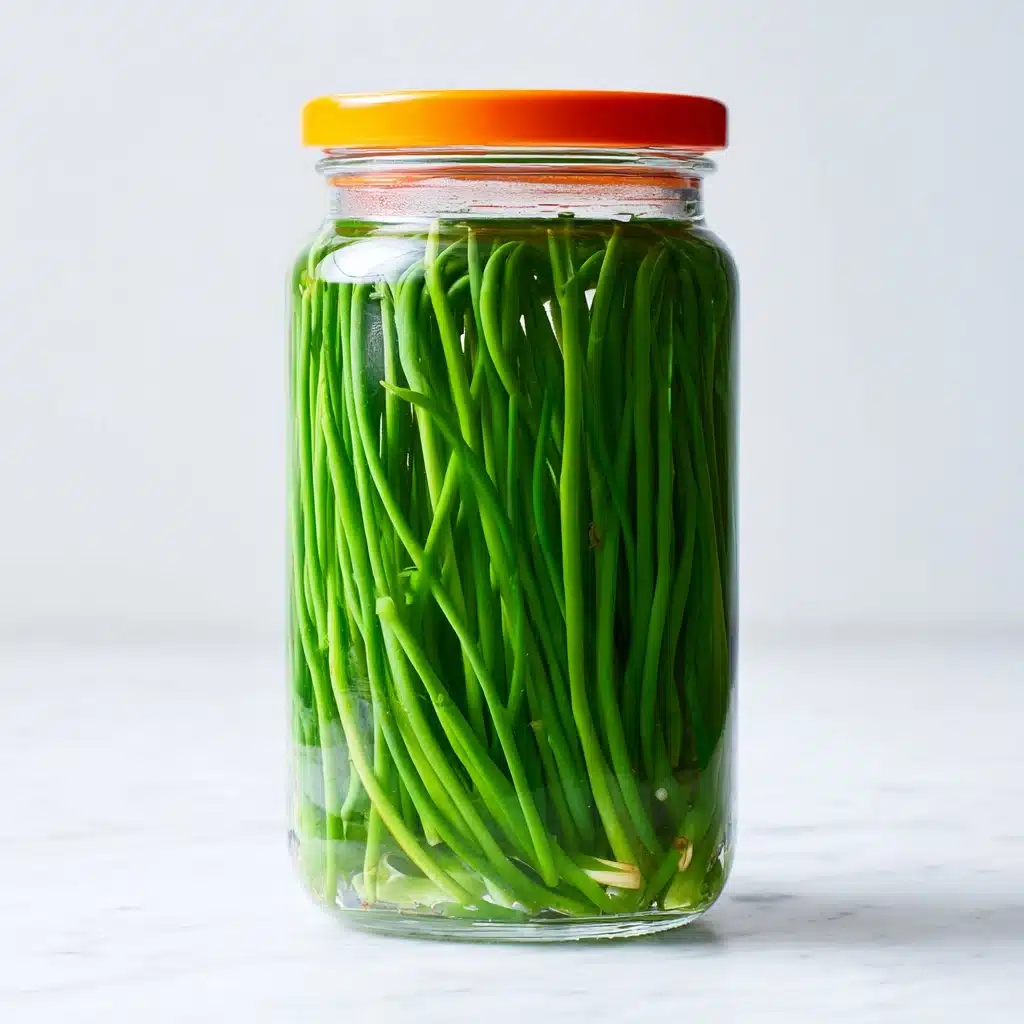
If you’re new to the world of small-batch ferments, let me introduce you to one of my kitchen’s brightest stars: Fermented Garlic Scapes. This playful, tangy condiment transforms ordinary garlic scapes into an irresistibly crunchy, slightly sour treat bursting with garlicky depth and a hint of spice. You’ll be amazed at how such a humble collection of ingredients alchemizes during fermentation, becoming the perfect gourmet topping or snappy snack for all kinds of savory dishes.
Ingredients You’ll Need
Fermented Garlic Scapes rely on a handful of good-quality ingredients—each one working its magic in the transformation process. What makes this recipe shine is its simplicity: every component adds a note of flavor, fragrance, or crunch, turning your jar of scapes into something truly special.
- Fresh garlic scapes: The curly flower stems of garlic, these are tender, mildly garlicky, and offer a crisp bite that holds up beautifully during fermentation.
- Filtered water: Essential for a clean brine; always use non-chlorinated water to encourage the best possible fermentation environment.
- Sea salt: This is what creates the magic! The salt brine protects the scapes from spoilage and helps the good bacteria thrive, developing complex tangy flavors as the days go by.
- Whole black peppercorns: These add subtle warmth and spicy notes, gently infusing the brine without overwhelming the star ingredient.
- Bay leaf: A single leaf adds earthy, herbal undertones that play nicely with the garlic’s intensity.
- Garlic clove (optional): For true garlic lovers, a smashed clove intensifies the aroma and boosts the ferment’s pungency just a touch.
How to Make Fermented Garlic Scapes
Step 1: Prepare Your Garlic Scapes
Rinse your garlic scapes well under cool running water, then trim off any withered ends or long flower buds. Cut the scapes into 4-inch lengths—which makes them easier to pack into your jar and also perfect for snacking later on. This little bit of prep sets you up for both an even ferment and beautiful results.
Step 2: Pack the Jar
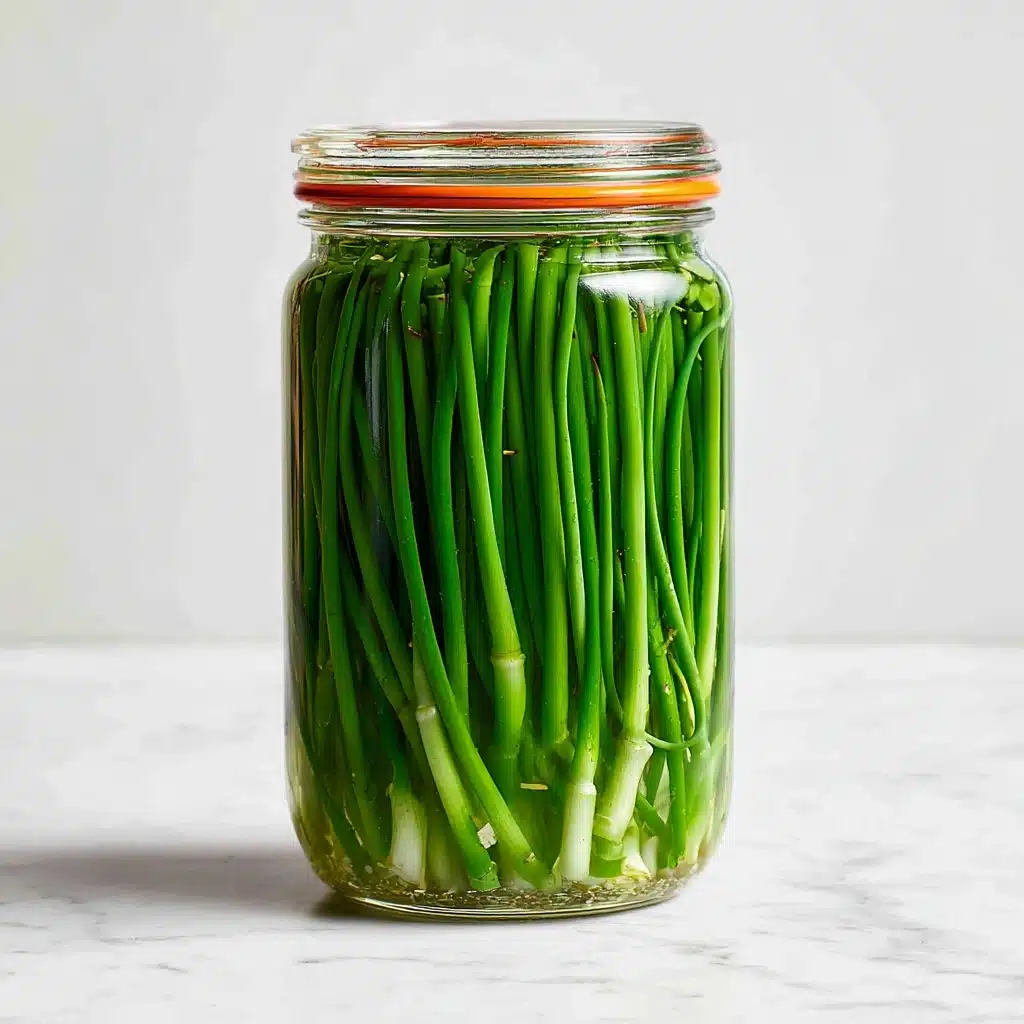
In a clean glass pint jar, start packing the trimmed garlic scapes in tightly, arranging them vertically and tucking in the bay leaf, whole black peppercorns, and optional smashed garlic clove as you go. Packing snugly helps keep the scapes submerged and ensures even flavor distribution in every bite of your Fermented Garlic Scapes.
Step 3: Mix the Brine
In a separate bowl or measuring jug, dissolve 1 1/2 tablespoons of sea salt in 2 cups of filtered water, stirring until completely dissolved. This salty solution is the foundation of safe, flavorful fermentation! Once mixed, pour the brine over the garlic scapes so they’re fully submerged, covering all the vegetables and spices.
Step 4: Weigh Down and Cover
To prevent any wayward scapes or spices from poking above the brine, use a fermentation weight or a small, clean glass jar to keep everything pressed down and submerged. Cover the jar with a loose-fitting lid or a fermentation airlock lid, which lets gases escape and keeps contaminants out. This small effort helps ensure happy, hands-off fermenting.
Step 5: Ferment and Taste
Place your jar in a cool, shaded corner of your kitchen—out of direct sunlight—for 7 to 10 days. Check the jar daily: Make sure all the scapes stay underwater, skim off any harmless surface bubbles, and start tasting around day 7. You’re looking for that perfect salty, garlicky tang that only Fermented Garlic Scapes deliver. Once you love the flavor, seal the jar tightly and refrigerate.
How to Serve Fermented Garlic Scapes
Garnishes
A jar of Fermented Garlic Scapes lives for finishing touches. Chop or slice them and sprinkle on deviled eggs, salads, grain bowls, burgers, or avocado toast for an extra pop of crunch and bold flavor. Their grassy-green color and striking curls brighten any plate, making even a basic snack feel gourmet.
Side Dishes
Fermented Garlic Scapes play nicely with so many sides. Instead of classic pickles, serve them alongside crispy roast potatoes, charcuterie meats, or a wedge of sharp cheddar. Their tartness cuts through rich stews, grilled sausages, even smoky barbecued vegetables—transforming everyday sides into something memorable.
Creative Ways to Present
Let your imagination run wild! Slice Fermented Garlic Scapes and stir them into homemade aioli or creamy dips. Layer them in sandwiches, fold them into pasta salads, or dice them finely for a vibrant, tangy salsa. You can even tuck whole scapes onto a cheese board or offer them as a zesty pre-dinner nibble at your next gathering.
Make Ahead and Storage
Storing Leftovers
After fermentation, tightly sealed jars of Fermented Garlic Scapes store happily in the fridge for up to six months—if you can keep them around that long! Always use a clean fork or tongs to fish out scapes to avoid introducing bacteria, which keeps the rest of your batch fresh and delicious.
Freezing
While freezing is an option, it does soften the celebratory snap of Fermented Garlic Scapes. If you absolutely need to, chop and freeze them in small portions using airtight containers. They’re still tasty stirred into hot dishes, but I always recommend fresh from the jar for the best texture.
Reheating
There’s rarely a need to reheat Fermented Garlic Scapes, since they truly shine when left cold or at room temperature. If adding to cooked recipes, toss them in at the end to maintain their lively crunch and vibrant flavor.
FAQs
Do fermented garlic scapes need to stay submerged?
Absolutely! This is the golden rule of fermenting: keeping the vegetables submerged in brine prevents mold and ensures safe, tasty results. A fermentation weight or even a small glass jar does the trick beautifully.
Is there a difference between pickled and fermented garlic scapes?
Yes—pickling uses vinegar for a tart, tangy flavor but skips fermentation’s probiotic magic. Fermented Garlic Scapes rely on salt and time, which encourage beneficial bacteria and add complex sour notes, all without vinegar.
Can I add other spices or herbs?
Totally! The recipe is a fantastic canvas for customization. Try mustard seeds, fresh dill, chili flakes, or coriander seeds depending on your mood and the flavors you love most with your ferments.
What if my brine turns cloudy?
Don’t panic! Cloudy brine is actually a sign of healthy fermentation. The lactic acid bacteria responsible for transforming your scapes frequently cloud the brine—completely normal and safe.
How do I know when Fermented Garlic Scapes are ready?
Start tasting around day 7. When you bite into a scape, you want bright tanginess, salty satisfaction, and a hit of that unmistakable garlicky flavor. If you crave more acidity, just let the process go a few days longer.
Final Thoughts
I can’t wait for you to discover just how addictive and easy Fermented Garlic Scapes can be. Once you’ve tasted that tangy, crunchy goodness, you’ll find yourself sharing jars, swapping serving ideas, and reaching for garlic scapes all season long. Go ahead—dive into the world of ferments and let these scapes turn you into a homemade pickle fan for life!
Print
Fermented Garlic Scapes Recipe
- Total Time: 15 minutes plus 7-10 days fermenting
- Yield: 1 pint jar 1x
- Diet: Vegan, Gluten-Free
Description
Learn how to make delicious fermented garlic scapes at home with this easy recipe. These tangy, probiotic-rich scapes are perfect for adding a flavorful kick to your favorite dishes.
Ingredients
Garlic Scapes:
- 1 bunch fresh garlic scapes, trimmed and cut into 4-inch pieces
Brine:
- 2 cups filtered water
- 1 1/2 tablespoons sea salt
Seasonings:
- 1 teaspoon whole black peppercorns
- 1 bay leaf
- 1 clove garlic, smashed (optional)
Instructions
- Pack the Jar: Pack the trimmed garlic scapes tightly into a clean glass jar, adding the peppercorns, bay leaf, and optional garlic clove.
- Prepare the Brine: Dissolve the sea salt in the filtered water to create a brine.
- Add the Brine: Pour the brine over the garlic scapes, ensuring they are fully submerged.
- Fermentation: Place a weight on top of the scapes to keep them submerged. Cover the jar loosely and ferment at room temperature for 7-10 days.
- Check and Taste: Check daily to ensure the scapes are submerged and taste for desired tanginess.
- Store: Once fermented to your liking, seal the jar tightly and refrigerate.
Notes
- Use non-chlorinated water for best results.
- Enjoy chopped in salads, sandwiches, or with cheese.
- Prep Time: 15 minutes
- Cook Time: 0 minutes
- Category: Condiment
- Method: Fermenting
- Cuisine: American
Nutrition
- Serving Size: 2 tablespoons
- Calories: 5
- Sugar: 0g
- Sodium: 200mg
- Fat: 0g
- Saturated Fat: 0g
- Unsaturated Fat: 0g
- Trans Fat: 0g
- Carbohydrates: 1g
- Fiber: 0g
- Protein: 0g
- Cholesterol: 0mg


