
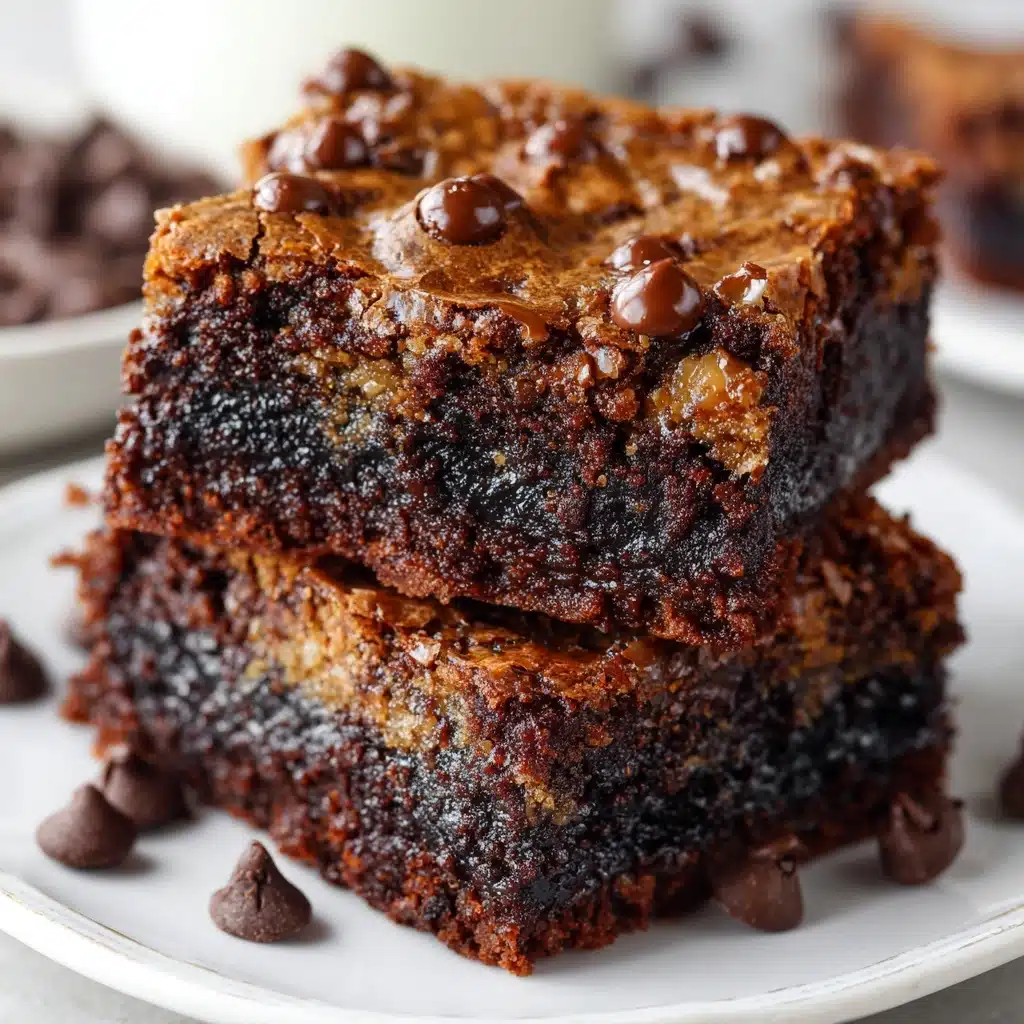
There’s something truly magical about biting into a decadent pan of gluten-free brownies — that perfect, fudgy center and crackly top, all without a hint of wheat. If you’ve been wishing for a brownie recipe that delivers classic chocolate overload, yet makes everyone at the table happy (including gluten-free friends), these are the treats you’ve been waiting for. Get ready to fall in love with your new favorite dessert.
Ingredients You’ll Need
The beauty of gluten-free brownies is in their simplicity. Each ingredient is chosen for a reason — from the smooth richness of butter to that cocoa-laden punch every bite delivers. Let’s take a closer look at what makes these brownies truly irresistible.
- Unsalted butter: Adds luscious moisture and classic richness; opt for real butter for best flavor, but plant-based works for dairy-free needs.
- Granulated sugar: Balances the cocoa with sweetness and helps create that shiny, crackly top everyone loves.
- Large eggs: Bind everything together and create that perfect, fudgy structure without gluten.
- Vanilla extract: Rounds out the chocolate flavor with warmth and depth.
- Unsweetened cocoa powder: Delivers deep chocolate notes; use Dutch-process for even more intensity if you like.
- Gluten-free all-purpose flour blend: The backbone of texture — choose one with xanthan gum for tender, chewy brownies.
- Salt: Just a pinch enhances the chocolate and balances the sweetness.
- Baking powder: Ensures a gentle lift, keeping the brownies from becoming too dense.
- Chocolate chips (optional): For pockets of melty, gooey chocolate in every bite; use dark, milk, or even dairy-free.
How to Make Gluten-Free Brownies
Step 1: Prep the Pan and Preheat
Start by preheating your oven to 350°F. Grease an 8×8-inch baking pan, or better yet, line it with parchment paper for easy lifting and clean slices later. This simple step ensures flawless brownies that release perfectly every single time.
Step 2: Melt the Butter
Place your unsalted butter in a medium saucepan over low heat. Let it melt gently — you want it completely liquid but not bubbling. This helps it blend beautifully with the sugar and cocoa for rich, even flavor.
Step 3: Mix the Wet Ingredients
After removing the saucepan from the heat, stir in your sugar, followed by the eggs and vanilla extract. Whisk until everything is smoothly incorporated and looks glossy. This forms the luscious base for your gluten-free brownies.
Step 4: Blend in the Dry Ingredients
Next, add in the cocoa powder, your gluten-free all-purpose flour blend, salt, and baking powder. Stir until your batter is smooth and no lumps remain — it should look lovely and thick, almost like chocolate fudge itself. If using chocolate chips, gently fold them in now.
Step 5: Bake to Perfection
Pour the batter into your prepared pan. Spread it evenly, then pop it in the oven for 20–25 minutes. The secret is to bake until a toothpick comes out with just a few moist crumbs; this guarantees chewy, fudgy brownies every time. Let them cool completely in the pan before slicing for those classic brownie squares.
How to Serve Gluten-Free Brownies
Garnishes
Dress your gluten-free brownies to impress by sprinkling a pinch of flaky sea salt or dusting them with powdered sugar just before serving. For a true showstopper, top each one with a dollop of whipped cream or a scoop of vanilla ice cream — the contrast of warm brownie and cold topping is simply unbeatable.
Side Dishes
Pair your brownies with fresh berries like raspberries or strawberries for a refreshing, tart counterpoint. A rich cup of coffee, a creamy cappuccino, or even an iced latte also helps elevate each bite, making dessert feel truly special.
Creative Ways to Present
If you’re serving at a party or potluck, cut the brownies into tiny squares and arrange them on a tiered platter for fuss-free finger food. For a simple yet elegant twist, stack two brownies and drizzle with warm chocolate sauce, or thread squares onto wooden skewers with marshmallows for a fun brownie kebab.
Make Ahead and Storage
Storing Leftovers
Once cooled, store your gluten-free brownies in an airtight container at room temperature; they’ll stay moist and delicious for up to three days. If your kitchen is especially warm or humid, pop them in the fridge to maintain their fudgy texture.
Freezing
For longer storage, these brownies freeze like a dream. Wrap individual squares in plastic wrap or parchment, then place in a zip-top freezer bag. They’ll keep beautifully for up to three months — just thaw at room temperature whenever a chocolate craving calls.
Reheating
To restore that just-baked magic, pop a brownie (or two!) in the microwave for 10–15 seconds. A short warm-up makes the edges soft and the center irresistible, especially if you plan to top with ice cream or serve to guests.
FAQs
Can I make these gluten-free brownies dairy-free?
Absolutely! Simply swap in your favorite plant-based butter and use dairy-free chocolate chips if you plan to include them. You’ll get brownies that are every bit as fudgy and rich, minus the dairy.
Do gluten-free brownies taste different from regular ones?
With a top-notch gluten-free flour blend, you’d be hard-pressed to tell the difference. These brownies have the same chocolate-rich, chewy texture — and most tasters won’t even notice they’re gluten-free!
Can I add nuts or other mix-ins?
Definitely. Chopped walnuts, pecans, dried cherries, or even a swirl of peanut butter are all delicious in gluten-free brownies. Just keep your add-ins to about 1/2 cup total to maintain that dreamy texture.
What’s the best way to cut brownies cleanly?
Let your brownies cool completely, then use a large, sharp knife. For extra neat squares, run the knife under hot water and wipe it clean between slices — this tricks even a fudgy brownie into releasing with perfect edges.
Can I double this recipe for a crowd?
Yes, you can! Simply double the ingredients and bake in a 9×13-inch pan. Your gluten-free brownies may need a few extra minutes in the oven; keep an eye on them and check with a toothpick for moist crumbs.
Final Thoughts
If you’re on the hunt for the ultimate gluten-free brownies, look no further than this easy, deeply chocolaty recipe. Whether you’re baking for a special occasion or simply craving a sweet pick-me-up, these brownies promise to deliver every time. Give them a try — you might just discover your new go-to treat!
Print
Gluten-Free Brownies Recipe
- Total Time: 35 minutes
- Yield: 9 brownies 1x
- Diet: Vegetarian
Description
Indulge in rich and fudgy Gluten-Free Brownies that are easy to make and perfect for those with gluten sensitivities. These decadent treats are sure to satisfy your chocolate cravings!
Ingredients
Dry Ingredients:
- 1/2 cup unsalted butter
- 1 cup granulated sugar
- 1/3 cup unsweetened cocoa powder
- 1/2 cup gluten-free all-purpose flour blend
- 1/4 teaspoon salt
- 1/4 teaspoon baking powder
Wet Ingredients:
- 2 large eggs
- 1 teaspoon vanilla extract
- 1/2 cup chocolate chips (optional)
Instructions
- Preheat the oven: Preheat the oven to 350°F and grease or line an 8×8-inch baking pan with parchment paper.
- Melt butter: In a medium saucepan, melt the butter over low heat.
- Combine ingredients: Remove from heat and stir in the sugar, eggs, and vanilla extract until well combined. Add cocoa powder, gluten-free flour, salt, and baking powder. Stir until smooth. Fold in chocolate chips.
- Bake: Pour the batter into the pan, spread evenly, and bake for 20–25 minutes until a toothpick comes out with moist crumbs.
- Cool and serve: Let the brownies cool completely in the pan before slicing.
Notes
- Use a high-quality gluten-free flour blend with xanthan gum for best results.
- To make dairy-free, use plant-based butter and chocolate chips.
- Prep Time: 10 minutes
- Cook Time: 25 minutes
- Category: Dessert
- Method: Baking
- Cuisine: American
Nutrition
- Serving Size: 1 brownie
- Calories: 210
- Sugar: 18g
- Sodium: 90mg
- Fat: 11g
- Saturated Fat: 6g
- Unsaturated Fat: 4g
- Trans Fat: 0g
- Carbohydrates: 26g
- Fiber: 2g
- Protein: 2g
- Cholesterol: 45mg


