
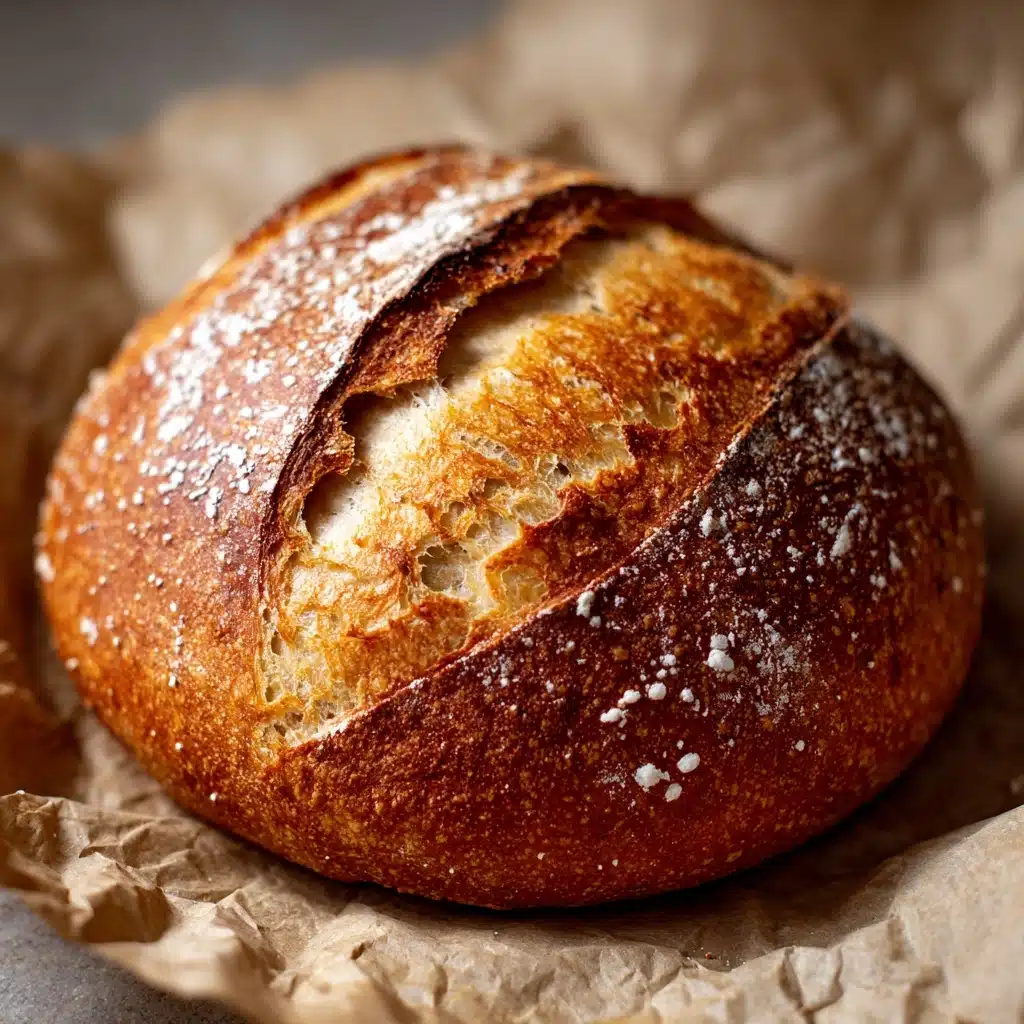
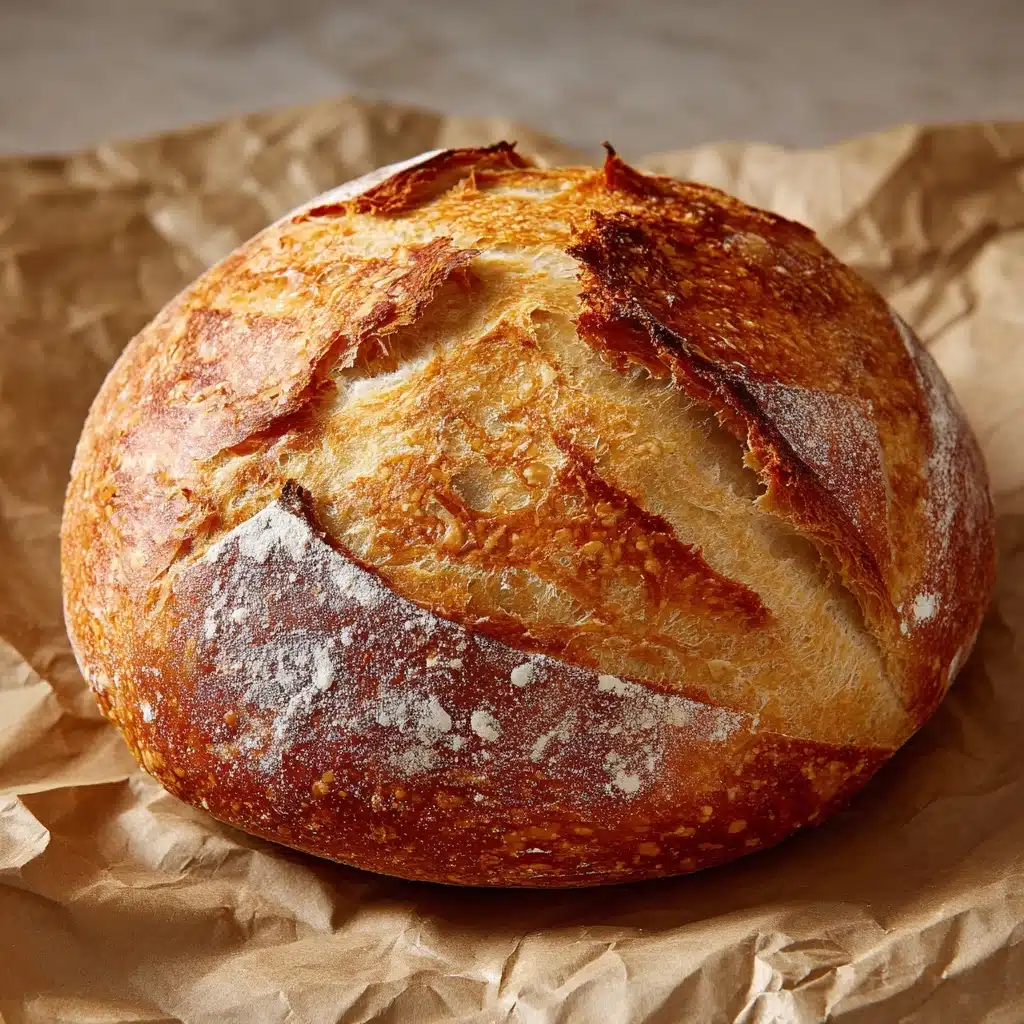
There’s something magical about sitting down to a slice of Grandma’s Perfect Homemade Bread, still warm from the oven, the aroma wrapping around you like a hug from the past. This bread is everything you want in a classic loaf: pillowy inside, golden and crisp outside, with just enough chew to make the perfect sandwich—or to simply slather with butter and call it lunch. Every bite is proof that a handful of honest ingredients, a little patience, and the right recipe can transport you right back to those cozy kitchen memories. Trust me: once you’ve tried this, you’ll understand why Grandma’s Perfect Homemade Bread is worth every minute.
Ingredients You’ll Need
The magic behind Grandma’s Perfect Homemade Bread comes from simple pantry staples, each playing a key role in bringing out the bread’s flavor, structure, and irresistible crust. Take a moment to read these tips, because a little attention to each ingredient makes all the difference.
- All-purpose flour (6 cups, divided): The foundation of the loaf, all-purpose flour gives just the right amount of softness and structure—measure carefully for best results.
- Active dry yeast (2 1/4 teaspoons, or 1 packet): The secret to that beautiful rise, make sure your yeast is fresh and bubbly for tender, airy bread every time.
- Warm water (2 1/4 cups, about 110°F): Just warm enough to activate your yeast, but not hot—test with your finger to avoid killing the yeast.
- Granulated sugar (2 tablespoons): A pinch of sweetness feeds the yeast and helps the bread brown to golden perfection.
- Salt (1 tablespoon): Essential for flavor—don’t skimp! Salt also helps control the fermentation and strengthens the dough.
- Vegetable oil or melted butter (2 tablespoons): Adds tenderness and a subtle richness that brings the whole loaf together—melted butter will add more flavor, but vegetable oil keeps things light.
How to Make Grandma’s Perfect Homemade Bread
Step 1: Activate the Yeast
Start by combining the warm water and sugar in a large mixing bowl, then sprinkle the yeast over the top. Give it a gentle stir, then let it sit for 5–10 minutes until the mixture turns frothy and bubbly. This step is essential for waking up the yeast—a sure sign your bread will rise tall and proud. If you don’t see foam, your yeast might be old, so it’s best to check before moving on.
Step 2: Mix in the Basics
Once the yeast is nice and lively, stir in the oil (or melted butter), salt, and 3 cups of flour. These first additions build the bread’s backbone and let you whisk or stir the mixture until it’s smooth, making sure there are no lumps. The dough will still be quite sticky here—don’t worry, that’s exactly how it should be.
Step 3: Add Flour and Form the Dough
Gradually add the rest of your flour, one cup at a time, mixing with a sturdy spoon or dough hook until a soft shaggy dough forms. The dough should pull away from the sides of the bowl but still feel just a touch sticky. Too dry, and your bread won’t be tender; too wet, and it’ll be hard to knead—go slowly and you’ll find the dough just right.
Step 4: Knead for Texture
Turn your dough onto a floured surface and knead for about 8 to 10 minutes, using the heel of your hand to push and fold it over itself. You’ll feel the dough transform under your hands—it should become smooth, springy, and elastic. Kneading develops gluten, giving Grandma’s Perfect Homemade Bread that perfect, chewy texture we all love.
Step 5: First Rise
Place the kneaded dough in a lightly greased bowl, turning it once to coat the top so it doesn’t dry out. Cover with a clean towel and set it in a warm, draft-free spot (an oven with the light on works great). Leave it for 1 to 1.5 hours, or until doubled in size—this is when the yeast works its magic.
Step 6: Shape and Second Rise
Gently punch down the dough to release excess air, then divide it in half. Shape each piece into a smooth loaf and tuck them into greased 9×5-inch loaf pans. Cover again, and let rise for another 30–45 minutes, until the dough has doubled and peeks over the edge of the pans. This second rise ensures an extra-light crumb.
Step 7: Bake the Loaves
Preheat your oven to 375°F near the end of the second rise. Slide the pans onto the middle rack and bake for 30–35 minutes, until the loaves are deeply golden and sound hollow when tapped on the bottom. That irresistible aroma is your first reward!
Step 8: Cool and Slice
Turn out the loaves onto a wire rack and let them cool completely for easiest slicing—though stealing a warm slice is basically a household tradition. For a softer crust, brush with a little melted butter right after baking, then cover loosely while cooling. Now, you’re ready to enjoy Grandma’s Perfect Homemade Bread fresh from your own kitchen!
How to Serve Grandma’s Perfect Homemade Bread
Garnishes
A simple swipe of salted butter is a classic, but you can also brush the warm loaves with honey, a sprinkle of flaky sea salt, or even a dusting of cinnamon sugar. For a savory twist, try topping slices with a bit of olive oil and cracked black pepper while still warm.
Side Dishes
This bread shines next to hearty homemade soups, crisp salads, or a steaming bowl of chili. It also elevates even the simplest meals, like a plate of scrambled eggs, or as the bookends to a thick BLT. It’s the perfect excuse to whip up your favorite spreads and dips for a bread-and-cheese night.
Creative Ways to Present
Try cubing the cooled loaf into rustic hunks for a stunning bread basket at gatherings, or use thick-cut slices for overnight French toast. For holidays, shape one loaf into a round boule and present on a wooden board surrounded by fresh herbs and cheeses—friends will think you’re a pro.
Make Ahead and Storage
Storing Leftovers
Wrap any extra slices or loaves in plastic wrap or aluminum foil to keep things fresh and soft for up to three days at room temperature. If you have a bread box, even better—just tuck the bread inside to avoid it drying out. Avoid the fridge, which can make homemade bread go stale faster.
Freezing
One of the best things about Grandma’s Perfect Homemade Bread is how beautifully it freezes. Cool the loaves completely, then wrap tightly in plastic wrap and again in foil or place in a hefty zip-top freezer bag. It will keep for up to three months this way, ready to defrost whenever you crave a fresh loaf.
Reheating
To bring your bread back to life, warm slices in a toaster or refresh an entire loaf in a 300°F oven for 10–15 minutes, wrapped loosely in foil. This makes the crust crisp up again and the inside just as delicious as the day you baked it.
FAQs
Can I use bread flour instead of all-purpose flour?
Absolutely! Using bread flour will give Grandma’s Perfect Homemade Bread a slightly chewier texture and a bit more structure. It’s a great option if you want an extra bakery-style loaf.
What if I don’t have a stand mixer?
No problem at all—this recipe is designed to be approachable with just a bowl, spoon, and some elbow grease. Kneading by hand works perfectly and lets you really feel when the dough is ready.
How can I tell when the bread is fully baked?
A golden brown top is a great clue, but the best test is to remove a loaf from the pan and tap the bottom—it should sound hollow. If you’re super precise, aim for an internal temperature of about 190°F.
Can I make smaller or larger loaves?
You sure can! Just divide the dough accordingly—mini loaves make lovely gifts, and you might need to adjust the baking time a bit (about 20–25 minutes for minis, longer for a big round boule).
Why did my bread not rise properly?
Usually it’s a matter of live yeast: make sure it’s fresh and bubbly before mixing. Also, check that your water isn’t too hot. Letting dough rise in a warm, draft-free spot is key to those lofty loaves you remember from Grandma’s Perfect Homemade Bread.
Final Thoughts
Few things fill a home with joy like the smell of Grandma’s Perfect Homemade Bread baking away in the kitchen. If you’re ready for a slice of true comfort (and pride!) give this recipe a try—you just might find yourself passing on the tradition for generations to come.
Print
Grandma’s Perfect Homemade Bread Recipe
- Total Time: 2 hours 30 minutes
- Yield: 2 loaves (about 16 slices) 1x
- Diet: Vegetarian
Description
This recipe for Grandma’s Perfect Homemade Bread is a classic that yields two loaves of soft, fluffy bread with a golden crust. Follow these simple steps to create a delicious homemade bread that your whole family will love.
Ingredients
Dough:
- 2 1/4 cups warm water (about 110°F)
- 2 1/4 teaspoons active dry yeast (1 packet)
- 2 tablespoons granulated sugar
- 2 tablespoons vegetable oil or melted butter
- 1 tablespoon salt
- 6 cups all-purpose flour (divided)
Instructions
- Dissolve Yeast: In a large mixing bowl, dissolve sugar in warm water and sprinkle yeast over the top. Let it sit until foamy.
- Mix Dough: Stir in oil, salt, and 3 cups of flour. Gradually add the remaining flour, mixing until a soft dough forms.
- Knead: Turn dough onto a floured surface and knead for 8–10 minutes until smooth.
- Rise: Place dough in a greased bowl, cover, and let it rise for 1 to 1.5 hours until doubled in size.
- Shape and Bake: Divide dough, shape into loaves, let rise again, then bake at 375°F for 30–35 minutes until golden brown.
- Cool: Let loaves cool on a wire rack before slicing.
Notes
- For softer crusts, brush the tops of the loaves with butter after baking.
- Bread flour can be used for a chewier texture.
- This bread freezes well—cool completely and wrap tightly.
- Prep Time: 20 minutes
- Cook Time: 35 minutes
- Category: Bread
- Method: Baking
- Cuisine: American
Nutrition
- Serving Size: 1 slice
- Calories: 150
- Sugar: 2g
- Sodium: 230mg
- Fat: 2.5g
- Saturated Fat: 0.5g
- Unsaturated Fat: 2g
- Trans Fat: 0g
- Carbohydrates: 28g
- Fiber: 1g
- Protein: 4g
- Cholesterol: 0mg


