There’s just something magical about the bold, salty bite of Home-Cured Olives. With deep Mediterranean roots, this recipe brings ancient preservation techniques right to your kitchen, allowing you to transform fresh olives into a flavorful snack or show-stopping appetizer. Home curing unlocks a world of tailored seasonings and satisfying textures you simply can’t find in store-bought jars. Whether you love them buttery and briny or sharp and herbaceous, these Home-Cured Olives put authentic, rustic flavor within your reach.

Ingredients You’ll Need
The best part about making Home-Cured Olives is how surprisingly minimalist the ingredient list is. Each item in this recipe brings a punch of flavor or plays a crucial role in the process—use these thoughtfully, and you’ll taste the difference with every bite!
- Fresh olives (2 pounds): Your star ingredient, offering endless variety in flavor and texture depending on whether you choose green or black.
- Sea salt, non-iodized (1/2 cup): Essential for fermentation; non-iodized salt keeps the brine pure and supports good bacterial growth.
- Filtered water (enough to cover): Using filtered water keeps additives and chemicals from interfering with curing.
- Garlic, smashed (2 cloves, optional): Adds a mellow, aromatic boost if you like a garlicky undertone to your olives.
- Fresh rosemary or thyme (2 sprigs, optional): Infuses classic herbaceous flavors for a fragrant Mediterranean finish.
- Lemon peel strip or slice of chili (optional): Customize with citrus brightness or a kick of gentle heat, depending on your mood!
How to Make Home-Cured Olives
Step 1: Rinse and Sort Your Olives
Start by giving your fresh olives a good rinse under cool water—this washes away any lingering dust or debris from harvest. Take a moment to remove any bruised, overly soft, or damaged olives. A careful selection at this step ensures a better fermentation process and the best possible flavor for your Home-Cured Olives.
Step 2: Break the Skins
To help the brine penetrate and speed up curing, use a small knife to make a lengthwise slit in each olive, or gently crush them with a rolling pin just enough to crack the skin. Don’t smash them completely—a little break is perfect. This step is the secret to tender, well-seasoned Home-Cured Olives.
Step 3: Prepare the Brine
Dissolve the sea salt in filtered water, aiming for a 10% salt solution (about 1 tablespoon salt per cup of water). This precise ratio is key: the salt preserves your olives while allowing natural fermentation to work its magic. If you want to get technical, you can actually weigh your water and salt for accuracy, but a well-measured tablespoon per cup is perfectly reliable.
Step 4: Pack the Jar and Add Flavors
Tuck your prepared olives into a large, clean jar or food-safe container. If you’re feeling adventurous, layer in optional garlic, herbs, lemon peel, or chili—these infusions make each batch uniquely yours. Pour the brine over the olives, ensuring they’re completely submerged. To keep them down, use a fermentation weight or a small, sealable bag filled with extra brine. This keeps the uppermost olives protected from air exposure so your Home-Cured Olives ferment safely.
Step 5: Cover and Ferment
Cover your jar loosely with a lid or a cloth tied on with string. You want gases produced during fermentation to escape, but keep dust and critters out. Place the jar somewhere room temperature, out of direct sunlight— a pantry shelf is perfect. Now, give your Home-Cured Olives time: curing usually takes 3 to 6 weeks depending on olive size and variety. Check them every week; if olives start to peek above the brine, press them back down and top off with more brine if needed.
Step 6: Taste and Finish
Starting after three weeks, taste an olive every week to monitor bitterness and flavor. Some olives slow-dance towards doneness, while others are quick studies—trust your tastebuds! Once the bitterness mellows to your liking and the olives have developed depth and tang, they’re done. Strain the olives, then store in a fresh brine or marinate in olive oil with herbs and citrus peel. Refrigerate, and enjoy your homemade bounty whenever the craving strikes.
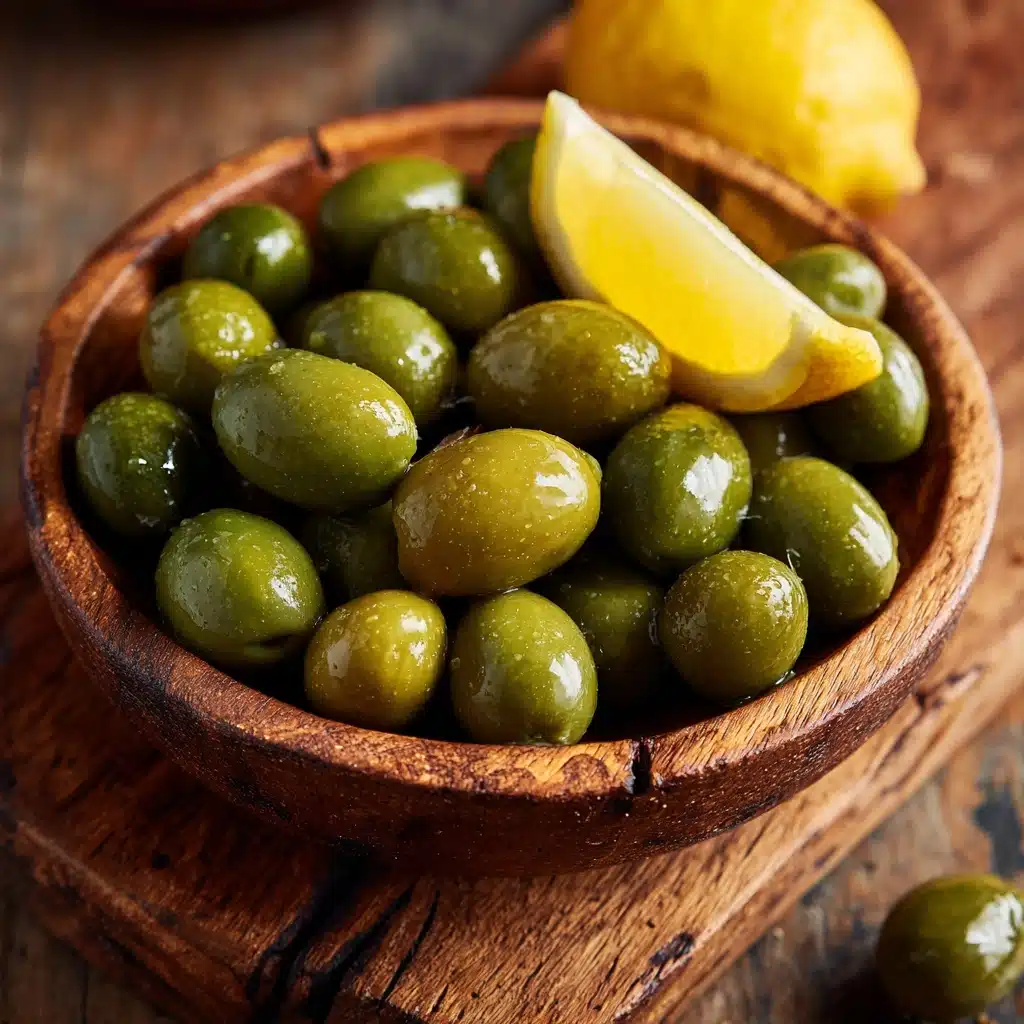
How to Serve Home-Cured Olives

Garnishes
Home-Cured Olives truly shine with just a sprinkle of citrus zest, a drizzle of peppery olive oil, or a scattering of fresh chopped herbs. For a beautiful presentation, toss them with thin slices of orange or lemon, or dust lightly with cracked black pepper. Even a splash of red wine vinegar can brighten the flavors—let your creativity (and pantry) guide you!
Side Dishes
There’s no wrong way to serve a bowl of Home-Cured Olives, but they’re at their best nestled alongside a board of aged cheeses, crusty sourdough, and smoked nuts. Add a little cured meat or some roasted peppers for a hearty antipasto spread. If you’re hosting, these olives can elevate even a humble salad or pasta night with their tangy character.
Creative Ways to Present
To impress guests, skewer your Home-Cured Olives with cubes of feta, marinated artichokes, or cherry tomatoes for colorful bites. For a rustic centerpiece, mound them into a clay dish layered with dried herbs and lemon twists. Or incorporate them into tapenades, stuff them into warm focaccia, or use them as a zesty topping for flatbreads. The possibilities are nearly endless!
Make Ahead and Storage
Storing Leftovers
Once your Home-Cured Olives are ready and stored in fresh brine or olive oil, they’ll keep beautifully in the refrigerator for several weeks. Always use a clean spoon to remove olives, and make sure they stay completely submerged in liquid to stay fresh and prevent spoilage. The flavors deepen even more after curing, rewarding your patience.
Freezing
While Home-Cured Olives aren’t typically frozen, you can freeze them for up to three months in well-sealed, brine-filled containers. Expect a slight change in texture once thawed—they may become softer—but the flavor remains bold and satisfying, making this a handy trick for longer-term storage.
Reheating
Generally, you don’t need to reheat Home-Cured Olives—just let them come close to room temperature for peak flavor and aroma before serving. If you want to serve them warm, gently heat in olive oil with herbs on the stovetop for a few minutes, but take care not to cook them. Warming unlocks an incredible aroma and brings your flavors to life!
FAQs
Can I use any kind of olives for curing?
Absolutely! Both green and black varieties work beautifully for Home-Cured Olives. Green olives are usually firmer and take a bit longer to lose their bitterness, while black olives cure more quickly and have a milder flavor. Just make sure your olives are fresh, firm, and unblemished.
Is it necessary to pit the olives before curing?
It’s perfectly fine (and traditional) to cure olives with the pits intact for the best flavor and texture. If you’d like pit-free olives, you can pit them after curing, but be gentle as they tend to soften during fermentation.
My olives look cloudy—should I worry?
A little cloudiness in the brine is normal during fermentation and usually signals healthy activity in your Home-Cured Olives. However, if you see mold, strong unpleasant smells, or slimy textures, discard that batch and try again with extra attention to cleanliness.
Can I reuse the brine for another batch?
It’s best to start each curing batch with fresh brine to avoid contamination and achieve the cleanest taste. However, you can use the old brine in salad dressings or as a tangy marinade base if you’d like to capture its rich, complex flavors!
How do I know when my olives are ready?
Trust your taste buds! Home-Cured Olives are ready when they’ve lost their harsh bitterness and have developed a pleasing, tangy flavor and tender, yielding texture. Begin tasting after three weeks and check regularly—some types may take a full six weeks or even longer.
Final Thoughts
If you love a hands-on kitchen project with delicious, distinct results, Home-Cured Olives are a joy from start to finish. There’s so much satisfaction in tailoring the flavors and knowing every bite was crafted by you. Give this recipe a try—you might find yourself hooked for life!
Print
Home-Cured Olives Recipe
- Total Time: 30 minutes plus 3-6 weeks curing
- Yield: 2 quarts
- Diet: Vegan
Description
Learn how to easily cure fresh olives at home to create a flavorful Mediterranean treat with this simple recipe for Home-Cured Olives.
Ingredients
Fresh Green or Black Olives:
2 pounds,
Sea Salt (non-iodized):
1/2 cup,
Filtered Water:
enough to cover,
Garlic (smashed, optional):
2 cloves,
Fresh Rosemary or Thyme (optional):
2 sprigs,
Lemon Peel Strip or Slice of Chili (optional):
1
Instructions
- Rinse the olives: Discard any bruised ones. Slice or gently crush for quicker curing.
- Prepare brine: Dissolve sea salt in filtered water to create a 10% brine.
- Brine the olives: Pour over olives, ensure they’re submerged. Add optional flavorings.
- Fermentation: Store at room temperature for 3-6 weeks, checking and adding brine weekly.
- Strain and store: Once ready, store in fresh brine or marinade in the fridge.
Notes
- Use non-iodized salt and filtered water for best results.
- Taste weekly to track curing progress.
- Green olives may take longer than black to cure.
- Prep Time: 30 minutes
- Cook Time: 0 minutes
- Category: Fermented Foods
- Method: Fermentation
- Cuisine: Mediterranean
Nutrition
- Serving Size: 5 olives
- Calories: 40
- Sugar: 0g
- Sodium: 300mg
- Fat: 4g
- Saturated Fat: 0.5g
- Unsaturated Fat: 3.5g
- Trans Fat: 0g
- Carbohydrates: 1g
- Fiber: 0g
- Protein: 0g
- Cholesterol: 0mg


