
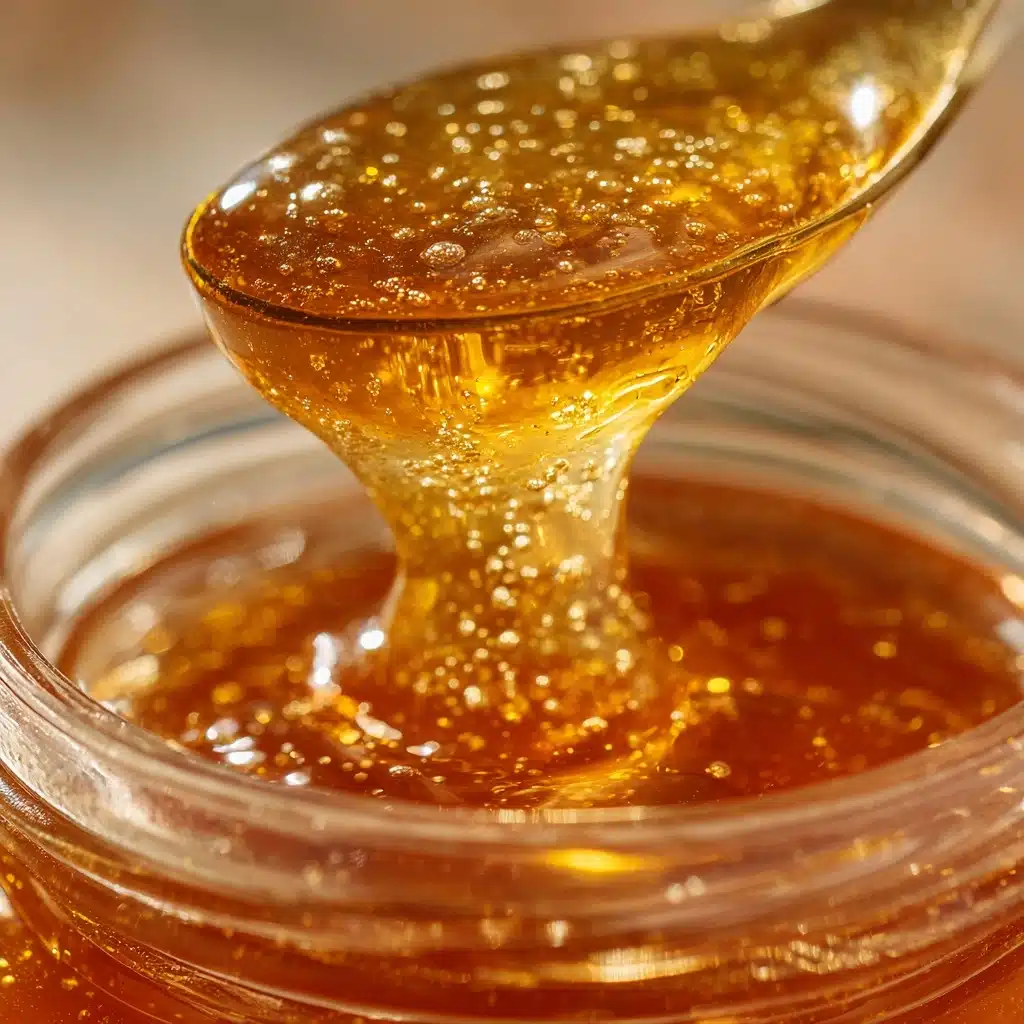
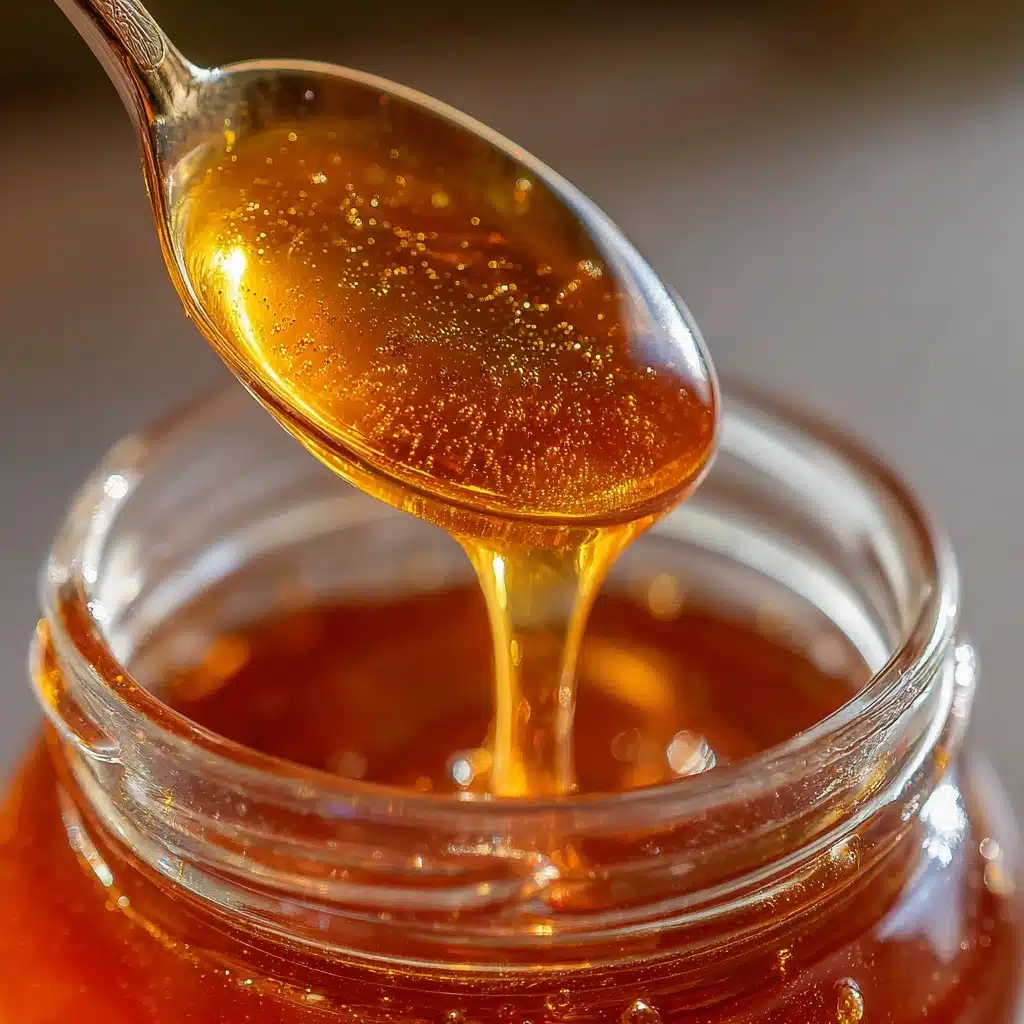
Making your own Home Made Syrup is not just easy, it’s downright delightful! Imagine drizzling a golden, glossy syrup that you crafted yourself over stacks of pancakes, waffles, or even using it as a sweetener for your morning coffee. With just a handful of staple ingredients and a few minutes on the stovetop, you’ll have a luscious, versatile syrup that rivals anything you can buy—plus, you get to control the flavor and sweetness. There’s something so satisfying about knowing exactly what’s in your syrup and being able to tweak it to perfection every single time you make it.
Ingredients You’ll Need
The beauty of this recipe lies in its simplicity—each ingredient plays an important role in creating the perfect texture, flavor, and sheen for your syrup. Don’t underestimate these basics; together, they transform into something truly delicious!
- Granulated sugar (1 cup): The star of the show, providing sweetness and the classic syrupy gloss.
- Water (1 cup): Balances and dissolves the sugar, creating the ideal syrup consistency.
- Vanilla extract (1 teaspoon, optional): Adds a warm, aromatic note that elevates the syrup’s flavor.
- Butter (1 tablespoon, optional): Offers a subtle richness and silkier texture if you want to take your syrup to the next level.
- Pinch of salt: Enhances all the other flavors and keeps the sweetness from becoming one-dimensional.
How to Make Home Made Syrup
Step 1: Combine Sugar and Water
Start by grabbing a small saucepan and adding both the sugar and water. This classic duo is the foundation of your Home Made Syrup. Stir them together to help the sugar begin dissolving, and set your burner to medium heat. It’s amazing how quickly these humble ingredients begin their transformation!
Step 2: Dissolve and Boil
Bring the mixture to a gentle boil, stirring occasionally. Watch as the sugar disappears into the water and the liquid turns clear. This is where the magic happens—your syrup is forming! No need to rush or stir constantly; just keep an eye on it and enjoy the aroma.
Step 3: Simmer and Thicken
Reduce the heat to low and let the syrup simmer for 5 to 7 minutes. You’ll notice it starting to thicken slightly, but don’t worry if it still seems a little thin—it will continue to thicken as it cools. If you want to infuse extra flavors like cinnamon, citrus zest, or berries, now’s the time to add them.
Step 4: Add Flavor and Finish
Once the syrup has reached your desired consistency, remove the saucepan from the heat. Stir in the vanilla extract, butter, and a pinch of salt if you’re using them. The vanilla brings a lovely aroma, the butter gives a hint of richness, and the salt ties everything together. Let the syrup cool slightly before serving.
How to Serve Home Made Syrup
Garnishes
A little garnish goes a long way! Try topping your Home Made Syrup with a sprinkle of cinnamon, a few fresh berries, or even a twist of lemon zest for a pop of color and flavor. These small touches turn a simple breakfast into a beautiful treat.
Side Dishes
This syrup is a superstar alongside all your favorite breakfast classics—think fluffy pancakes, crispy waffles, or golden French toast. But don’t stop there! Drizzle it over oatmeal, Greek yogurt, or even roasted fruit for a sweet upgrade.
Creative Ways to Present
Pour your Home Made Syrup into a cute mason jar or a little pitcher for that charming, homemade touch. You can also swirl it into iced lattes, use it as a glaze for baked goods, or package it in small bottles as thoughtful edible gifts for friends and family.
Make Ahead and Storage
Storing Leftovers
Keep any leftover syrup in an airtight container in the refrigerator. It’ll stay fresh and delicious for up to two weeks, making it easy to have a jar of Home Made Syrup ready whenever your sweet tooth strikes.
Freezing
If you want to make a big batch, you can absolutely freeze your Home Made Syrup! Pour it into a freezer-safe container, leaving a little space for expansion, and freeze for up to three months. Just thaw in the fridge overnight when you’re ready to use it.
Reheating
To reheat, simply warm the syrup gently in the microwave or in a small saucepan over low heat. Stir well before serving, and your syrup will be just as smooth and pourable as when you first made it.
FAQs
Can I use brown sugar instead of white sugar?
Absolutely! Brown sugar will give your Home Made Syrup a deeper, caramel-like flavor and a darker color. It’s a lovely twist, especially for fall-inspired breakfasts.
How do I make flavored syrup?
Simply add flavorings like a cinnamon stick, a strip of lemon zest, or a handful of berries during the simmering stage. Strain them out before storing to keep your syrup smooth and clear.
Is this syrup gluten-free and vegan?
Yes, the basic recipe is naturally gluten-free and vegan. Just skip the butter or substitute with a plant-based alternative if you want to keep it vegan-friendly.
Why did my syrup turn grainy?
Graininess usually happens if the sugar didn’t fully dissolve or the syrup was cooked too long. Make sure to dissolve all the sugar before simmering and avoid overcooking for the smoothest results.
Can I double or triple the recipe?
Definitely! Just keep the ratios of sugar to water the same, and your Home Made Syrup will turn out perfectly every time, whether you’re making a little or a lot.
Final Thoughts
Once you try making your own Home Made Syrup, you’ll wonder why you ever bought it at the store! It’s quick, customizable, and endlessly useful. Give this recipe a go and see just how effortless and delicious homemade can be.
Print
Home Made Syrup Recipe
- Total Time: 9 minutes
- Yield: 1 cup 1x
- Diet: Vegan
Description
This homemade syrup recipe is a simple and versatile sweetener made by combining sugar and water, simmered to a perfect consistency. Optional additions like vanilla, butter, and a pinch of salt enhance the flavor, making it an ideal topping for pancakes, waffles, French toast, or as a sweetener for beverages. Easy to prepare and store, this syrup offers a fresh alternative to store-bought versions.
Ingredients
Main Ingredients
- 1 cup granulated sugar
- 1 cup water
- 1 teaspoon vanilla extract (optional)
- 1 tablespoon butter (optional, for richness)
- Pinch of salt
Instructions
- Combine Ingredients: In a small saucepan, mix the granulated sugar and water to start the syrup base.
- Bring to Boil: Heat over medium heat, stirring occasionally until the sugar completely dissolves and the mixture comes to a gentle boil.
- Simmer: Reduce heat and let the syrup simmer for 5 to 7 minutes, allowing it to thicken slightly while stirring occasionally.
- Add Flavorings: Remove from heat and stir in vanilla extract, butter for richness, and a pinch of salt if desired to enhance the flavor profile.
- Cool and Store: Let the syrup cool slightly before serving; it will thicken more as it cools. Store in an airtight container in the refrigerator for up to 2 weeks.
Notes
- For flavored variations, add a cinnamon stick, lemon zest, or crushed berries during simmering, then strain before storing.
- Use this syrup as a topping for pancakes, waffles, and French toast or as a sweetener for drinks.
- Prep Time: 2 minutes
- Cook Time: 7 minutes
- Category: Condiment
- Method: Stovetop
- Cuisine: American
Nutrition
- Serving Size: 2 tablespoons
- Calories: 100
- Sugar: 25g
- Sodium: 10mg
- Fat: 0g
- Saturated Fat: 0g
- Unsaturated Fat: 0g
- Trans Fat: 0g
- Carbohydrates: 25g
- Fiber: 0g
- Protein: 0g
- Cholesterol: 0mg


