
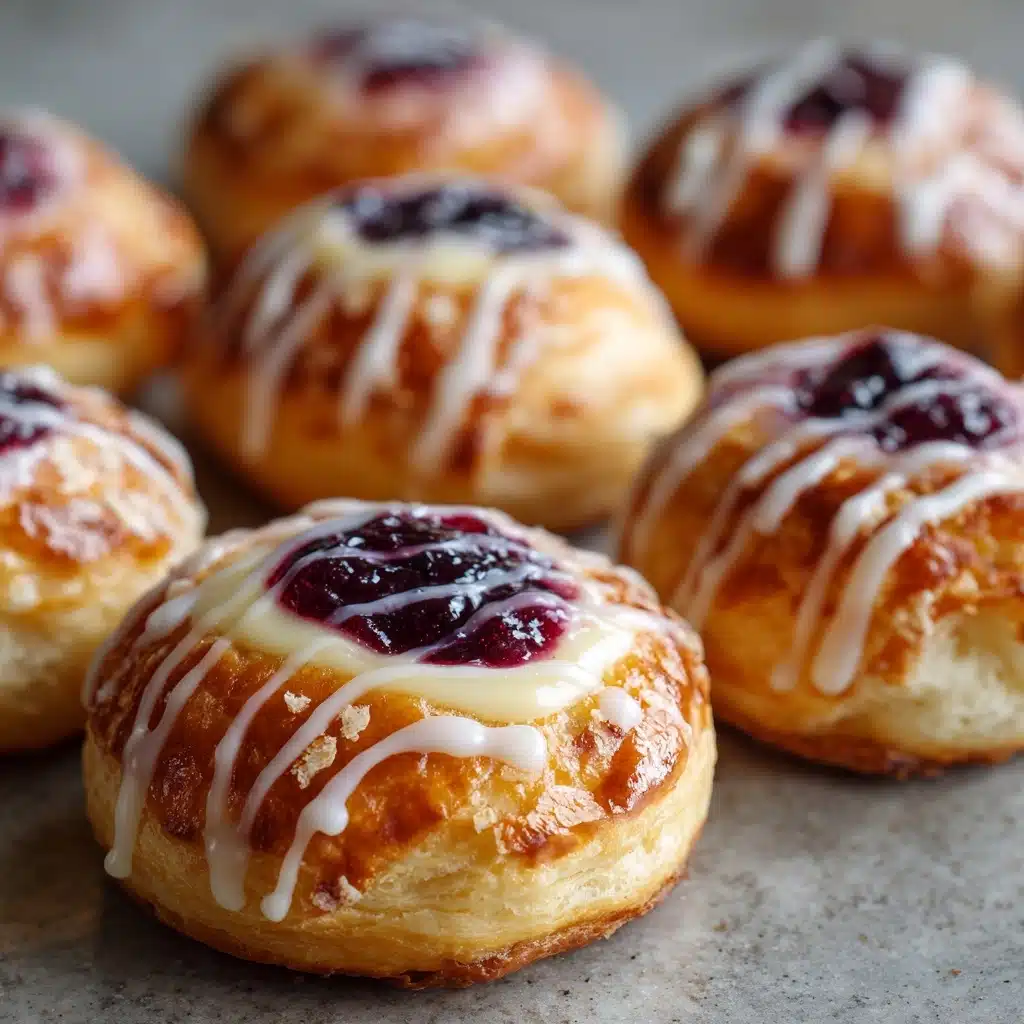
Ready to transform your kitchen into a charming European bakery? These Homemade Breakfast Danish Pastries have a tender, flaky puff pastry shell, a rich layer of tangy-sweet cream cheese, and a sparkling crown of fruit jam and vanilla glaze. They’re the kind of treat that feels luxuriously bakery-quality but are incredibly easy to make at home. Imagine waking up to the aroma of buttery pastry and the shimmer of sweet icing — there’s simply no better way to start your morning.
Ingredients You’ll Need
The beauty of Homemade Breakfast Danish Pastries lies in their simplicity. Each ingredient is crucial for that perfect bite: pillowy pastry, creamy filling, bright citrus, and a fruity flourish. Gather everything below for a no-fuss, flavor-packed breakfast that wows every time.
- Puff pastry: Store-bought sheets make this recipe quick, giving the pastries that irresistible flaky texture.
- Cream cheese (softened): The creamy base provides richness and a silky center for every Danish.
- Granulated sugar: Adds just enough sweetness to enhance the cream cheese flavor.
- Lemon juice: Fresh citrus lifts the filling, balancing sweetness with brightness.
- Vanilla extract: A dash makes both the filling and glaze extra aromatic and inviting.
- Egg yolk: This enriches the cream cheese mixture and helps set it as it bakes.
- Fruit jam or preserves (raspberry, apricot, or blueberry): The jam brings a juicy, chewy burst of fruitiness — pick your favorite or mix and match!
- Egg (beaten, for egg wash): Brushing the pastry ensures a glossy, golden finish.
- Coarse sugar (optional, for sprinkling): Adds a sparkling, caramelized crunch to the pastry edges.
- Powdered sugar: This is the base for a sweet, drizzly glaze that adds a final bakery touch.
- Milk: Thins the glaze to just the right consistency for drizzling.
- Vanilla extract (for glaze): Ties all the flavors together with warmth and sweetness.
How to Make Homemade Breakfast Danish Pastries
Step 1: Prep Your Tools and Ingredients
Preheat your oven to 400°F (200°C) and line a baking sheet with parchment paper. Take a moment to gather and measure all your ingredients. Having everything ready before you start makes your Danish-making session totally stress-free!
Step 2: Mix the Cream Cheese Filling
In a medium bowl, beat together the softened cream cheese, granulated sugar, lemon juice, vanilla extract, and egg yolk. Keep mixing until the filling is smooth, luscious, and completely lump-free. This creamy layer is what makes Homemade Breakfast Danish Pastries so decadent.
Step 3: Shape the Puff Pastry Squares
Unfold your thawed puff pastry sheets onto a lightly floured surface. Use a sharp knife or pizza cutter to slice each sheet into 4 neat squares (for a total of 8). Place them evenly on the lined baking sheet. Next, lightly score a half-inch border around each square — this helps give your Danish their classic raised edge, while the centers stay wonderfully soft and filled. Prick centers with a fork to prevent too much puffing.
Step 4: Fill Your Pastries
Spoon about 1 tablespoon of the cream cheese mixture into the center of every pastry square, keeping it inside the scored border. Top this with a heaping spoonful of your chosen fruit jam. Don’t be shy — the more colorful, the better! The contrast between tangy cheese and sweet fruit is pure magic.
Step 5: Add Egg Wash and Optional Sugar
Brush the pastry borders with the beaten egg, which will turn golden and shiny as they bake. For an extra bakery flair, sprinkle the edges with coarse sugar; this step adds delightful sparkle and crunch to your Homemade Breakfast Danish Pastries.
Step 6: Bake to Golden Perfection
Bake for 15 to 18 minutes, or until the Danish are puffed and beautifully golden brown. The aroma filling your kitchen will be irresistible! Let them cool on the baking sheet for about five minutes — hard to wait, but totally worth it.
Step 7: Glaze and Serve
Mix together powdered sugar, 2 to 3 tablespoons of milk, and a splash of vanilla extract until smooth. Drizzle this silky glaze over the slightly cooled pastries, then stand back and admire your handiwork. Your Homemade Breakfast Danish Pastries are ready for their close-up!
How to Serve Homemade Breakfast Danish Pastries

Garnishes
A little extra flourish goes a long way! Dust your pastries with powdered sugar for a snowy effect, scatter fresh berries over your serving platter, or top each Danish with a thin slice of fruit that matches the jam. The glaze is already gorgeous, but a sprinkle of lemon zest brightens everything up.
Side Dishes
While Homemade Breakfast Danish Pastries are a showstopper on their own, they’re spectacular next to a fresh fruit salad or a bowl of creamy Greek yogurt. Hot coffee or tea makes the perfect companion, adding warmth to every bite. For a more filling brunch, team your Danish with scrambled eggs or a savory frittata.
Creative Ways to Present
Set your pastries on a wooden board with small pots of jam and extra glaze for dipping. Arrange mini Danish for a breakfast buffet or brunch party, or tuck a few into a pretty basket lined with cloth for breakfast in bed. They also make thoughtful gifts, especially packaged in a bakery box tied with ribbon.
Make Ahead and Storage
Storing Leftovers
If you’re lucky enough to have a few Danish left, store them in an airtight container in the refrigerator for up to two days. This keeps the pastry flaky and the cream cheese filling fresh and delicious.
Freezing
Want to make Homemade Breakfast Danish Pastries ahead of time? Freeze the baked, unglazed pastries in a single layer on a baking sheet, then transfer to a freezer bag. They’ll keep beautifully for up to two months. Thaw overnight in the fridge before reheating and glazing.
Reheating
For that just-baked texture, reheat your pastries in a 350°F (175°C) oven for 5 to 8 minutes. This refreshes the layers and brings back the signature flakiness. Glaze after reheating for best results!
FAQs
Can I use homemade puff pastry instead of store-bought?
Absolutely! If you have the time and energy, homemade puff pastry takes these pastries to an even more artisanal level. The process is a bit more involved, but the results are extra flaky and buttery — just make sure to keep everything as cold as possible when working with homemade dough.
What are the best jams or preserves for these Danish?
Classic flavors like raspberry, apricot, or blueberry are my top picks, but almost any fruit preserve will work. Just avoid overly runny jams, which can leak out during baking. If you love a hit of tartness, try cherry or blackberry!
Can I make Homemade Breakfast Danish Pastries ahead of time?
Yes, you can prep the pastries and filling a day ahead, then assemble and bake fresh in the morning. Baked Danish also freeze well before glazing, so you can have a taste of homemade bakery goodness anytime.
How do I keep the fruit filling from leaking out?
Be careful to keep the filling within the scored border and avoid overfilling. Using a thicker jam or preserves (not jelly) helps too, as it tends to stay put during baking.
Are these pastries suitable for vegetarians?
Definitely! Homemade Breakfast Danish Pastries use only vegetarian-friendly ingredients. If you’re accommodating dietary restrictions, always check the labels on your puff pastry (some brands use animal-derived fats) to be sure.
Final Thoughts
I can’t think of a cozier, more satisfying way to start your day than with these Homemade Breakfast Danish Pastries. They’re fun to make, even more delightful to share, and guaranteed to bring a little bakery magic right to your kitchen. Don’t wait for a special occasion — treat yourself and your loved ones to the homemade Danish of your dreams!
Print
Homemade Breakfast Danish Pastries Recipe
- Total Time: 38 minutes
- Yield: 8 pastries 1x
- Diet: Vegetarian
Description
Indulge in these delightful Homemade Breakfast Danish Pastries filled with creamy cheese and fruity jam, all encased in flaky puff pastry. Perfect for a weekend brunch treat!
Ingredients
Puff Pastry:
- 2 sheets puff pastry (thawed)
Cream Cheese Filling:
- 8 ounces cream cheese (softened)
- 1/4 cup granulated sugar
- 1 teaspoon lemon juice
- 1 teaspoon vanilla extract
- 1 egg yolk
Additional Ingredients:
- 1/2 cup fruit jam or preserves (such as raspberry, apricot, or blueberry)
- 1 egg (beaten, for egg wash)
- 1 tablespoon coarse sugar (optional, for sprinkling)
- 1 cup powdered sugar
- 2–3 tablespoons milk
- 1/2 teaspoon vanilla extract (for glaze)
Instructions
- Preheat Oven: Preheat the oven to 400°F (200°C) and line a baking sheet with parchment paper.
- Prepare Filling: In a medium bowl, mix cream cheese, sugar, lemon juice, vanilla extract, and egg yolk until smooth.
- Prepare Pastry: Roll out puff pastry and cut into squares. Score borders, add filling, and jam. Brush with egg wash and sugar.
- Bake: Bake for 15–18 minutes until golden brown.
- Make Glaze: Mix powdered sugar, milk, and vanilla for glaze. Drizzle over cooled pastries.
Notes
- Enjoy fresh on the same day for the best taste.
- Store leftovers in the refrigerator for up to 2 days.
- Reheat in the oven to refresh.
- Prep Time: 20 minutes
- Cook Time: 18 minutes
- Category: Breakfast, Brunch
- Method: Baking
- Cuisine: European-Inspired
Nutrition
- Serving Size: 1 pastry
- Calories: 310
- Sugar: 17g
- Sodium: 200mg
- Fat: 19g
- Saturated Fat: 11g
- Unsaturated Fat: 7g
- Trans Fat: 0g
- Carbohydrates: 31g
- Fiber: 1g
- Protein: 4g
- Cholesterol: 55mg


