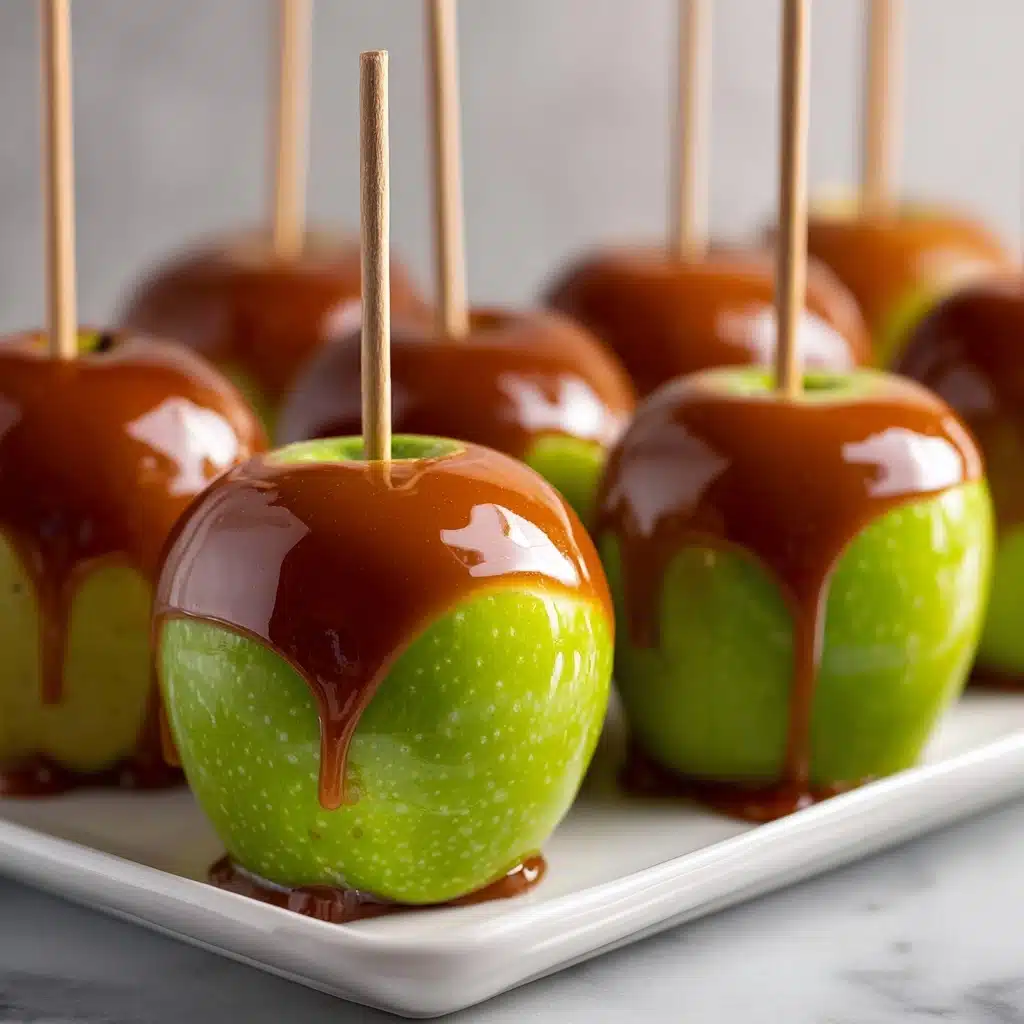
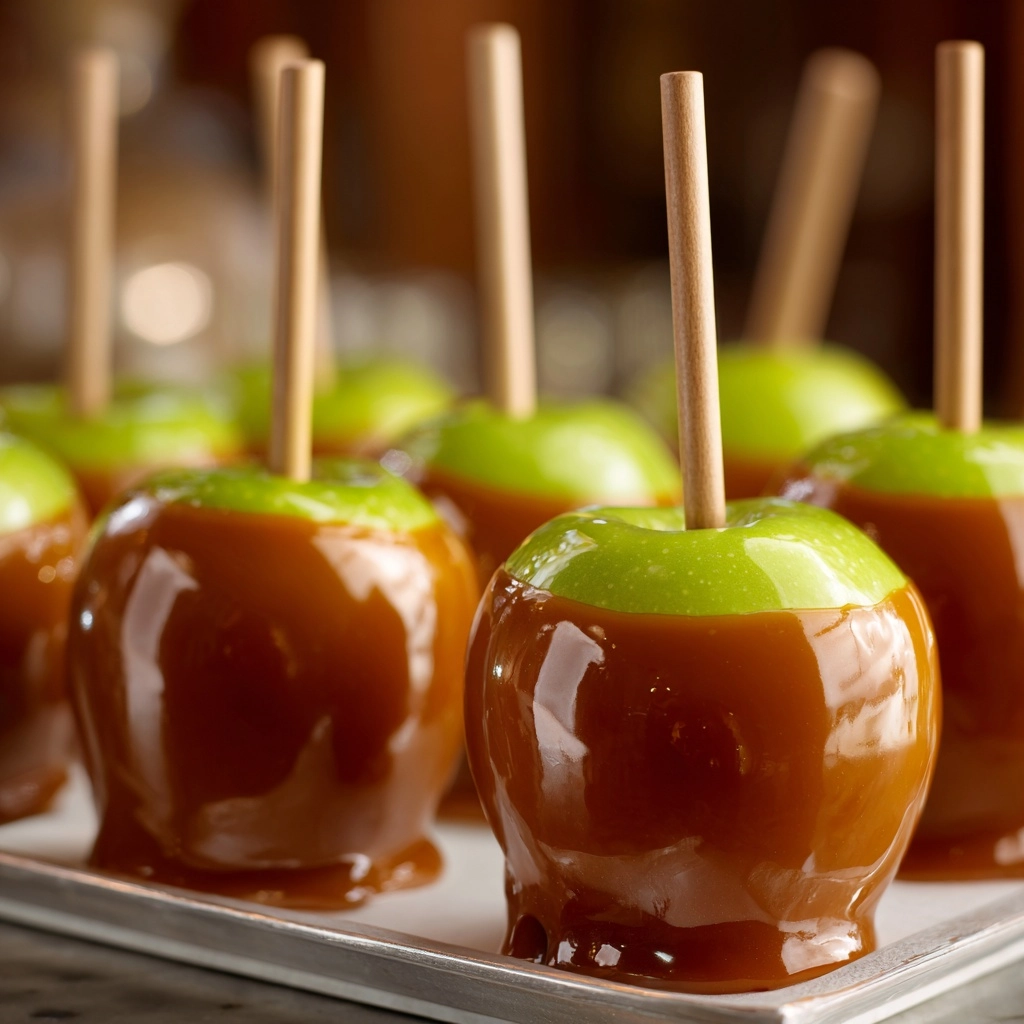
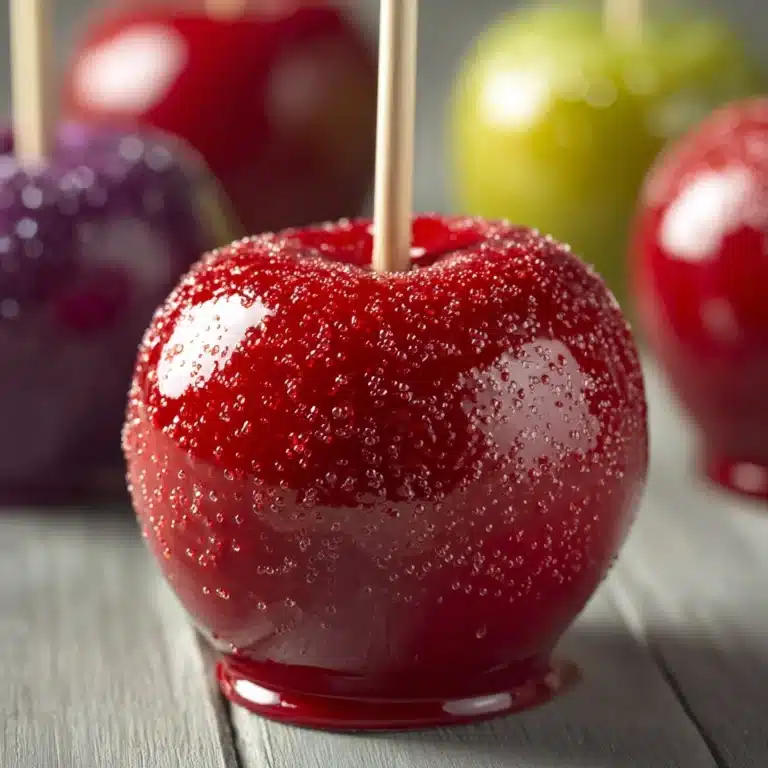
If you’re craving a classic treat that captures all the joy and nostalgia of county fairs and cozy autumn afternoons, Homemade Caramel Apples are your ticket to happiness. These beauties pair crisp apples with a rich, buttery caramel coating that comes together in about half an hour. With just a handful of ingredients, you can transform everyday apples into showstoppers that delight kids and adults alike. Making your own means you get to control every ooey-gooey detail, from the gleaming caramel shell to your favorite toppings—plus, it’s surprisingly easy and outrageously fun. There’s nothing quite like that first sweet, sticky bite of a homemade caramel apple, and once you try them, you’ll want to make them a tradition every year!
Ingredients You’ll Need
These Homemade Caramel Apples start with just a few simple, pantry-friendly ingredients—but don’t let that fool you. Each plays an absolutely essential role in taste, texture, and mouthwatering appeal. Here’s what you’ll need, along with a pro tip for each item.
- Apples (6 small to medium, Granny Smith or Honeycrisp): Choose tart apples for a perfect sweet-sour contrast, and be sure they’re super dry so the caramel sticks!
- Unsalted butter (1 cup): Adds velvety richness and that melt-in-your-mouth texture you crave in great caramel.
- Packed brown sugar (2 cups): For deep caramel flavor and that magical molasses note—pack it tight for accuracy.
- Light corn syrup (1 cup): Helps the caramel stay glossy and smooth without any graininess.
- Sweetened condensed milk (1 14-ounce can): This gives caramel its signature creamy body and gentle sweetness.
- Salt (1/4 teaspoon): A tiny pinch makes the flavors pop and balances the sweetness.
- Vanilla extract (1 teaspoon): Don’t skip this! It brings the whole caramel together with warmth and depth.
- Wooden sticks: Sturdy sticks are key for easy dipping, decorating, and eating.
How to Make Homemade Caramel Apples
Step 1: Prepare Your Apples
Start by washing the apples thoroughly to remove any wax or residue, which helps the caramel cling perfectly. Dry them completely—a little moisture can cause the caramel to slide off. Remove the apple stems, then firmly twist a wooden stick into the top of each apple where the stem used to be. Set your apples aside and line a baking sheet with parchment, giving it a quick light grease so nothing sticks later.
Step 2: Melt the Butter
In a large, heavy-bottomed saucepan, melt the butter over medium heat. This is where your caramel starts to build its rich, smooth character, so let it melt steadily and don’t rush the process.
Step 3: Make the Caramel Base
Now stir in the packed brown sugar, light corn syrup, and sweetened condensed milk. Keep stirring as everything melts together into a dreamy, golden caramel. The sugar dissolves while the syrup and condensed milk create that hallmark creamy drizzle.
Step 4: Cook to the Perfect Temperature
Bring your caramel mixture to a gentle boil, stirring constantly to prevent scorching. Grab your candy thermometer: you’re aiming for 245°F (118°C)—that’s the firm ball stage, perfect for homemade caramel apples. This usually takes about 15-20 minutes, so settle in and keep an eye on the temperature as it climbs.
Step 5: Flavor and Cool the Caramel
Once you’ve hit the target temperature, take the pan off the heat right away. Stir in the vanilla extract, which not only flavors the caramel but fills your kitchen with mouthwatering aroma. Let the caramel sit for 3-5 minutes so it thickens up just a bit—this makes it wonderfully coat the apples without running off.
Step 6: Dip the Apples
Working carefully (but confidently!), dip each prepared apple into the warm caramel, twirling and tilting to coat all sides. Let the extra caramel drip back into the pan and set each finished apple onto your greased parchment. If you want to add toppings, sprinkle or roll them on while the caramel is still tacky. Let your caramel apples cool at room temperature until they set into shiny, irresistible treats.
How to Serve Homemade Caramel Apples

Garnishes
What’s better than a caramel apple? One covered in crunchy or colorful extras! Before the caramel fully sets, try rolling your apples in chopped peanuts, pecans, mini chocolate chips, crushed cookies, or sprinkles. These fun additions not only add flavor and crunch but make each apple look totally unique and utterly tempting.
Side Dishes
Homemade Caramel Apples are a star dessert all on their own, but they absolutely shine on a fall dessert platter. Serve them alongside spiced apple cider, cinnamon-sugar donuts, or warm pumpkin bars. A scoop of vanilla ice cream or a hot cup of coffee makes the experience even more special.
Creative Ways to Present
If you’re gifting these beauties or bringing them to a party, wrap each apple in cellophane and tie it up with a festive ribbon for a beautiful homemade gift. Or, for sharing, slice apples into wedges after they’ve set. Arrange them on a platter with bowls of extra caramel and toppings for dipping—it’s the perfect centerpiece for a fall party or family movie night!
Make Ahead and Storage
Storing Leftovers
If you have any Homemade Caramel Apples left, store them in the refrigerator. Wrap each apple in plastic wrap or store in an airtight container to keep them fresh and prevent sticky messes. They’ll stay delicious for up to 3 days.
Freezing
While caramel apples can technically be frozen, it’s not recommended as the caramel can sweat and slide off as it thaws, and the apple texture can become watery. For best results, enjoy them within a few days of making.
Reheating
Homemade Caramel Apples are made to enjoy at room temperature—there’s no need to reheat. If the caramel feels a little hard straight from the fridge, let the apples sit out for 10-15 minutes to soften before biting in.
FAQs
What apples are best for caramel apples?
Tart varieties like Granny Smith or Honeycrisp work beautifully for Homemade Caramel Apples. Their crisp texture and slightly tangy flavor pair perfectly with the buttery sweetness of the caramel.
Can I make the caramel without a candy thermometer?
It’s possible, but a thermometer takes out the guesswork for beginners. If you go by eye, the caramel is ready when it thickly coats a spoon and forms a firm ball in cold water, but the thermometer guarantees perfect results every time.
How do I prevent the caramel from sliding off the apples?
Wash and dry your apples thoroughly, removing all wax, and let them reach room temperature before dipping. This makes a huge difference in helping the caramel stick and set.
Can I use store-bought caramel instead?
Absolutely! If you’re crunched for time, melt high-quality store-bought soft caramels with a splash of milk. However, nothing beats the flavor and satisfaction of truly Homemade Caramel Apples from scratch.
What toppings work well besides nuts and sprinkles?
Get creative! Mini chocolate candies, graham cracker crumbs, flaked sea salt, freeze-dried berries, or crushed pretzels all make for delicious (and eye-catching) variations on your Homemade Caramel Apples.
Final Thoughts
There’s just something magical about crafting your own Homemade Caramel Apples from start to finish. Every step feels special, and the result—crisp, sweet, and totally swoon-worthy—is worth every minute. Give them a try and make some sweet memories in your own kitchen this season. Your family, friends, and most importantly, your taste buds, will thank you!
Print
Homemade Caramel Apples Recipe
- Total Time: 35 minutes
- Yield: 6 caramel apples 1x
- Diet: Vegetarian
Description
Indulge in the nostalgic delight of Homemade Caramel Apples with this easy-to-follow recipe. Perfect for fall festivities or a sweet treat any time of the year, these apples are coated in a luscious caramel that is sure to be a hit with everyone.
Ingredients
Apples:
- 6 small to medium apples (Granny Smith or Honeycrisp work well)
Caramel:
- 1 cup unsalted butter
- 2 cups packed brown sugar
- 1 cup light corn syrup
- 1 (14-ounce) can sweetened condensed milk
- 1/4 teaspoon salt
- 1 teaspoon vanilla extract
Additional:
- Wooden sticks for dipping
Instructions
- Prep Apples: Wash and dry apples, remove stems, and insert wooden sticks.
- Prepare Caramel: Melt butter in a saucepan, add brown sugar, corn syrup, and condensed milk. Boil until 245°F, then stir in vanilla.
- Dip Apples: Coat each apple with caramel, let excess drip off, and place on a prepared baking sheet.
- Cool and Serve: Let apples cool until caramel is set.
Notes
- For fun variations, roll the dipped apples in chopped nuts, mini chocolate chips, or sprinkles before the caramel sets.
- Store caramel apples in the refrigerator for up to 3 days.
- Prep Time: 15 minutes
- Cook Time: 20 minutes
- Category: Dessert
- Method: Stovetop
- Cuisine: American
Nutrition
- Serving Size: 1 apple
- Calories: 500
- Sugar: 72g
- Sodium: 140mg
- Fat: 18g
- Saturated Fat: 11g
- Unsaturated Fat: 6g
- Trans Fat: 0g
- Carbohydrates: 86g
- Fiber: 4g
- Protein: 4g
- Cholesterol: 45mg

