
There’s just something magical about Homemade Chocolate Pudding: that silky, luscious texture, the deep chocolate flavor, and the comforting nostalgia it brings. Whether you grew up sneaking spoonfuls straight from the fridge or you’re discovering its charm for the first time, this delightful dessert is a pure chocolate lover’s dream. Truly, it’s a treat you can make from scratch with simple ingredients and a bit of stirring—and the payoff is absolutely worth every moment!
Ingredients You’ll Need
This recipe relies on a handful of kitchen staples that work together to create an unbelievably rich and creamy pudding. Each ingredient, while simple, plays a crucial role in building those layers of flavor and texture that set Homemade Chocolate Pudding apart from anything store-bought.
- Granulated sugar: Adds essential sweetness and balances out the cocoa’s natural bitterness.
- Unsweetened cocoa powder: Brings all the deep, chocolaty goodness and gorgeous color.
- Cornstarch: The secret to thick, spoonable pudding—without any floury aftertaste.
- Salt: Just a pinch wakes up all the other flavors, making the chocolate pop.
- Whole milk: Makes the pudding ultra-creamy and gives a rich mouthfeel.
- Heavy cream: Bumps up the silkiness and richness for that melt-in-your-mouth texture.
- Egg yolks: Not only thicken the pudding but also add unbelievable smoothness and taste.
- Unsalted butter: Rounds everything out for a velvety finish and glossy shine.
- Vanilla extract: Brings a subtle warmth that enhances the chocolate without overpowering it.
- Semi-sweet chocolate (chopped): The final flourish, delivering deep chocolate intensity with every bite.
How to Make Homemade Chocolate Pudding
Step 1: Whisk the Dry Ingredients
Start by grabbing a medium saucepan and whisking together the granulated sugar, cocoa powder, cornstarch, and salt. This ensures the dry ingredients are blended thoroughly and the cornstarch is evenly distributed, helping to avoid any lumps later.
Step 2: Add Milk and Cream
Slowly pour in the whole milk and heavy cream while whisking constantly. This step is all about patience and persistence—whisk until everything is smooth before moving on. No dry pockets should remain, setting the stage for a flawlessly creamy Homemade Chocolate Pudding.
Step 3: Cook Until Thickened
Place the saucepan over medium heat and start cooking, stirring constantly with a spatula or whisk. In about 5 to 8 minutes, the mixture will start to thicken and form gentle bubbles. Don’t wander off—this part is fast, and constant stirring gives you perfect pudding.
Step 4: Temper the Egg Yolks
In a small bowl, lightly beat the egg yolks. Carefully ladle about ½ cup of the hot pudding mixture into the yolks, whisking constantly to gently warm them up. This prevents the yolks from scrambling when added back—which is the secret to glossy, velvety pudding.
Step 5: Finish Cooking
Pour the egg yolk mixture back into the saucepan with the rest of the pudding, whisking constantly. Continue cooking for about 2 more minutes, stirring well until the pudding is thick, luscious, and creamy.
Step 6: Add Final Touches
Remove the saucepan from heat. Stir in the unsalted butter, vanilla extract, and chopped semi-sweet chocolate last. Allow everything to melt completely, stirring until the pudding is shiny, smooth, and irresistibly rich.
Step 7: Chill and Set
Pour the pudding into individual serving dishes or a large bowl. Press plastic wrap directly on the surface to keep a skin from forming. Refrigerate for at least 2 hours—this wait is tough, but it lets all the flavors meld and sets Homemade Chocolate Pudding to the perfect consistency.
How to Serve Homemade Chocolate Pudding
Garnishes
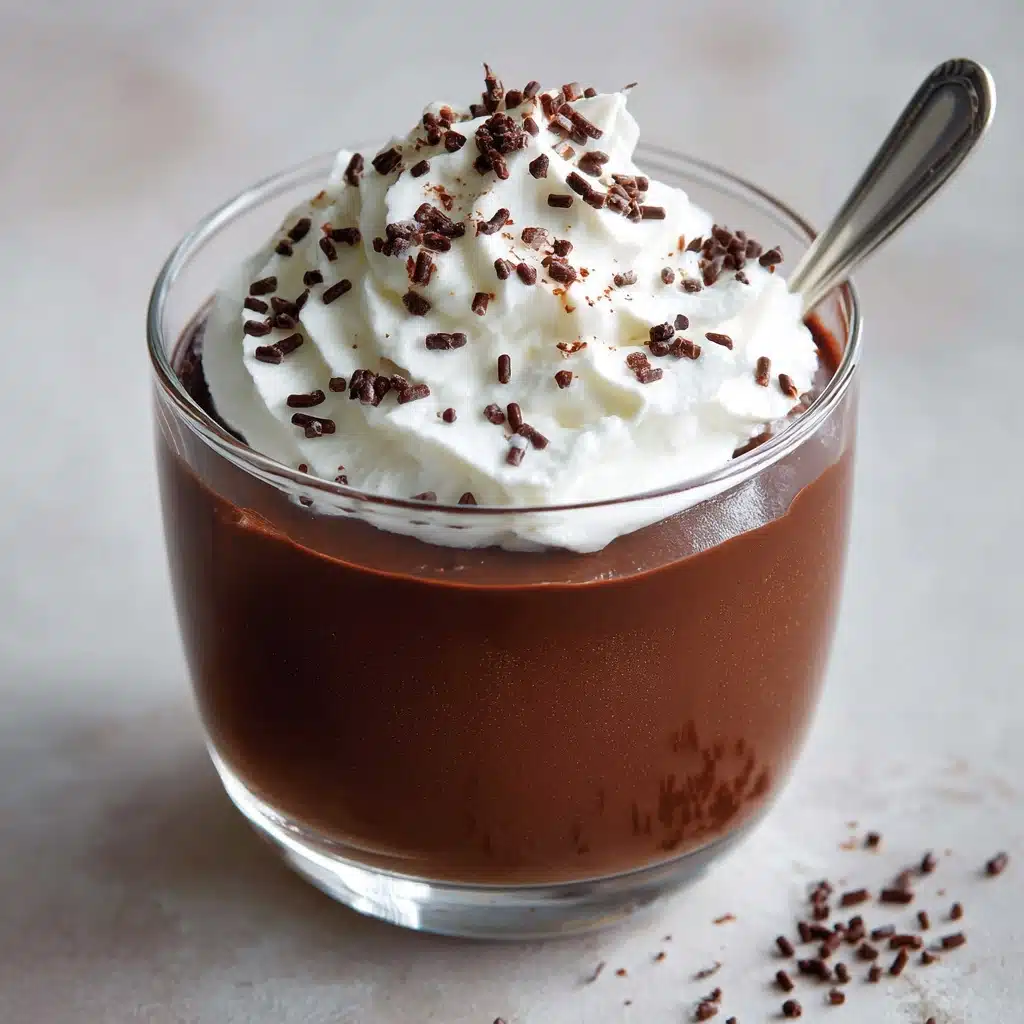
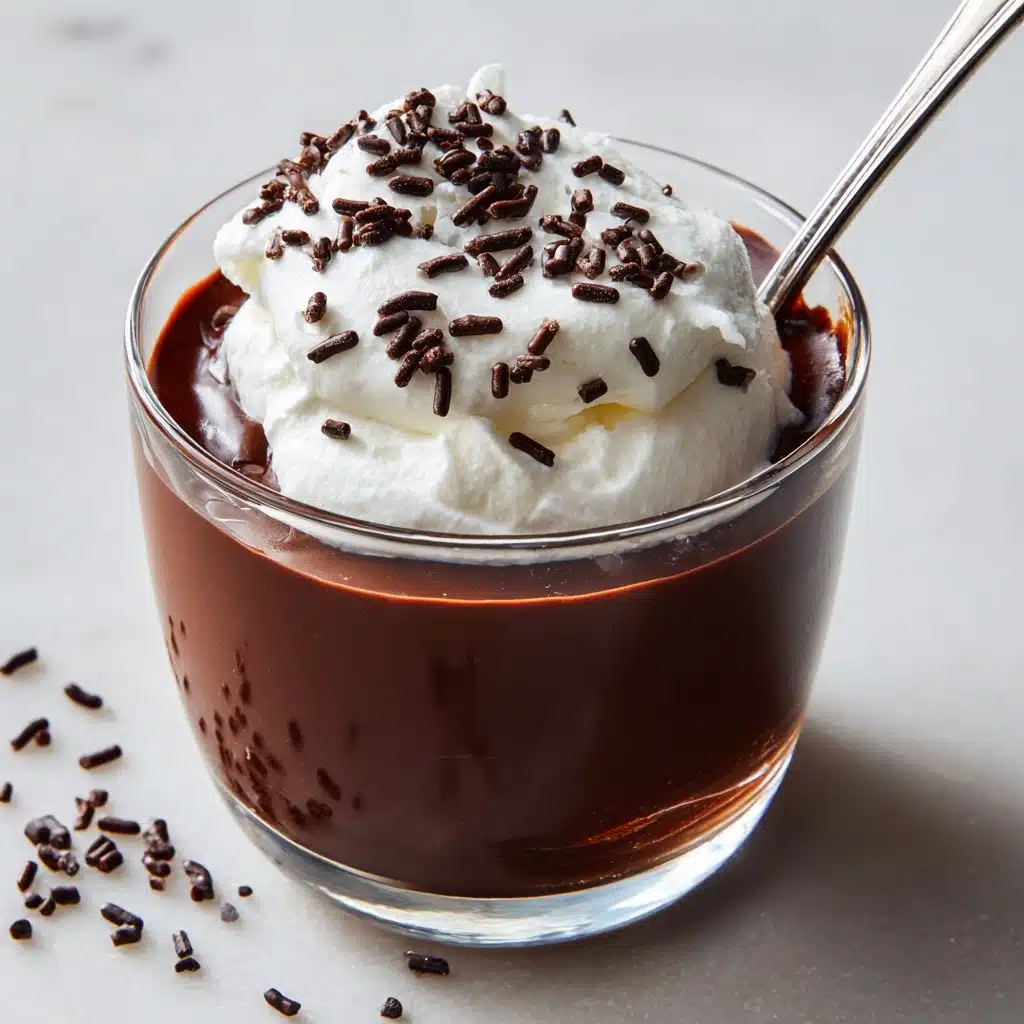
Go classic with a generous dollop of whipped cream or sprinkle on some chocolate shavings for extra allure. Fresh berries, a handful of toasted nuts, or even a drizzle of caramel really pump up the gourmet vibes. Each garnish adds a personal, playful touch to your Homemade Chocolate Pudding.
Side Dishes
Though Homemade Chocolate Pudding needs little company, it’s fantastic served alongside a crisp butter cookie or shortbread biscuit for a delightful contrast. Occasionally, I’ll pair it with a scoop of vanilla ice cream for a sophisticated hot-and-cold duet, or even with a shot of espresso on the side for an elegant dessert moment.
Creative Ways to Present
If you’re feeling adventurous, try serving in pretty glass jars or parfait cups layered with crushed cookies or berries. For parties, spoon pudding into mini phyllo cups or chocolate shells. Or, swirl in a ribbon of fruit puree for a stunning visual effect that’s just as satisfying as the taste.
Make Ahead and Storage
Storing Leftovers
Homemade Chocolate Pudding keeps beautifully in the fridge for up to 4 days. Be sure to press plastic wrap directly on the surface to prevent that sneaky skin from forming and to lock in its ultra-smooth texture. A quick stir before serving refreshes the pudding if it settles a bit.
Freezing
While you technically can freeze Homemade Chocolate Pudding, I find the texture isn’t quite as creamy after thawing—it tends to get a bit grainy. However, if you have leftovers and want to try, transfer to an airtight container and freeze for up to 1 month. Thaw overnight in the fridge, then whisk to smooth out any lumps.
Reheating
Pudding is best enjoyed cold, but if you want to gently warm it, microwave individual servings in short bursts, stirring often. Be careful not to overheat or you risk breaking the smooth structure. For that just-made luxury, reheat slowly on the stove over low heat, stirring constantly until warm.
FAQs
Can I use low-fat milk instead of whole milk?
Whole milk is what gives this pudding its lush, creamy consistency, but you can substitute 2% milk if needed. Just know the resulting texture may be slightly lighter and less rich—but still absolutely tasty!
Is there a way to make Homemade Chocolate Pudding dairy-free?
Absolutely! Swap in your favorite plant-based milk (like almond or oat milk), use dairy-free chocolate, and plant-based butter. The pudding will still be decadently smooth and satisfying for those avoiding dairy.
What if I don’t have cornstarch?
If you’re out of cornstarch, arrowroot powder can be used in its place. The texture might turn out just a touch different, but you’ll still get that wonderful, thick pudding consistency.
Why do I need to temper the eggs?
Tempering slowly warms the yolks, preventing them from scrambling when added into the hot pudding base. It’s essential for achieving that signature velvety-smooth texture in Homemade Chocolate Pudding without accidental lumps.
Can I make this pudding ahead for a party?
Definitely! Homemade Chocolate Pudding actually improves with a chill, so feel free to make it up to two days in advance. Just keep the plastic wrap pressed on the surface until you’re ready to garnish and serve for the freshest flavor and texture.
Final Thoughts
If you’ve been craving a truly comforting, chocolatey dessert, it’s time to dig into Homemade Chocolate Pudding. The process is simple, the results are dazzling, and every spoonful brings a little joy. Don’t wait—make a batch soon and experience just how special “homemade” can taste!
Print
Homemade Chocolate Pudding Recipe
- Total Time: 20 minutes (plus chilling time)
- Yield: 4 servings 1x
- Diet: Vegetarian
Description
Indulge in the rich and creamy delight of Homemade Chocolate Pudding. This stovetop dessert is a classic favorite, perfect for satisfying chocolate cravings.
Ingredients
Dry Ingredients:
- ¾ cup granulated sugar
- ⅓ cup unsweetened cocoa powder
- ¼ cup cornstarch
- ¼ teaspoon salt
Liquid Ingredients:
- 2¾ cups whole milk
- ¼ cup heavy cream
- 4 large egg yolks
- 2 tablespoons unsalted butter
- 1 teaspoon vanilla extract
Additional:
- 4 ounces semi-sweet chocolate (chopped)
Instructions
- Prepare the Pudding Base: In a medium saucepan, whisk together sugar, cocoa powder, cornstarch, and salt. Slowly whisk in milk and cream until smooth.
- Cook the Mixture: Heat the saucepan over medium heat, stirring constantly until thickened. Reduce heat, then temper and add egg yolks. Cook until thick and creamy.
- Finalize the Pudding: Remove from heat, stir in butter, vanilla, and chopped chocolate until smooth. Pour into dishes, cover with plastic wrap, and refrigerate for 2 hours.
Notes
- Top with whipped cream, chocolate shavings, or fresh berries for an extra treat.
- For a dairy-free version, substitute almond milk and plant-based butter and chocolate.
- Prep Time: 10 minutes
- Cook Time: 10 minutes
- Category: Dessert
- Method: Stovetop
- Cuisine: American
Nutrition
- Serving Size: 1 cup
- Calories: 320
- Sugar: 28g
- Sodium: 160mg
- Fat: 17g
- Saturated Fat: 9g
- Unsaturated Fat: 6g
- Trans Fat: 0g
- Carbohydrates: 37g
- Fiber: 2g
- Protein: 5g
- Cholesterol: 135mg


