
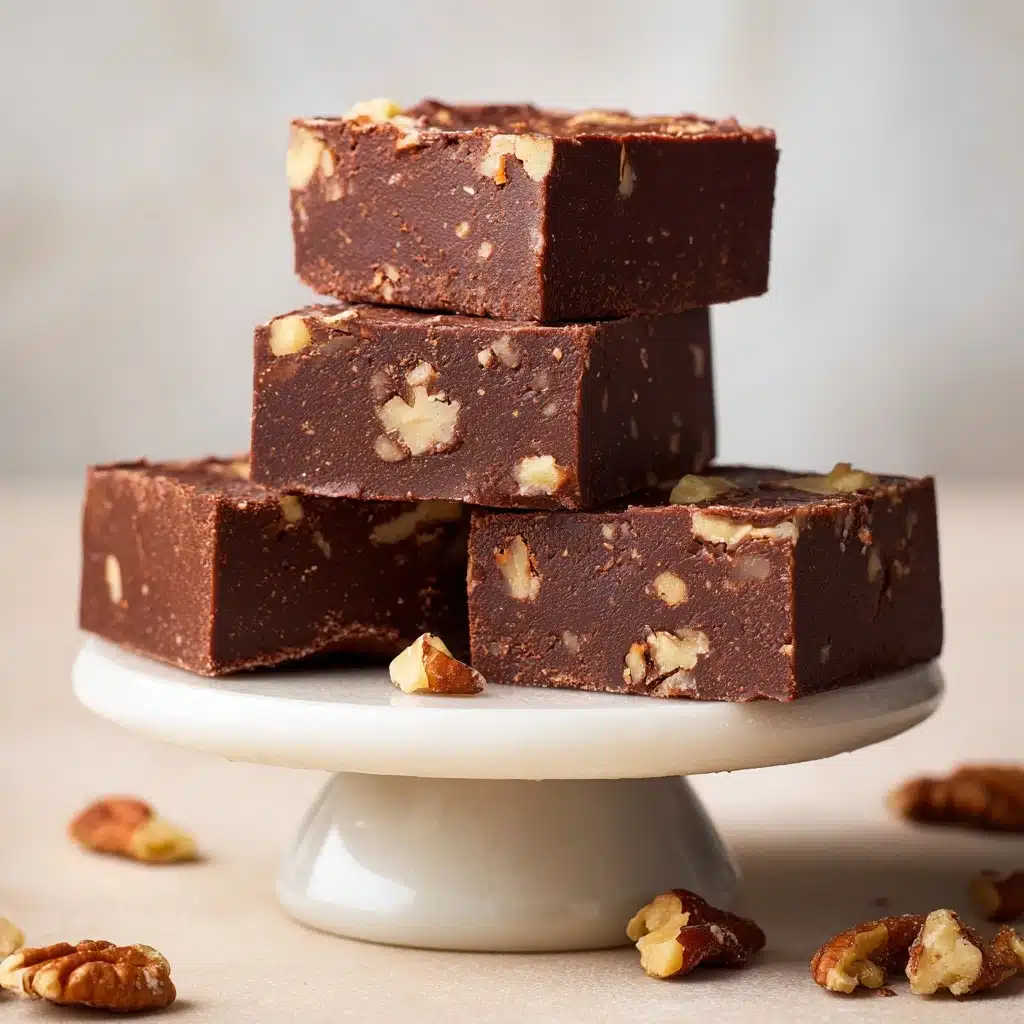
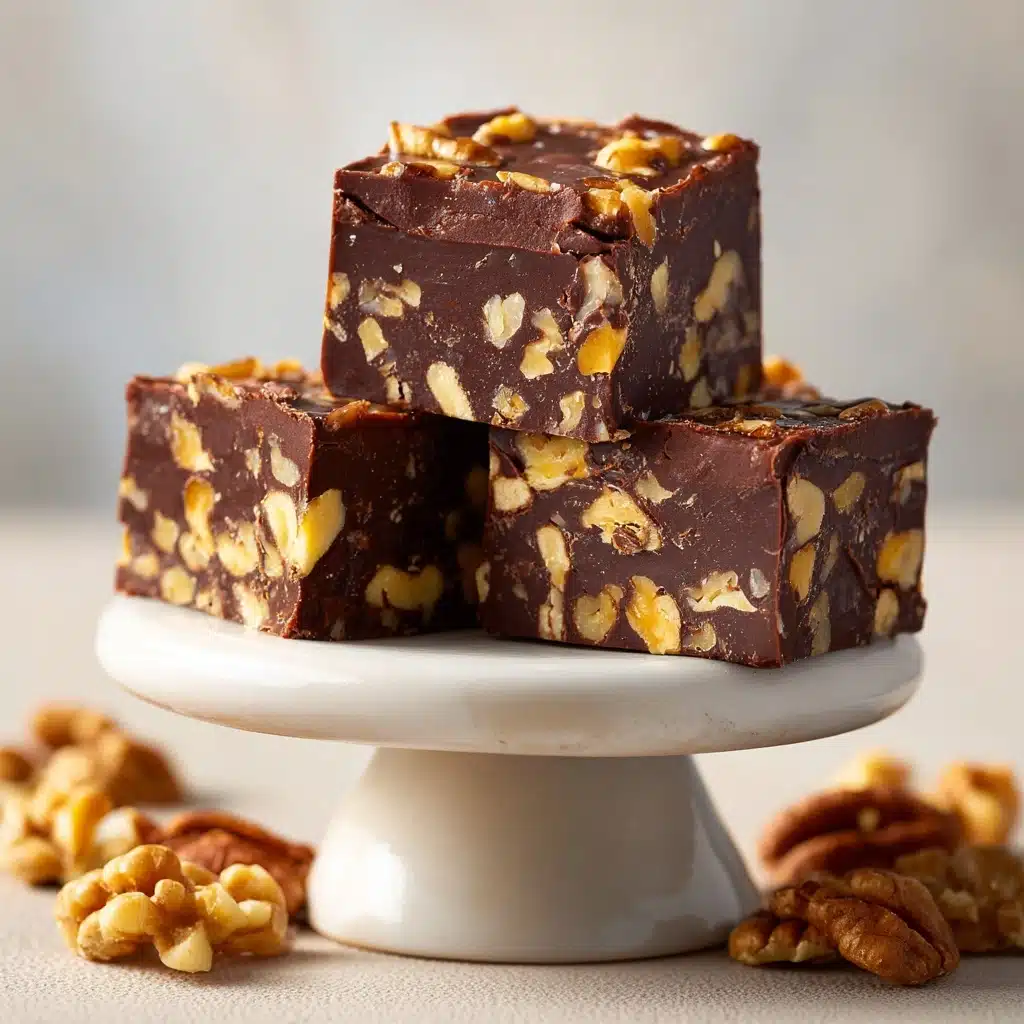
There’s simply nothing like a batch of Homemade Fudge to satisfy your sweet tooth and spark instant joy. This luscious, chocolatey treat is a beloved classic for a reason: it comes together quickly, tastes absolutely decadent, and fills the kitchen with the most irresistible aroma. Whether you’re making it for a holiday, sharing it at a potluck, or just surprising the family with a weeknight indulgence, this fudge recipe is truly foolproof and always a crowd-pleaser. If you’ve never experienced the delight of perfect, creamy Homemade Fudge made right in your own kitchen, you’re about to discover a new favorite tradition.
Ingredients You’ll Need
The beauty of Homemade Fudge is in its simplicity—just a few staple ingredients transform into a showstopping dessert. Each component plays a unique role, giving the fudge its signature creaminess, rich flavor, and satisfying snap.
- Semi-sweet chocolate chips: These are the chocolatey foundation of your fudge, providing depth and richness without being overly sweet.
- Sweetened condensed milk: This creamy, thick milk balances the bold chocolate flavor and ensures your fudge stays soft and melt-in-your-mouth.
- Unsalted butter: Adds luxurious smoothness and just the right hint of richness.
- Vanilla extract: Don’t skip this! It brings out the best in the chocolate and rounds out the flavors beautifully.
- Pinch of salt: A little salt makes the chocolate taste even more chocolatey and cuts through the sweetness perfectly.
- Chopped nuts (optional): For a delightful crunch and a touch of toasty flavor, swirl in your favorite nuts—walnuts or pecans are always a hit.
How to Make Homemade Fudge
Step 1: Prepare Your Pan
Start by lining an 8×8-inch baking pan with parchment paper, letting a little hang over the sides for easy lifting later. If you don’t have parchment, a light coating of butter or nonstick spray will also do the trick. This step makes getting that beautiful slab of Homemade Fudge out of the pan a breeze.
Step 2: Melt Chocolate, Milk, and Butter
In a medium saucepan set over low heat, combine your chocolate chips, sweetened condensed milk, and butter. Stir gently and constantly—this keeps everything melting evenly and prevents scorching. It’ll look chunky and thick at first, but after a few minutes you’ll have a silky smooth, glossy chocolate mix that’s hard to resist sampling!
Step 3: Add Vanilla and Salt
Once your chocolate mixture is luxuriously smooth, remove the pan from the heat. Now stir in the vanilla extract and a good pinch of salt. These little additions are small but mighty, dialing up the flavors and adding warmth in every bite.
Step 4: Fold In Nuts (Optional)
If you’re a fan of a little crunch, this is the time to stir in chopped nuts. Just gently fold them through the fudge to distribute them evenly. It’s totally okay to skip the nuts if you want a classic, creamy Homemade Fudge without any extras.
Step 5: Pour and Set
Pour the fudge mixture into your prepared pan and use a spatula to smooth it into an even layer, getting it nice and flat in the corners. Pop the pan in the refrigerator and let it chill for at least 2 hours—this is the hardest part, but it’s so worth the wait! When it’s set, just lift the fudge out with the paper and slice it into gorgeous, bite-sized squares.
How to Serve Homemade Fudge
Garnishes
Homemade Fudge loves to dress up for the occasion! For a touch of elegance, sprinkle it with flaky sea salt or a dusting of cocoa powder before chilling. You can even drizzle a little melted white chocolate over the top or add a handful of colorful sprinkles for a festive touch.
Side Dishes
As rich as fudge is, it pairs beautifully with lighter sides. Fresh berries, juicy orange slices, or a few crisp apple wedges all cut through the sweetness and create a balanced, enticing dessert platter. Don’t forget the coffee or a big glass of ice-cold milk to wash down every decadent bite!
Creative Ways to Present
Think beyond the classic square! Try cutting your Homemade Fudge into triangles or using cookie cutters for fun shapes. Stack pieces in a glass jar tied with a ribbon for a heartfelt gift, or arrange them on a tiered cake stand for an eye-catching centerpiece at your next gathering.
Make Ahead and Storage
Storing Leftovers
Homemade Fudge keeps fantastically well, so don’t worry if you can’t finish every last square at once. Store leftovers in an airtight container in the refrigerator, and your fudge will stay fresh, creamy, and dreamy for up to two weeks. Layer parchment or wax paper between pieces to keep them from sticking together.
Freezing
Want to stock up or prep ahead for holidays? Wrap cooled fudge tightly in plastic wrap, then stash in a freezer bag or airtight container. Homemade Fudge freezes beautifully for up to three months. Just let it thaw overnight in the fridge before serving for perfect texture every time.
Reheating
Fudge is best enjoyed at cool room temperature, but if you like a softer bite, just let it sit out for 10 to 15 minutes before serving. Avoid microwaving, which can make it melt or turn greasy; patience here is key for the ideal fudge experience.
FAQs
Why did my fudge turn grainy?
If your Homemade Fudge has a grainy texture, it may have been overheated or not stirred enough. Keep the heat low and stir constantly for the silkiest, creamiest results—patience is the secret weapon!
Can I use different types of chocolate?
Absolutely! While semi-sweet is classic, feel free to try dark chocolate for a deeper, less sweet flavor, or mix in some milk chocolate chips for an ultra-smooth, mellow fudge. Just keep the measurements the same.
Is it possible to make this fudge without nuts?
Definitely. The nuts are completely optional and can be left out for a smooth and traditional Homemade Fudge, or swapped for something like dried fruit or shredded coconut if you want a twist.
How can I add more flavor?
Try swirling in a spoonful of peanut butter, adding a dash of cinnamon, or a shot of espresso powder for a little kick. Top with sea salt or even crushed peppermint candies for a seasonal version—you can truly make Homemade Fudge your own.
Can I double this recipe?
Yes! Simply double all the ingredients and pour the mixture into a 9×13-inch pan instead. You might need to add a few extra minutes of chilling time, but you’ll have plenty of Homemade Fudge to share (or keep all to yourself).
Final Thoughts
If you’ve been looking for a reliable, rewarding, and downright delicious treat to whip up at home, this Homemade Fudge is the answer. Gathering just a handful of ingredients and a few minutes in the kitchen can create a chocolate masterpiece you’ll crave again and again. Go ahead—grab your apron and share a batch of this dreamy fudge with someone you love!
Print
Homemade Fudge Recipe
- Total Time: 20 minutes plus chilling time
- Yield: 36 squares 1x
- Diet: Vegetarian
Description
Indulge in the rich, creamy goodness of Homemade Fudge with this easy-to-follow recipe. This classic chocolate treat is perfect for any occasion and is sure to satisfy your sweet tooth.
Ingredients
Main Ingredients:
- 3 cups semi-sweet chocolate chips
- 1 (14-ounce) can sweetened condensed milk
- 4 tablespoons unsalted butter
- 1 teaspoon vanilla extract
- Pinch of salt
Optional:
- 1/2 cup chopped nuts
Instructions
- Prepare the Pan: Line an 8×8-inch baking pan with parchment paper or lightly grease it.
- Melt Ingredients: In a medium saucepan over low heat, combine chocolate chips, sweetened condensed milk, and butter. Stir until smooth.
- Add Flavor: Remove from heat, stir in vanilla extract and salt. Add nuts if desired.
- Chill: Spread mixture into the pan, refrigerate for 2 hours until set.
- Serve: Cut into squares and enjoy chilled or at room temperature.
Notes
- Store fudge in the refrigerator for up to 2 weeks.
- Enhance with peanut butter swirls or flaky sea salt for added flavor.
- Prep Time: 10 minutes
- Cook Time: 10 minutes
- Category: Dessert
- Method: No-Bake
- Cuisine: American
Nutrition
- Serving Size: 1 square
- Calories: 130
- Sugar: 14g
- Sodium: 15mg
- Fat: 7g
- Saturated Fat: 4g
- Unsaturated Fat: 2g
- Trans Fat: 0g
- Carbohydrates: 17g
- Fiber: 1g
- Protein: 2g
- Cholesterol: 5mg


